

Business Hours in ThriveDesk lets you define when your team is available to respond to support requests. You can set different schedules for different inboxes and channels, mark holidays as non-business hours, and trigger automatic replies and workflows based on whether a message arrives inside or outside your operating hours.
This article will explain how to create business hours, schedule holidays, manage your timezone, and use business hours to power auto replies and automation.
Where to Find Business Hours
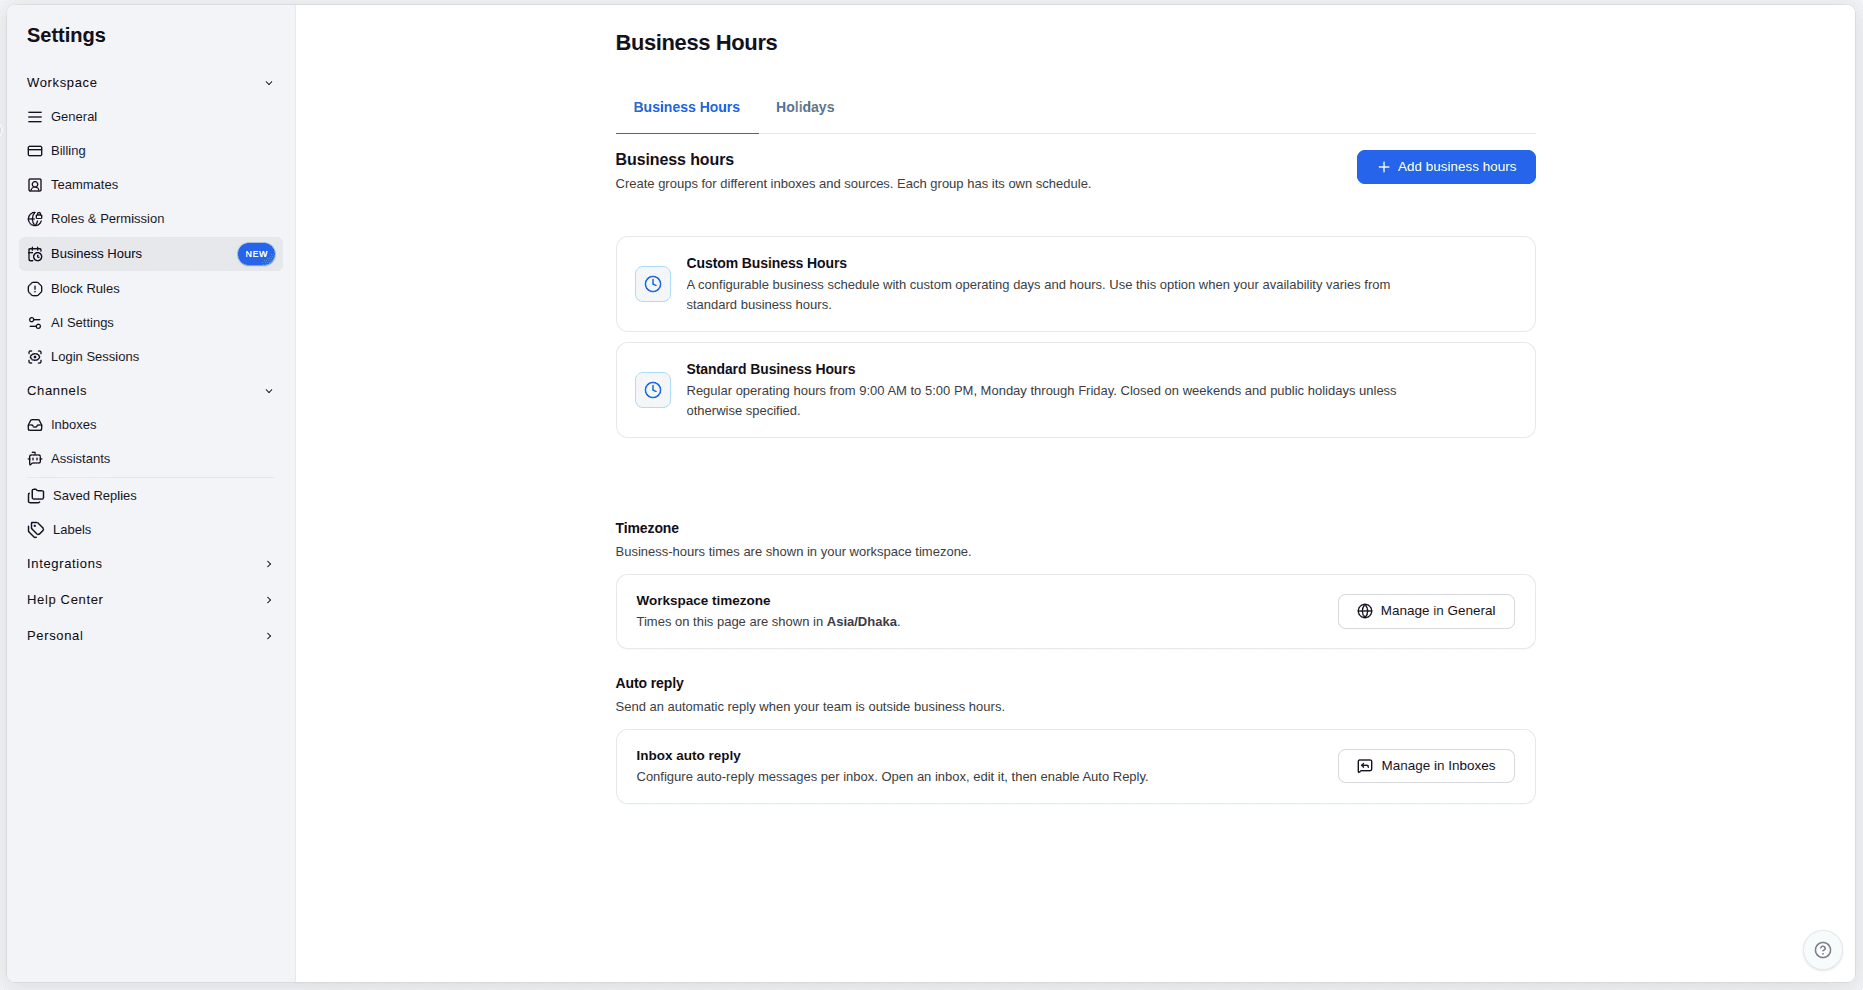
Go to Workspace > Settings > Business Hours. This is where you create and manage every business-hours group for your workspace.
The page has two tabs:
Business Hours — create groups that each cover specific inboxes, channels, and a schedule.Holidays
— mark dates or date ranges that should be treated as closed.
Creating a Business Hours Group
Each group has its own schedule, so you can give different inboxes and sources different operating hours.
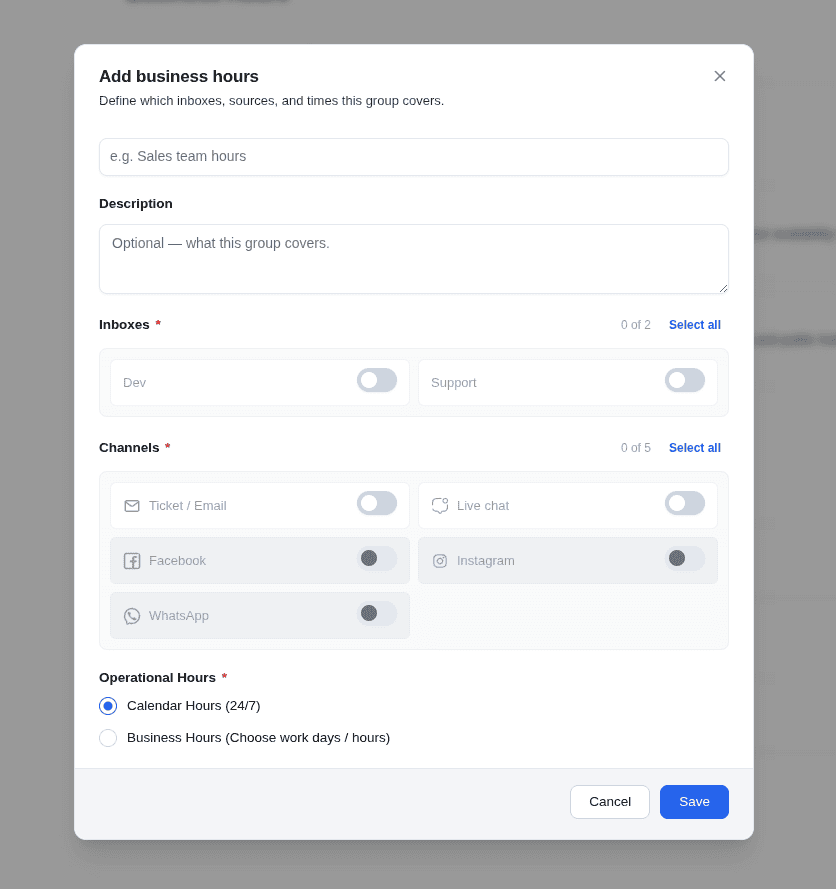
Click Add Business Hours in the top-right corner to open the setup window, then fill in the following fields:
Name — a label for the group, e.g. Sales team hours.
Description (optional) — a short note describing what this group covers.
Inboxes — select one or more inboxes this schedule applies to. Use Select all to include every inbox.
Channels — choose which sources the schedule covers: Ticket/Email, Live chat, Facebook, etc.
Operational Hours — choose how this group operates (see below).
Choosing Operational Hours
When setting up a group, you'll pick one of two operating modes:
Calendar Hours (24/7) — the group is always considered open. Use this when support is available around the clock.
Business Hours (Choose work days/hours) — set specific days and times when the group is open.
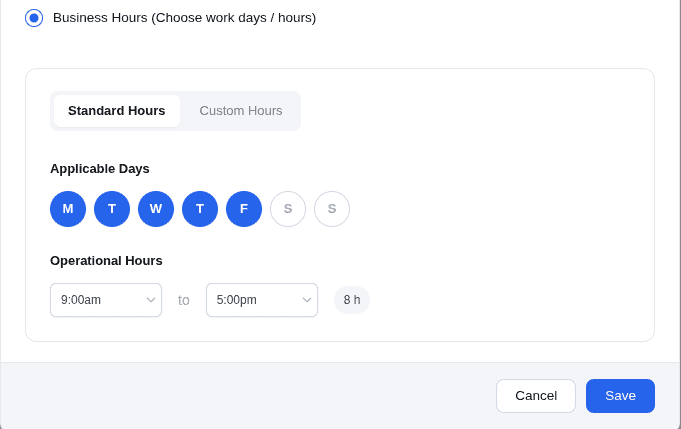
If you select Business Hours, you can then configure the schedule as either Standard Business Hours, depending on your needs.
Standard Hours
Use Standard Hours when every working day shares the same operating times. Select your Applicable Days, then set a single start and end time that applies to all of those days. The duration is alculated for your automatically.
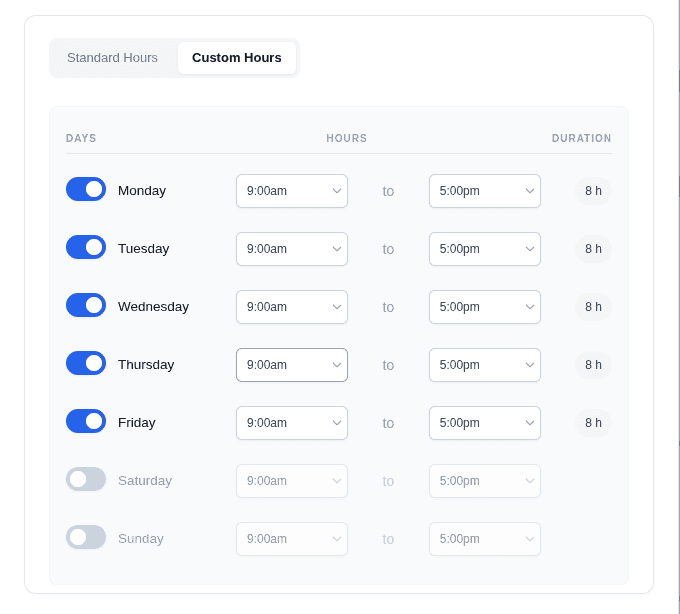
Custom Hours
Use Custom Hours when your hours vary from day to day. Toggle each day on or off individually, and set a separate start and end time for each one. Days that are toggled off are treated as closed.
When you're done, click Save to create the group. It will then appear on the Business Hours page, where you can edit or delete it at any time using the icons on each card.
Scheduling Holidays
Holidays let you mark dates when your business is closed and agents are not available to respond. A holiday is always treated as outside business hours, regardless of the schedule set in your business-hours groups.
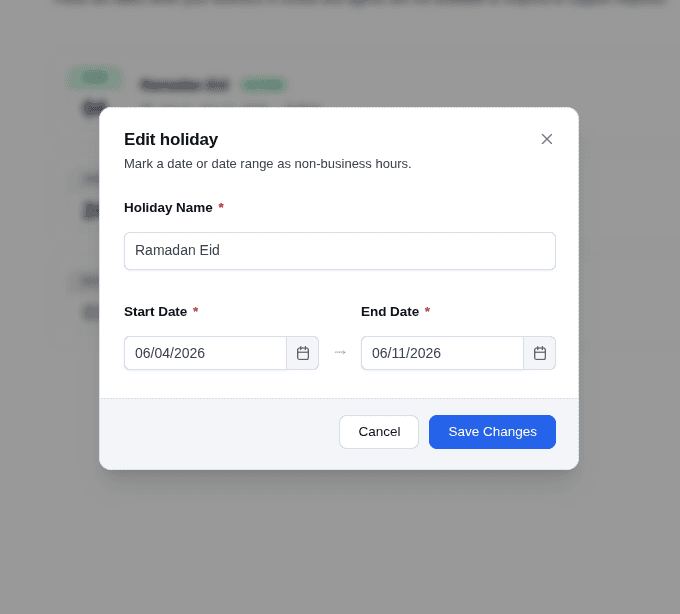
To add one, open the Holidays tab and click Add holiday, then provide:
Holiday Name — e.g. Ramadan Eid.
Start Date and End Date — the range the holiday covers. For a single day, set the same start and end date.
Click Add Holiday to save it.
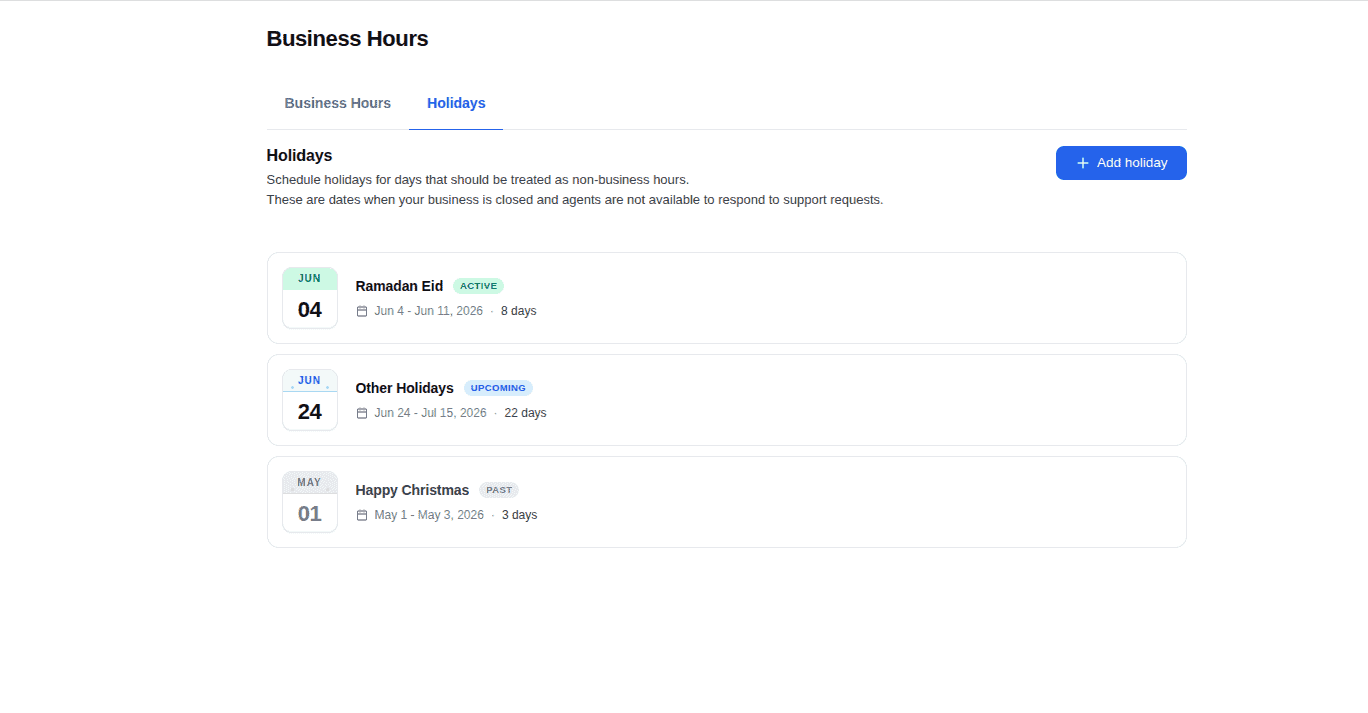
Each holiday is listed with its date range, duration, and a status label — Active (happening now), Upcoming (scheduled for the future), or Past (already ended).
Timezone
Business-hours times are always shown and evaluated in your workspace timezone. You can see which timezone is in effect on the Business Hours page.
To change it, click Manage in General (or go to Workspace > Settings > General) and update your workspace timezone there. All business-hours schedules will follow the new timezone.

Auto Reply Based on Business Hours
When business hours are enabled, you can send automatic replies that differ depending on whether a message arrives within or outside your operating hours.
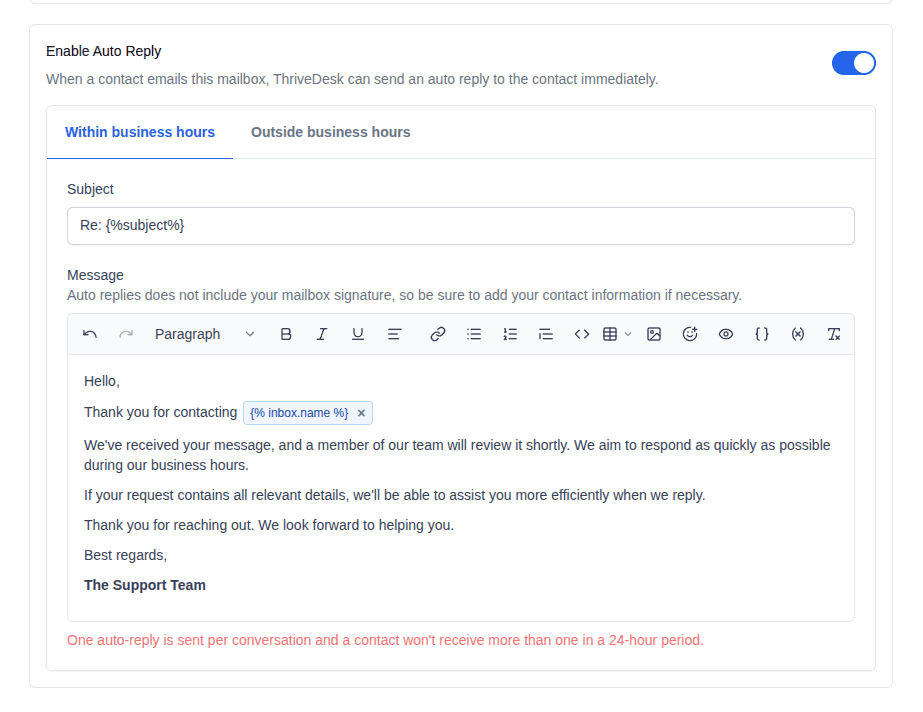
To set this up, go to Settings > Inboxes, open the inbox you want to manage, and enable Auto Reply. You'll see two tabs:
Within business hours — the reply sent when a contact messages you while you're open. This is a good place to confirm that their message was received and set expectations for a response.
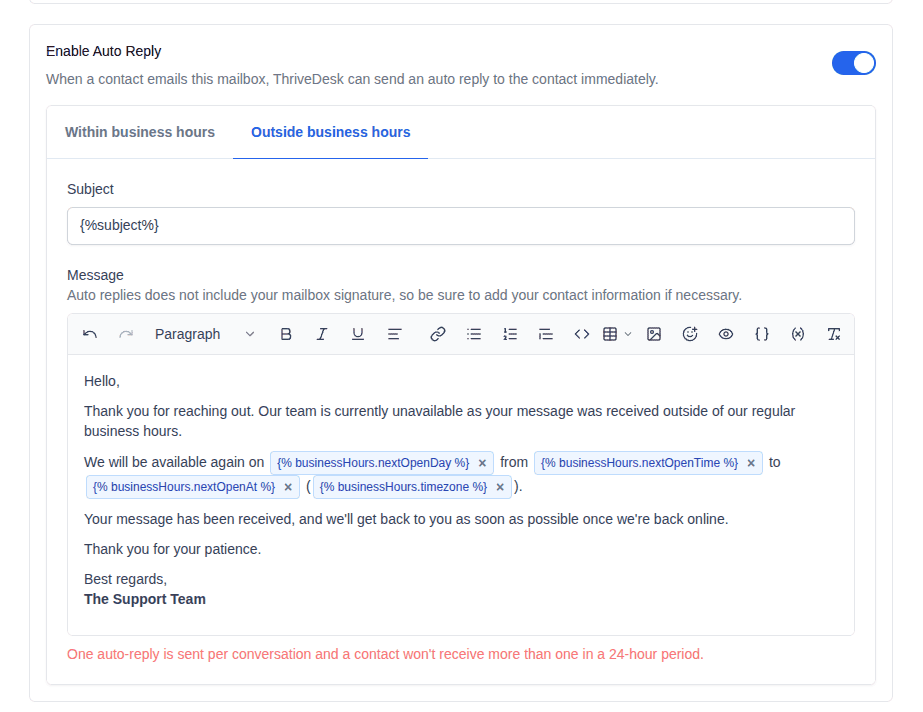
Outside business hours
— the reply sent when a contact messages you while you're closed. You can use dynamic variables such as {% businessHours.nextOpenDay %}, {% businessHours.nextOpenTime %}, {% businessHours.nextOpenAt %}, and {% businessHours.timezone %} to automatically tell contacts when you'll be available again.
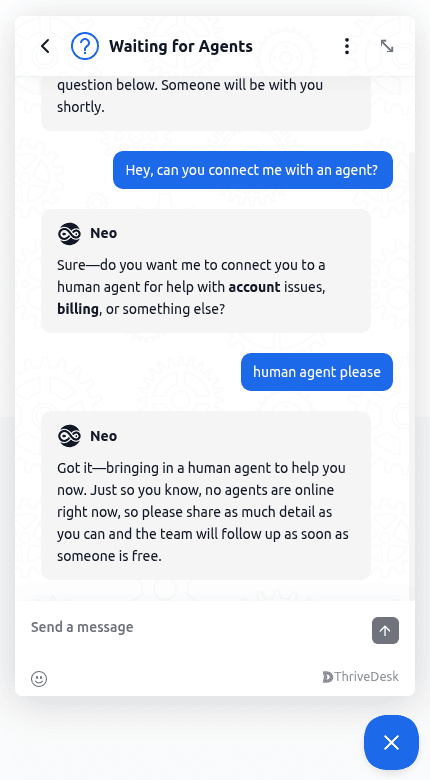
In our live chat, the business hours feature is also important. If the timing falls outside business hours, our AI chatbot will automatically notify the user.
Automation with Business Hours
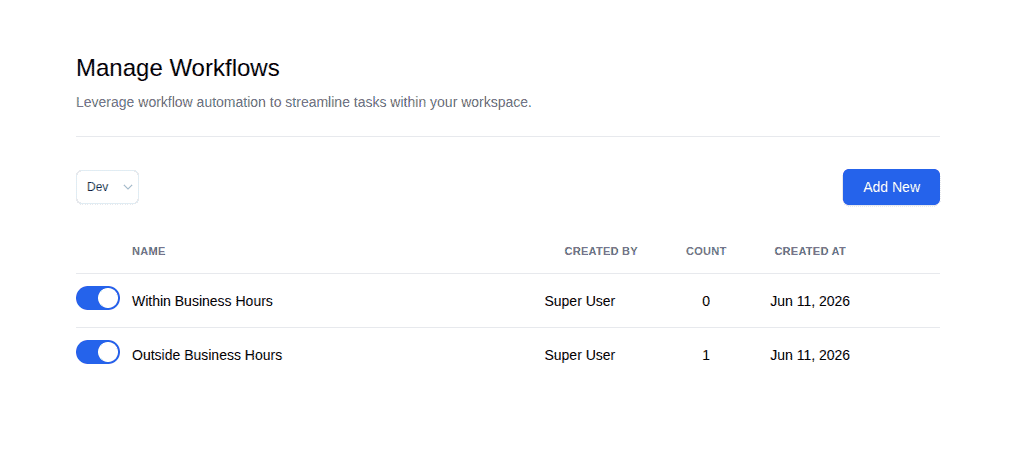
Beyond auto replies, you can build workflows that behave differently based on whether your business is open or closed. For example, you can:
Send an auto reply to a specific channel only.Assign new tickets that arrive outside business hours to a certain agent.Apply different routing or tagging rules during off-hours.
...and much more. This makes it easy to keep coverage organized even when your team is away.
Reporting (Coming Soon)
Soon, you'll be able to filter your report data based on business hours, so you can analyze performance during your operating hours separately from off-hours activity.