

This article will guide you how to forward emails from Microsoft 365's Outlook Web Access (commonly known as OWA), to your ThriveDesk Inbox.
Setup email forwarder
- First things first: Make sure you have followed the first steps in Connect Your Custom Address and you have your ThriveDesk Inbox Address ready.
- Log in to your Microsoft 365 Outlook Web Access as your custom email address. If you're not able to log in there, check with your email administrator to find out the address for your OWA login page.
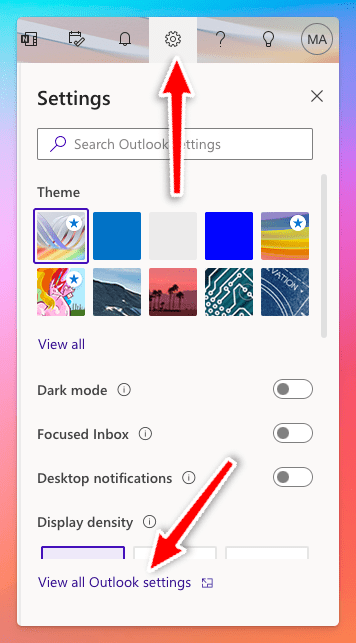
- Click on the gear icon in the upper right-hand corner, then View all Outlook settings at the bottom of that menu.
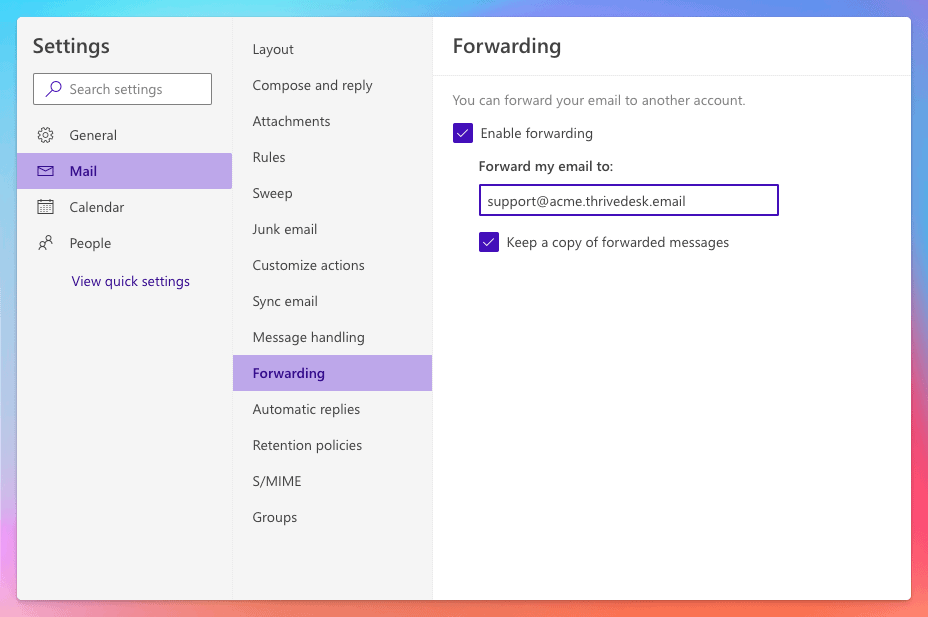
- Choose Mail, then Forwarding. Click Enable forwarding and paste in your ThriveDesk email address. We recommend also checking Keep a copy of forwarded messages as an archive. Click Save at the bottom of this screen then close the menu by clicking the x in the top right corner.
- That will do it — head back into ThriveDesk to see your emails in your mailbox!
Next steps: Set up Return-Path and DKIM to allow ThriveDesk servers to send email on your behalf.
You may need to take an additional step if you're receiving bounce messages after setting up the forwarding here. Microsoft 365 spam protection might be set to block automatic forwards for your organization. Follow steps below to enable external forwarding in Microsoft 365 👇
Enable External Forwarding in Microsoft 365
Some Microsoft 365 accounts default to block automatic email forwarding as part of their outbound spam protection. If external forwarding is disabled for your Microsoft 365 account, you will see a specific bounce message in your inbox at Microsoft 365 after attempting to set up forwarding to ThriveDesk. The text of the bounce will include this line:
5.7.520 Access denied, Your organization does not allow external forwarding.
Please contact your administrator for further assistance. AS(7555)
Enable Automatic External Forwarding for All Mailboxes
- Log in to your Office 365 Security & Compliance portal for Microsoft 365 and choose Policies & rules > Threat policies > Anti-spam policies or head directly to the Anti-spam settings page here: https://security.microsoft.com/antispam
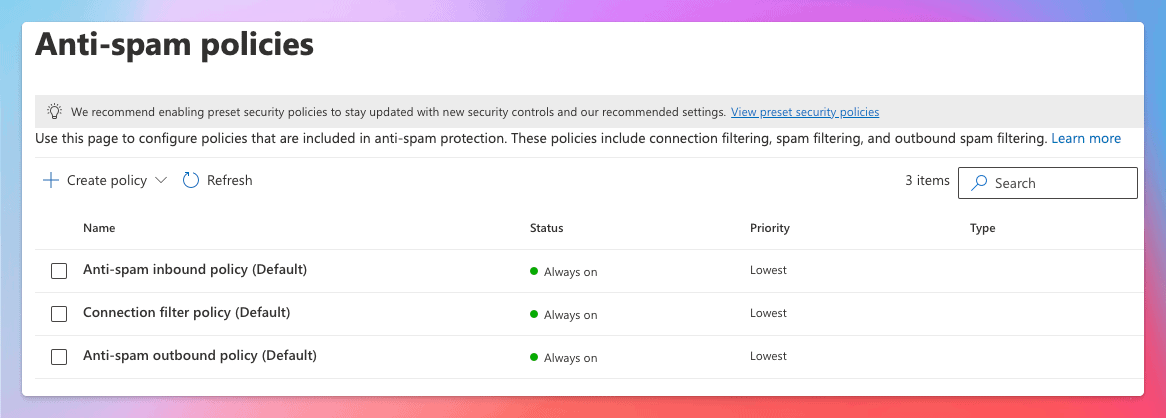 Note that the policies you see in your own admin may differ from those shown here, as these are only the default policies.
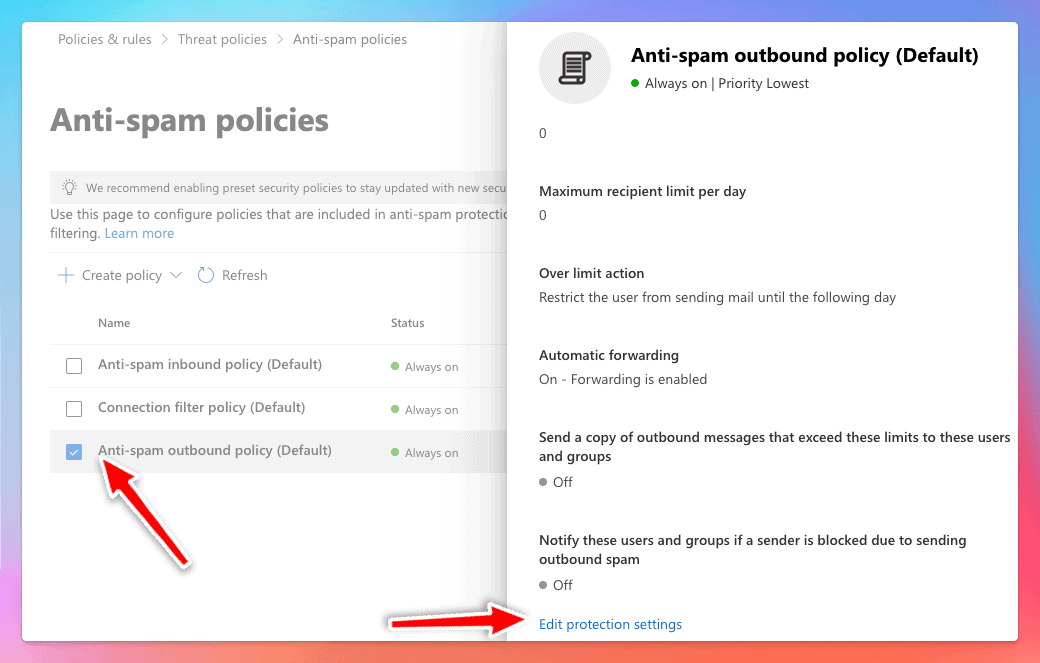
 - Click on Anti-spam outbound policy (Default) and scroll to click the Edit protection settings link at the bottom of the sidebar.
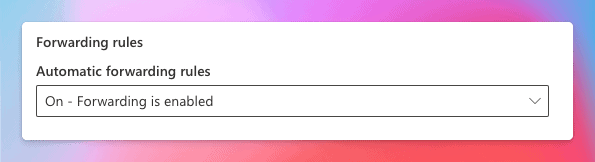
- Find the section called Forwarding Rules, and the dropdown list called Automatic Forwarding Rules. Pull that list down and choose On - Forwarding is enabled. Click Save at the bottom.
Enable Automatic External Forwarding for Individual Mailboxes
- Log in to your Office 365 Security & Compliance portal for Microsoft 365 and choose Policies & rules > Threat policies > Anti-spam policies or head directly to the Anti-spam settings page here: https://security.microsoft.com/antispam
Note that the policies you see in your own admin may differ from those shown here, as these are only the default policies.
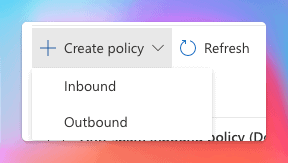
- Click + Create policy and choose Outbound.
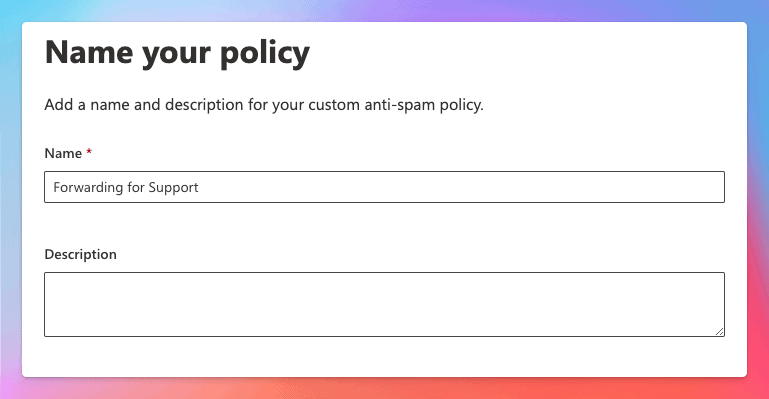
- Give your new outbound spam filter policy a Name and Description and click Next.
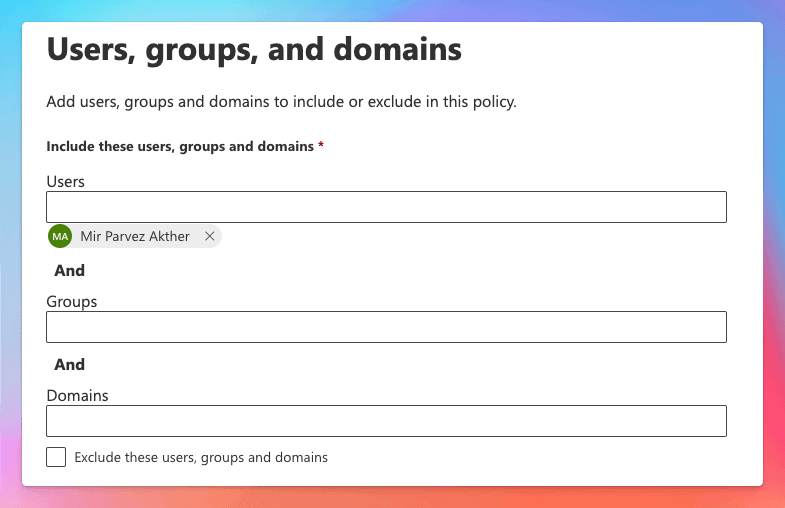
- Search to find the user account you want to allow to forward, i.e. the email account that you are forwarding to ThriveDesk, which will display under the Users field after you select it. Click Next to continue.
- Scroll to the Forwarding rules section, and click the dropdown under Automatic forwarding rules. Choose On - Forwarding is enabled, then click Next. Review the settings on the last screen and click Create to create your new outbound policy for the specified user(s).
You may have other transport rules or spam policies in place at Microsoft 365 that block external forwarding in addition to the outbound spam filtering we've covered here. If automatic external forwarding is still blocked after adjusting these policies, you will want to reach out to your Microsoft 365 support for assistance in finding any further blocking that has been set up in your Microsoft 365 account.