

If you have administrative privileges in a Google Workspace, you can also set up a Google Group to utilize with ThriveDesk. This article will guide you through the process of setting up a new Google Group or ensuring that your existing Google Group is compatible with ThriveDesk.
There are a couple of things to keep in mind if you're using a Google Group:
- Google does not offer OAuth access for Google Groups addresses, which means all emails you send will be sent from ThriveDesk server and you’ll not be able to view them from Google Group. If you want to use ThriveDesk with Google Workspace email instead, checkout our auto forward from Google workspace tutorial.
- Google Groups includes an unsubscribe link in the footer of emails sent to members who are not part of your domain, which includes your ThriveDesk inbox. You can disable this from Group settings > Email options and uncheck Include the standard Groups footer option.
Once you've configured your Google Workspace Group to forward to ThriveDesk, you should have no further involvement in the Group. Remove all members besides your ThriveDesk email. Do not respond to or alter any Group chats, as doing so will break the ThriveDesk conversation link. If you are not using ThriveDesk exclusively, responses or changes may be lost.
Create a New Google Group
- First things first: Make sure you have followed the first steps in Connect Your Custom Address and you have your ThriveDesk Inbox Address ready.
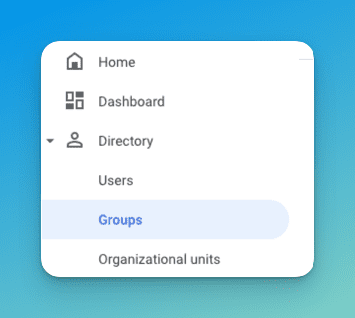
- Head to Google Workspace admin and log in as administrator. From the Admin console sidebar menu, click on the Directory > Groups menu.
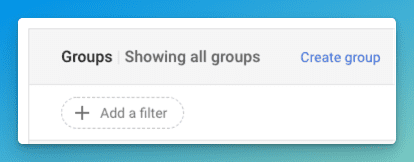
- Click on the Create group button in the page header.
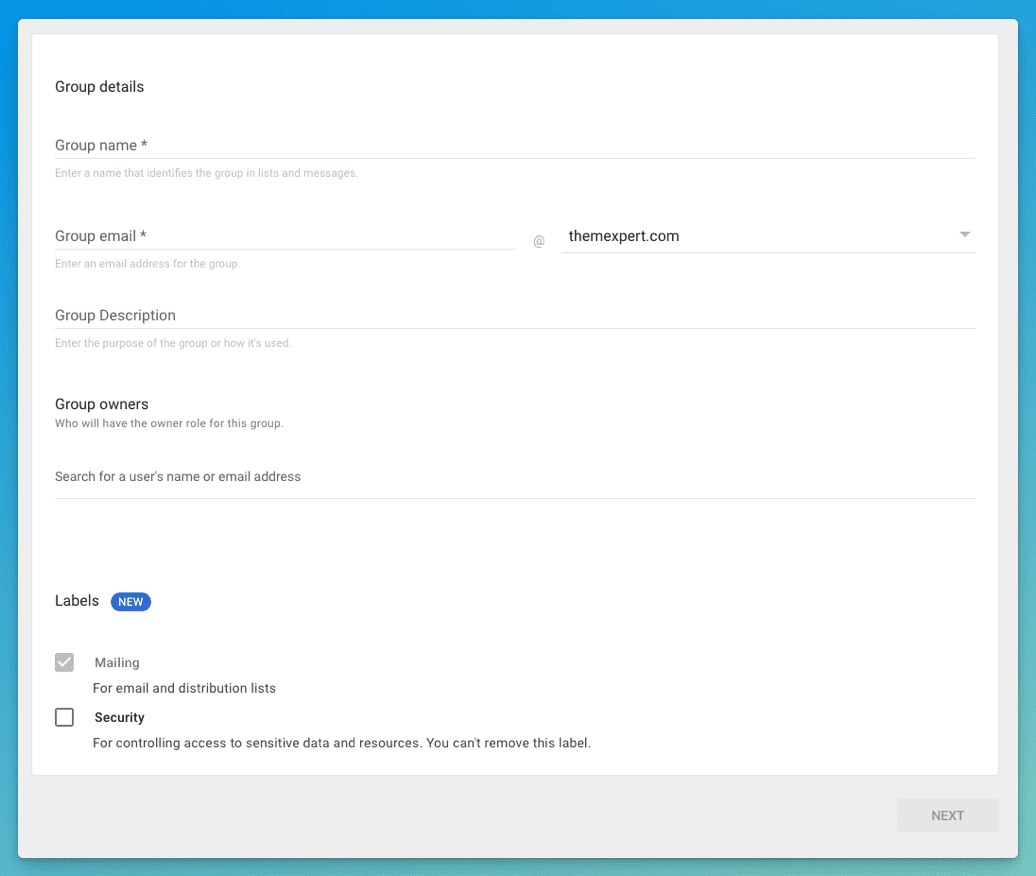
- On the first screen, provide a name for the group, an optional description, and a group email under the brand you want. Click the Next button.
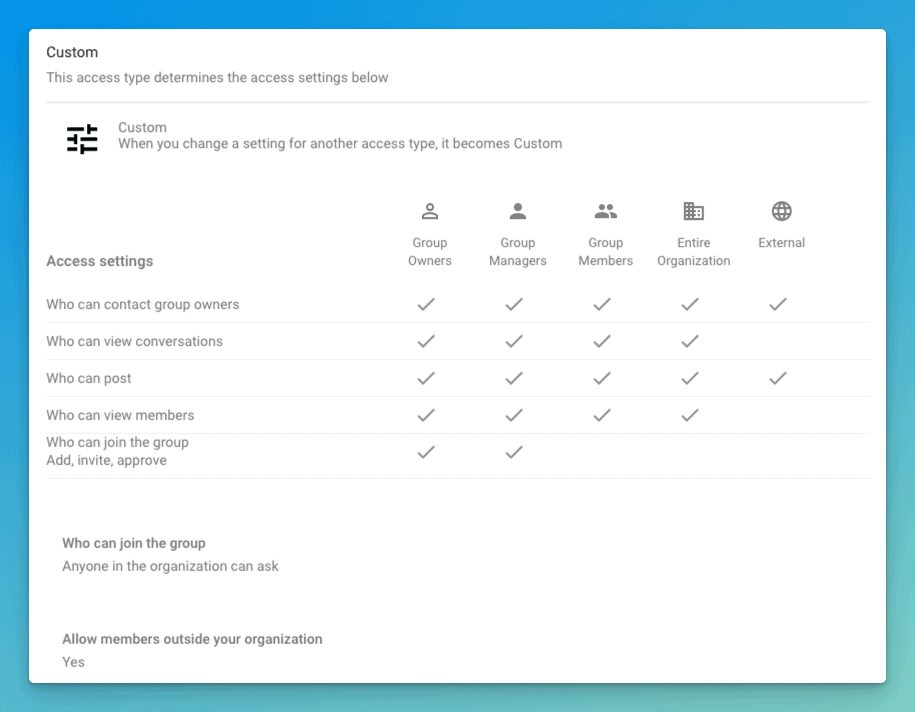
- On the access control screen, make sure to set the access level to Custom, and check the box that allows External accounts to publish posts, and make sure that Allow members outside your organization is toggled on. Click Create Group.

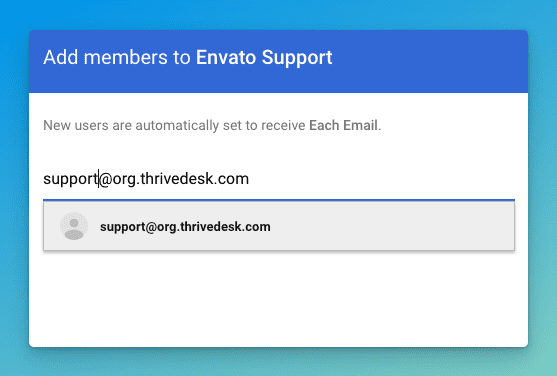
- After creating your group, click Add members and paste in your ThriveDesk Inbox Address. It will show as an option to select - you must click the dropdown with that address to select it for Google to allow you to add it. Click the ADD TO GROUP link to finish adding the member to the group.
- Send a test message to your Google Group address, and head back into ThriveDesk. Click the Check Email button and we'll be able to confirm your inbox with that test email. Now you're all set!
Your ThriveDesk email address should be the only Google Group member. Keeping more group members in the group can cause issues with straight forwarding into ThriveDesk, as well as duplicates among team members.
Edit an Existing Google Group
- Make sure you have followed the first steps in Connect Your Custom Address and you have your ThriveDesk Inbox Address ready.
- Head to Googel Workspace admin and log in as administrator. From the Admin console sidebar menu, click on the Directory > Groups menu.
- Hover over the Group you want to edit, then choose Edit settings from the menu that appears.

- Click the edit icon on this page so that there is a check in the External column for Publish posts, and Allow members outside your organization shows as Yes.
- Click on the advanced settings link from the bottom of that page and choose People > Members from the left menu. Click Add members on the top of the page.
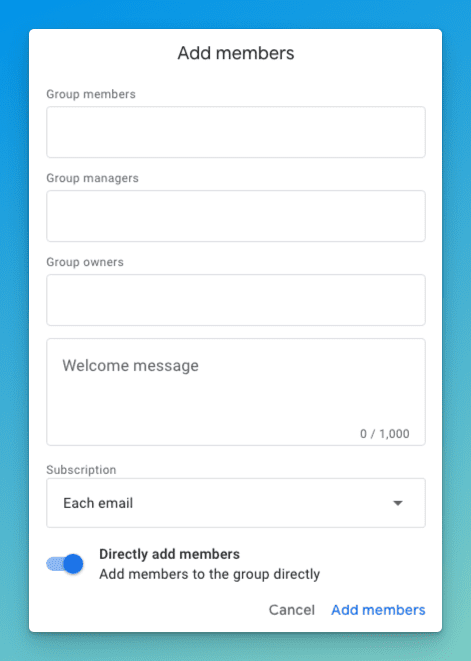 Enter your ThriveDesk inbox address in the Group Members field and make sure that Subscription is set to Each email and Directly add members is toggled on. Click Add members to complete.
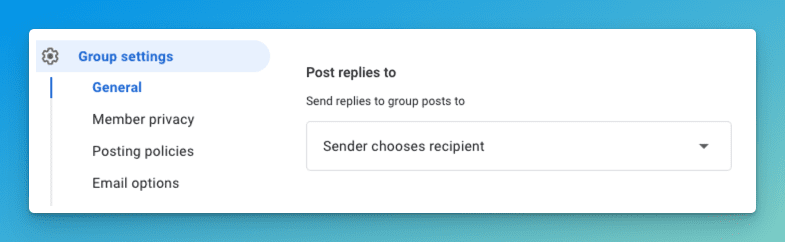
 - Now go to Group settings > Email options from the left menu, and set Post replies to as Sender chooses recipient.
When you're ready to start working from ThriveDesk, remove any members of the Group. Once the address is forwarded into your ThriveDesk Inbox, your team will be able to access and collaborate with it from within ThriveDesk.