In this guide we will go through with many of the basic features of Shared Inbox which allows a smooth flow for giving customer support or carrying on conversations, which as follows:
Toggle between folders
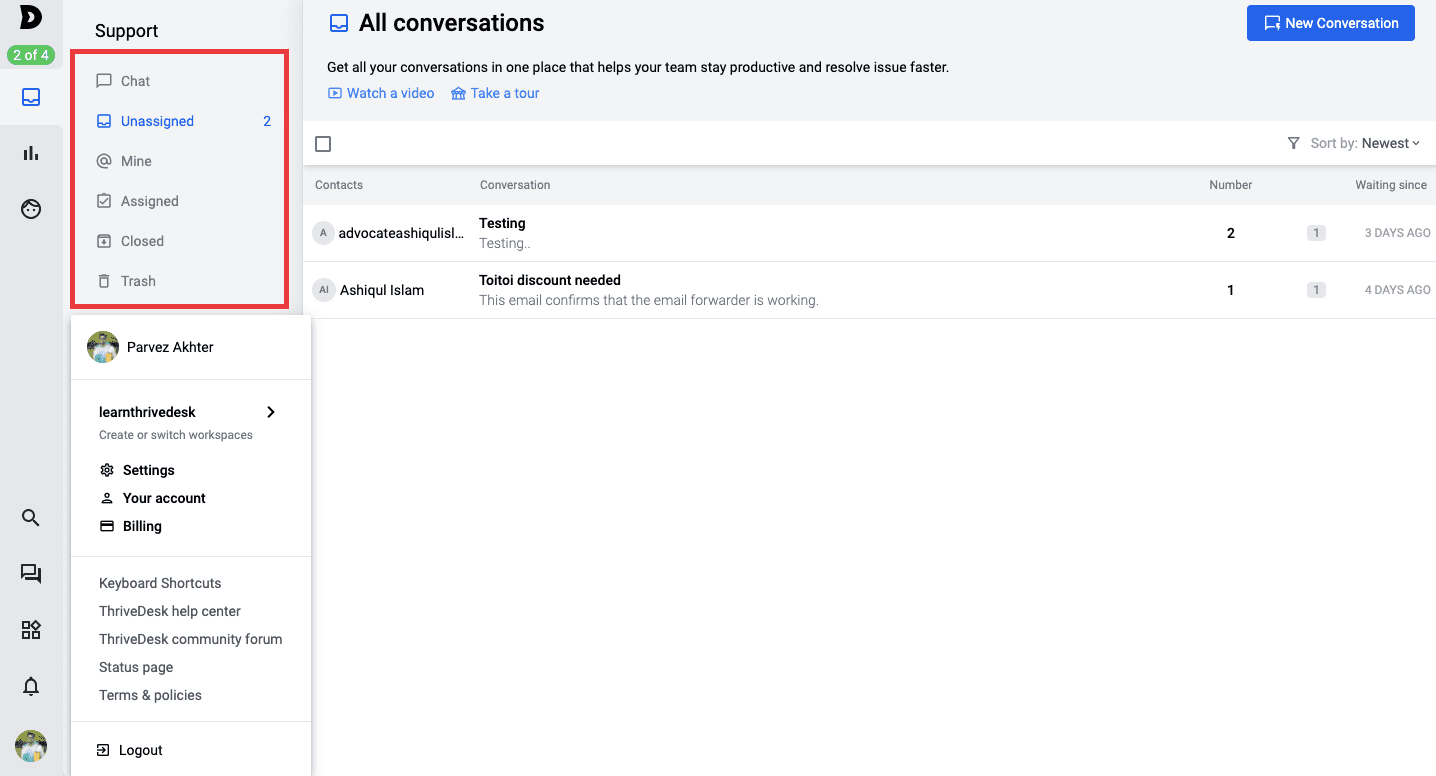
It’s important to have a birds eye view of all the queries coming in and out of your support, which also means that you need the most convenient mode of navigating from one folder to another and also check out the “unattended” or “attention needed” queries in numbers without even getting into the folder.
As a matter of fact followings are the list of folders you can toggle between and figure out the queries and the source of such queries:
Chat - all chat queries are compiled and received in this folder.
Unassigned- means that in default scenario, all the queries that you have received but neither it has not been assigned to any one nor any else has given a reply to it and are currently Active, will be found here.
Mine- all queries that are assigned to you will be found here.
Assigned- all the queries that are assigned to all the other members of the your team except yourself and are not done or Closed are to be found here.
Closed- All the queries that has been answered goes here.
Trash- Self explanatory, all the deleted queries before getting permanently deleted goes here.
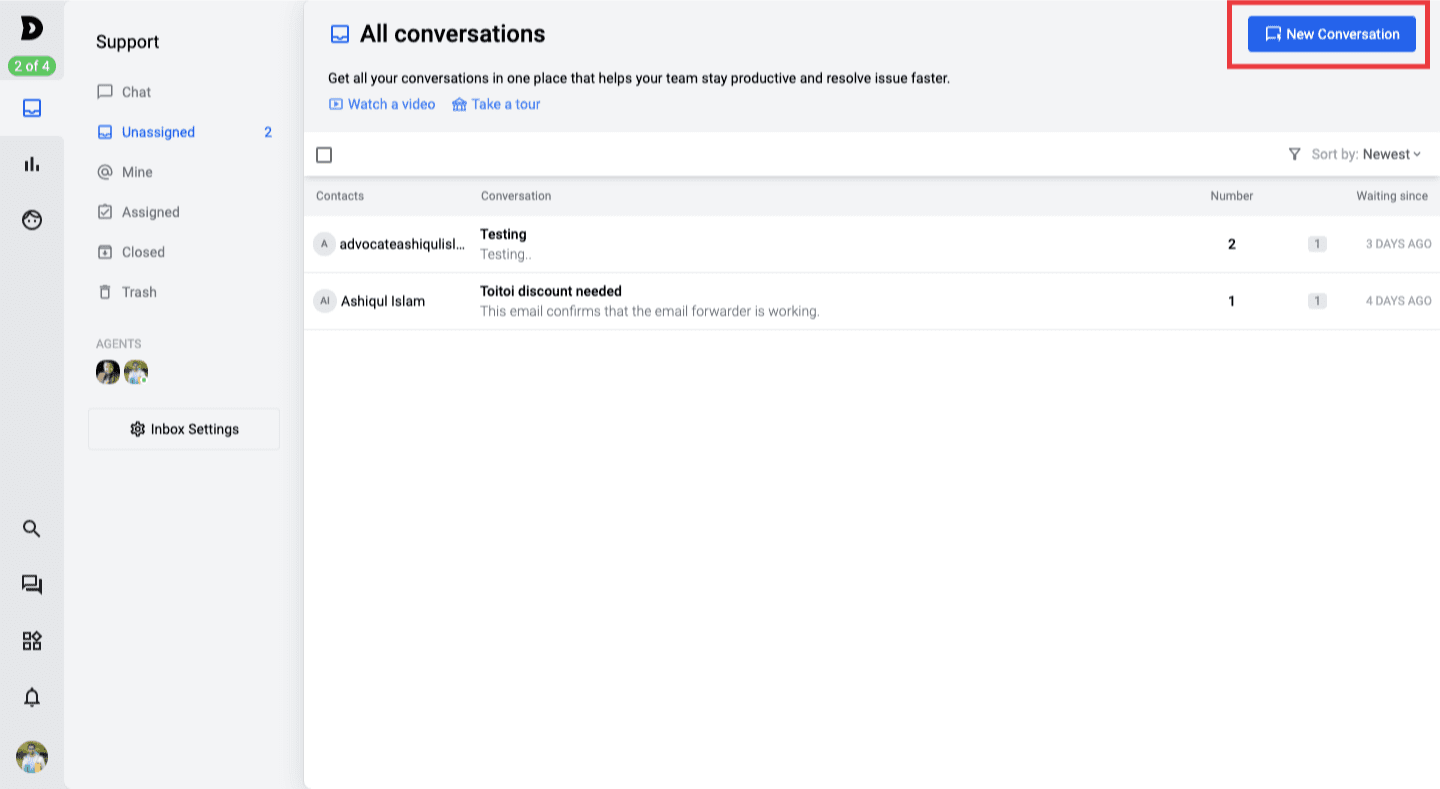
New Conversation
Isn’t that cool that you don’t really even have to get inside your webmail or email service provider to send out a New Email if you are using ThriveDesk. Yes, thats true, with the “New Conversation” option you can send out a fresh email or queries or start a new conversation with your customers for the first time.
Basic features that ensure a smooth Support workflow
When it comes to replying to the queries of the customers or proceed on with the conversations, there are certain features that is important to understand for ensuring a smooth yet an effective customer support system, which are as follows:
Assigning (without reply)
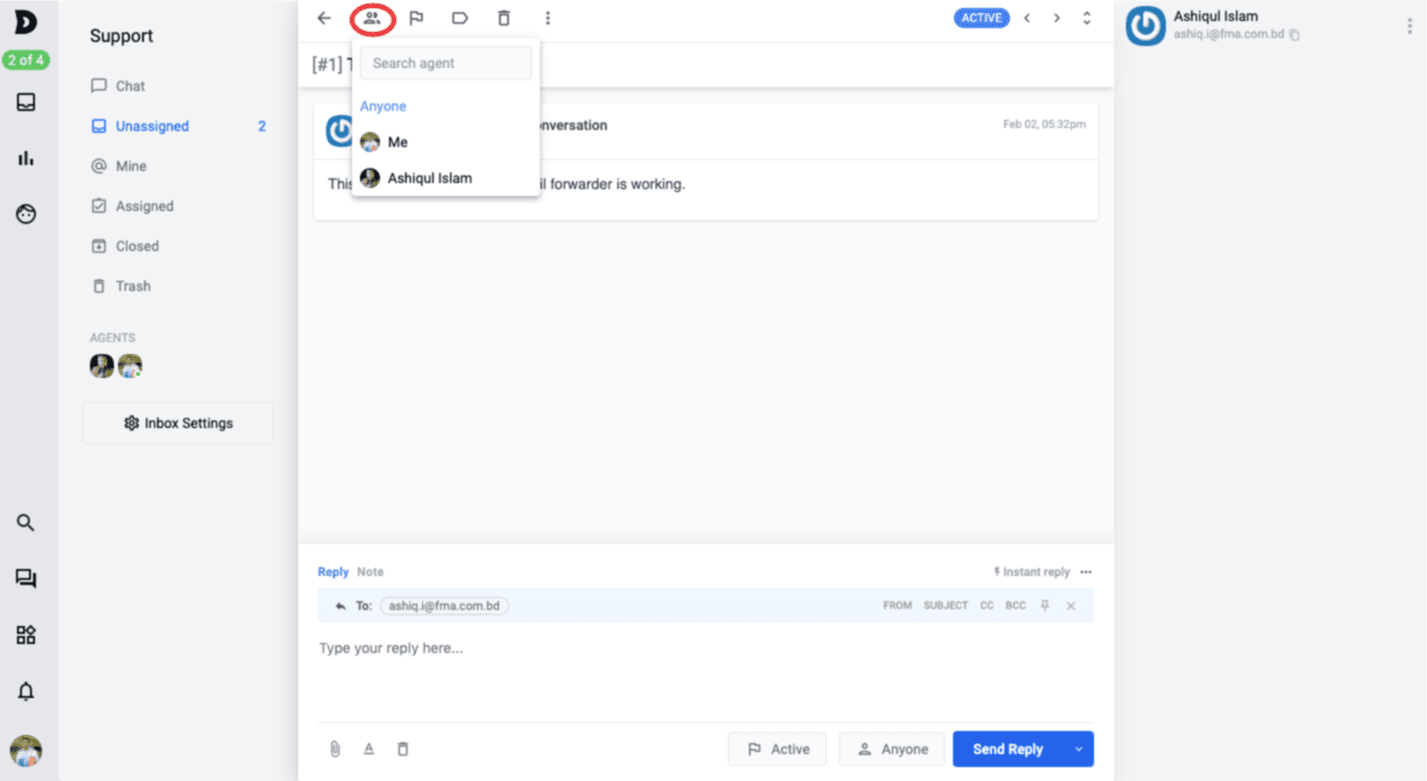
Well to be honest there are two ways to assign someone else to any ticket or queries straight out of inbox interface, although there are two ways to do it, the purpose is completely different from one another.
Lets talk about the first method, which is Assigning (without a reply), it means that once you open the queries it appeared that there is no need to even give an initial reply rather someone else should directly assist on this then use this option to assign that person.
Assigning (with reply)
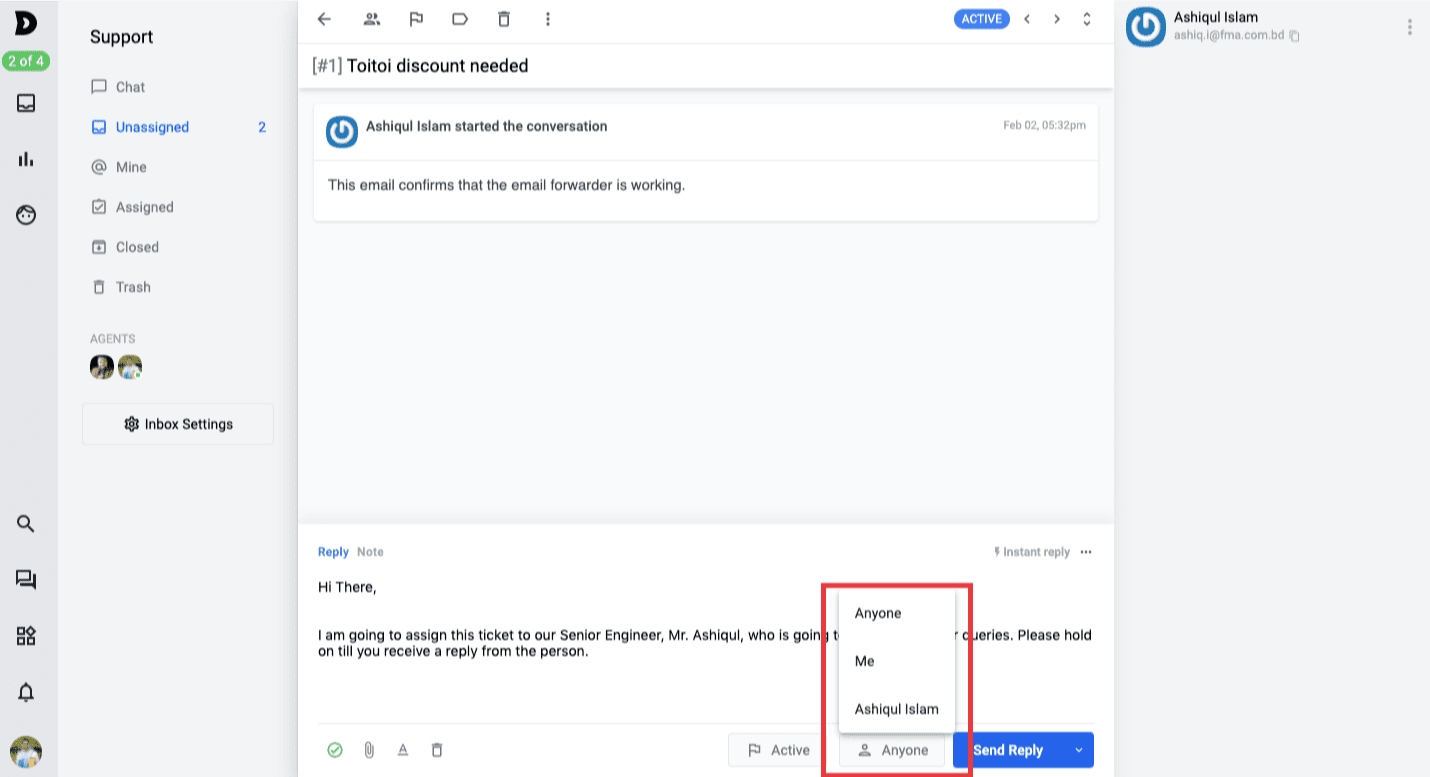
Moving on to the second option, which is Assigning with reply, it also means that when you need to send an initial answer where you have actually referred it to a senior engineer or to someone else in order for that person to resolve it then you are not truly closing the ticket rather just Assigning someone else after your initial reply.
Status change - Active, Closed, Pending (without reply)
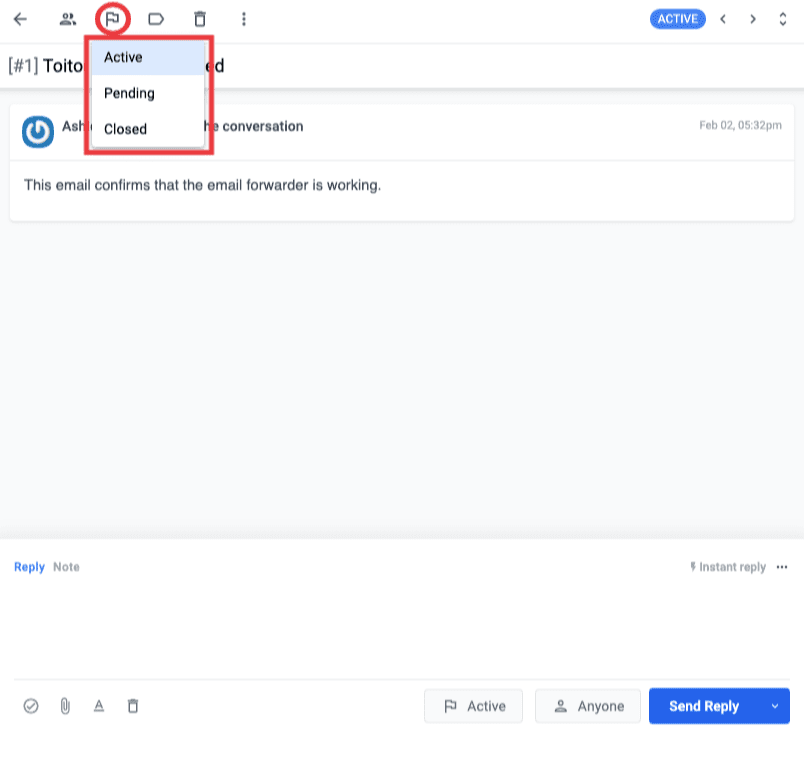
Right after you got inside a ticket and realise it doesn’t need any reply, may be because its a spam or simple verification email. Therefore, send it directly to the closed item or make its status active or pending straight out of here.
Status change - Active, Closed, Pending, Trash & Spam (with reply)
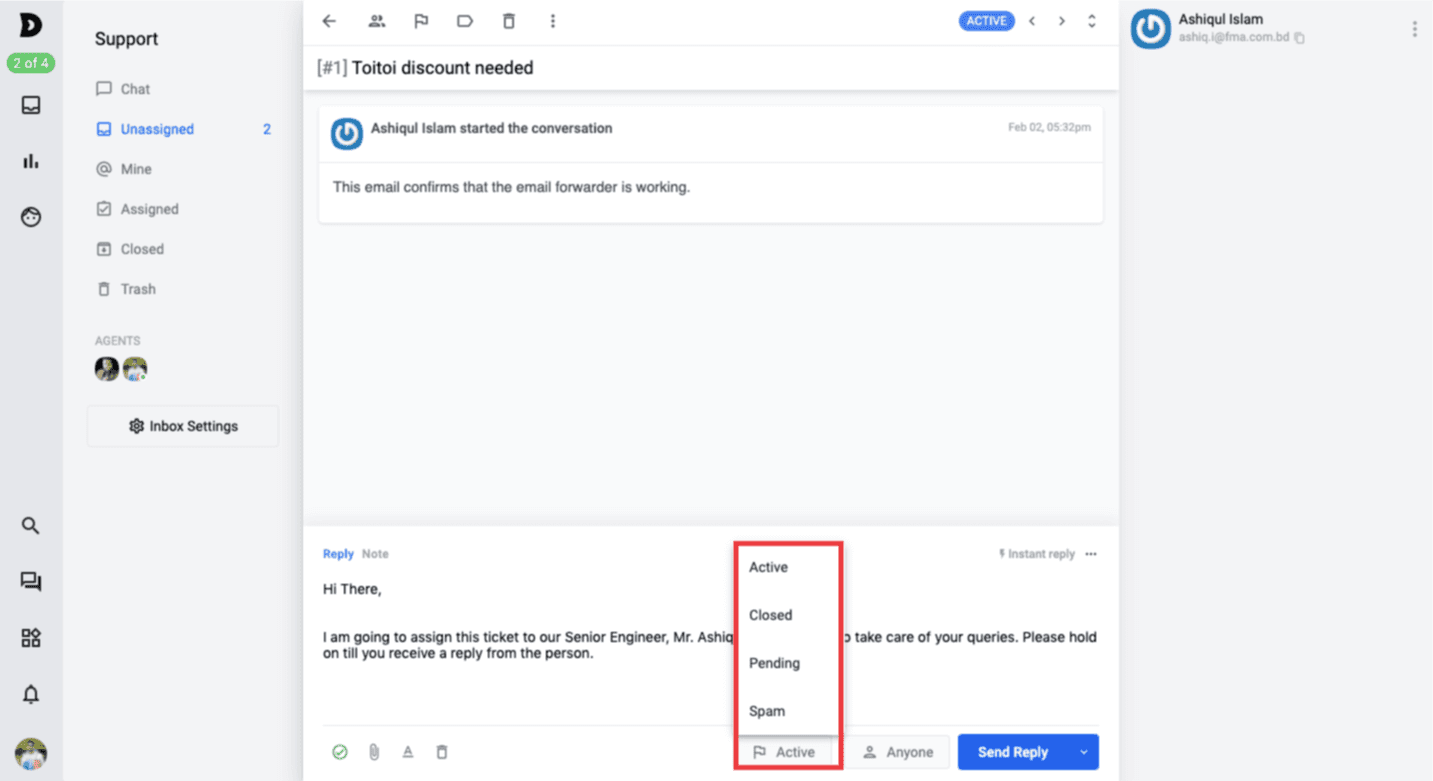
What happens to your ticket once a reply has been given? Where does it go? well you can set its destinations from the menu shown above. Active - tickets goes to Assigned tab if assigned to someone else or mine tab if assigned to yourself and the ticket stays active, Pending - tickets goes to Assigned tab if assigned to someone else or mine tab if assigned to yourself and the ticket stays Pending, Closed - tickets goes to the closed folder once it has been replied. Spam - it goes away and mark that email as spam, kindly note that once its marked spam you cannot unmark it spam (please contact the support team should you need to mark it as spam).
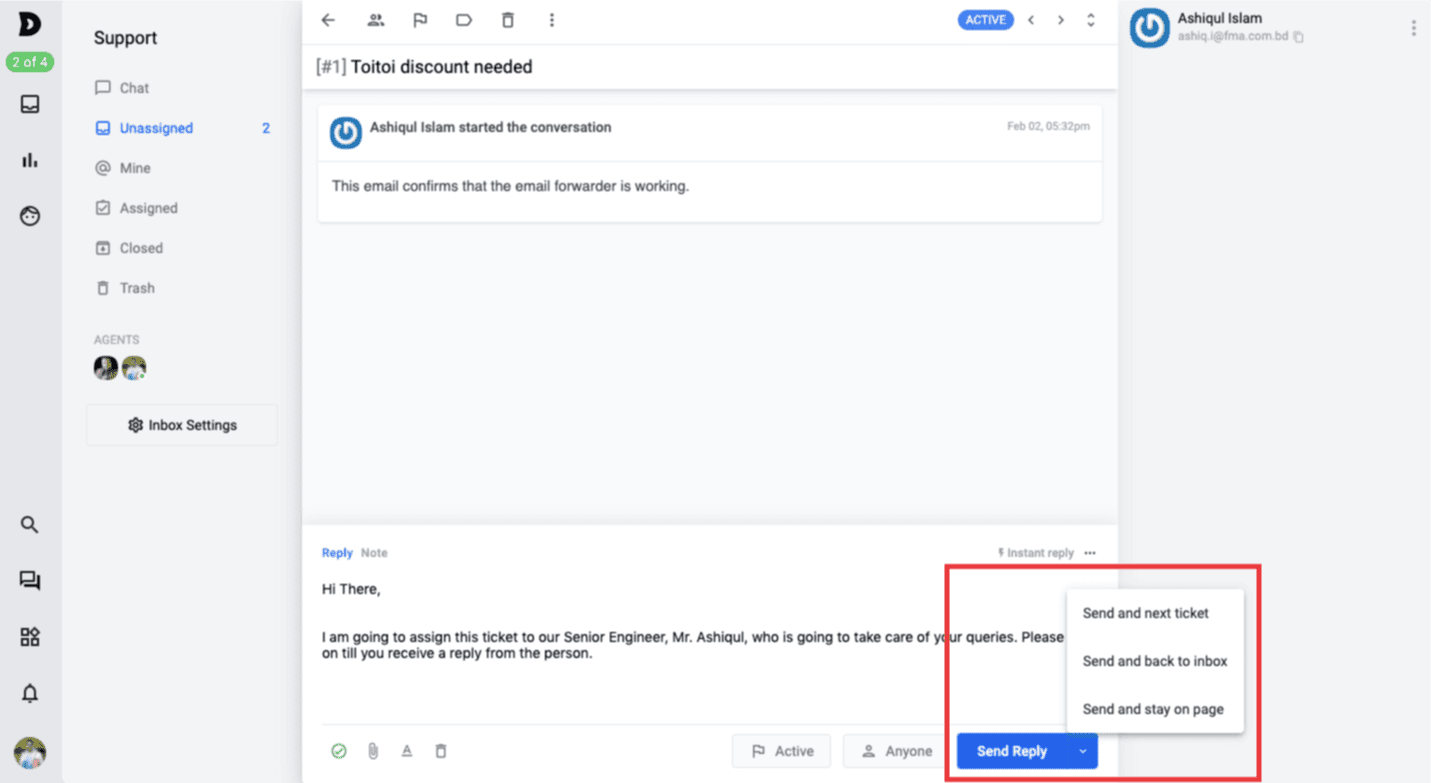
Move On
You can simply move on right after reply has been made, use this menu option with the self explanatory options
Internal Notes
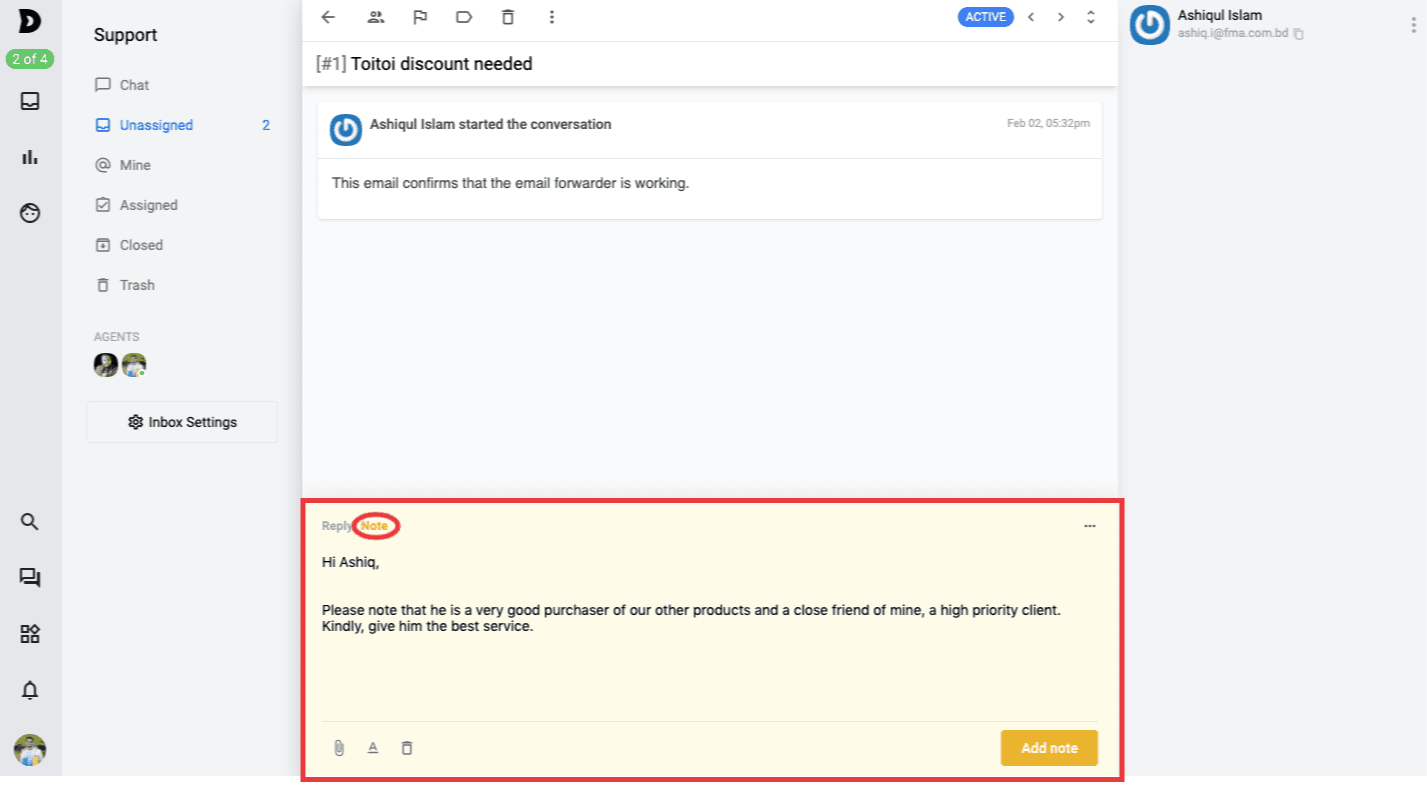
No need to call your team members and say “hey I have assigned you a ticket of a high priority customer, we need to get him onboard, here are the tips to proceed with him correctly....”.
Apparently, you can communicate with your own team members through internal notes only visible to the team members and kept it completely hidden from the customers.
Subject- CC - BCC - From - To
Although the information regarding the sender From and To along with the Subject is available only CC and Bcc are editable, see below:

Tags
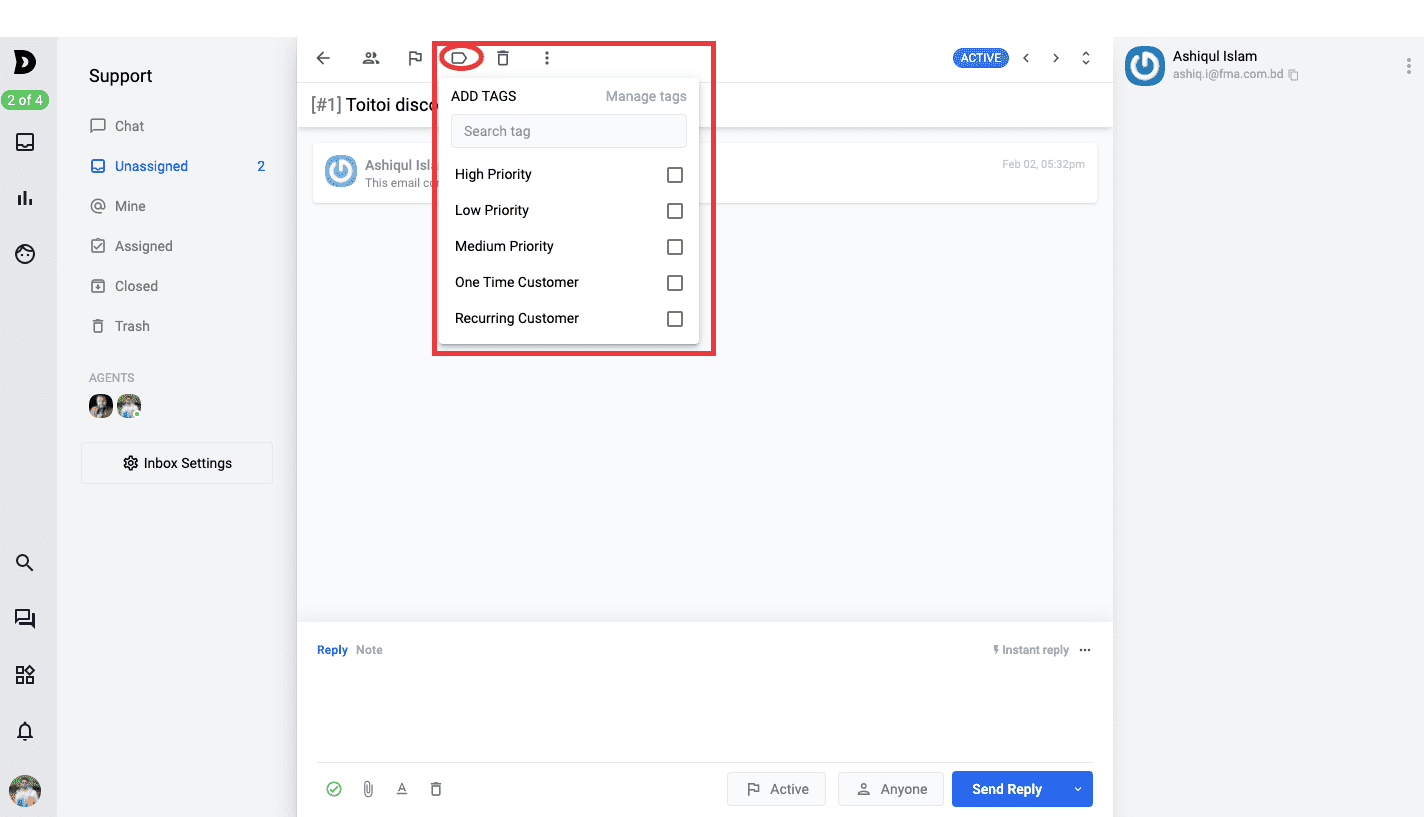
Worried about losing your answers or queries or wish to manage your customer tickets in a a much more organised manner, this is why we have tags.
tags assist on organising your customers with priority or segments as you wish, because you can create your own tags and in order to create one click on Manage from the above picture and you will be directed to the below page, as follows:
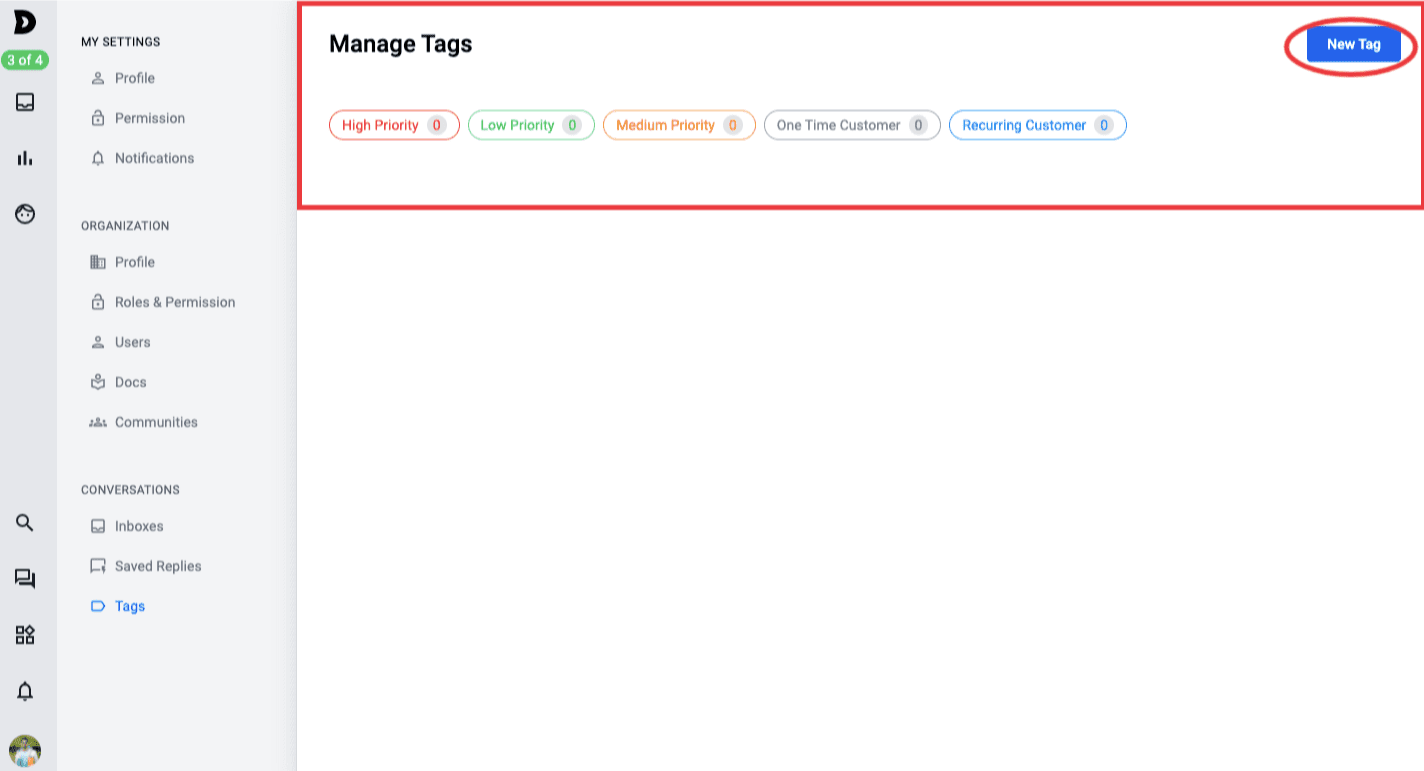
You can create and manage Tags here. You can also find this menu in ths general settings section under Conversations.
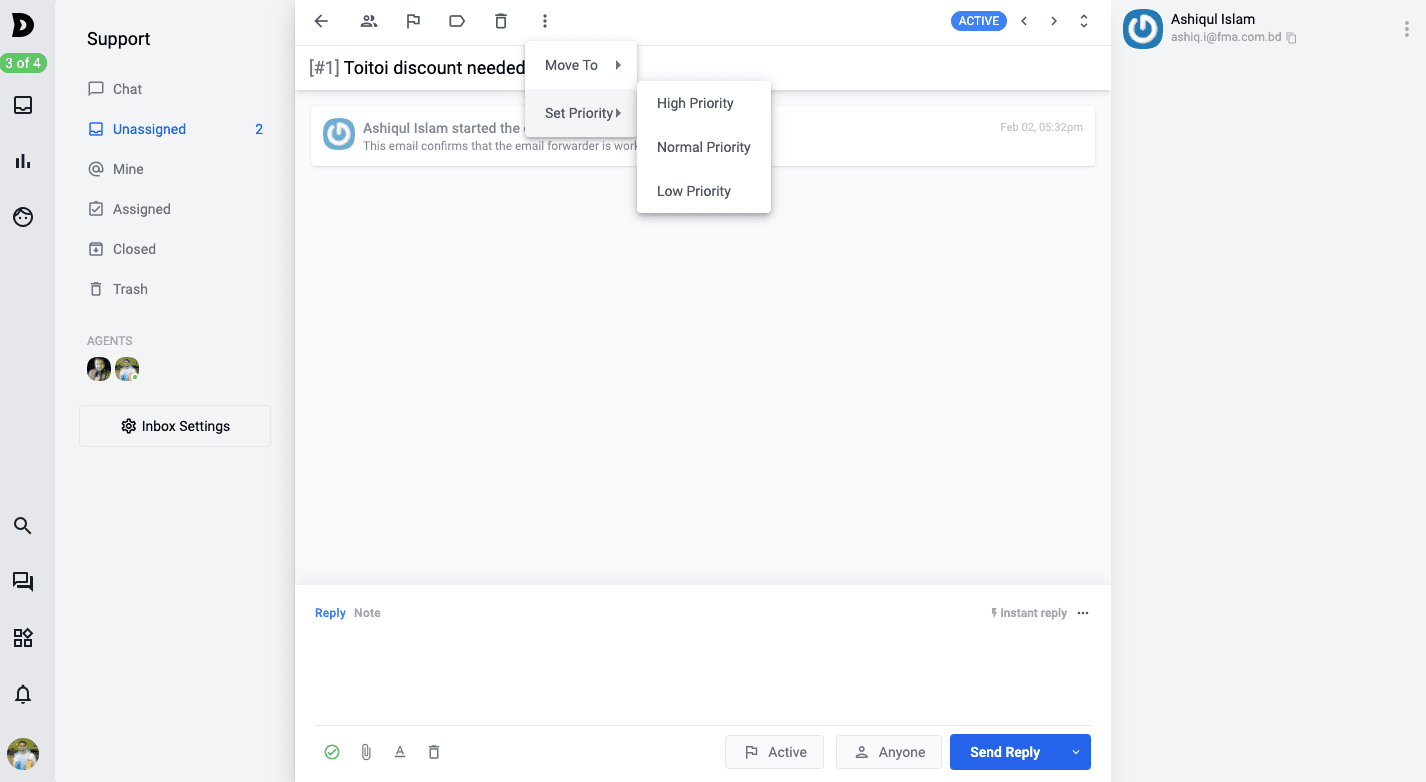
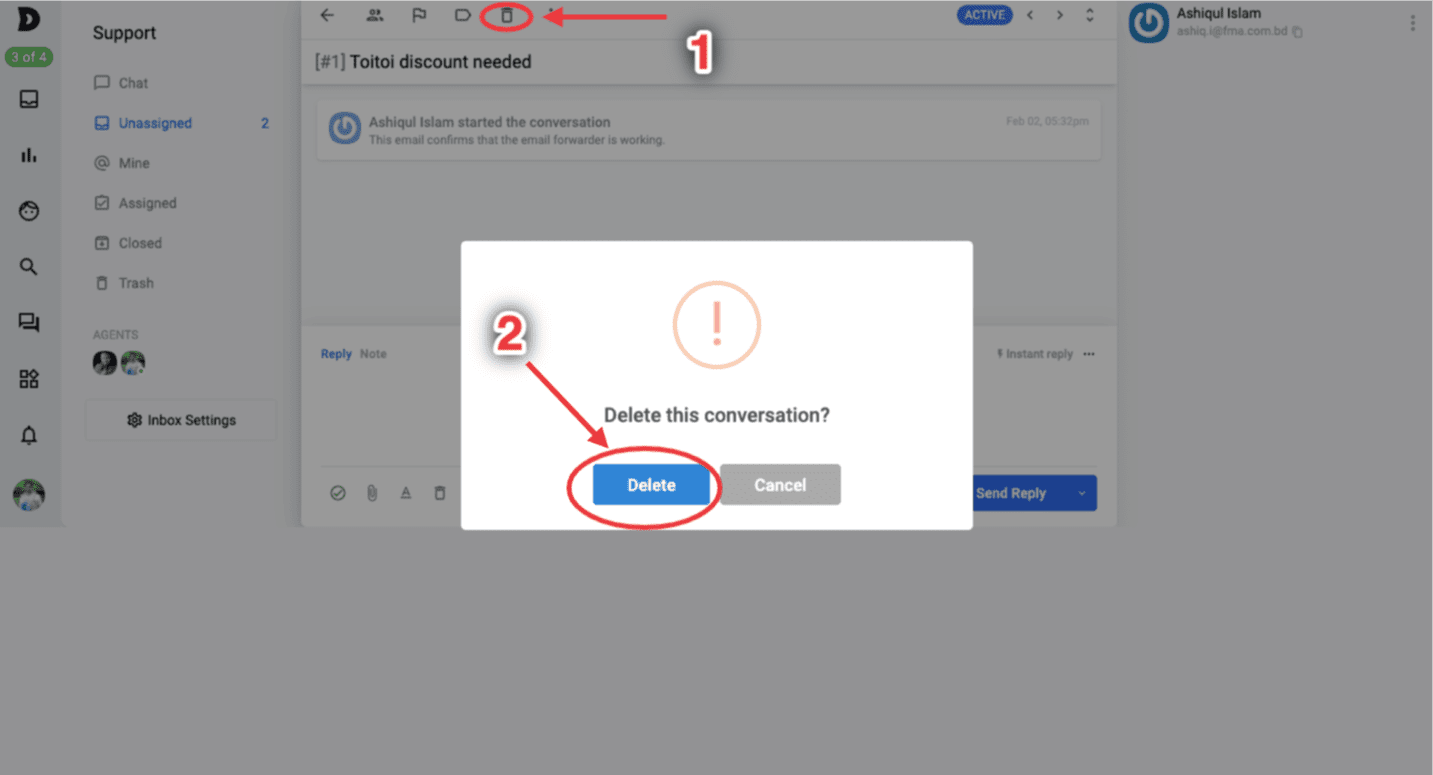
Trash, “Move to” or Set Priority”
Trash - If you wish to delete a query or conversation you can simply do so click on the Trash icon and after clicking on the icon you can confirm the delete after clicking on the same as per the below image:
Move To
One of the amazing feature of using ThriveDesk is having the flexibility to move tickets or queries from one folder to another folder and also from one inbox to another. Let’s say a customer knocked at your sales inbox related to issue concerning support of a technical issue, asking the customer to send it to the right inbox could be a hassle, hence with ThriveDesk you can simply move it to the other inbox or inboxes, see the image below:
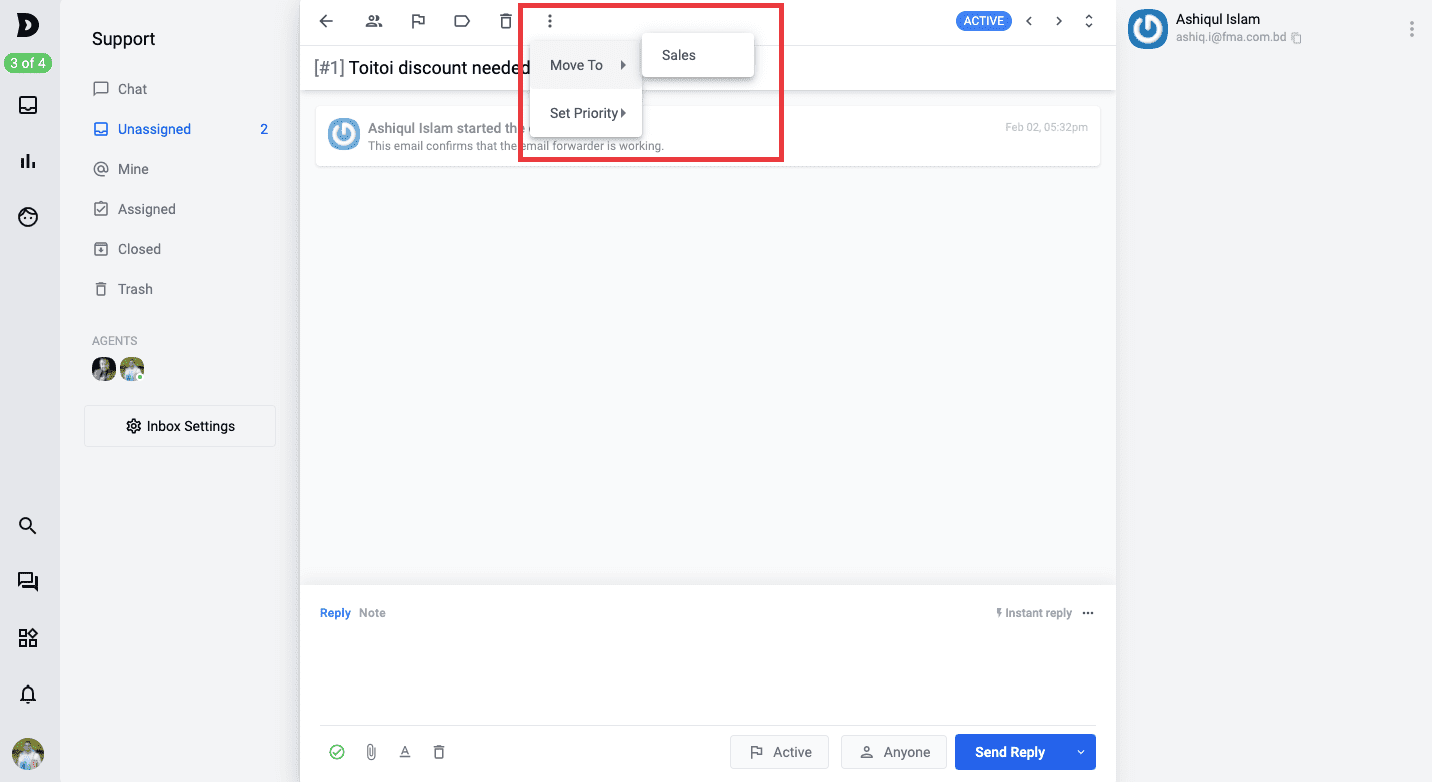
Set Priority
Apart from Tags, you can also set Priority straight out on the conversation you are making with your customers. Check the image below: