

Administrators and Account Owners can create and manage Assistant. Depending on your plan, you can make a certain number of Assistants, and our Assistant builder makes it quick and easy to get things going.
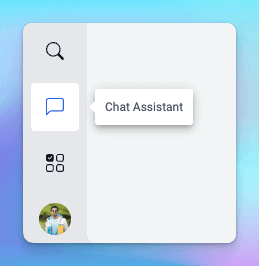
Head to Chat Assistant from the bottom left app panel and click on the New Assistant button to get started.
Create new Assistant
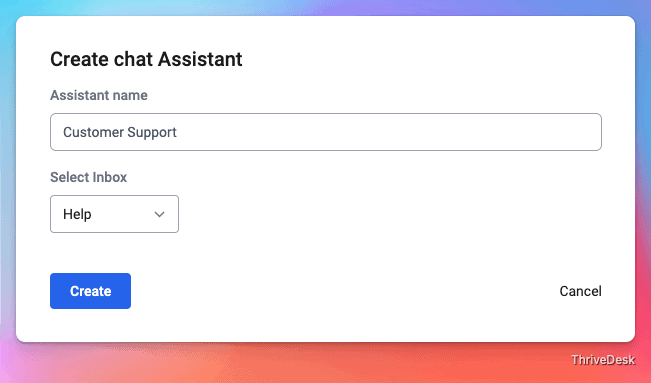
Give your assistant a name and choose Inbox from the dropdown. Chats and contact form submissions from Assistant will appear in this inbox.
Customize your Assistant
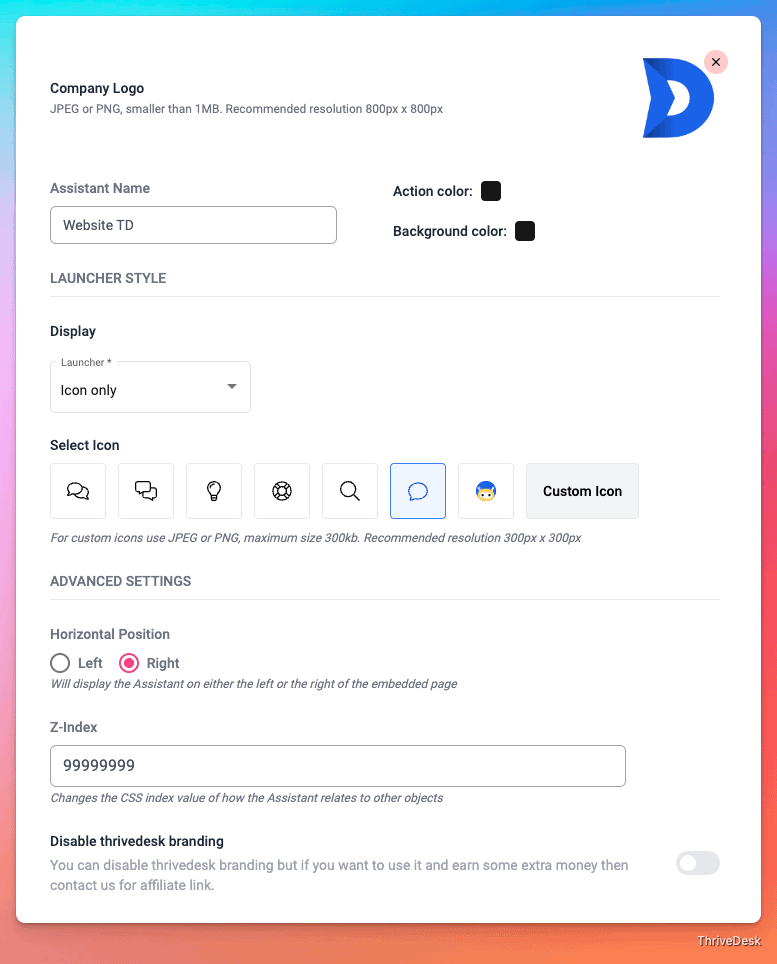
Assistant Identity
The Assistant name is for internal use only. Your customers do not see the name of your Assistant when using the Assistant.
Upload your logo, it has to be in JPEG or PNG format and must be smaller than 1MB.
Select your brand colors for Action or Background color.
Button Style
Choose a button style that works best for you. You can select from our icon library or upload your own icon.
Advanced Settings
Display the Assistant on the left or right side of the page. Most people opt for the right side, but you might go with a left side embed if you have another widget in the right corner of the page.
Z-Index
Adding a z-index value changes the stack order of Beacon so that it’s not bumping in to other elements on the page. There’s no minimum or maximum value, and you can use negative values, too.
ThriveDesk Branding
Pro plan customers can toggle ThriveDesk branding on or off. If this option is disabled for you, you’ll see a small Powered by ThriveDesk mark displayed on the bottom of your Assistant.
Connecting Apps

Your Assistant > Apps page will show you any apps from the ThriveDesk app store that work with Assistant. By turning on the app, you connect the app to the assistant.
Connecting Doc
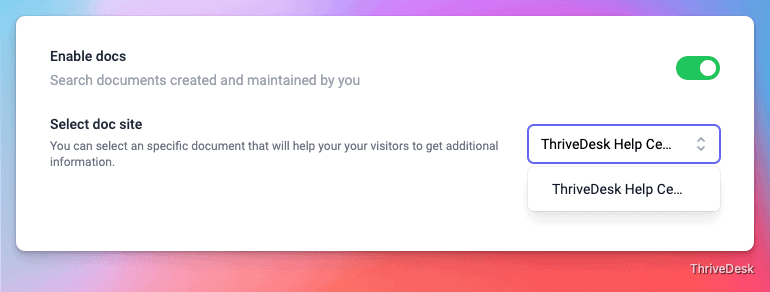
If you do not have a public doc you will not be able to toggle the switch to enable Docs in Assistant. Make sure you have created a doc site first then come back here and try again!
Enable Docs articles to be served in your Assistant. If you have more than one Docs site, choose the site you wish to serve in the Assistant. One Assistant can only connect to one Docs site.
Contact Form Settings
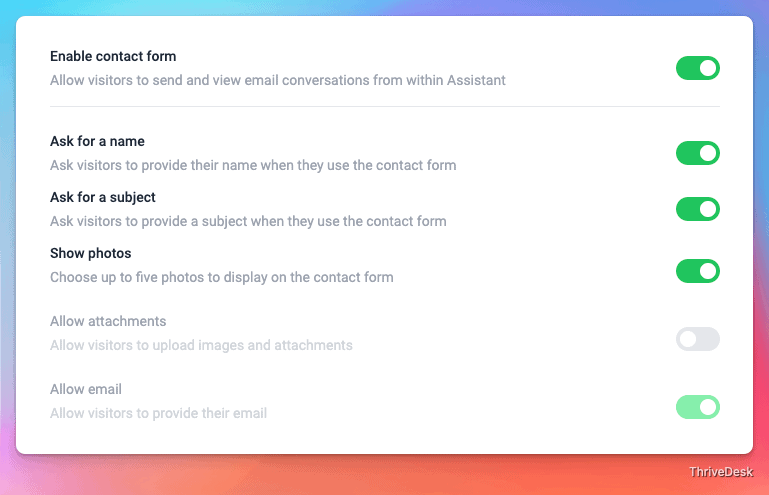
Use the contact form to allow your customers to email you right from the Assistant.
Ask for a name
Ask visitors to provide their name when they use the Assistant contact form. If you’re using the Assistant JavaScript identify feature, the name field is automatically pre-filled.
When you enable this field, it is a required field on your contact form.
Ask for a Subject
Ask customers to provide a subject when they use the Assistant contact form. When you enable this field, it is a required field on your contact form.
Allow attachments
Allow customers to upload images or attach files when sending a message through the contact form. The maximum file size for any single attachment is 5MB. Customers can attach up to 3 images or files per message.
Show photos
Enable Show photos to choose and manage which of your ThriveDesk User's profile pictures show in the Ask screen in Assistant.
Chat Settings
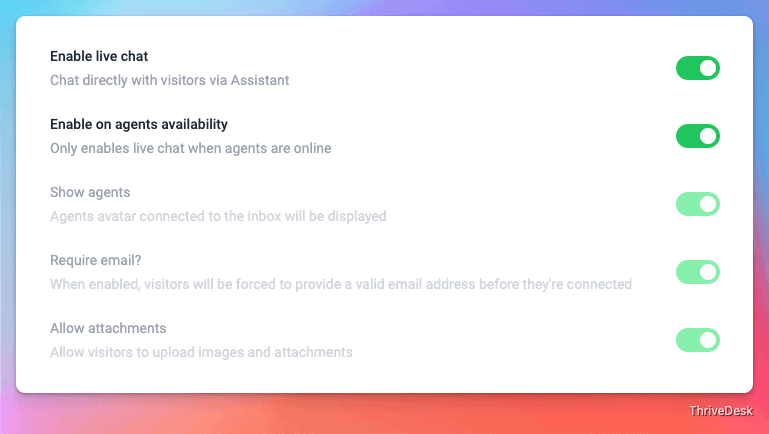
Enable live chat feature so your visitor can chat directly with your support agent from the Assistant.
Enabling on agent availibility
Live chat feature enable when an agent logged into ThriveDesk and his status Available for chat. Live chat alwyas visible if you toggle this settings off.
Show agents
VIsitor will see which agent he's chatting with. You can't toggel this off.
Require email
Enable this feature to require an email address before a chat session begins.
Email transcript
Choose to have an email transcript emailed to the customer when the chat has ended.
Translating Assistant
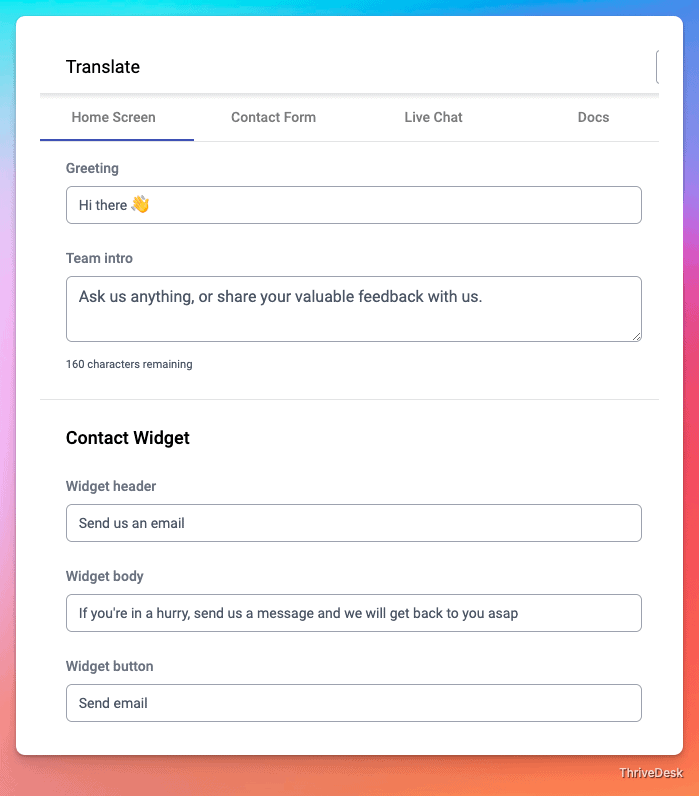
Visit the Translate tab to personalize every label that your consumers see in your Assistant. You may want to translate the content into another language or modify the English wording to fit your own brand and service standards.
Add Assistant to Your Website or App
The Assistant installation code is just one JavaScript calls that will load the Assistant wherever you want to install it. Head to Chat Assistants > [Choose your Assistant] > Installation tab.
Click the Copy button to copy the entire code you see there to your clipboard.
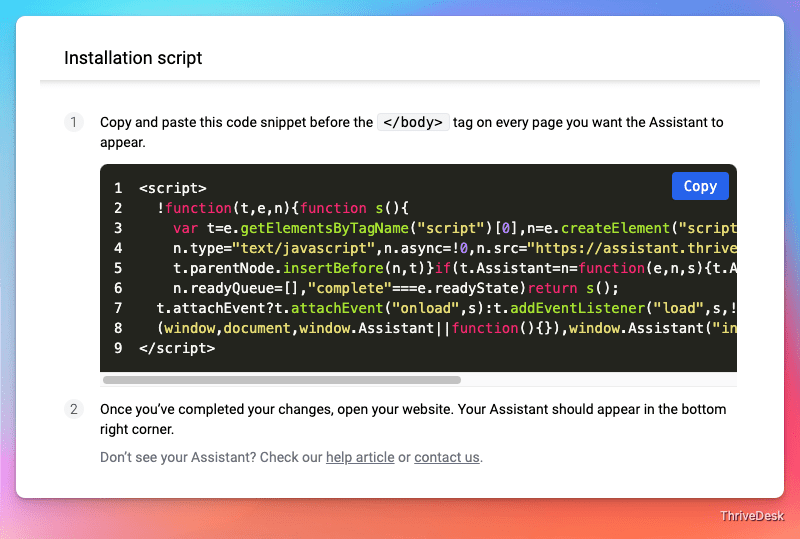
Add that code to your website's code on any pages where you want Assistant to appear. It's that simple!
Obviously, you will need to know how to add it to your website's code in order to do so. If you are unsure how to do so, contact the person or team responsible for maintaining your website and email them the code.
Choose your platform below: