

Custom Fields allow you to collect, organize and use additional data on your tickets (or conversations) beyond the standard fields. With Custom Fields you can capture information such as product version, customer tier, issue category, or any other attribute relevant to your support process. You can then use that information in filtering, reporting, workflows and automation.
Using Custom Fields you will:
Extend the data you collect on each ticket
Maintain consistent data across tickets by using predefined field types and options
Use the collected data in views and reports to improve visibility
Make certain fields required so that key data is not omitted
How Custom Fields Work
Each Inbox can have any number of Custom Fields but we recommend to keep it low for better management. There are 4 supported field types:
Dropdown: A list of predefined options; user selects one.
Single‑line text: Free text entry on one line.
Multi‑line text: Free text entry over multiple lines.
Toggle: A toggle selector for boolean value.
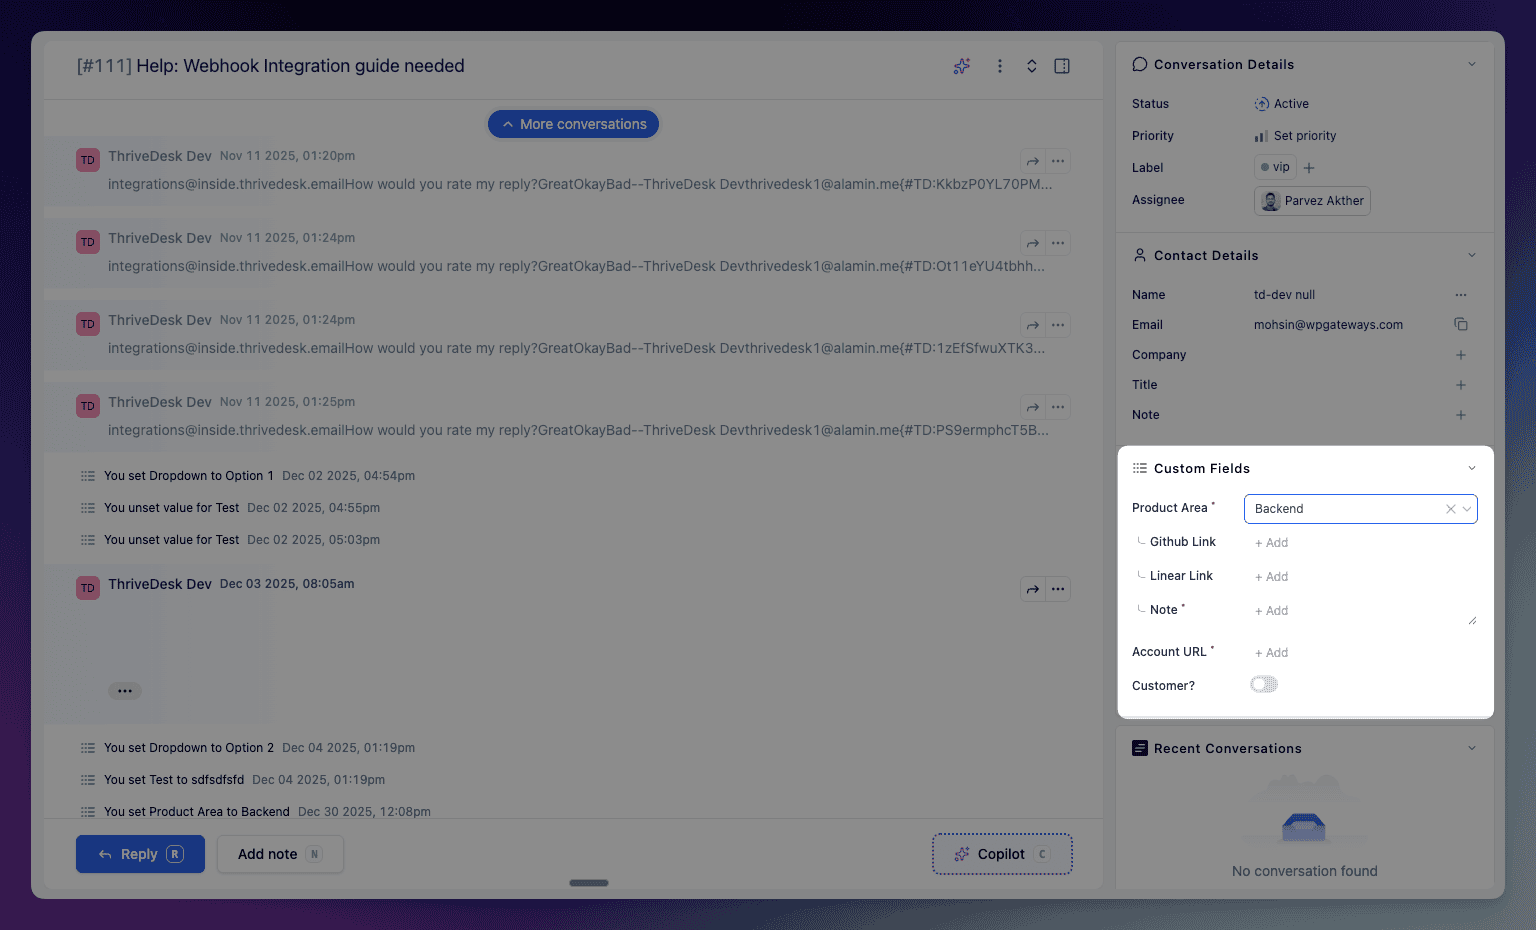
You can specify that a custom field is required. Users must fill in a required custom field when sending a reply to the conversation. Custom fields appear in a few different places:
In the sidebar of conversation.
On the new conversation page when sending a new email, or when logging a new phone conversation.
In Assistant if you enable the option. See Manage Assistant Contact Settings for the details on using custom fields in Assistant.
Conditional Fields
Conditional Fields allow you to control the visibility of certain custom fields based on the value selected in a Dropdown field. This helps keep your ticket forms clean and relevant, showing only the fields that are necessary for a specific situation.
For example, if you have a dropdown field called Issue Type with options such as Billing, Technical Issue, and Feedback, you can configure conditional fields so that:
When Billing is selected, a field called Invoice Number appears.
When Technical Issue is selected, fields like Operating System and App Version become visible.
When Feedback is selected, only a Feedback Category field appears.
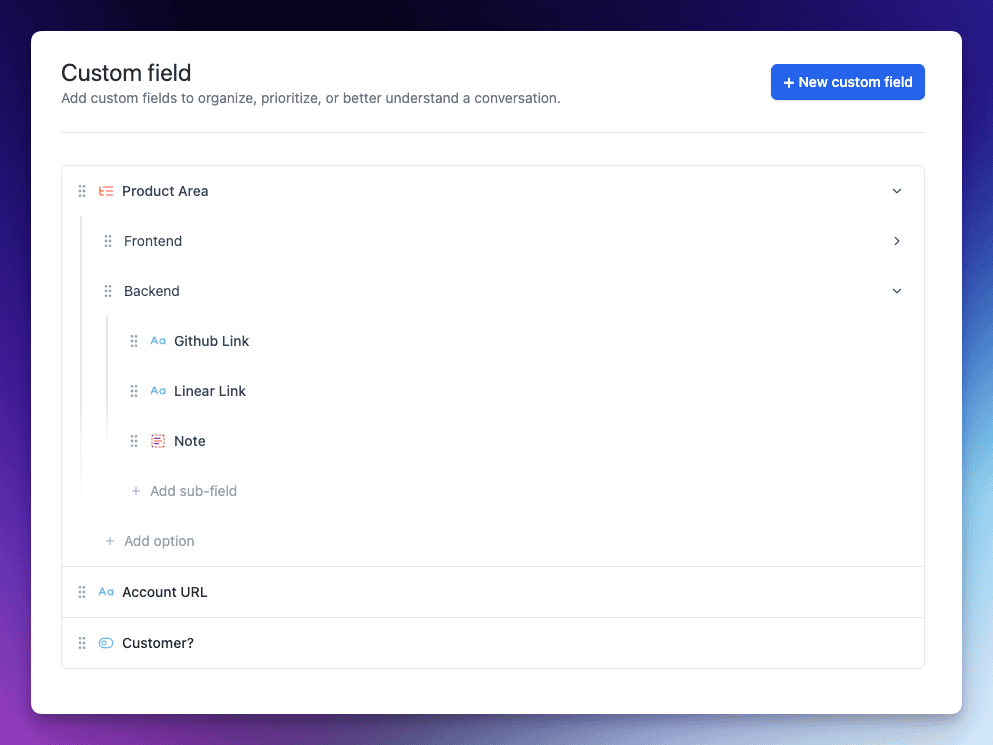
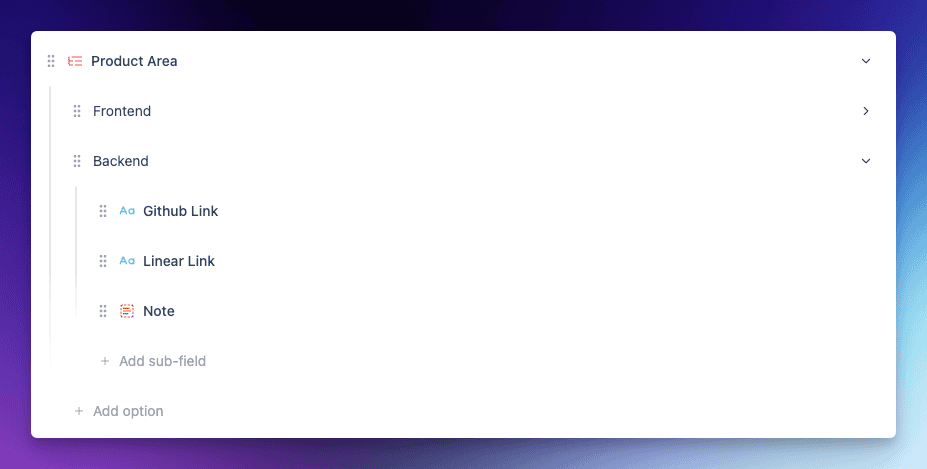
When you create Dropdown field you can easily create options and sub-fields with visual drag and drop interface. Sub-fields will only appear when you select the specific option from parent list.
Create and Edit Custom Fields
Custom Fields is an option in Inbox Settings and only Administrators and Account Owners can add or edit custom fields by default.
Creating custom fields
Head over to your Inbox > Settings > Custom Fields. Click + New Custom Field.
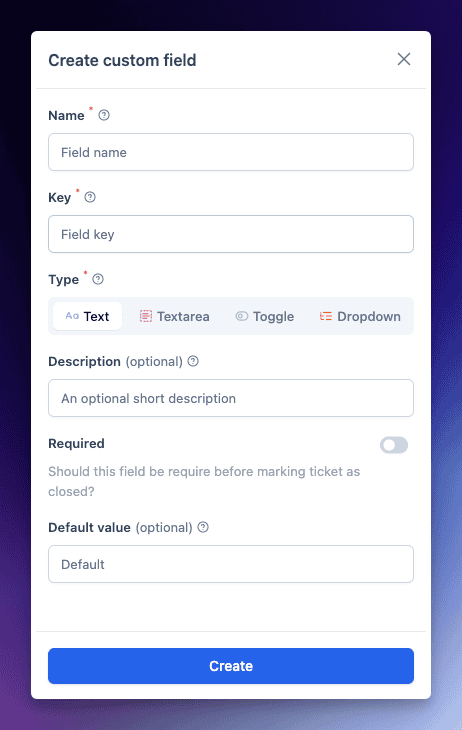
Start building the field
The Name will be visible to agent while replying to ticket and customers when using Custom Fields in Assistant.
Key field will only use on the API and must be unique.
Select a field type. Choose from a dropdown, single line, multi line, or toggle.
Make the field required by flipping the Required toggle to the on position. Users must populate a required field before sending a reply.
The example shown here is a dropdown field. You can add new options by clicking the + button, then re-order each option by dragging and dropping. Click the Save Field button to save the field.
You can select or add default value for the field.
Edit existing fields
Click on the field title bar and edit screen slide from the right. You can change the descriptions, or whether or not the field is required and default value.
You cannot change the field name, type and key.
Delete Custom Fields
Click the red Delete button and you'll be presented with a confirmation screen. Click Ok to confirm deletion. All the sub sub-fields associated with the field will also get deleted.