In this article the scope of the Inbox Settings as well as the process of changing the settings will be addressed.
Let’s begin with the navigation, in order to find the Shared Inbox settings, go to SETTINGS and click on Inboxes.
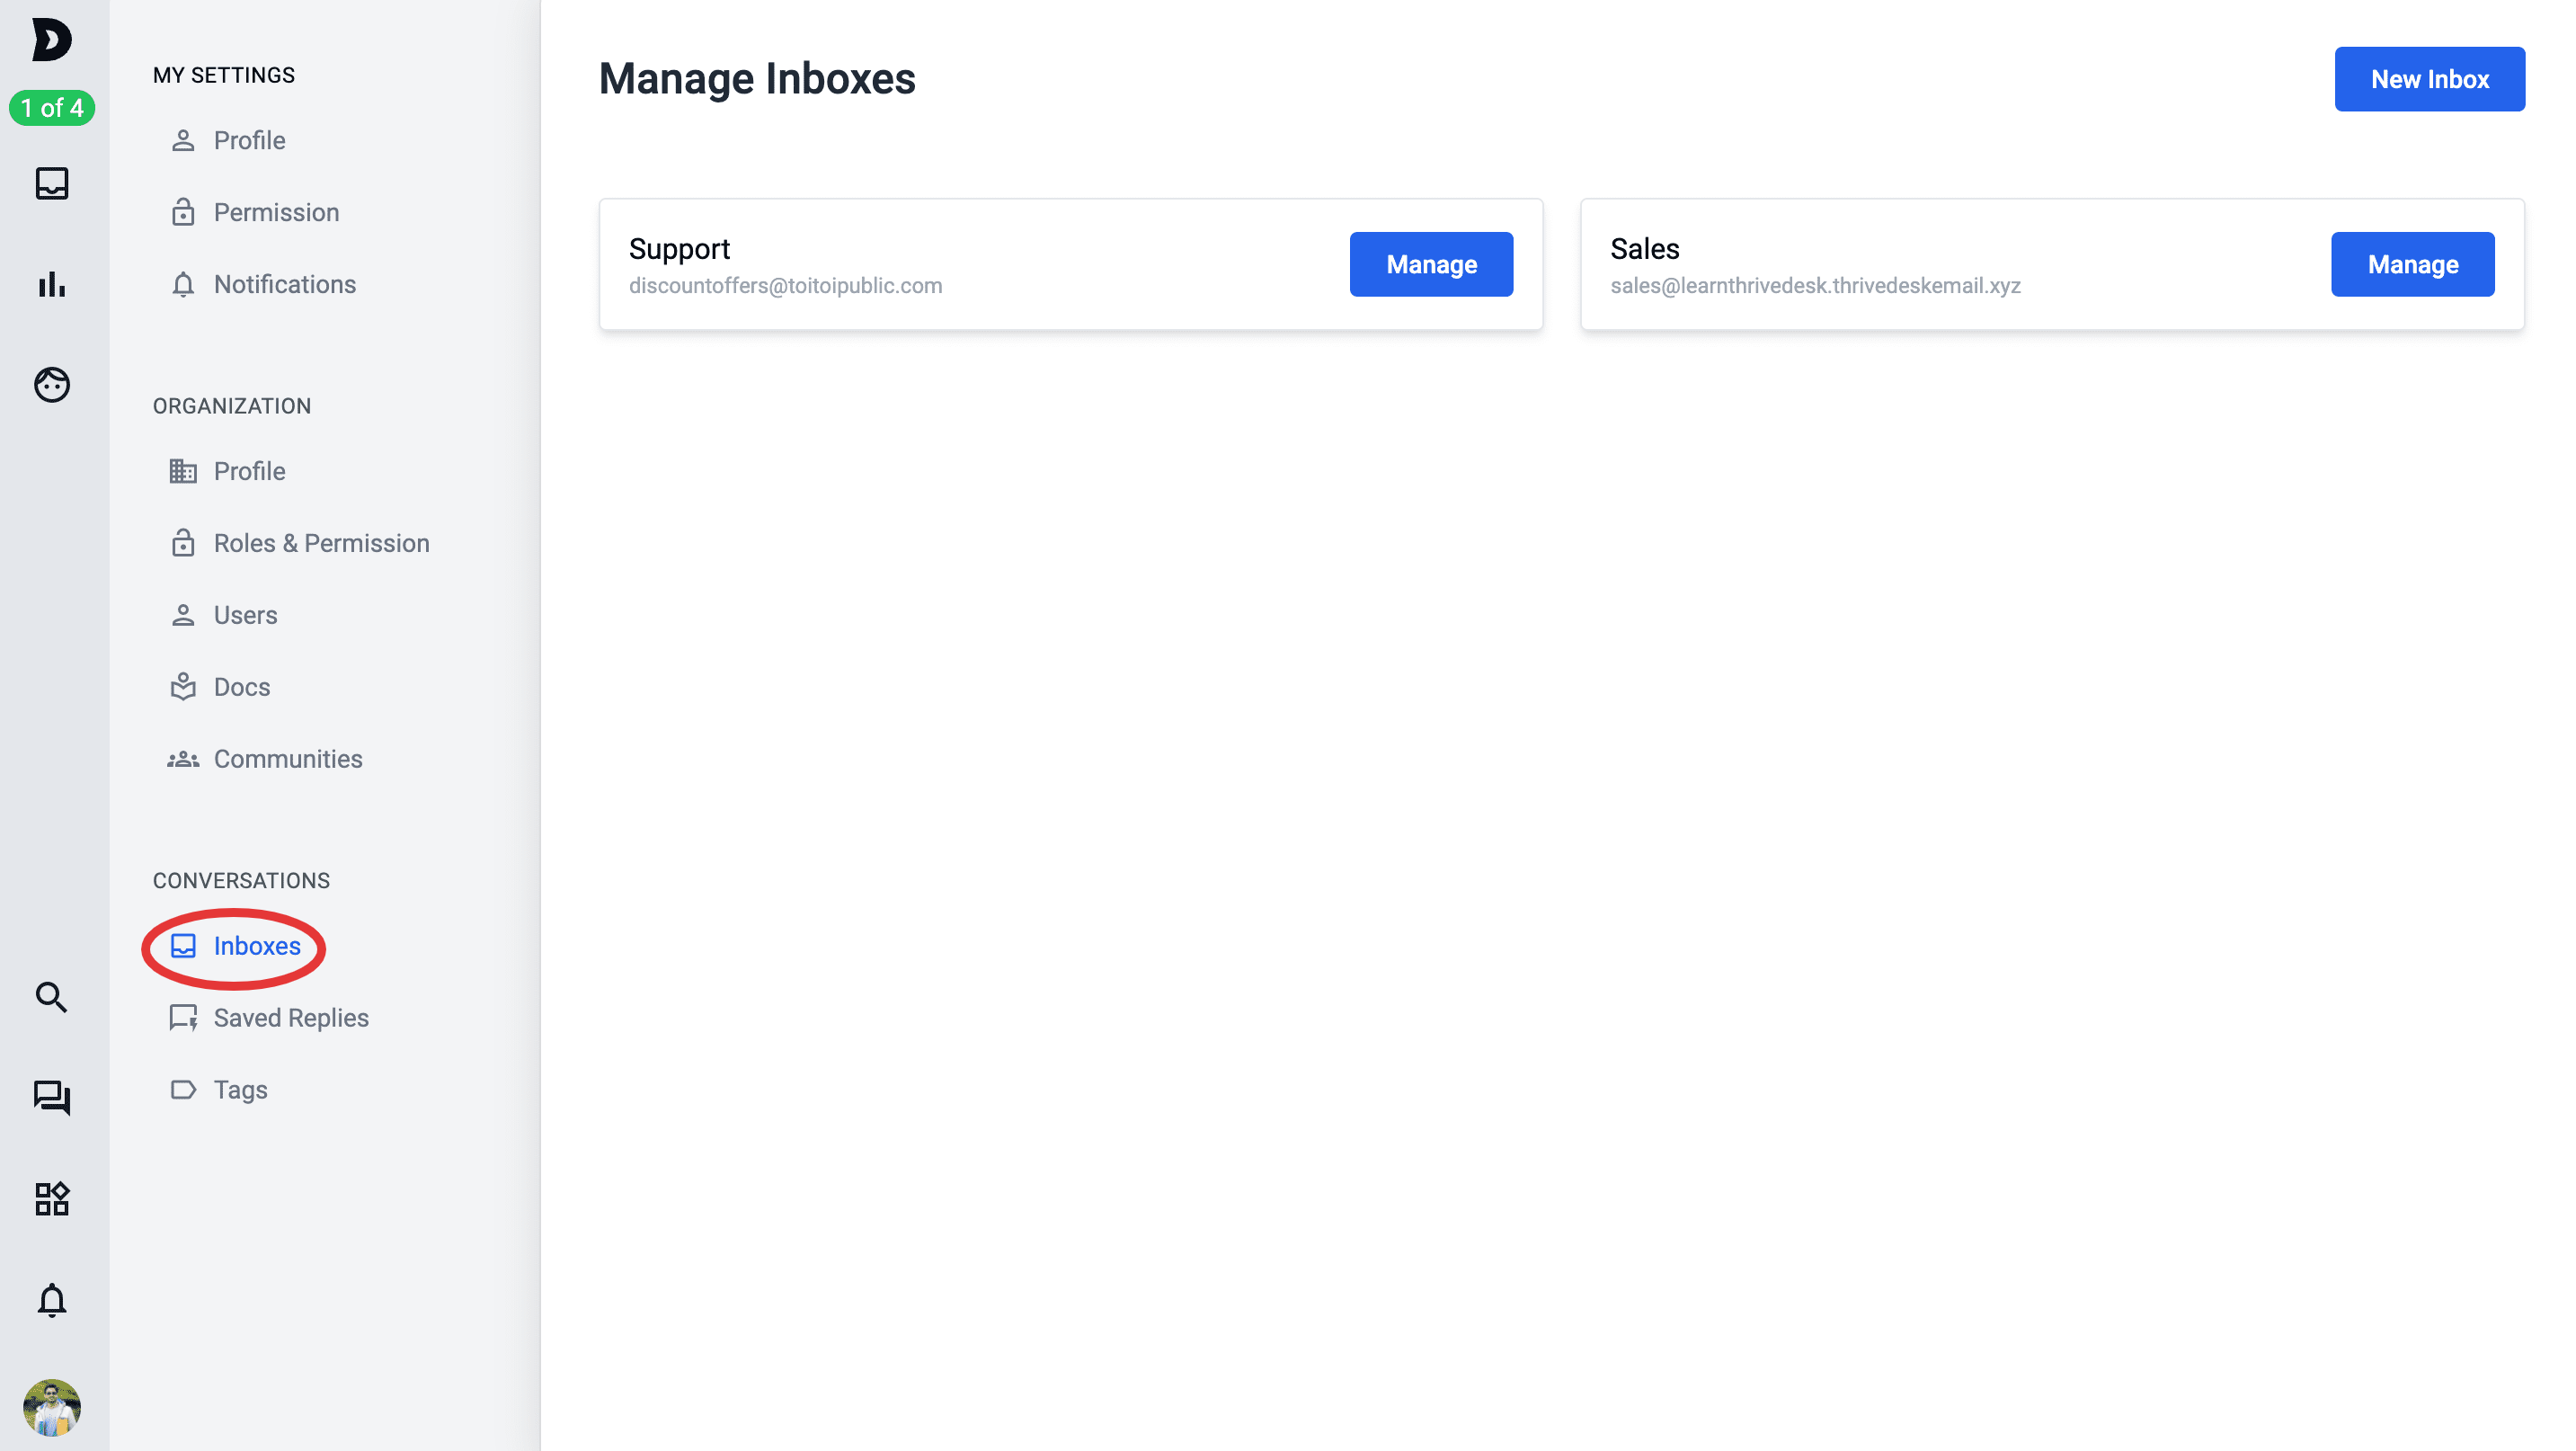
So each and every inboxes that you have created has their distinct settings and many of the features available in ThriveDesk are inbox specific, for example, you can have separate signatures and set separate roles and permission for your team as per Inboxes separately.
In order to manage each of these inboxes, click on Manage from the respective inboxes available as per the image above. Inside the Manage section of each of the inboxes you will have the following options and settings available:
Basic Settings
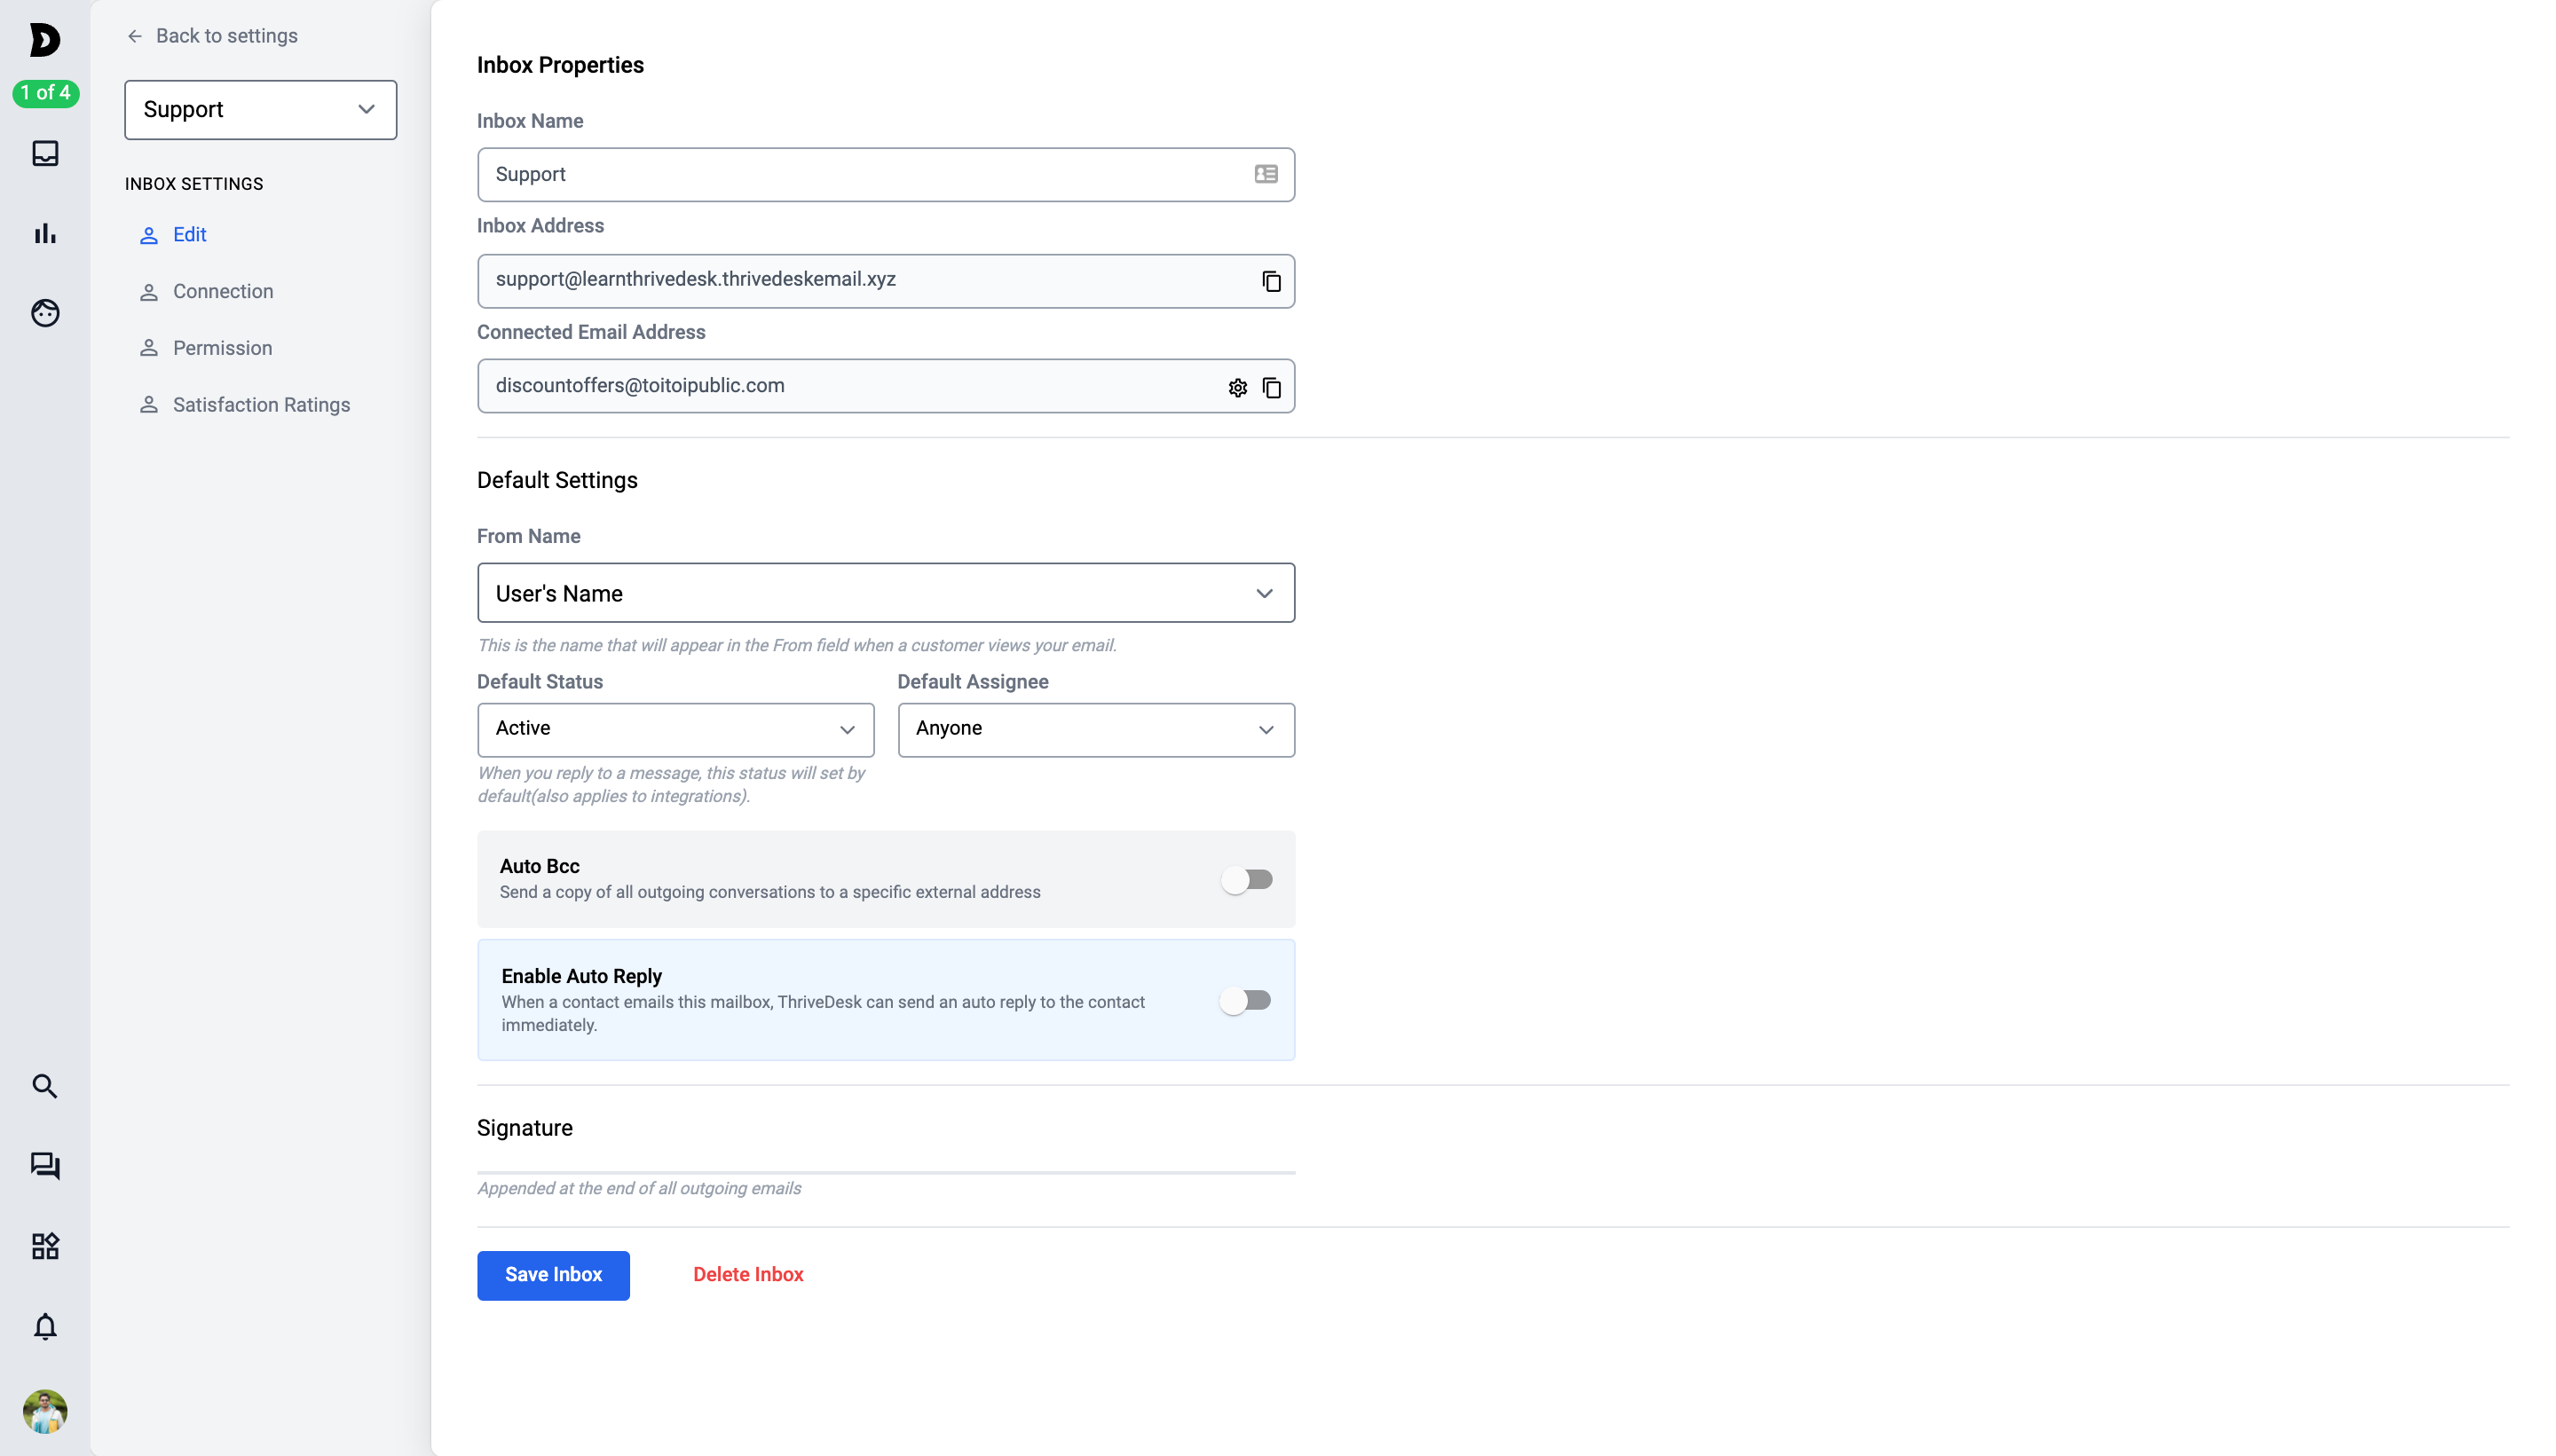
Inbox Name: this is the name given to your inbox from your end, you can change the name as you desire. Note that, the name is not visible from the end of the customers unless From Name (See below) of senders name are set as Inbox, it is just to segregate the number of inboxes available for edit.
Inbox Address: This is an auto generated email address from our end, this email address is attached with this inbox and cannot be changed. Therefore, all the emails or customer queries that are sent to your domain based email/Connnected Email Address are forwarded to the Inbox Address, if the forwarders are set correctly, and it is only then the queries will land on the designated inbox.
Connected Email Address: This is your domain based email address where you would like your customers to send queries. This email address is changeable.
Default Settings
From Name
You have three different options available for From Name, they are Inbox Name, User’s Name, Custom Name.
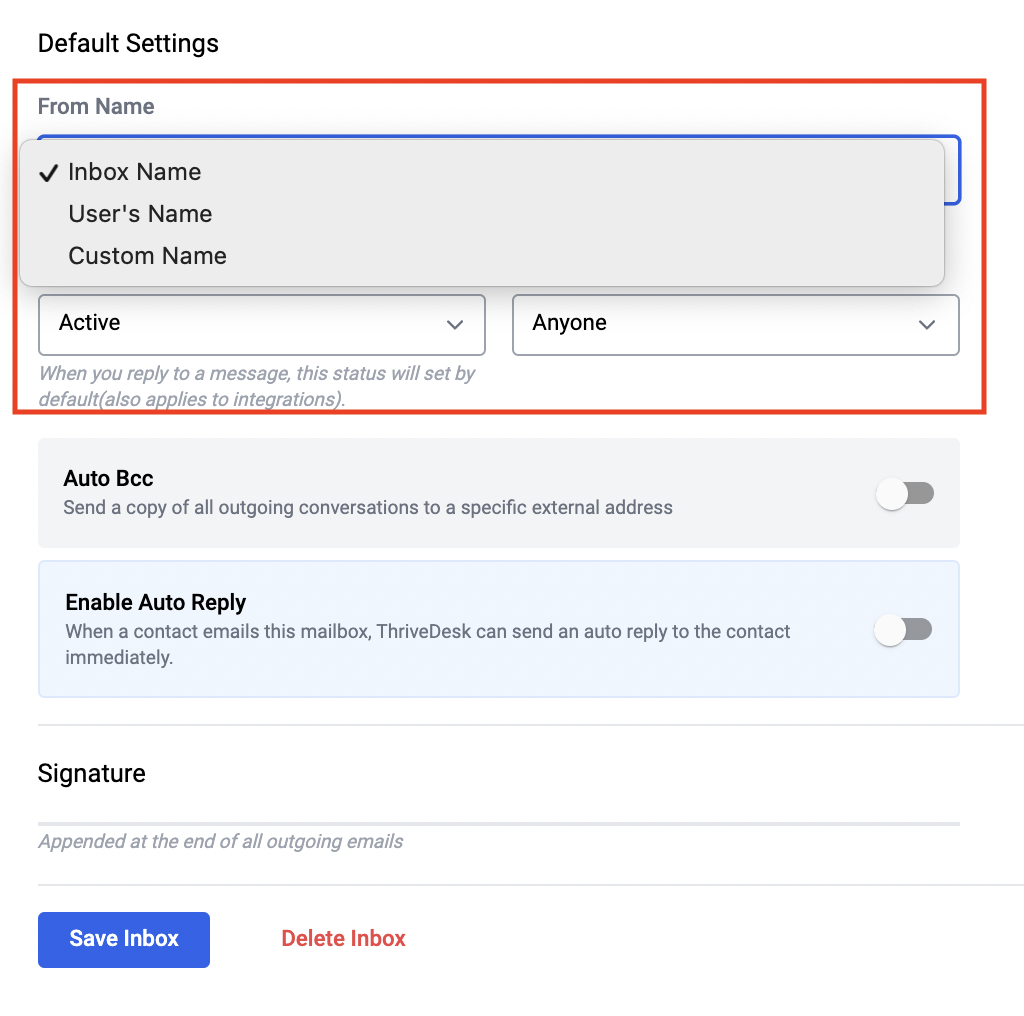
These sets the name of the sender, therefore, when the customers receive an email they see the name set here, for example I have set User’s Name and when the customer receive the email it will show that the email sent from “Parvez Akhter” as I am the user here.
In case you have set the From Name as inbox name, it will display inbox name as the sender. As oppose to that, if set it as Custom Name then a new field will pop up where you can use a name of your preference.

Before we jump straight into the functionality of this option, lets visualise the inbox dashboard, here how it looks:
As you can see that there are certain folders pre-configured folders created for the convenience of this support workflow, lets understand what are these folders for:
- Unassigned- means that in default scenario, all the queries that you have received but neither it has not been assigned to any one nor any else has given a reply to it and are currently Active, will be found here.
- Mine- all queries that are assigned to you will be found here.
- Assigned- all the queries that are assigned to all the other members of the your team except yourself and are not done or Closed are to be found here.
- Closed- All the queries that has been answered goes here.
- Trash- Self explanatory, all the deleted queries before getting permanently deleted goes here.
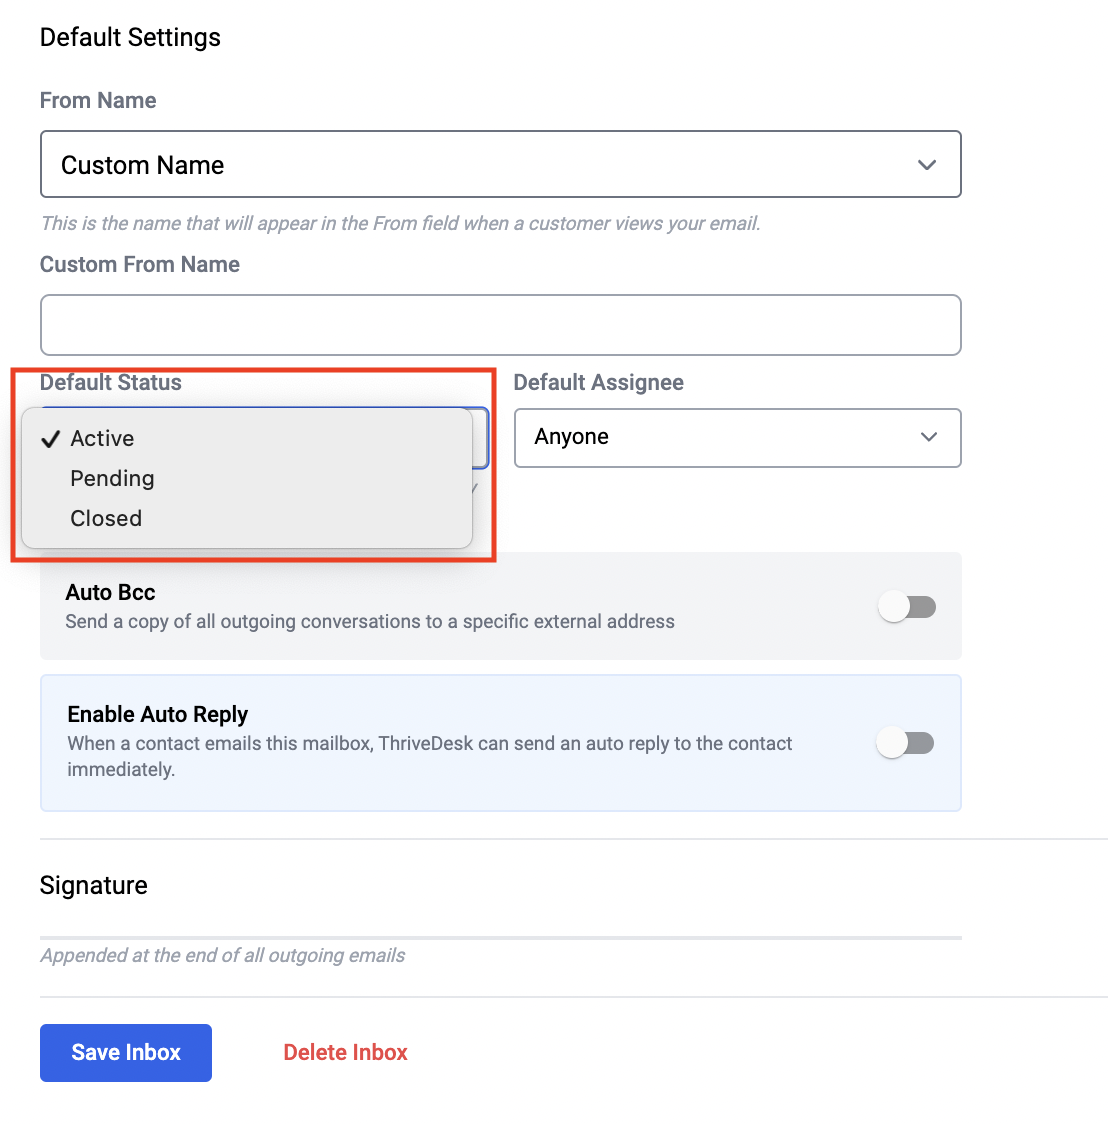
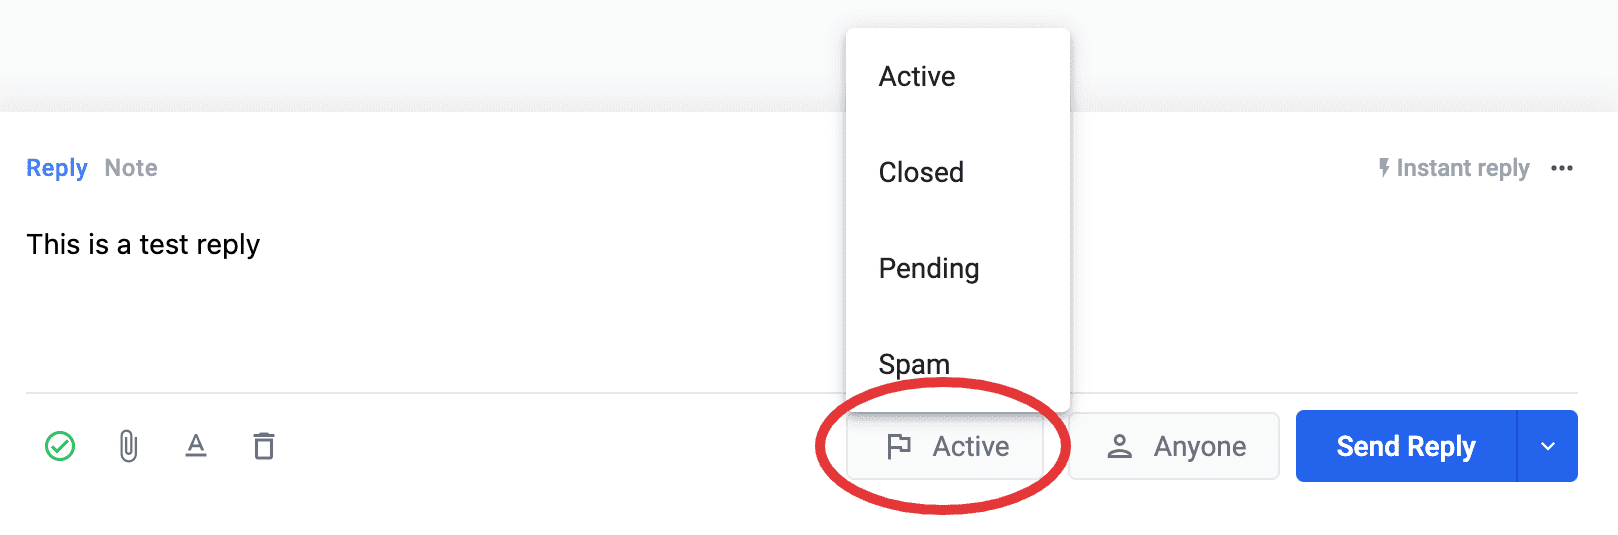
Now come to the Default Status, there are basically three different default status available, they are Active, Pending & Closed, however, you can manually change it at the time of replying the queries.
- Active - It means whenever queries are replied, by default the status of the conversation will stay active and it will not go to the Closed folder.
- Pending - It means that the queries are neither active nor closed, rather it is currently pending and requires action from the end of your support team, the queries when replied with this status will also not go to the Closed folder, it will stay in the Mine folder for the person to whom it is assigned and will stay in Assigned folder for everyone else giving a birds eye view to the support team as to how many of the queries are still pending.
- Closed - It means that once the queries are replied it will directly got to the Closed folder by default.
As stated above, irrespective of what you have set in the default you still can change it at the time of replying the queries.
Default Assignee
It means by default to whom the queries will be assigned to after reply. It have three options namely:
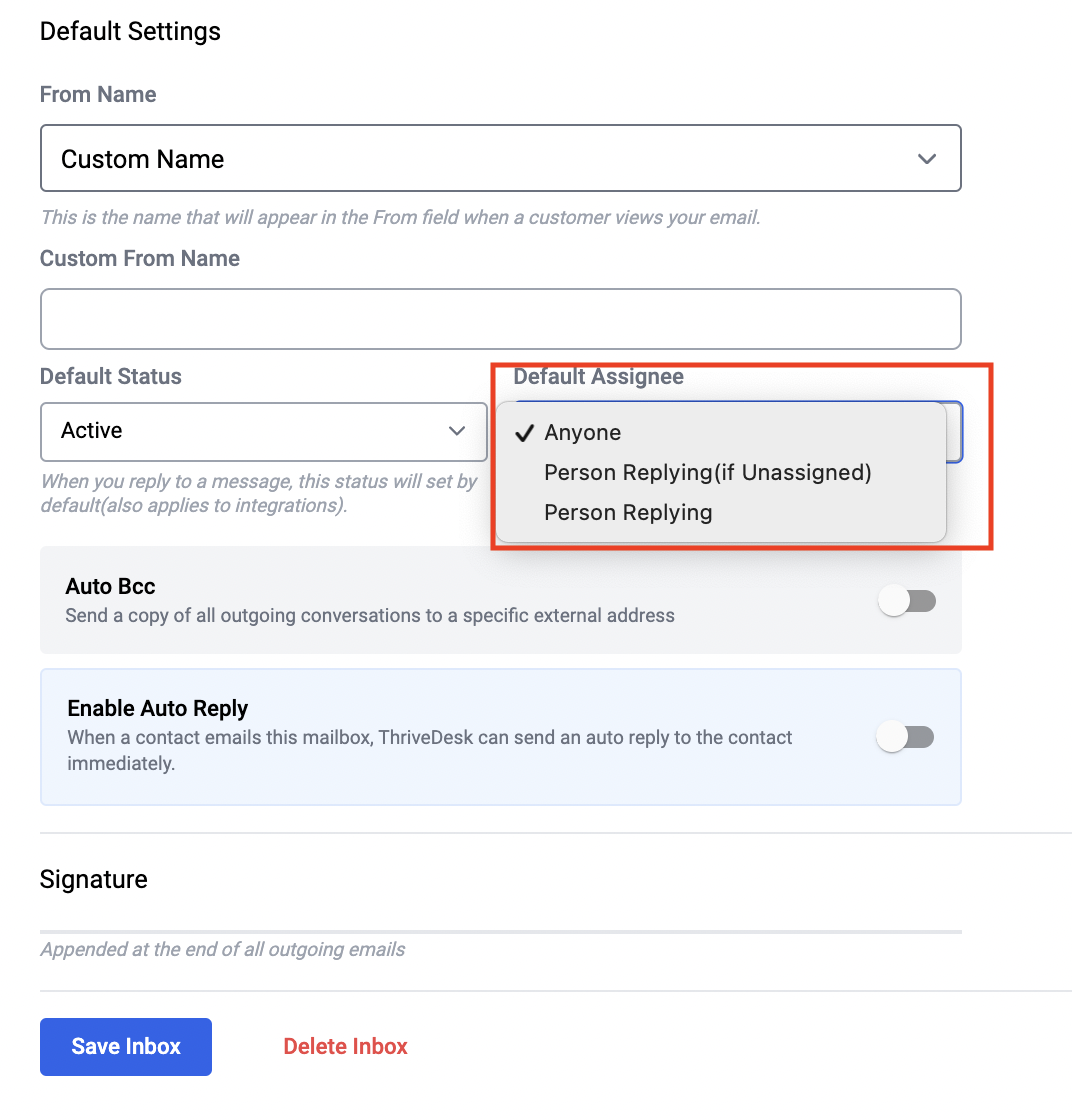
- Anyone - it means no one is assigned to the queries, it will pop up in the unassigned folder every time a new queries comes in from the same customer regarding the same subject matter.
- Person Replying (if Unassigned) - if set, when a team member reply to the queries it will come back to the Mine folder of that person and will be assigned to him, but only when the queries were unassigned and afresh.
- Person Replying - irrespective of whether the queries were assigned to someone else or not, if this is set, then whenever you have replied to any queries it will be automatically assigned to you.
Nevertheless, you can also set it differently at the time of replying from the editor.
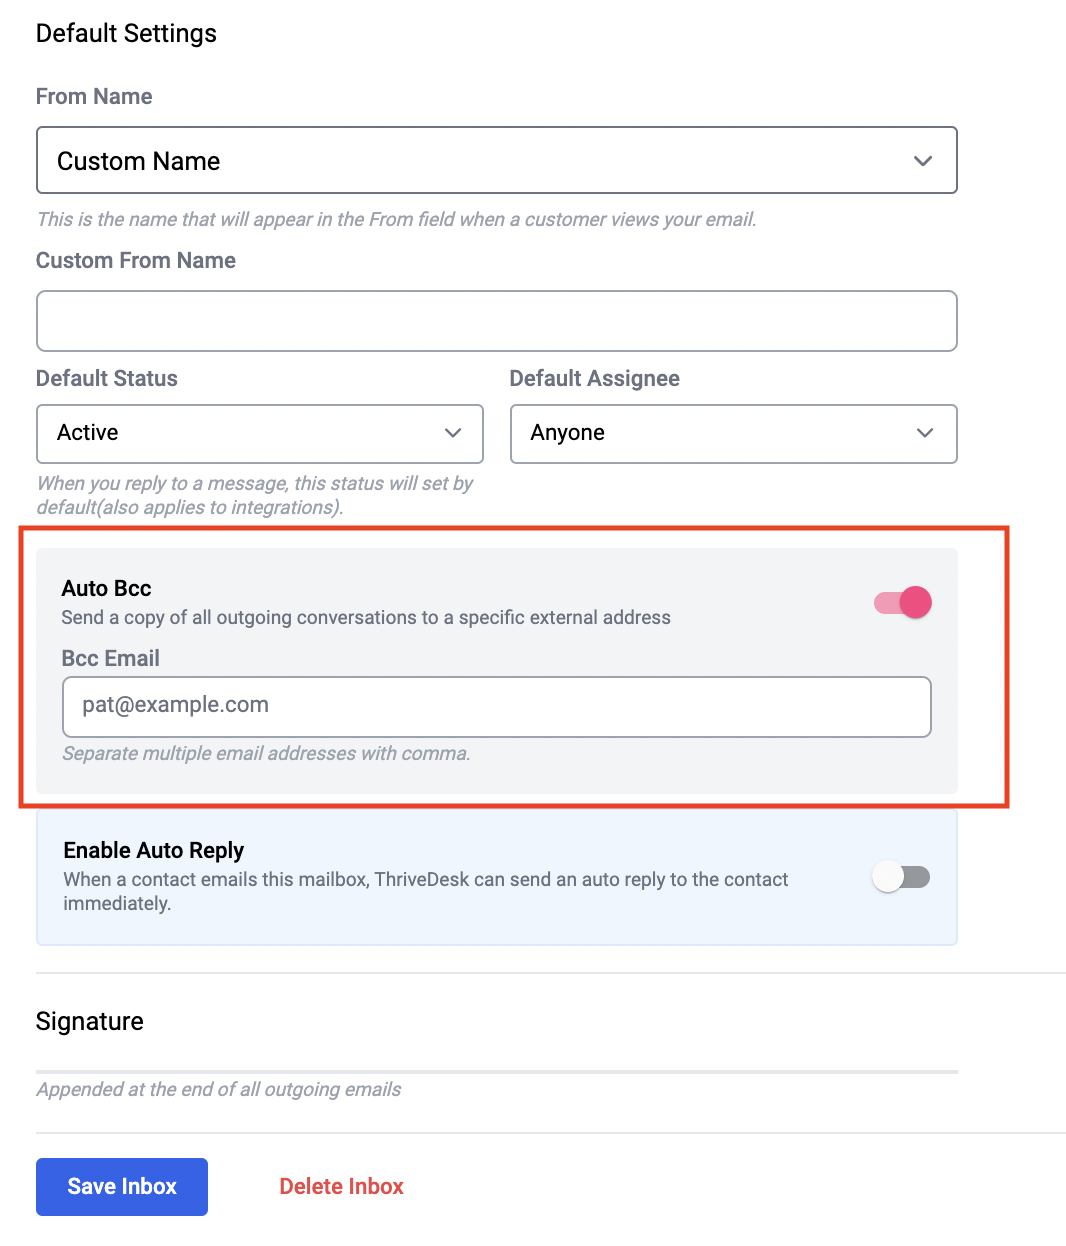
Auto Bcc
You want each of the queries, replied or answered to be forwarded to another email address, then no worries, you can set Auto Bcc for your inbox, so whenever someone replies to a ticket your designated email address given in this section will receive a copy of it.
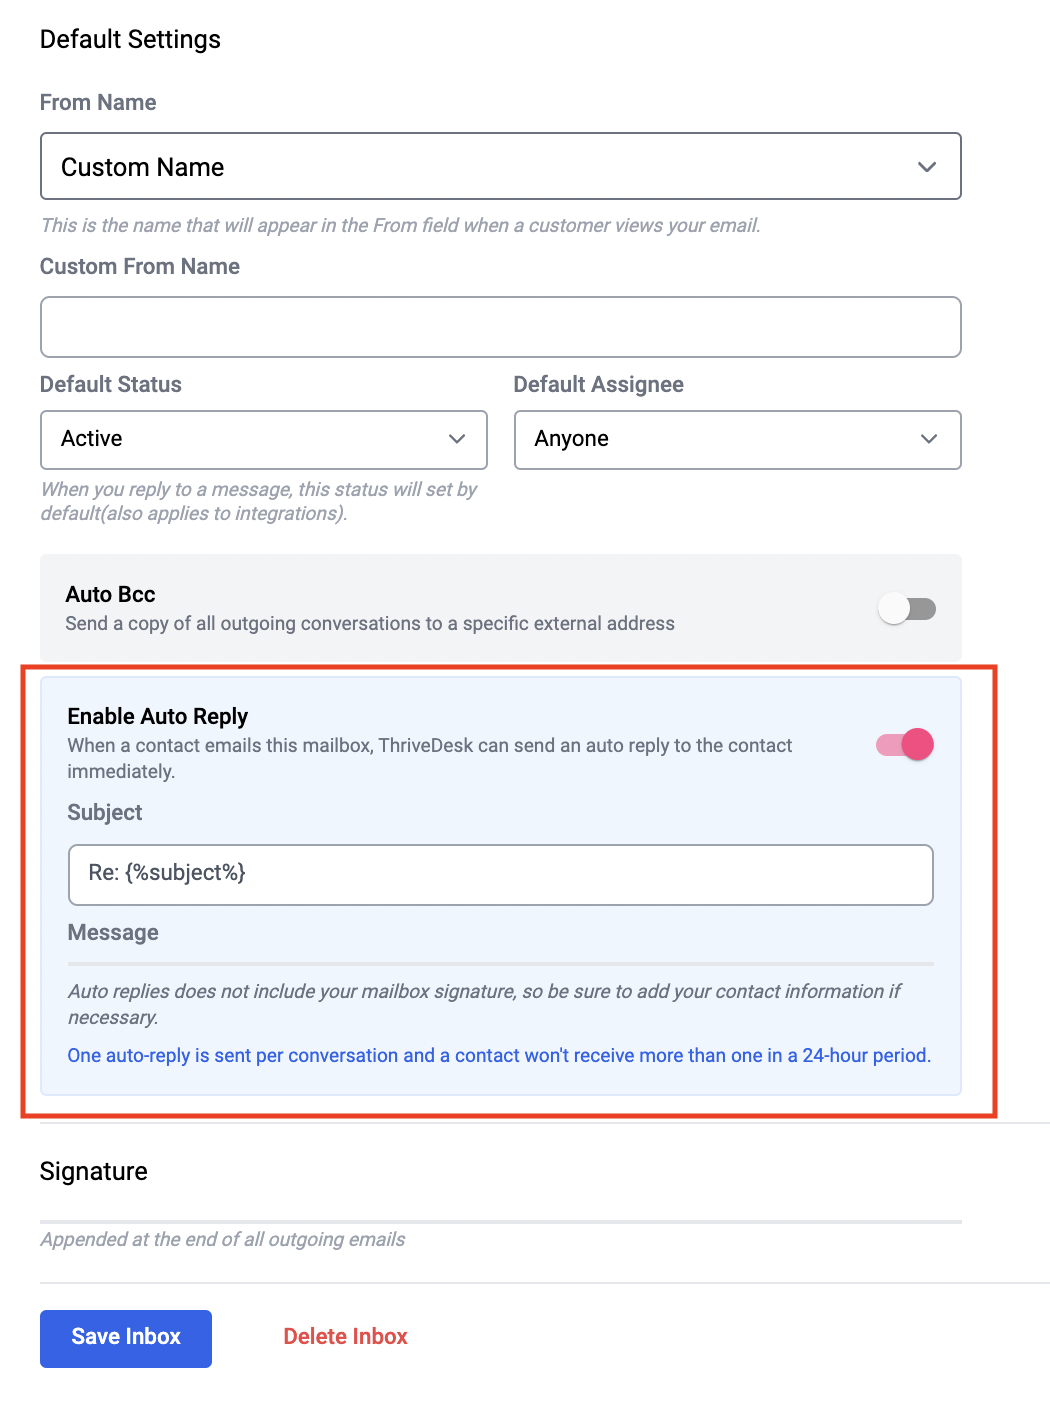
Auto Reply
The first auto generate message or reply when customer sent a queries to you can be set through this option. So use your imagination and set the autoresponder as per you desire (note that the auto replies does not include your mailbox signature so be sure to add your contact information if necessary).
Signature
You can set your signature for the respective inbox from this menu option as well.
Permission
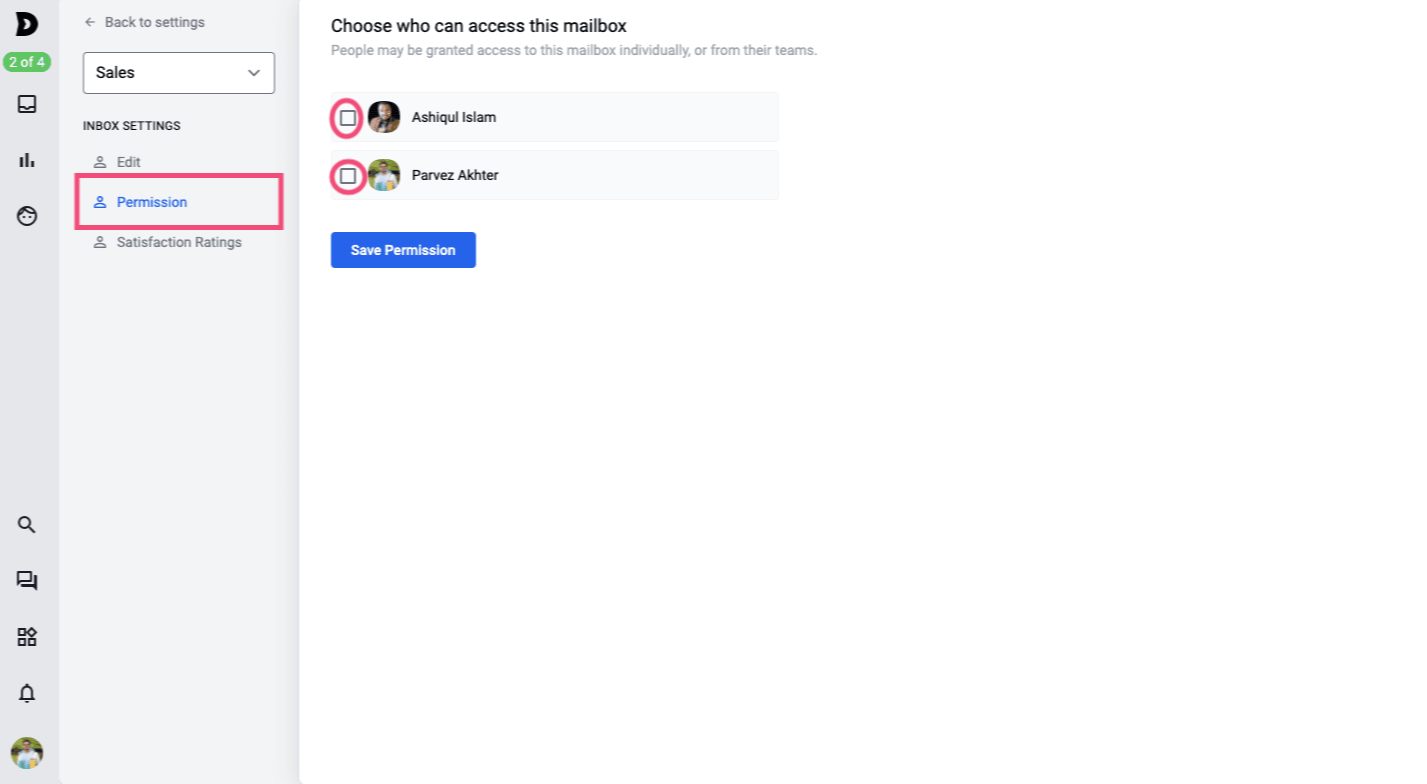
Welcome to inbox permission settings. You can set the inbox permission level or grant access to the particular inbox from the Permission menu as shown in the above pictures. As you can see that the agents have tickbox besides their name, so ticking any of these boxes would mean that you have granted access to that particular inbox.
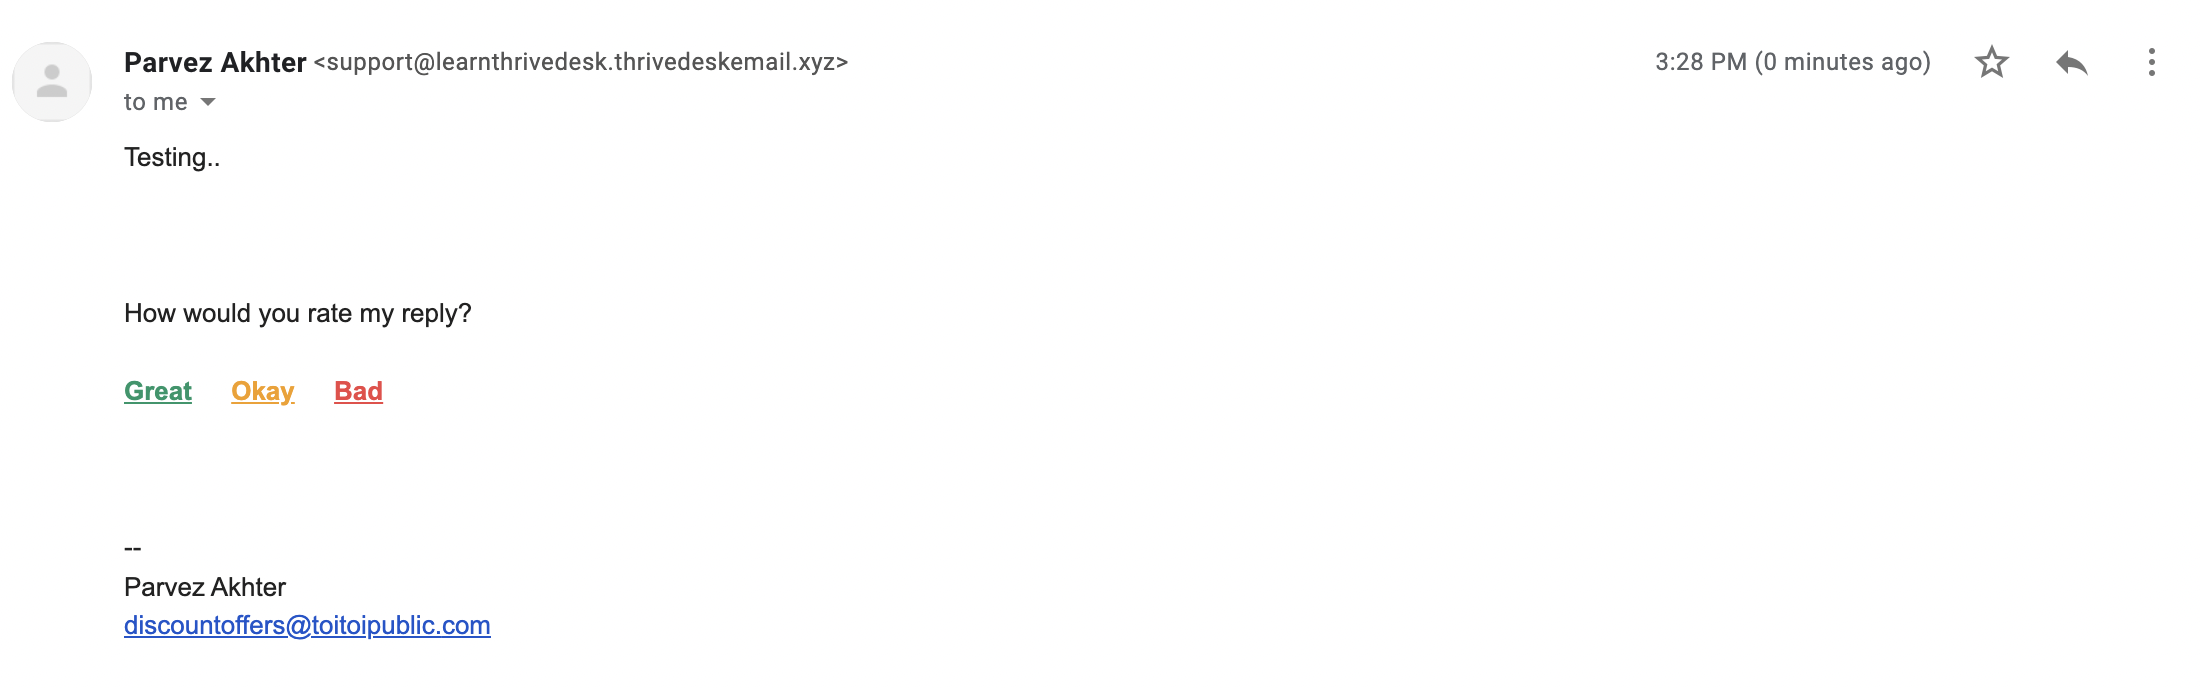
Satisfaction Survay
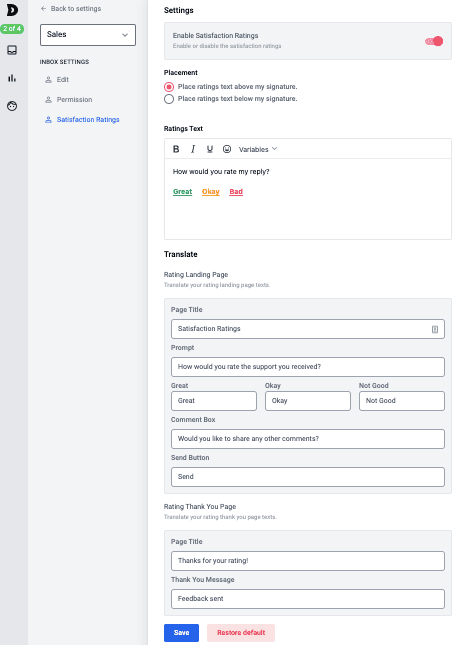
In this menu you will be able to set the following things as per the markup given on the image above and that too in your own language, so just copy paste the language you want to set here and it would work, the settings are:
- Enable Satisfaction Ratings - Enable the satisfaction ratings by clicking on the knob.
- Placement - Where do you want to place the satisfaction ratings bar? is it before or after the signature on the email? the choices are yours and you can change it from here
- Rating Text - This is where you can edit the text that gets sent out automatically with each and every replies asking the customers for providing a ratings.
- Rating Landing Page - This section constitutes of the titles and the text that can be used for the rating landing page or form, which means when the customers goes through the ratings process they will have to answers or comment or address these issues.
- Rating Thank You Page- This is the message which pops up once ratings have been given, you can certainly edit the message from here.
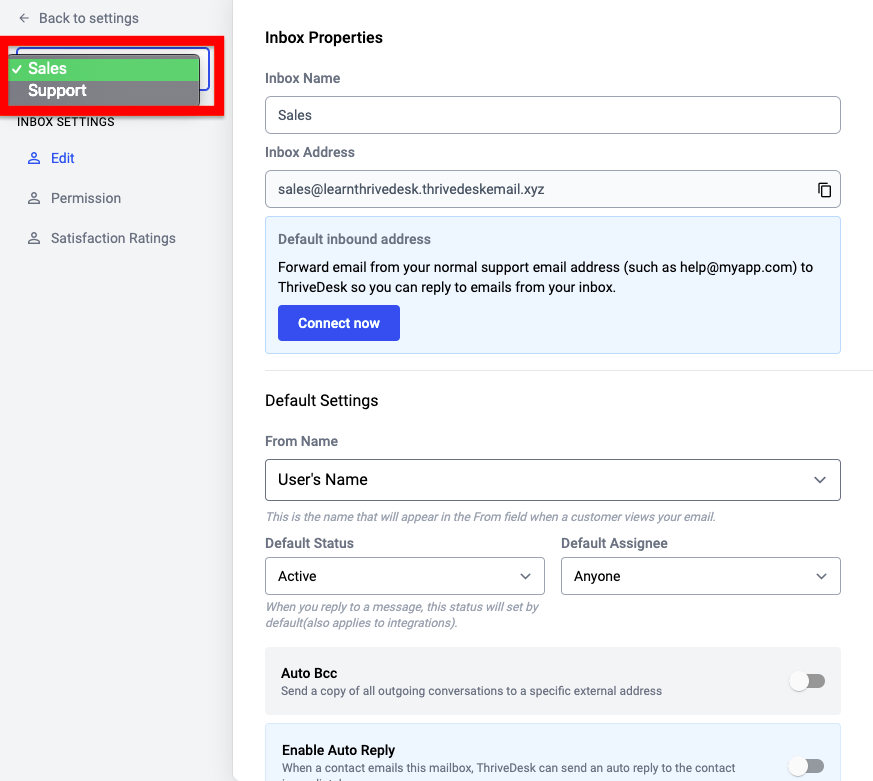
Last but not the least you can also jump from the settings menu of one inbox to another inbox, see below: