# Add Chat Assistant to Dorik Site
Dorik is one of the fastest growing no-code website builder for designers and freelancers. Assistant is a help widget that lets you add on-demand Docs, chat, and an email contact form to your Dorik site.
If you made and hosted your website on Dorik, it's as easy as copying and pasting to add Assistant.
## Installation
1. [Create a new Assistant](//help.thrivedesk.com/en/create-a-new-chat-assistant) or navigate to the Installation page of an existing Assistant to retrieve the embed code. Simply click the Copy button to get the code copied to the clipboard. 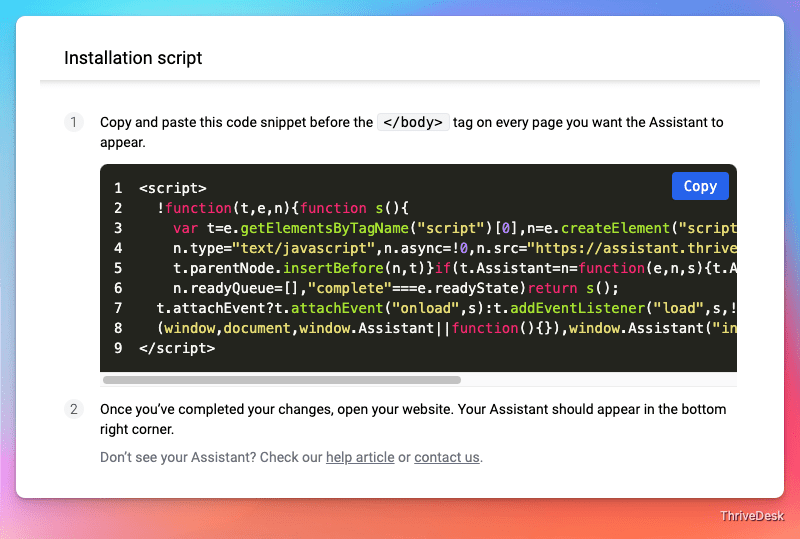
2. Open your site editor and click **Site Settings** then **Advanced Tab** and paste code from step 1 to **Footer code** field. 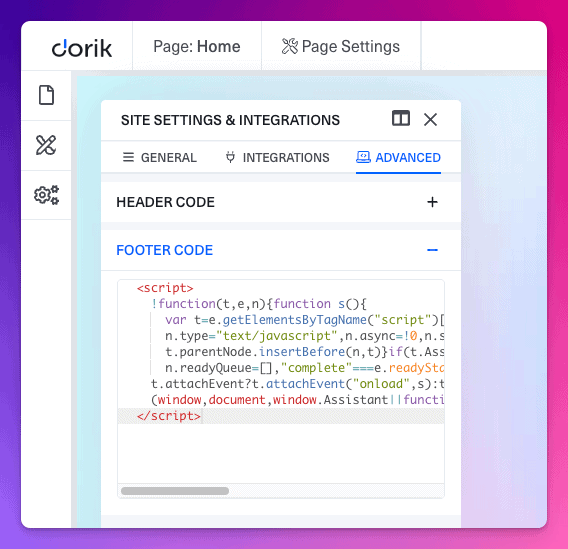
3. **Save** and **Publish** the page and you are ready to chat with your visitor!
You can play with [Assistant Javascript API](https://developer.thrivedesk.com/assistant/assistant-for-web/javascript-api) and pop up the chat widget anywhere on your Dorik site.
# Add Assistant to Squarespace site
Squarespace is an all-in-one no code website builder with modern design. Assistant is a help widget that lets you add on-demand Docs, chat, and an email contact form to your Squarespace site.
If you made and hosted your website on Squarespace, it's as easy as copying and pasting to add Assistant.
**Note:** Adding JavaScript or iframes to code blocks is a premium feature available in Business and Commerce plans.
## Installation
1. [Create a new Assistant](//help.thrivedesk.com/en/create-a-new-chat-assistant) or navigate to the Installation page of an existing Assistant to retrieve the embed code. Simply click the Copy button to get the code copied to the clipboard. 
2. Edit a page or post, click **Add Block** or an insert point, then click **Code**.
3. Select **Javascript** from the **Display Source** dropdown.
4. Add your Assistant code in the text field.
5. Save, refresh, and you're all set! You'll see the Assistant widget load on your site.
## Troubleshooting
If you are having issue or need more guidence with Squarespace code block, check out [this gudie](https://support.squarespace.com/hc/en-us/articles/206543167-Code-blocks).
# Add Chat Assistant to Webflow
Webflow gives designers the tools they need to make professional, custom websites on a blank canvas without any code. Assistant is a help widget that lets you add on-demand Docs, chat, and an email contact form to your Wix site.
If your Webflow plan has the Embed option, adding Assistant is as easy as copying and pasting.
## Installation
1. [Create a new Assistant](//help.thrivedesk.com/en/create-a-new-chat-assistant) or navigate to the Installation page of an existing Assistant to retrieve the embed code. Simply click the Copy button to get the code copied to the clipboard. 
2. Open your site in the Webflow designer. Click the **+** in the left navigation to open the Add Elements screen. Scroll down in that list to the Components section, and click **Embed**.
3. Paste the Beacon embed code you copied in step 1 into the *HTML Embed Code Editor*, and click **Save & Close** at the bottom.
4. Publish your Webflow site to see the Assistant on your page, and voila! That's it — you've added Live Chat Assistant to your Webflow site!
## Troubleshooting
**Widget not showing up, what to do?**
Webflow doesn't show the embeds in the designer or preview, but it will appear on the published site.
# Add Assistant to Weebly
Weebly is a powerful website builder with a lot of great free templates that you can use to show off your site. Assistant is a help widget that lets you add on-demand Docs, chat, and an email contact form to your Weebly site.
If you made and hosted your website on Weebly, it's as easy as copying and pasting to add Assistant.
## Installation
1. [Create a new Assistant](//help.thrivedesk.com/en/create-a-new-chat-assistant) or navigate to the Installation page of an existing Assistant to retrieve the embed code. Simply click the Copy button to get the code copied to the clipboard. 
2. In Weebly, click on **Settings** in your navigation menu, then **SEO** in the left navigation menu.
3. Scroll down to and paste the Assistant embed code you copied in step 1 into **Footer Code**. 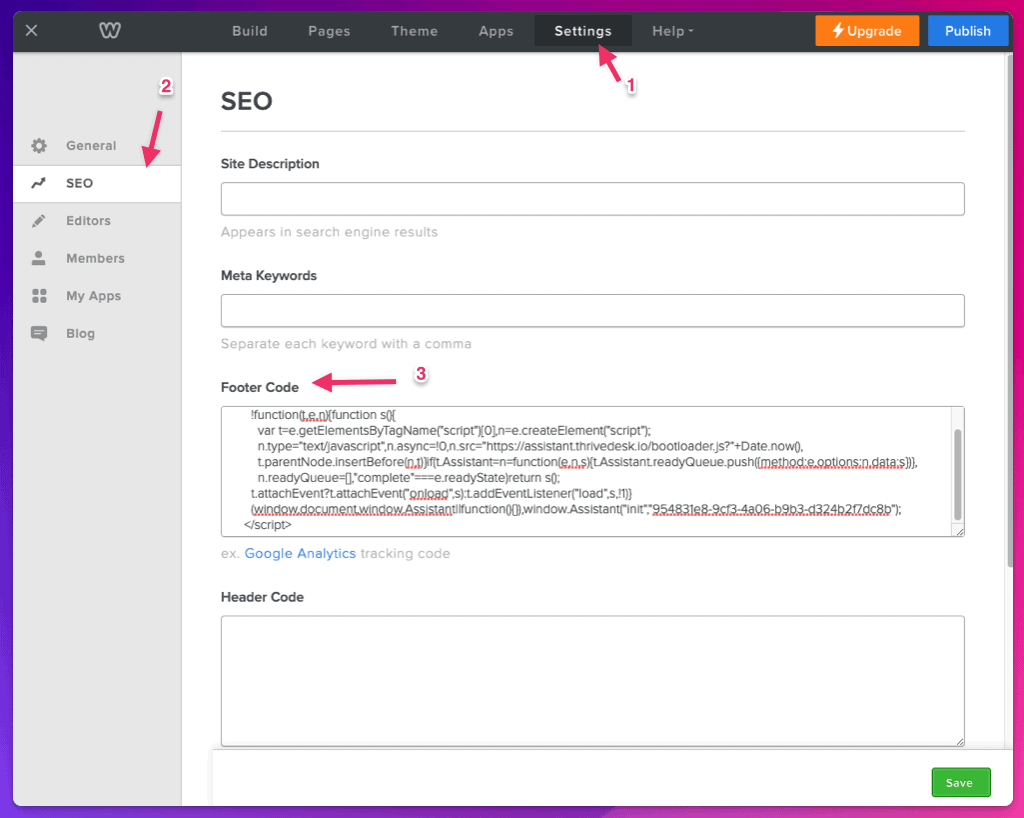
4. **Save and Publish**, and you're all set! You'll see Assistant on your Weebly site.
**Heads up:** Assistant will not appear in the Weebly editor or Weebly Preview. You will need to **Save and Publish** your site, and view the Assistant widget on your live site.
# Add Chat Assistant to Wix
Wix lets you make beautiful websites to show off your business by just dragging and dropping. Assistant is a help widget that lets you add on-demand Docs, chat, and an email contact form to your Wix site.
If you built and host your website on Wix, all you have to do to embed Assistant is copy and paste! To use the Custom Code block, your Wix site must be on a paid plan.
## Installation
1. [Create a new Assistant](//help.thrivedesk.com/en/create-a-new-chat-assistant) or navigate to the Installation page of an existing Assistant to retrieve the embed code. Simply click the Copy button to get the code copied to the clipboard. 
2. Head into the Site Editor in Wix. Click the Plus sign to add elements to your site, then choose **Embed → Marketing Tools →** then **Custom Code**. 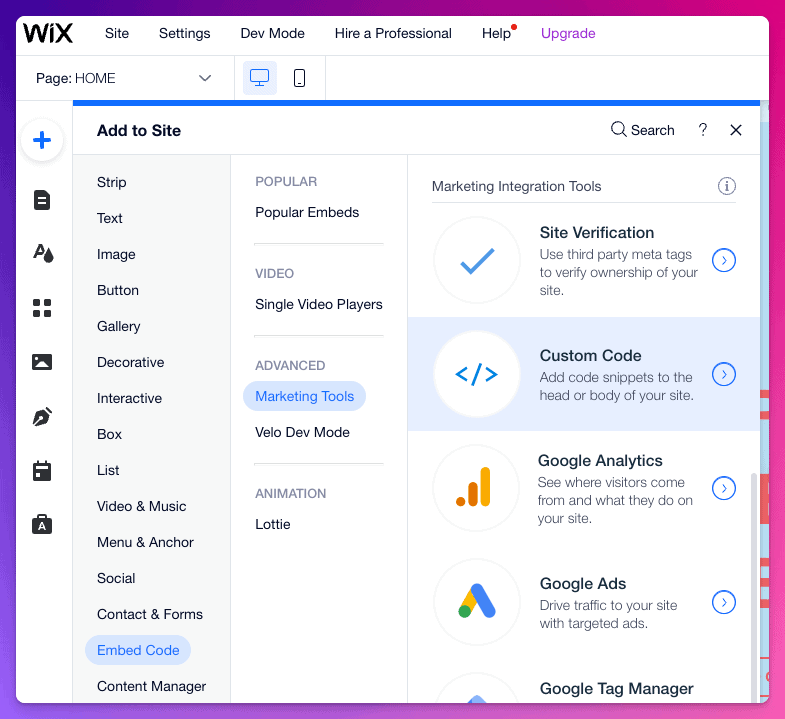
3. Click **+ Add Custom Code** at the top right. Paste the code snippet that you *copied at step 1* in the text box. Enter a recognizable name for your code so you can quickly identify it later, and choose if you want it to be added to **All pages** or **selected** pages. Choose **Body - end** under Place Code in Click **Apply**.
4. Publish your website, then visit the live site to view your Assistant in all its splendor!
**Heads up:** Assistant will not appear in the Wix editor or Wix Preview but will appear on your live site after you've published it!
## Troubleshooting
# Add Chat Assistant to WordPress
You can add ThriveDesk Assistant to your WordPress site in several ways. In this article we'll cover each of them.
## ThriveDesk WordPress plugin
One of the simplest and most straightforward methods to integrate the ThriveDesk into your WordPress site is by installing the ThriveDesk plugin and configuring it with API keys.
### Installation & API Key
1. To begin, navigate to the plugin section of your WordPress site and search for the **ThriveDesk** plugin. Once located, proceed to **install** and **activate** the plugin.**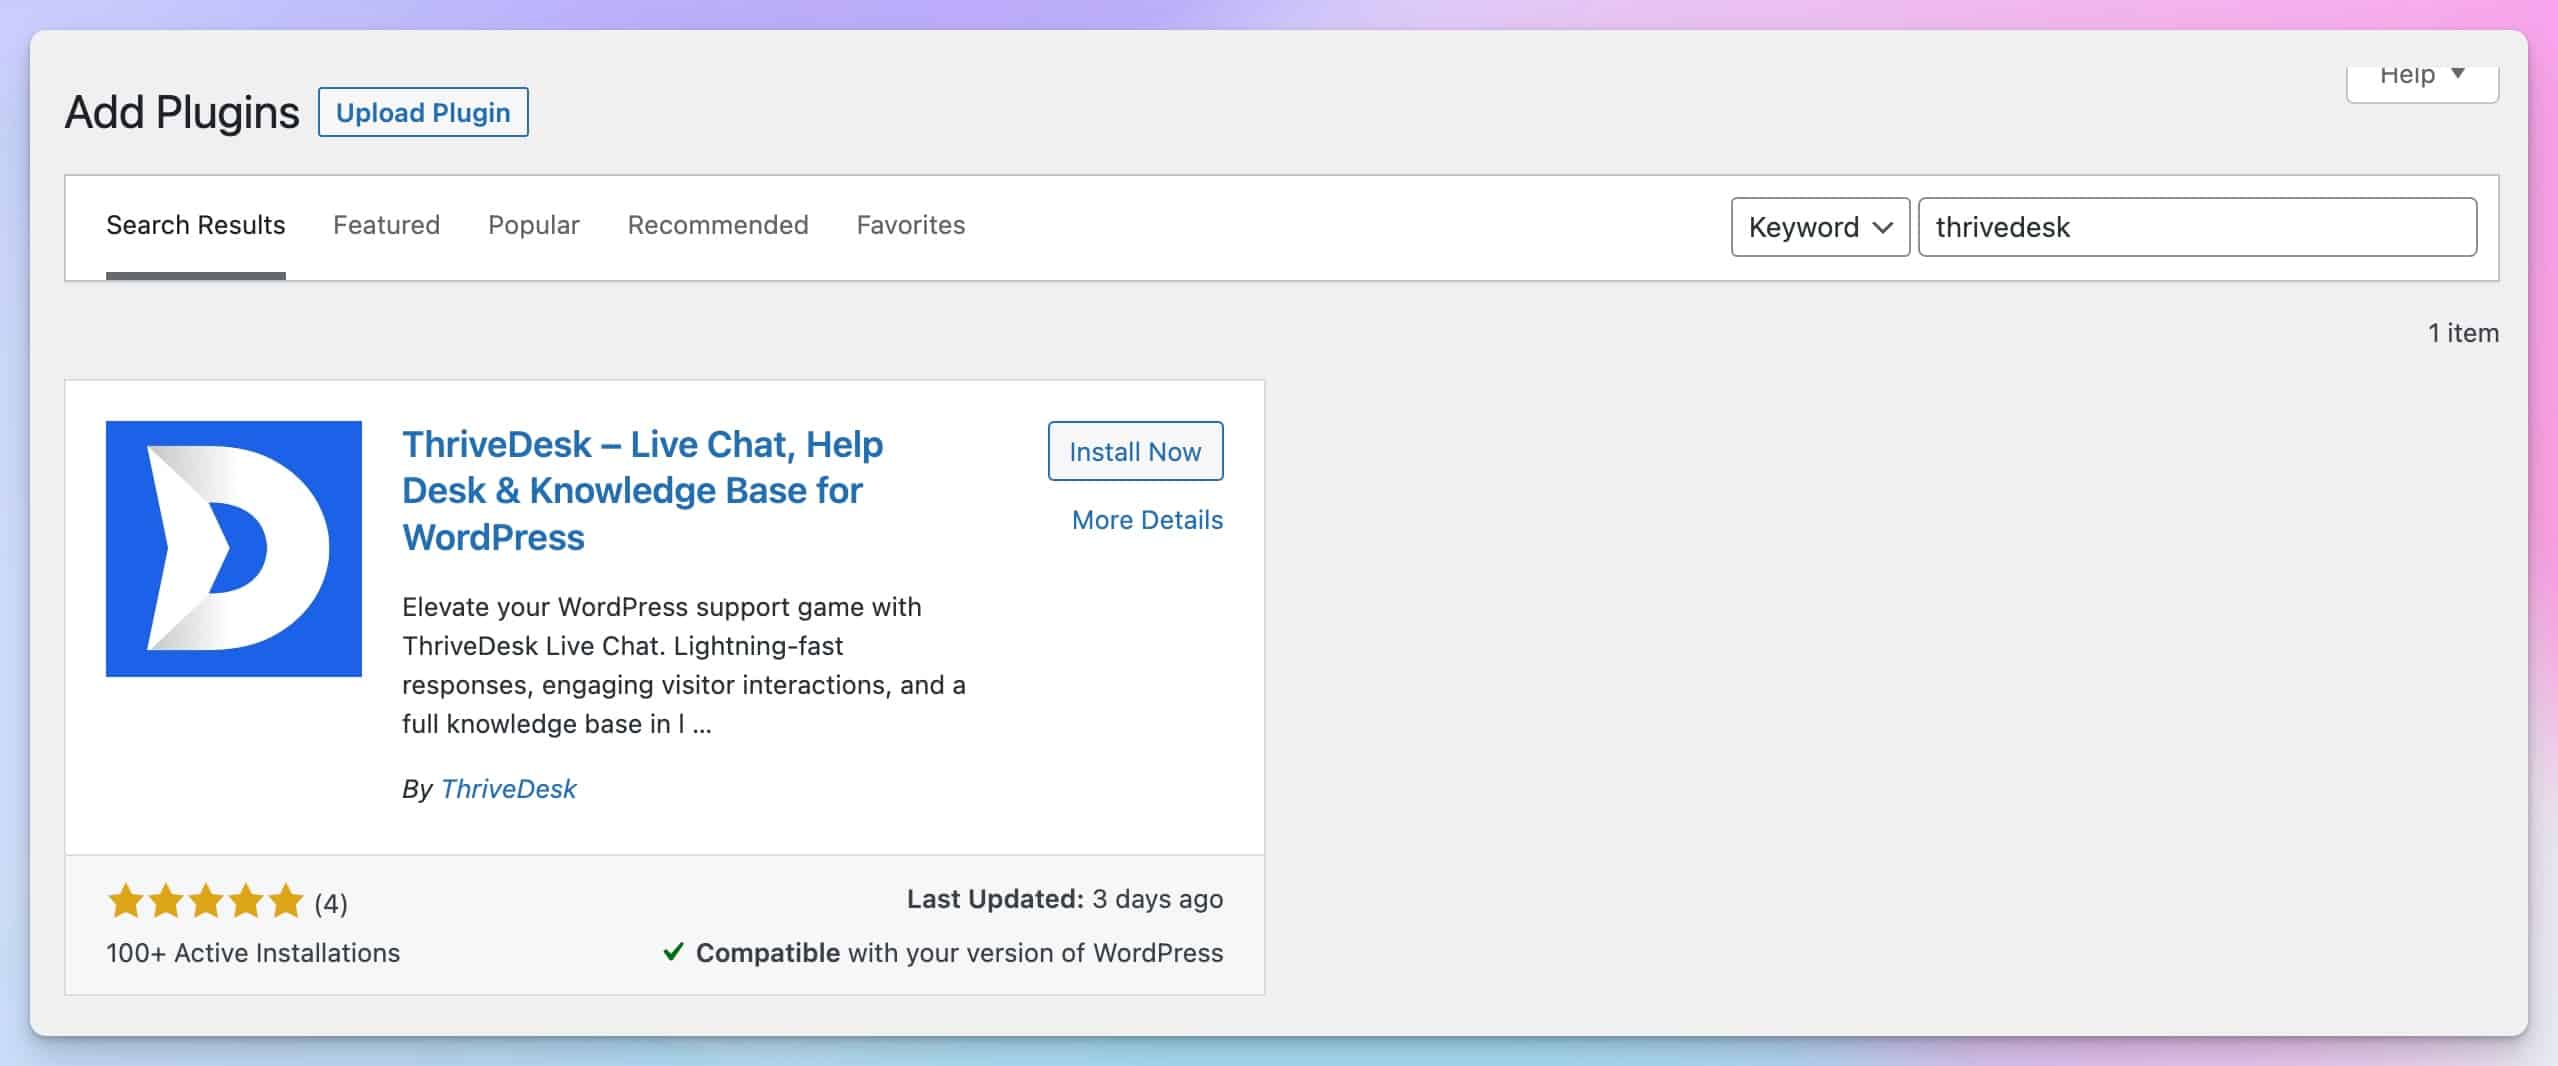**
2. Head over to **Settings > ThriveDesk** page.
3. If you're new to ThriveDesk click **Setup my account** button from dashbaord.
4. If you already have an account then [login to ThriveDesk](https://app.thrivedesk.com/) and go **Settings > API Keys** page.
5. Once the API keys have been generated, navigate to the ThriveDesk plugin settings and enter the keys to complete the integration process.
6. Press verify and save button to save the API key.
7. Select Assistant from the Assistant section and you are done. 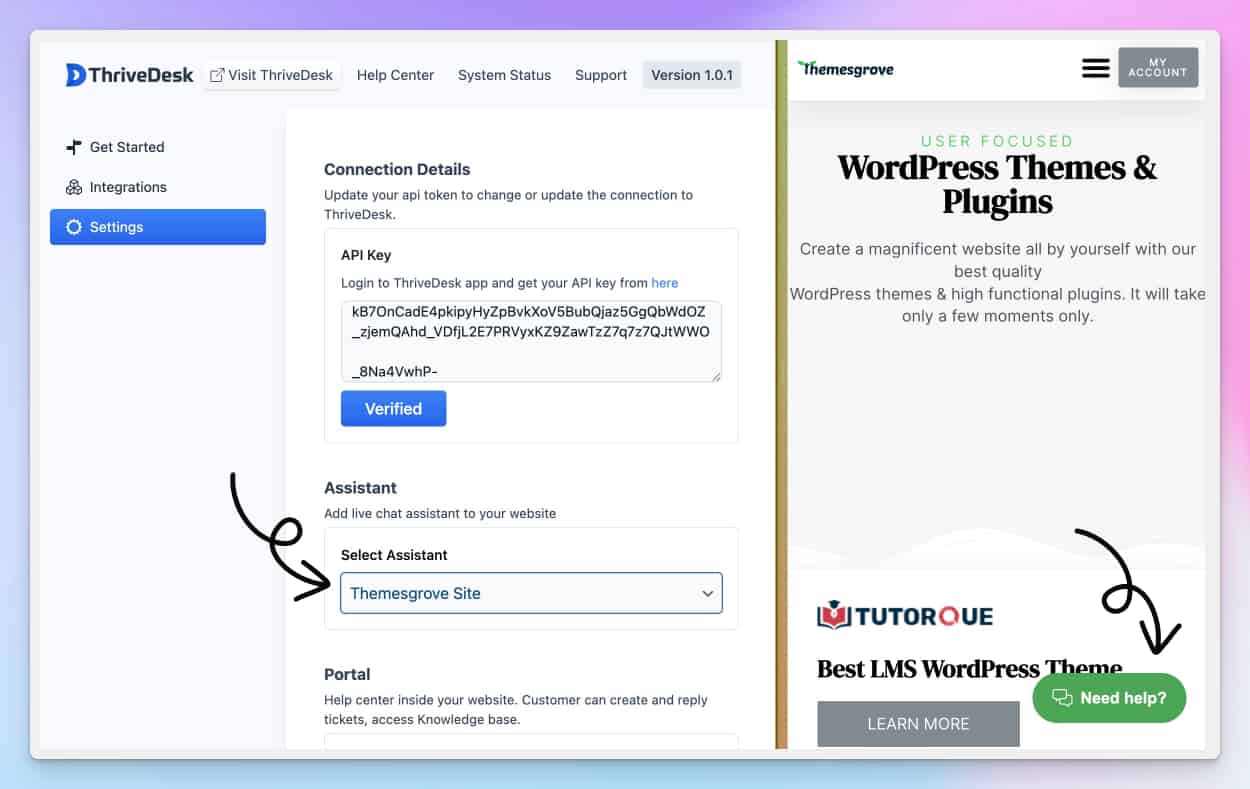
## Code Snippets Plugin
There are several code snippets plugins available for WordPress, providing users with the flexibility to select any plugin that best suits their needs. Below are some of the most popular and widely used code snippets plugins for WordPress users.
* [Code Snippets](https://wordpress.org/plugins/code-snippets/)
* [WPCode](https://wordpress.org/plugins/insert-headers-and-footers/)
* [Header Footer Code Manager](https://wordpress.org/plugins/header-footer-code-manager/)
* [Woody Code Snippet](https://wordpress.org/plugins/insert-php/)
* and many [more](https://wordpress.org/plugins/search/code+snippets/)...
### How to use code snippets plugin
In this tutorial, we will be using the WPCode Snippet plugin as an example. However, it is worth noting that other plugins work in a similar manner.
1. Copy Assistant installation script from ThirveDesk.
2. In your WordPress site go to **Code Snippets > Header & Footer** menu**.**
3. Paste ThriveDesk assistant script in the **footer** area.
4. **Save changes** and you are done.
## Use WordPress Hooks
If you prefer not to install a plugin to add JavaScript to your WordPress site, you can also do it manually using your theme's **functions.php** file and the WordPress hook system.
This approach is a bit more advanced, but it can produce the same result as using a plugin.
With the WordPress hook system, you can add content to your site's header or footer, including JavaScript. By combining some PHP code for the hook with your JavaScript, you can inject it into your site automatically.
Here's an example of the code you would use to add JavaScript to your site's header:
```
function thrivedesk_assistant() {
?>
// Replace with ThriveDesk Assistant js code
) to explore our subscription tier and bundles.
## Tip: Earn free credits
You can earn free credits by referring ThriveDesk to your friends or colleague. If they ended up in paid plan you'll be awarded 2000 credits per referral.
## How to reduce AI credit?
You can [bring your own AI keys](https://help.thrivedesk.com/en/bring-your-ai-key)(BYOK) to reduce ThriveDesk AI credit usages. In that case all the AI tasks will consume one credit instead variable credit.
| **Work Type** | **Without BYOK** | **With BYOK** | **Savings** |
|---|---|---|---|
| **AI Reply / Draft** | 5-10 credits per call (varies by model tier) | **1 credit** per call | Up to 97% |
| **AI Chatbot** | 6-10 credits per call | **50% off** token-based cost | 50% |
**Requirements:**
* Standard plan or higher
* Your own OpenAI, Anthropic, or Google AI account
## Credit overages
If you reach your monthly credit limit, your bot will continue to function but will display a message suggesting users try again later.
You can upgrade your plan or buy bundle credit at any time to increase your limit, or wait for it to reset at the start of your next billing cycle.
## Do credits roll over every month?
Credits do not roll over between months. However, bundle credits have no expiration date.
# Amplitude
Amplitude is an advanced product analytics platform that helps businesses understand user behavior and optimize their product experiences. By capturing and analyzing data on user interactions, Amplitude provides actionable insights for product teams to make data-driven decisions, improve engagement, and drive growth.
## Steps to Acquire an API Key:
* Log into your Amplitude account and open the **Settings** tab.
* Navigate to **Organization Settings** and select **Projects**.
* Choose the project you want to integrate, then scroll to the **API Keys** section.
* Copy the API Key displayed for use in your integration setup.
## Install PostHog App
1. Log into ThriveDesk Knowledge Base(KB) site and go to **Settings > Apps**.
2. Click **Install** button on Amplitude App.
3. Put your **API Key and press **Save Changes**.
Remember that preview links won’t track analytics by default.
# AppSumo
This guide will help you understand what’s included in each tier, how to make the most of your deal, and answer common questions from new users.
## Plans & Features
Here’s a breakdown of what’s included in each AppSumo license tier:
| Feature | License Tier 1 | License Tier 2 | License Tier 3 | License Tier 4 |
|---|---|---|---|---|
| **Teammates** | 2 | 4 | 6 | 10 |
| **Inboxes** | 1 | 2 | 3 | 4 |
| **Chatbots** | 1 | 3 | 6 | 10 |
| **One-time AI credits** | 2,000 | 5,000 | 10,000 | 20,000 |
| **Links to train AI** | 10 | 20 | 50 | 100 |
| **Live chat** | ✔️ | ✔️ | ✔️ | ✔️ |
| **Private notes & search** | ❌ | ✔️ | ✔️ | ✔️ |
| **Automations** | ❌ | ❌ | ✔️ | ✔️ |
| **Knowledge base** | ❌ | ❌ | ✔️ | ✔️ |
| **External API & Webhooks** | ❌ | ❌ | ❌ | ✔️ |
| **Embeddable help center** | ❌ | ❌ | ❌ | ✔️ |
| **WooCommerce integration** | ❌ | ❌ | ❌ | ✔️ |
| **Helpdesk features** | ❌ | ✔️ | ✔️ | ✔️ |
---
## What is an Inbox?
An **Inbox** is where all your support channels — email, live chat, and social inquiries — come together in one place.
* Each inbox can connect up to **6 different email accounts** (e.g., Gmail, Outlook, custom domains).
* You can create inboxes for different **organizations, departments, or use cases** (for example: Support, Billing, or Sales).
---
## What if My AI Credits Expire?
If your included one-time AI credits expire:
* You can continue using ThriveDesk normally, just **without AI features**.
* You can purchase additional AI credits at **$12 per 1,000 credits** whenever you need them.
---
## Can ThriveDesk Do That?
* **Can I integrate Facebook, Twitter/X, or WhatsApp?**
We’re working on social integrations right now and will announce them soon.
* **Is social integration included in my AppSumo deal?**
Only **Tier 4** customers will get access to social integrations.
* **Where’s your mobile app?**
Our **Android app** is available here: [Download from Google Play](https://play.google.com/store/apps/details?id=com.thrivedesk). The **iOS app** is in progress.
* **How many Knowledge Bases can I create?**
Tiers **3 and 4** include **1 Knowledge Base**. You can purchase additional Knowledge Bases for **$20/month per KB**.
* **✅ Connect Gmail, Outlook, Hey, or custom email**
You can connect up to 6 email accounts per inbox, whether they’re Google, Microsoft, or custom domains, so all communication flows into ThriveDesk.
* **✅ Clients can respond via email**
When you reply from ThriveDesk, your clients see it as a normal email. They can reply directly, and their responses come back into ThriveDesk.
* **✅ Provide live chat support on your website**
Install the ThriveDesk live chat widget on your site to offer real-time customer support.
* **✅ Add chatbot to live chat assistant**
Each live chat can be paired with an AI-powered chatbot that provides instant answers and reduces agent workload.
* **✅ Add chat assistant to any platform**
The chat widget is embeddable on **any platform** (WordPress, Shopify, custom sites, etc.) with just a small script.
* **✅ Customize the live chat widget**
Change colors, branding, and behavior so the widget matches your website’s style and tone.
* **✅ Train AI with your website content**
Add links to your website or docs, and ThriveDesk AI will use that content to answer customer questions.
* **✅ Train AI with PDFs, Docs, and Knowledge Base content**
Upload files or connect your KB so AI has accurate and specific answers ready.
* **✅ Auto reply or draft response with AI**
AI can either reply directly to customers or prepare a draft for agents to approve.
* **✅ Handle tickets and assign them to teammates**
Convert emails or chats into tickets, then assign them to the right team member.
* **✅ Automate support workflows**
Use automation rules to set priorities, assign agents, or tag tickets based on keywords, sender, or conditions.
* **✅ Use canned replies/macros**
Save common responses as templates (macros) and reuse them to speed up replies.
* **✅ AI helps polish replies**
AI can improve grammar, tone, or clarity of your draft before you send it.
* **✅ Mention teammates with @**
Use @mentions in private notes to notify teammates via email instantly.
* **✅ Integrate with your favorite apps**
ThriveDesk integrates with WooCommerce, SureCart, Slack, and more, and Tier 4 adds API/webhooks for custom integrations.
* **✅ Assign tickets or chats to multiple people**
Assign conversations to individuals or teams, ensuring nothing gets overlooked.
* **✅ Filter tickets and chats with tags**
Add tags like *Urgent*, *Refund*, or *VIP* to filter and report on specific conversations.
* **✅ Create a Knowledge Base for self-service**
Build a searchable KB so customers can find answers on their own.
* **✅ Host Knowledge Base on your own domain**
Map your KB to a custom domain (like [support.yourcompany.com](http://support.yourcompany.com)).
* **✅ Measure team performance**
Reports help you see who’s performing well and who may need improvement.
* **✅ Faster query resolution**
By combining email, chat, AI, and automation, ThriveDesk helps your team respond quicker.
* **✅ Track client satisfaction**
Send satisfaction surveys (CSAT) after tickets are resolved to measure customer happiness.
* **✅ Search and filter tickets**
Use advanced search and filters to find conversations quickly.
* **✅ WooCommerce integration for customer insights** (Tier 4)
See order history and customer details right inside ThriveDesk.
* **✅ Chatbot on Shopify or any platform**
Easily add the ThriveDesk chatbot to your Shopify store or any website with a script.
# Assign Conversations
Assigning conversations helps ensure accountability and smooth workflow. By assigning, you make it clear who is responsible for replying to a customer and managing the conversation.
ThriveDesk provides several ways to assign conversations, whether manually or automatically.
See [User Roles and Permissions](https://help.thrivedesk.com/en/user-roles-and-permissions) for more information on the various User roles.
---
## **In a conversation**
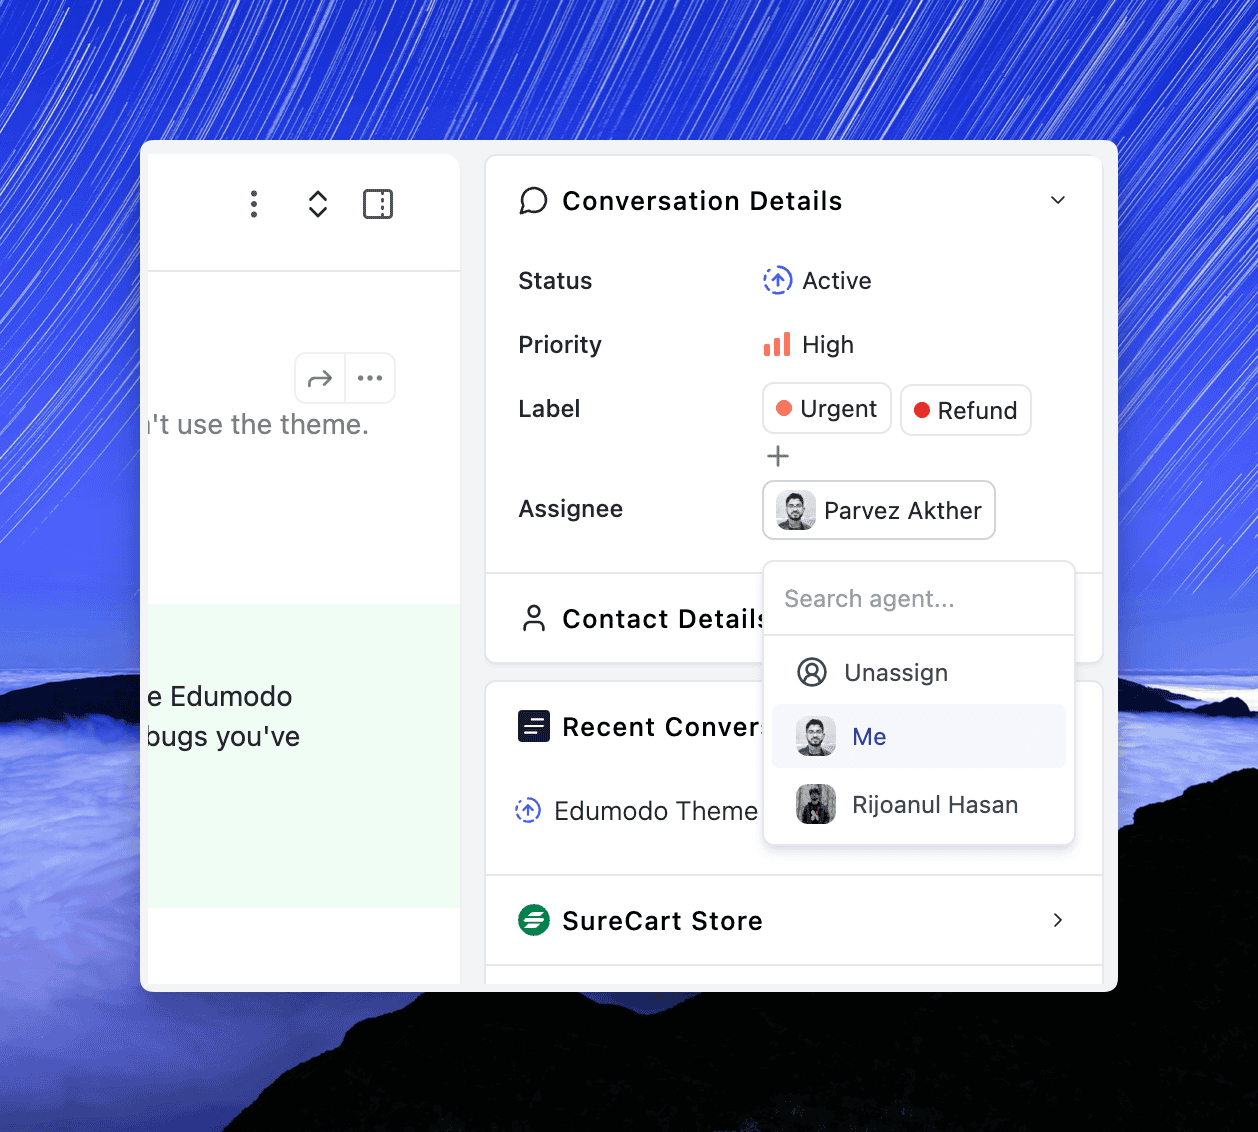
You can assign a conversation directly while viewing it.
1. Open the conversation.
2. In the **Conversation Details** panel, click the **Assignee field**.
3. Select an agent from the dropdown list.
---
## Bulk Assign
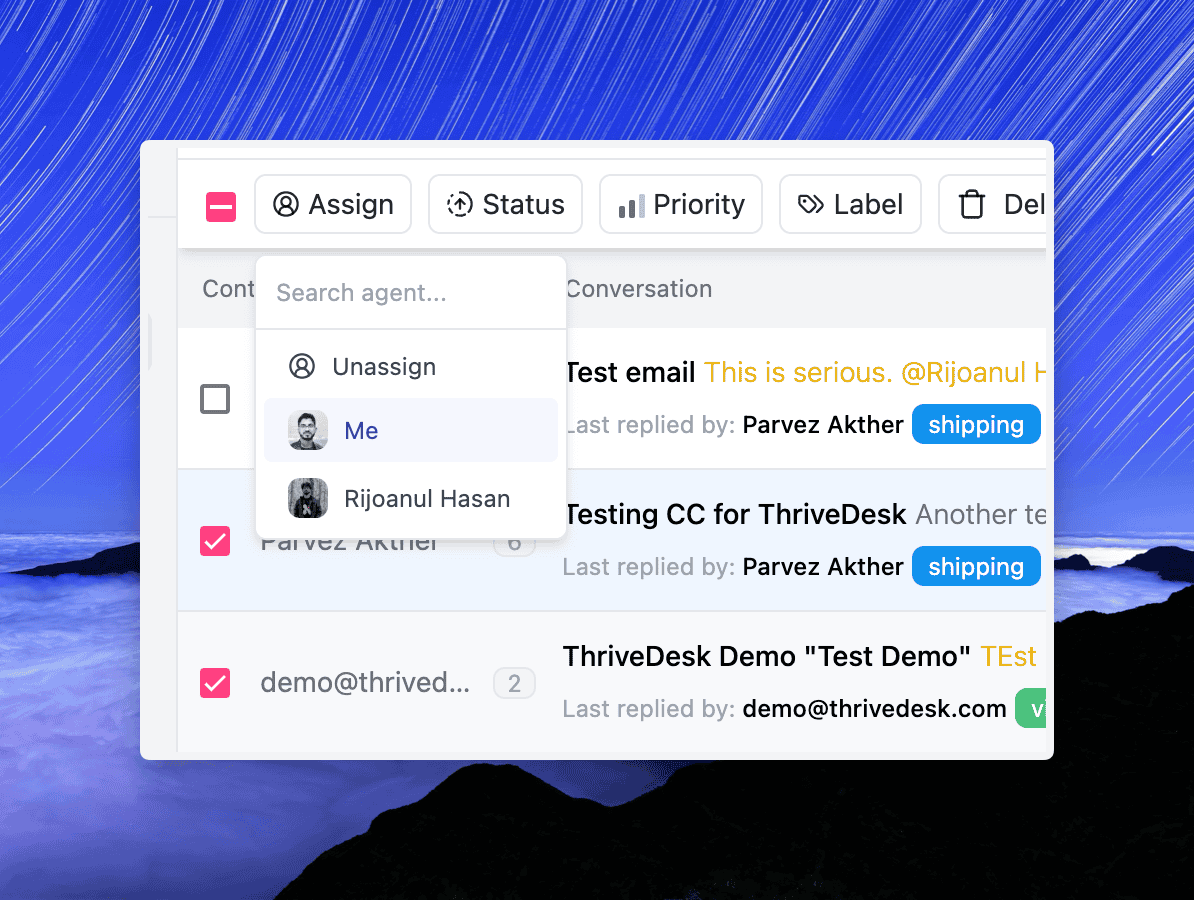
If you want to assign multiple conversations at once:
1. Go to your **Inbox folder**.
2. Select the conversations you want to assign.
3. Click the **Assign** button in the toolbar.
4. Choose an agent from the list.
---
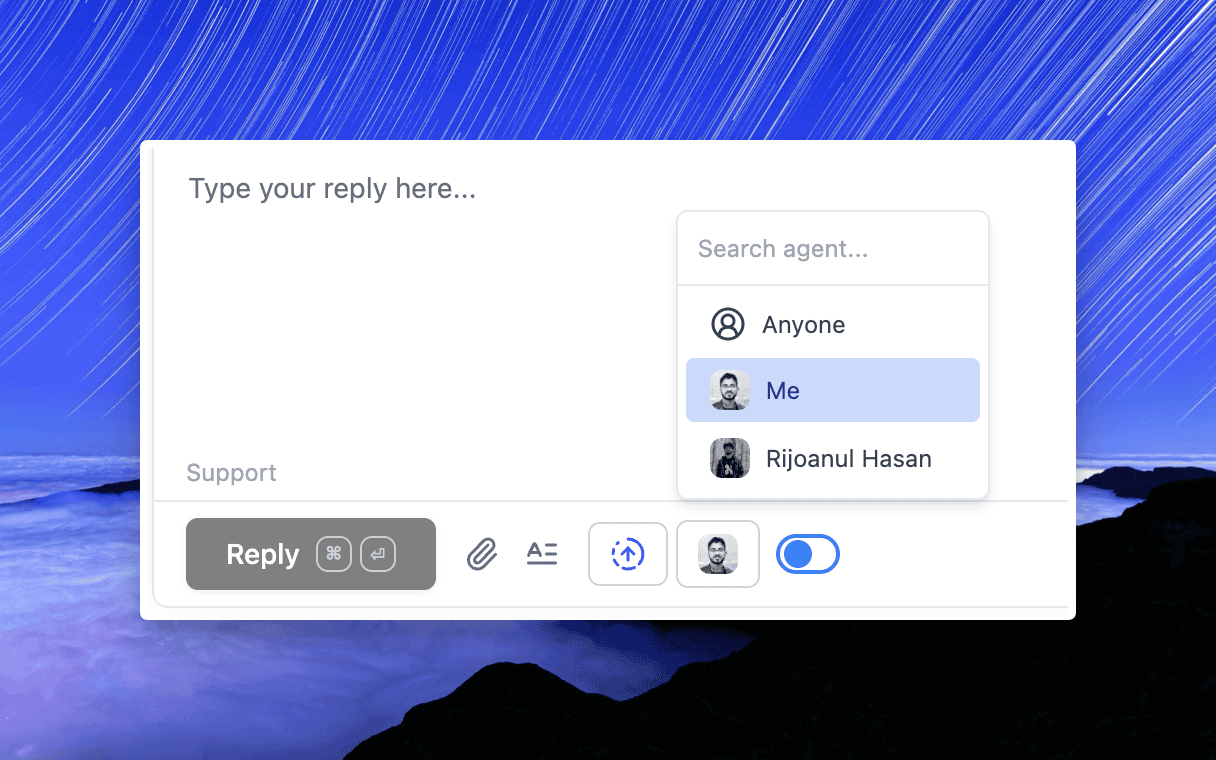
## **When replying or adding a note**
You can also assign a conversation while composing a reply.
1. At the bottom of the reply editor, click the **assignee dropdown**.
2. Choose the agent responsible.
---
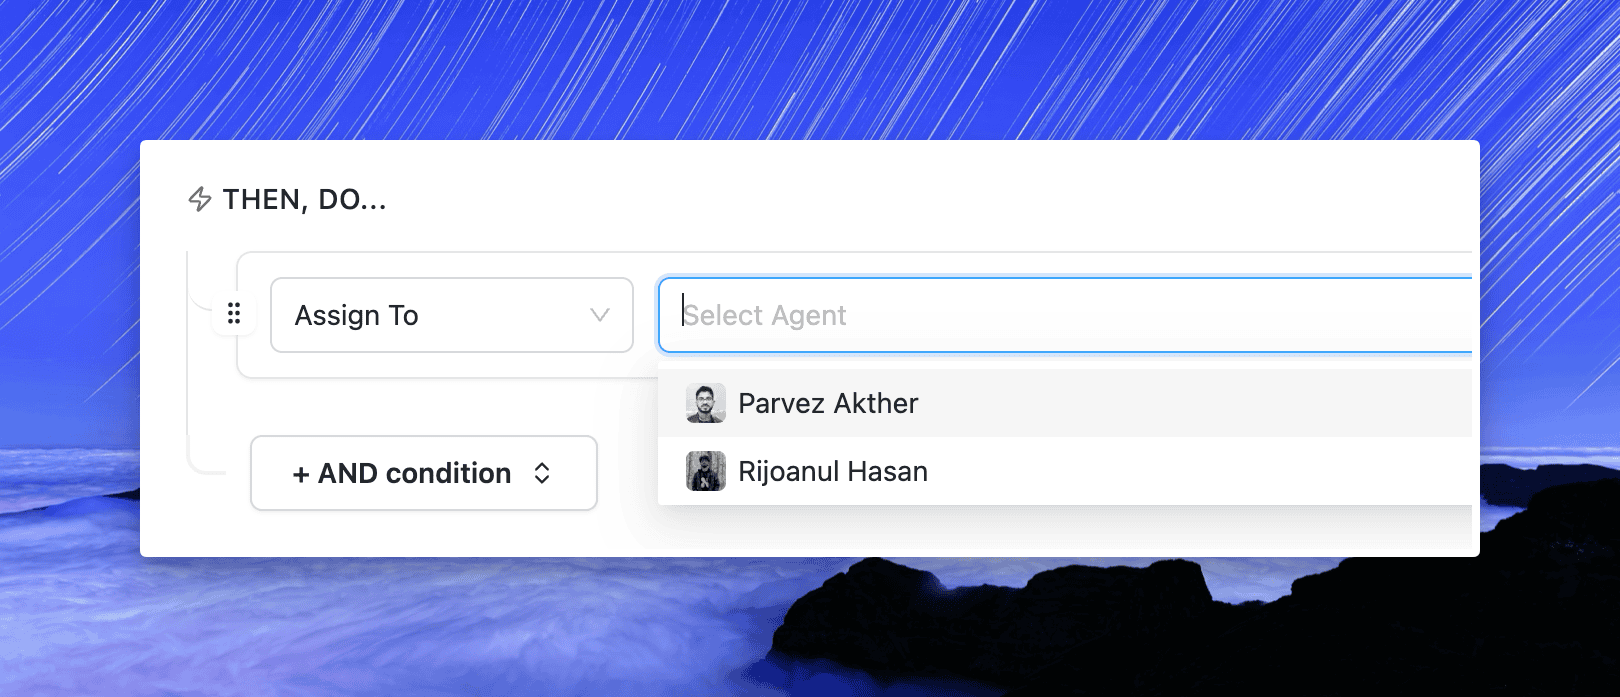
## Assign Using Workflow Automation
For repetitive or predictable cases, you can automate assignment.
1. Create or edit a workflow rule.
2. Add the action **Assign To**.
3. Select the agent you want to assign conversations to when conditions are met.
---
## Best Practices
* Assign conversations as early as possible to avoid confusion.
* Use **workflow automation** for repetitive tasks, such as routing based on subject or keywords.
* Reassign conversations when responsibility changes, so the correct agent has visibility.
# Setup & Customize the Assistant
Your one-stop guide to customizing, previewing, and managing the next generation Assistant.
## Overview
ThriveDesk’s Chat Widget stands out as one of the most adaptable live chat solutions available today. It allows for personalized themes and provides a wide range of customization features to seamlessly align with your brand’s identity.
---
## Installing the Assistant
To use the Assistant you must install it to your website or app. This is very simple and straight forward process. From **Settings → Channel → Assistant** create a new Assistant.
Open the Assistant and click the Installation tab, copy the javascript code and paste on your website footer. We've extensive installation guide for several platforms:
* [Google Tag Manager](https://help.thrivedesk.com/en/install-assistant-with-google-tag-manager)
* [WordPress](https://help.thrivedesk.com/en/add-assistant-to-wordpress)
* [Joomla](https://help.thrivedesk.com/en/live-chat-for-joomla)
* [Wix](https://help.thrivedesk.com/en/add-assistant-to-wix)
* [Squarespace](https://help.thrivedesk.com/en/add-assistant-to-squarespace)
* [Webflow](https://help.thrivedesk.com/en/add-assistant-to-webflow)
* [Weebly](https://help.thrivedesk.com/en/add-assistant-to-weebly)
# How to Auto-forward email from a Google Workspace Group
If you have administrative privileges in a Google Workspace, you can also set up a Google Group to utilize with ThriveDesk. This article will guide you through the process of setting up a new Google Group or ensuring that your existing Google Group is compatible with ThriveDesk.
There are a couple of things to keep in mind if you're using a Google Group:
* Google does not offer **OAuth access** for Google Groups addresses, which means all emails you send will be sent from ThriveDesk server and you’ll not be able to view them from Google Group. If you want to use ThriveDesk with Google Workspace email instead, checkout our [auto forward from Google workspace](../../en/thrivedesk-inbox/forward-email-from-google-workspace) tutorial.
* Google Groups includes an **unsubscribe link** in the footer of emails sent to members who are not part of your domain, which includes your ThriveDesk inbox. You can disable this from **Group settings > Email options** and uncheck Include the standard Groups footer option.
Once you've configured your Google Workspace Group to forward to ThriveDesk, you should have no further involvement in the Group. Remove all members besides your ThriveDesk email. Do not respond to or alter any Group chats, as doing so will break the ThriveDesk conversation link. If you are not using ThriveDesk exclusively, responses or changes may be lost.
## Create a New Google Group
1. First things first: Make sure you have followed the first steps in [Connect Your Custom Address](//help.thrivedesk.com/en/getting-your-emails-into-thrivedesk) and you have your ThriveDesk Inbox Address ready.
2. Head to [Google Workspace admin](https://admin.google.com/) and log in as administrator. From the Admin console sidebar menu, click on the **Directory > Groups** menu.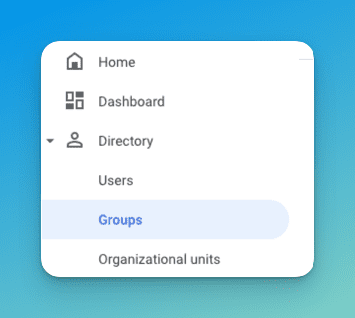
3. Click on the **Create group** button in the page header. 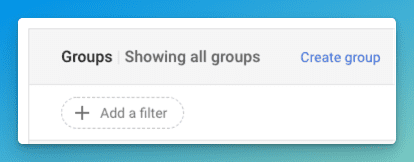
4. On the first screen, provide a name for the group, an optional description, and a group email under the brand you want. Click the **Next** button.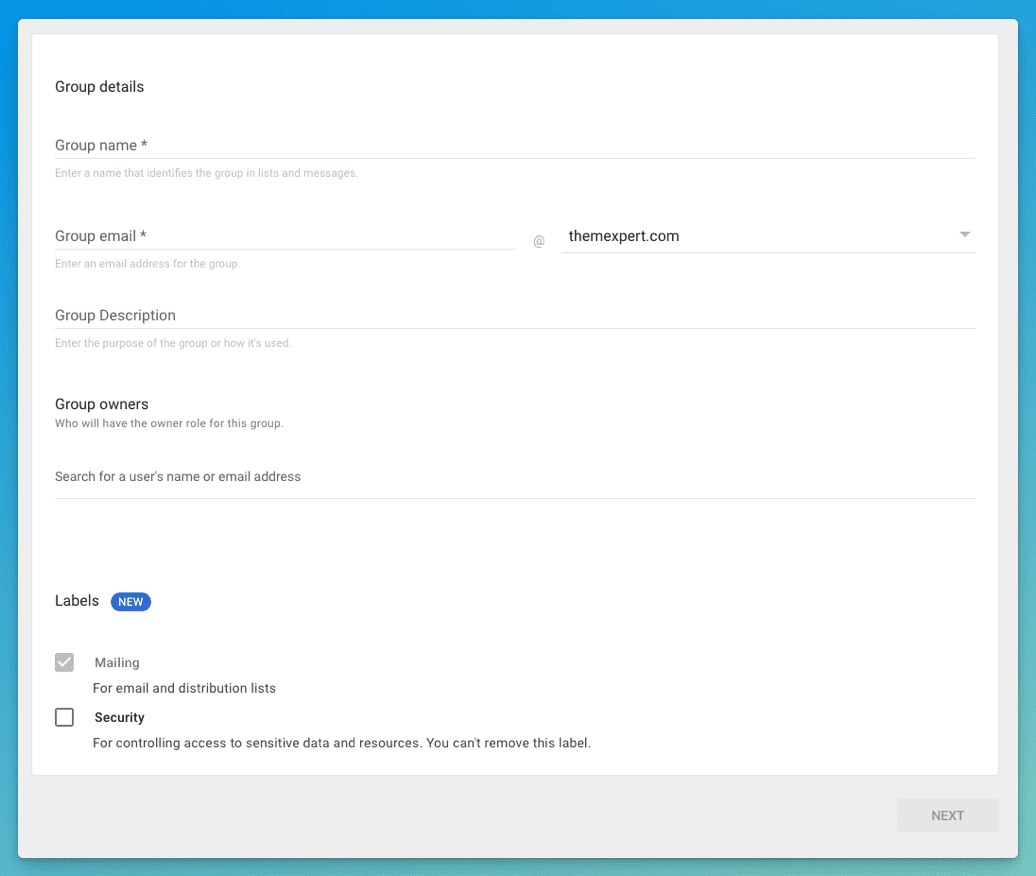
5. On the access control screen, make sure to set the access level to **Custom**, and check the box that allows External accounts to publish posts, and make sure that **Allow members outside your organization** is toggled on. Click Create Group. 
6. After creating your group, click **Add members** and paste in your ThriveDesk Inbox Address. It will show as an option to select - you must click the dropdown with that address to select it for Google to allow you to add it. Click the **ADD TO GROUP** link to finish adding the member to the group.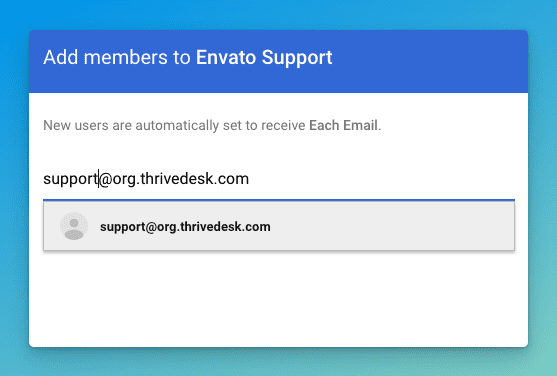
7. Send a test message to your Google Group address, and head back into ThriveDesk. Click the Check Email button and we'll be able to confirm your inbox with that test email. Now you're all set!
Your ThriveDesk email address should be the only Google Group member. Keeping more group members in the group can cause issues with straight forwarding into ThriveDesk, as well as duplicates among team members.
## Edit an Existing Google Group
1. Make sure you have followed the first steps in Connect Your Custom Address and you have your ThriveDesk Inbox Address ready.
2. Head to [Googel Workspace admin](https://admin.google.com) and log in as administrator. From the Admin console sidebar menu, click on the **Directory > Groups** menu.
3. Hover over the Group you want to edit, then choose **Edit settings** from the menu that appears. 
4. Click the **edit icon** on this page so that there is a check in the **External column** for Publish posts, and **Allow members outside your organization** shows as Yes. 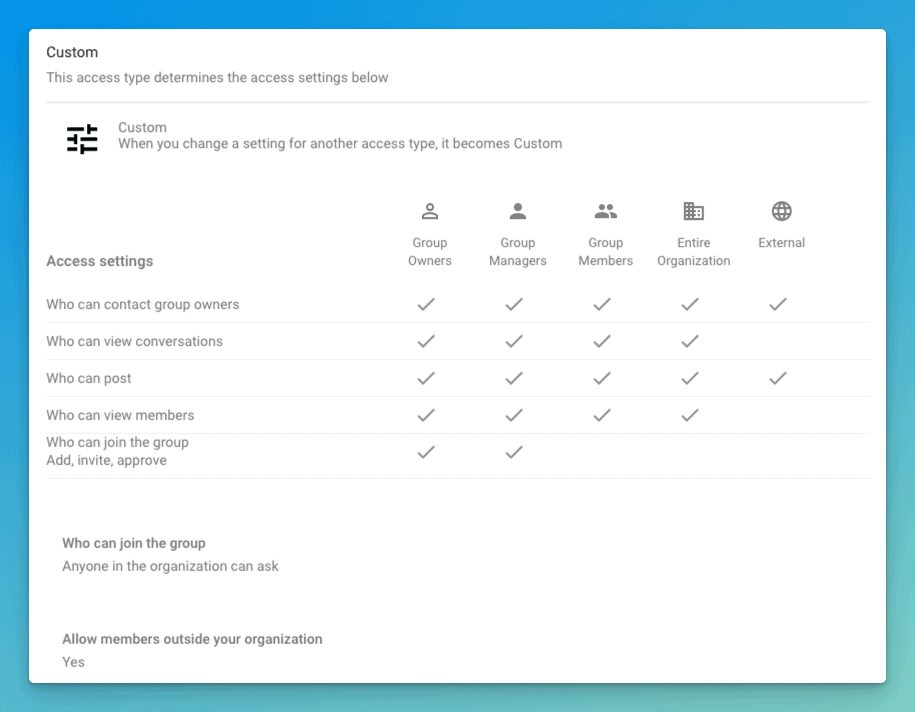
5. Click on the **advanced settings** link from the bottom of that page and choose **People > Members** from the left menu. Click **Add members** on the top of the page. 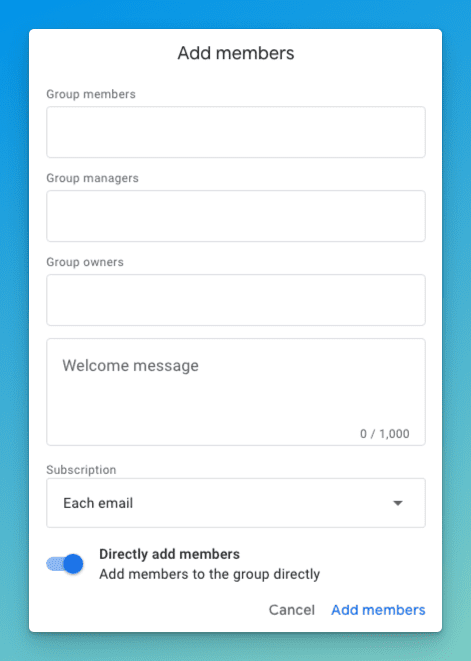Enter your ThriveDesk inbox address in the Group Members field and make sure that Subscription is set to **Each email** and Directly add members is toggled on. Click **Add members** to complete.
6. Now go to **Group settings > Email options** from the left menu, and set Post replies to as **Sender chooses recipient**.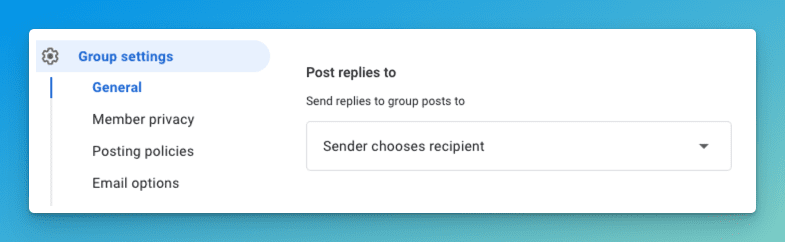
When you're ready to start working from ThriveDesk, remove any members of the Group. Once the address is forwarded into your ThriveDesk Inbox, your team will be able to access and collaborate with it from within ThriveDesk.
# FunnelKit Integration(Prev Autonami CRM)
FunnelKit is a powerful and lightweight CRM plugin for WordPress. FunnelKit offers you meaningful insights into every customer's buying behavior, rich contact profile, powerful segmentation and targeting broadcast all-in-one place.
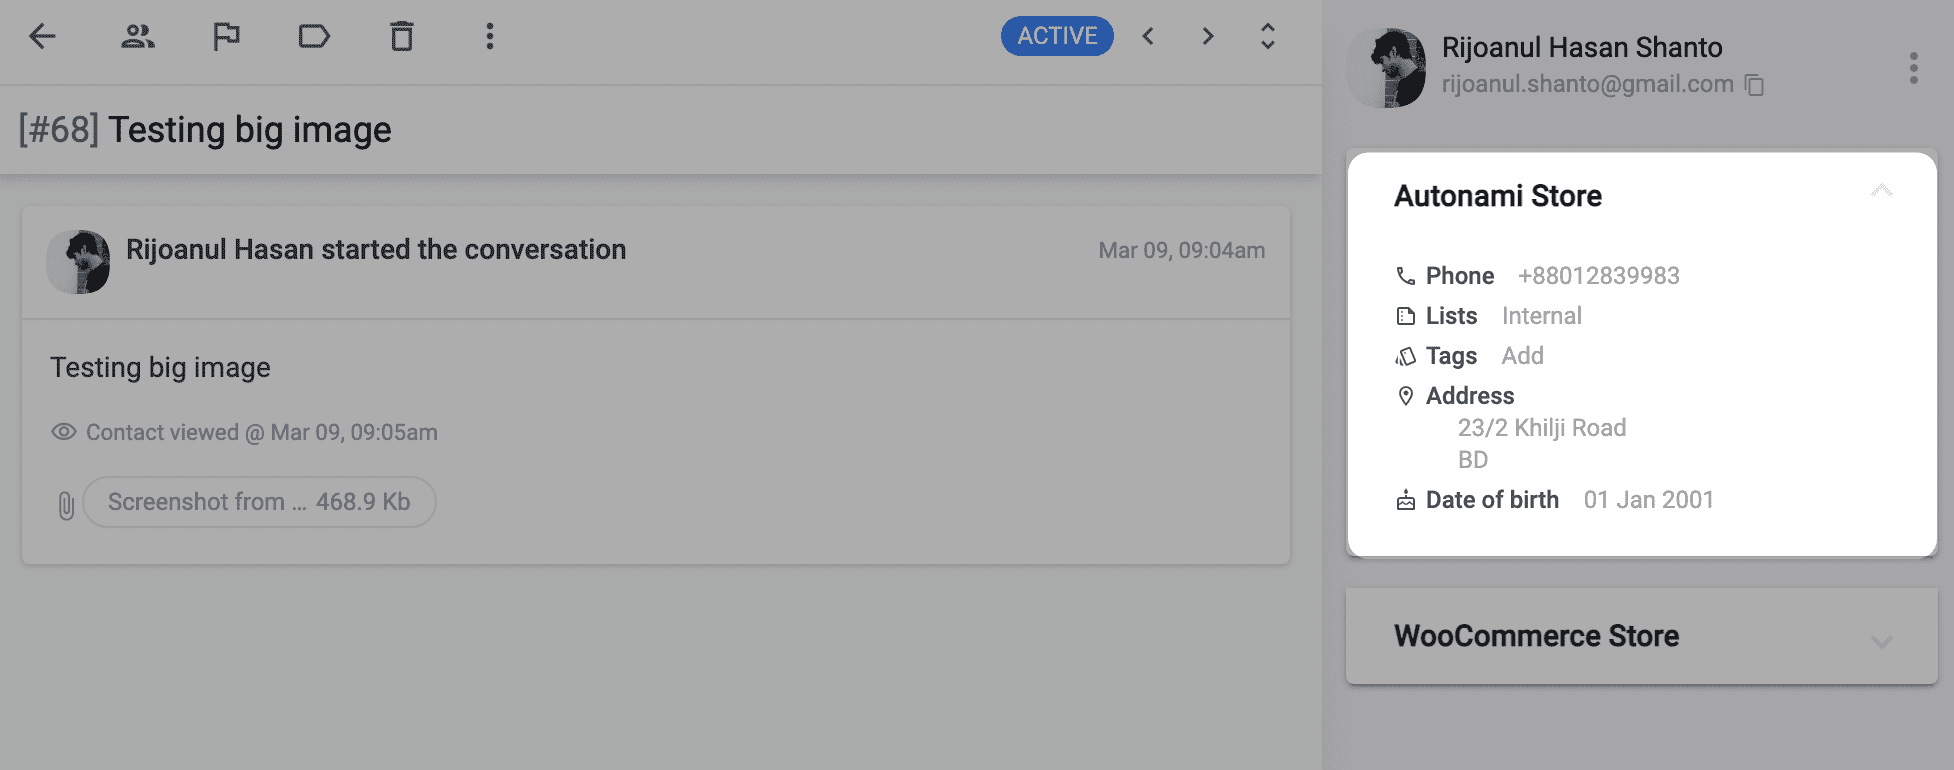
The ThriveDesk app instantly sync contacts to their FunnelKit profile. You can see the lists or tag they are subscribed to inside ThriveDesk and their ticket history in FunnelKit. Here's a snapshot of what it looks like in ThriveDesk
If you’re new here, please follow our [Getting Started guide](//help.thrivedesk.com/en/thirvedesk-setup-guide) to set up ThriveDesk correctly.
### Installation and Configuration
1. Login to your WordPress website.
2. Go to **Plugins > Add New** and search for ThriveDesk, or download the ThriveDesk plugin and install it manually.
3. Activate the plugin and navigate to the ThriveDesk page.
4. If you already have a ThriveDesk account, click the **Connect Existing Account** button. If you're starting fresh, click **Create New Account**.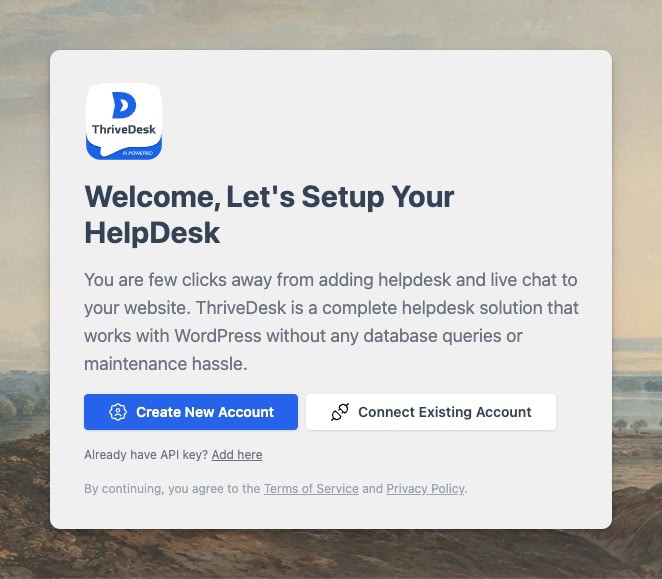
5. Once you complete the on-screen connection process, you'll be returned to the plugin settings screen.
6. If you have FunnelKit installed, you'll see a connect button.
7. Click the **Connect** button, and it will take you to the ThriveDesk app configuration page.
8. Label each app instance to easily distinguish them within the ThriveDesk sidebar.
9. Select the mailboxes where this app will be used. You can select multiple mailboxes.
10. Congratulations! Your FunnelKit app installation process is complete, and you'll be taken back to your WordPress site.
Only workspace owner and admin can install the app. Make sure you have the permission to install the app.
---
### Troubleshooting
**Unable to install the app**
This is likely a permissions issue. Only the workspace owner and admins can install the app. The workspace owner can grant or revoke permissions in the Rules and Permissions settings. If you’re an admin, ask your workspace owner to grant you the necessary permissions.
**Customer data not displaying**
There could be several reasons for this issue, but it is often due to server firewalls or security plugins that block API requests to your site.
* If your website is protected by Cloudflare's firewall, please refer to our [documentation](//help.thrivedesk.com/en/troubleshooting-with-cloudflare) for guidance.
* If you have a custom firewall installed on your server, ask your system administrator to [whitelist our IP](//help.thrivedesk.com/en/troubleshooting-with-cloudflare) addresses.
* If you have a security plugin installed, ensure that our [IP addresses](//help.thrivedesk.com/en/troubleshooting-with-cloudflare) are whitelisted.
---
### WP Portal
You can setup a help center inside your WordPress website where your customer can see their ticket and create new one. For more information and setup guide follow [WP Portal documentation](//help.thrivedesk.com/en/wpportal).
### Integrations with other WordPress plugins
* [WooCommerce](//help.thrivedesk.com/en/woocommerce-integration)
* [SureCart](//help.thrivedesk.com/en/surecart-integration)
* [Easy Digital Download](//help.thrivedesk.com/en/edd-integration)
* [Envato](//help.thrivedesk.com/en/envato-integration)
* [Freemius](//help.thrivedesk.com/en/freemius-integration)
# Billing and Plans Guide
ThriveDesk has different plans with different features and limits, as well as add-ons that can be used with certain plans. This lets you choose the plan and extras that work best for you.
This guide is for people who already have an active ThriveDesk account. It will help you find where to look at or change your current account plan or billing information, as well as answer some general billing questions you might have.
If you haven't opened a ThriveDesk account, check out our [Pricing page](https://www.thrivedesk.com/pricing/) for details and sign up for a free trial.
In ThriveDesk and our documentation, all prices are displayed in U.S. dollars (USD). Note that the graphics shown in this article are for illustration purposes only; your plan details will be unique to your account, and the plans offered may differ.
## Your Plan Details
Your current plan details can be seen in the app at any time by the Account Owner and any other users who have the **Manage Account: Billing and Plan Changes** permission.
Look at User Roles and Permissions to learn more about setting permissions.
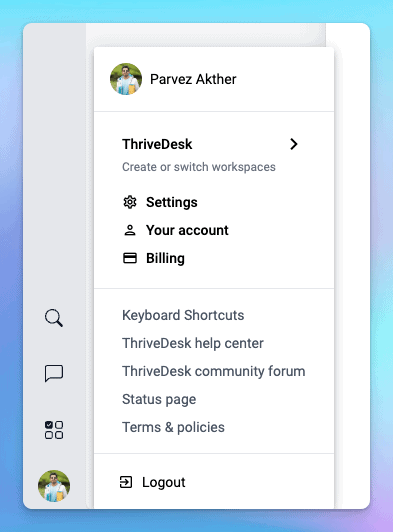
Click on your **avatar** or initials in the bottom left corner of the left app menu in ThriveDesk, then choose Your Plan to see all of the details.
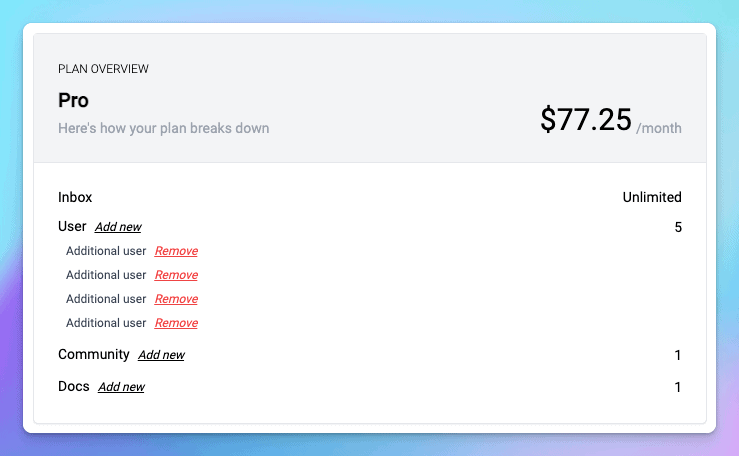
### Plan overview
Your plan overview is shown at the top of this page (for example, ThriveDesk Pro), and a breakdown of your upcoming billing for that plan is detailed below. Note that the image shown below is for illustrative purposes only — your plan details will be specific to your account.
### Payment Details
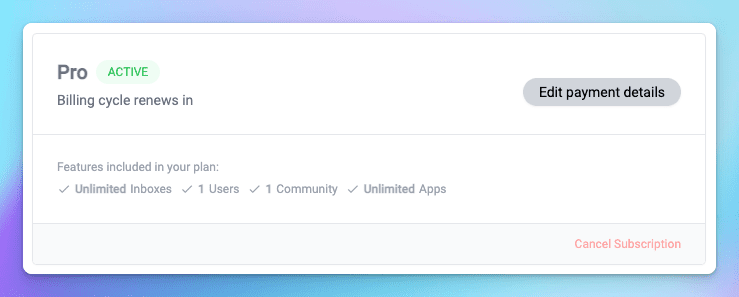
Next to the plan overview you'll see your current action plan and payment details button. You can update your payment method by clicking the **Edit payment details** button. You can cancel your subscritpion by clicking C**ancel subscription** link.
## Subscription Questions & Answers
#### What's a User? Am I paying for all of my customers who need help?
A ThriveDesk User is anyone on your team who needs a login to manage or view conversations. ThriveDesk doesn't let your customers log in, and you can help as many customers as you want with each plan.
#### Can I add new Users during the billing cycle?
You pay for ThriveDesk for the whole month up front, but you can add new Users whenever you need to. If you add a new User in between your billing dates, we'll charge you a prorated amount at your next billing based on how many days are left in your billing cycle.
For example, if you're on our Pro plan paying $15/month and you add a new User 15 days through a 30 day billing cycle, you will be charged $7.5 at your next billing for the 15 days of use.
**Let's do a simple math:**
You subscribe for Pro plan(comes with one user) 1st of September and your next billing is 1st of October.
You've added 2 users **15th** of september: **$15x2 = $30**($1 per day).
15 days left untill your next billing, prorated bill would be **$15** for 2 new users.
On 1st Octorber you'll charge: **$45**($15x3 users total) + **$15**(prorated amount) = **$60** in total.
On November you'll get regular **$45** bill if you don't add/remove any users.
#### Is the Account Owner a billable role?
Yes. One user account must be designated as the Account Owner, and all user accounts must be billed. The current Account Owner can transfer control of the account to any other user at any time; see Transfer Account Ownership for instructions.
#### What types of payment do you accept? Can I pay with PayPal?
We accept all major credit cards, Google and Appley pay for monthly and annual payments including PayPal.
#### Do you offer non-profit or education discounts?
Non-profit organizations and educational institutions are eligible for a 15-20% discount, which can be used with the yearly payment discount. Send us an email with official documents proving your organization's non-profit status to receive the non-profit discount. For example, if your organization is situated in the United States, we will want documentation of your 501(c)(3) status.
#### Why did I receive a Failed Payment Error email?
We were unable to charge the credit card on file, or you did not supply a credit card. If you are merely approaching the end of a trial account and do not desire to add a payment card, you may Cancel Your Help Scout Account to stop receiving these notifications.
If you are an existing client with a card on file, contact your credit card issuer to see why your card was refused or to update the credit card associated with your account.
If you've been locked out of your account, [send us a quick email](https://www.thrivedesk.com/contact) and we'll work with you to get it sorted.
#### Can I get a refund?
If for any reason you are unhappy with your ThriveDesk purchase, we offer a 30-day money back guarantee on your first payment.
If you decide not to use ThriveDesk in your business within 30 days from your first payment, you may request a full refund. This applies to both annual and monthly subscriptions.
## Docs Knowledge Base
#### How much does Docs cost?
All plans include at least one Docs site. Account Owners and Administrators can see the number of included Docs sites at Your Plan in-app. There is no limit to the number of collections, categories, or articles you can add to any single Docs site.
#### Can I add more Docs sites?
On any plan, you can add more sites for $20 per site, per month. You can add as many as you need by going to Settings > Docs and clicking New Site. Delete any extra Docs sites you don't need to stop being charged for them right away.
#### Can I just pay for Docs and not use the help desk or Assistant?
Docs is not offered a stand alone product. You are welcome to sign up for our lowest priced plan and only use Docs though!
# Block Rules & Spam Protection
The **Block Rules & Spam Handling** feature manages unwanted conversations using two connected mechanisms: spam marking and block rules.
Spam marking flags individual conversations as **spam**, either manually, via automation, or automatically on incoming emails. Block rules act as an organization-level blocklist, matching emails, domains, or patterns to automatically mark incoming messages as spam before they reach the inbox.
When a conversation is marked as spam, the sender’s email is added to the blocklist. Future messages from that sender are then automatically marked as spam on arrival, preventing inbox noise.
Block rules are evaluated first for all incoming emails. If a message is blocked, no automations will run. Automations are triggered only after the email passes block rules and exceptions.
## Let's start with the Block Rules
Go to **Settings → Block Rules** to view and manage your organization's blocklist.
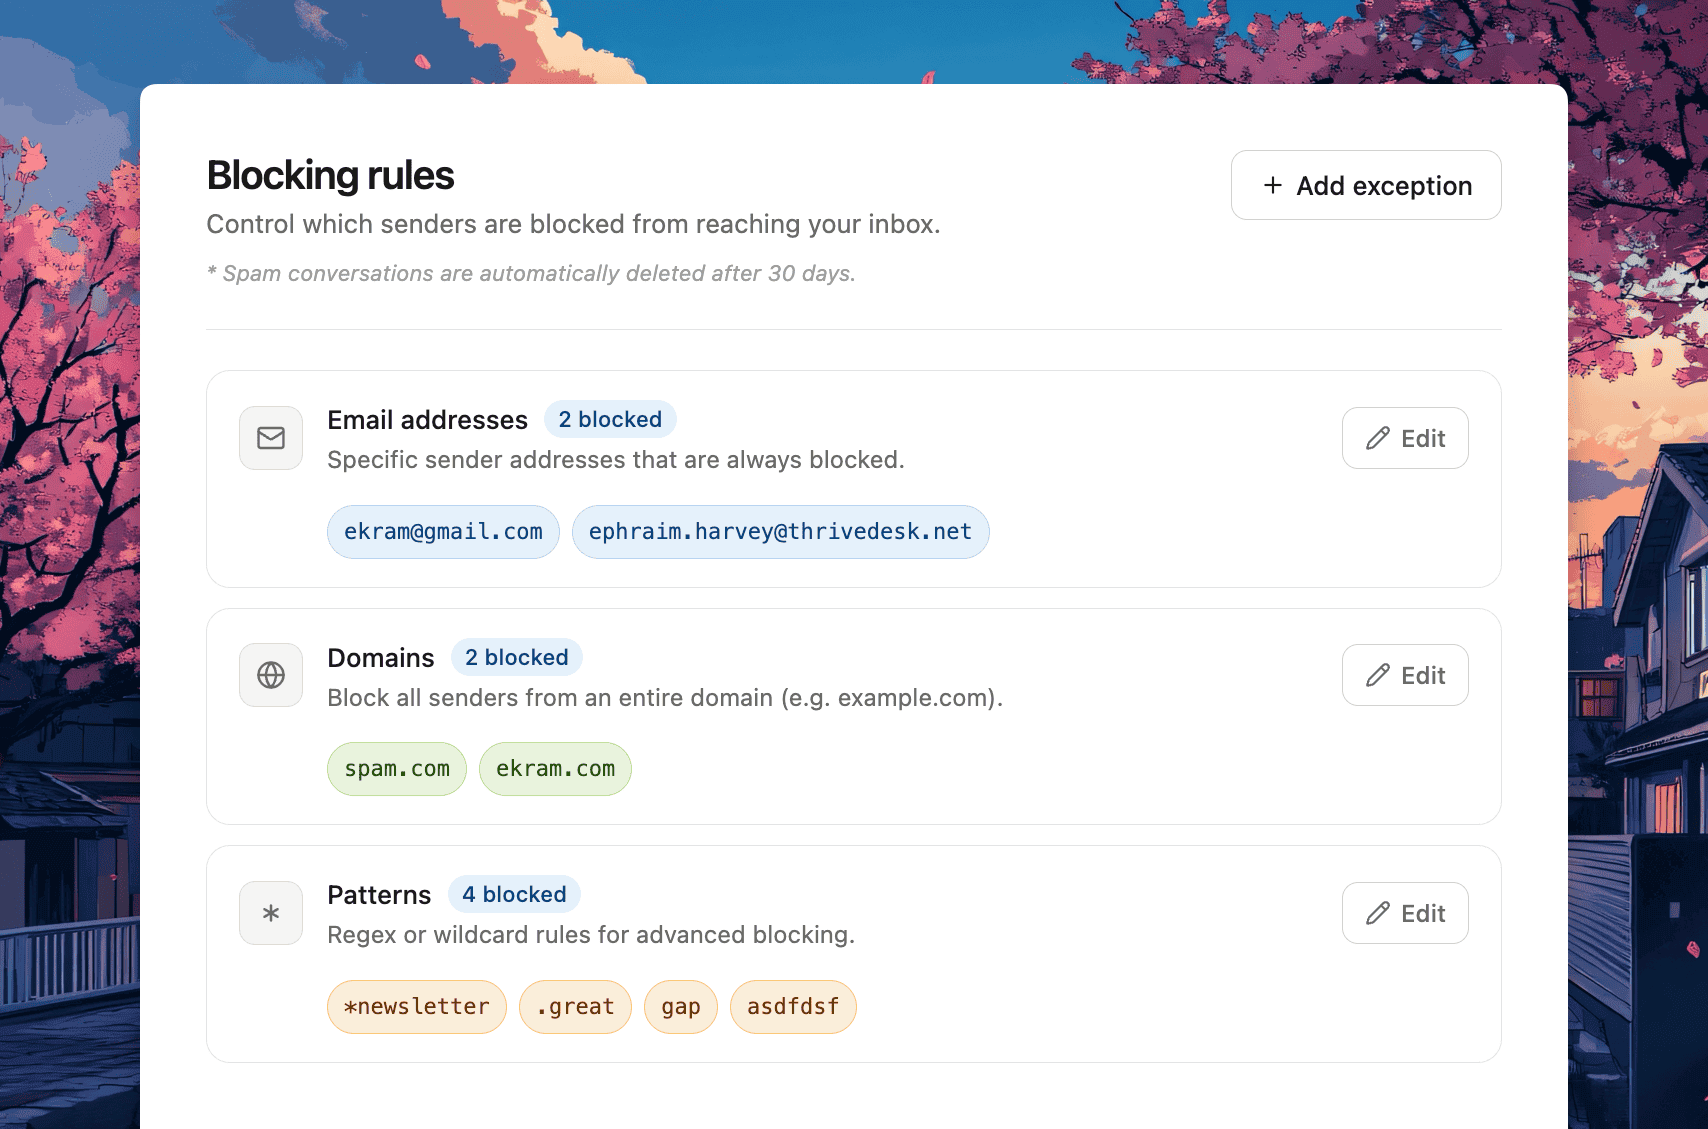There are three different ways you can set block rules for your organization. You can add **emails**, **domains**, or **patterns** in bulk.
**Email syntax** uses email matching, such as `user@email.com`
**Domain syntax** uses the domain matching, like `abc.com`
**Pattern syntax** uses simple wildcard matching (not regex):
* `*` matches any number of characters
* `?` matches exactly one character
* Example: `*@spam*.com` blocks any email from any domain starting with `spam`
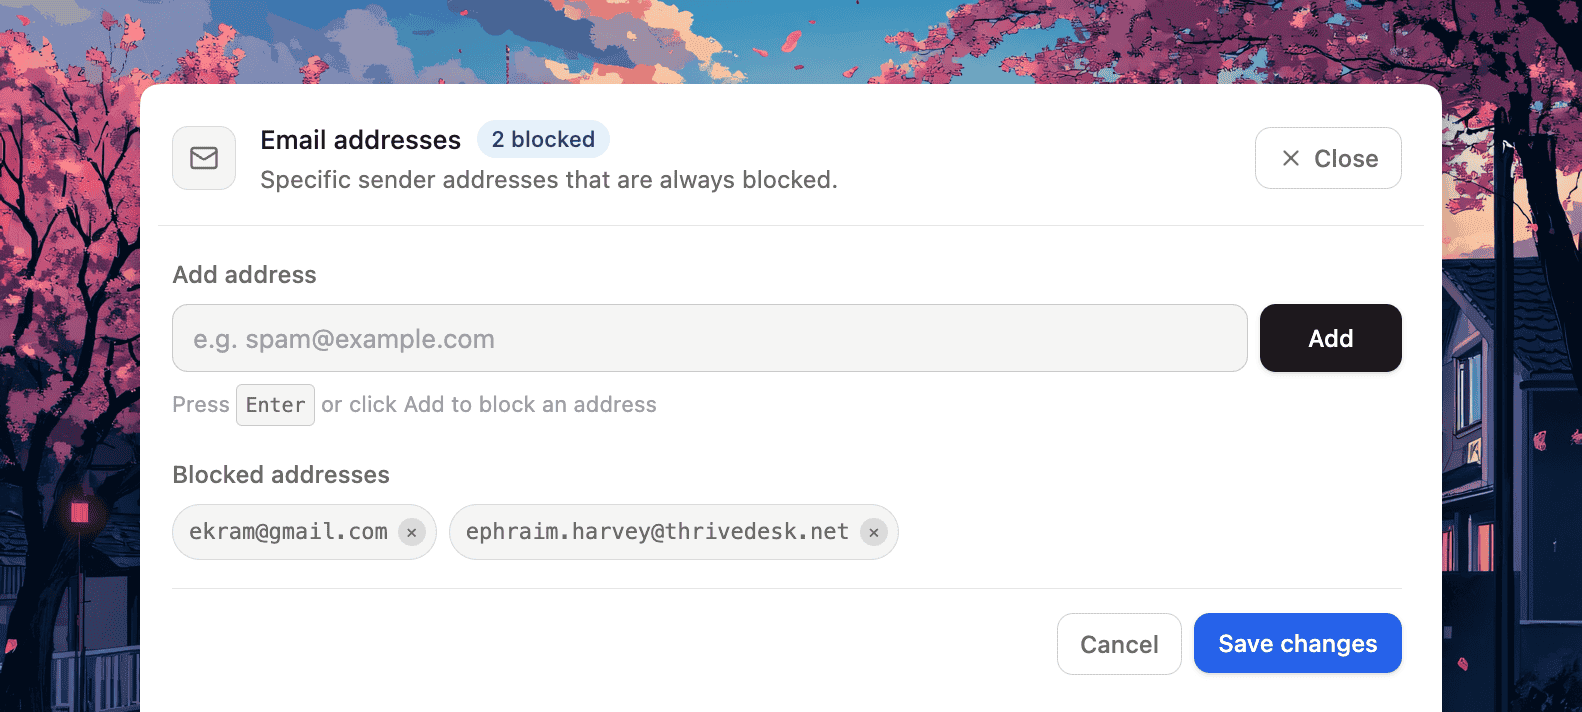
You can also update emails, domains, and patterns individually.
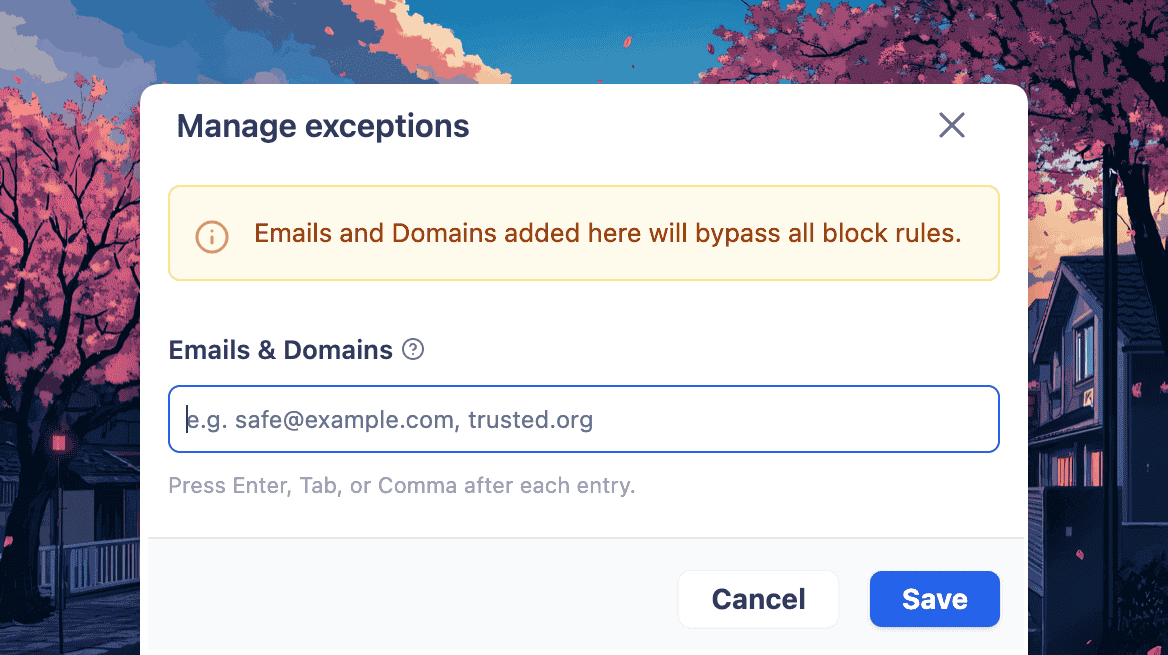
## **Block Rule Exceptions**
Sometimes, certain emails or domains need to bypass standard block rules even if they match spam criteria.
To handle these cases safely and intentionally, we introduced **Block Rule Exceptions**.
This allows specific senders or domains to be explicitly whitelisted, ensuring they are not blocked by automated filtering rules while keeping the overall system behavior predictable and controlled.
You can add multiple emails and domains here. e.g. `safe@example.com`, `trusted.org`
**Exception values will bypass all blocking rules.**
## Marking a Ticket as Spam
Go to the **conversation page**, then click the **three-dot menu** (marked as 1 in the image). From there, select **“Mark as spam”** (marked as 2). Once the conversation is marked as spam, it will be in the spam folder, and you will get the option to mark it as not spam.
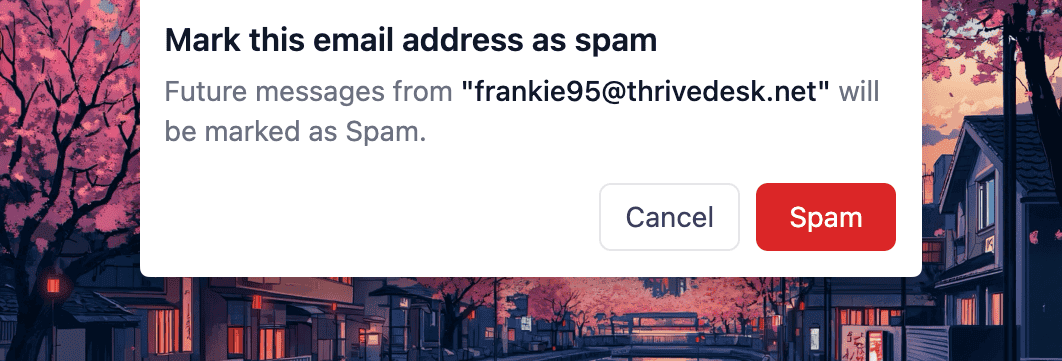
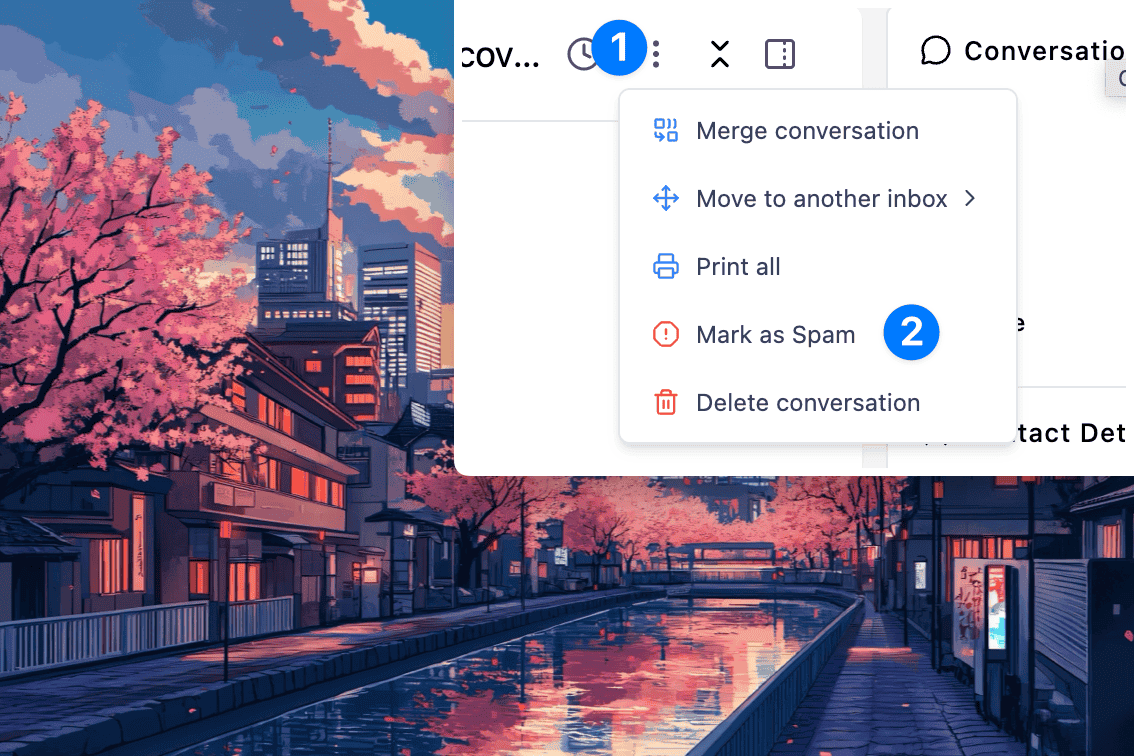When an agent clicks **Mark as Spam** on a conversation:
1\. The conversation is flagged as spam.
2\. The contact's email address is **automatically added to the organization's blocklist**.
3\. A red **Spam** label is attached to the conversation.
Marking a conversation as spam will block the sender. Any future emails from that address will be auto-flagged upon arrival. See [Exceptions](#5-exceptions--the-safe-senders-list) if you need to undo this for a legitimate sender.
## Marking a Ticket as Not Spam
When an agent clicks **Not Spam** (unmark):
1. The spam flag is removed.
2. The "Spam" label is detached.
Unmarking a conversation does **not** remove the sender from the blocklist. You must do that separately in **Settings → Block Rules**. This is intentional; the sender is still considered a risk until explicitly unblocked.
Unmarking a conversation does **not** remove the sender from the blocklist. You must do that separately in **Settings -> Block Rules.** This is intentional; the sender is still considered a risk until explicitly unblocked.
When unmarking a conversation, a confirmation pop-up will appear asking whether you also want to unblock the sender. If you choose to unblock the user, their email or domain will be removed from the blocklist, and future messages from them will be delivered normally instead of being automatically marked as spam.
## Permissions
Go to **Settings → Roles & Permissions** to view and manage the permission role.
Managing block rules requires the **Manage Block Rules** permission. Organization owners always have full access by default. Admins and agents can manage block rules only if this permission is explicitly enabled for their role.
Marking or unmarking conversations as spam does not require any additional permissions beyond the standard ability to update a conversation.
## Delete Spam Conversations
Spam conversations are automatically deleted after 30 days. This action is permanent and cannot be reversed.
# Bring Your Own Key (BYOK)
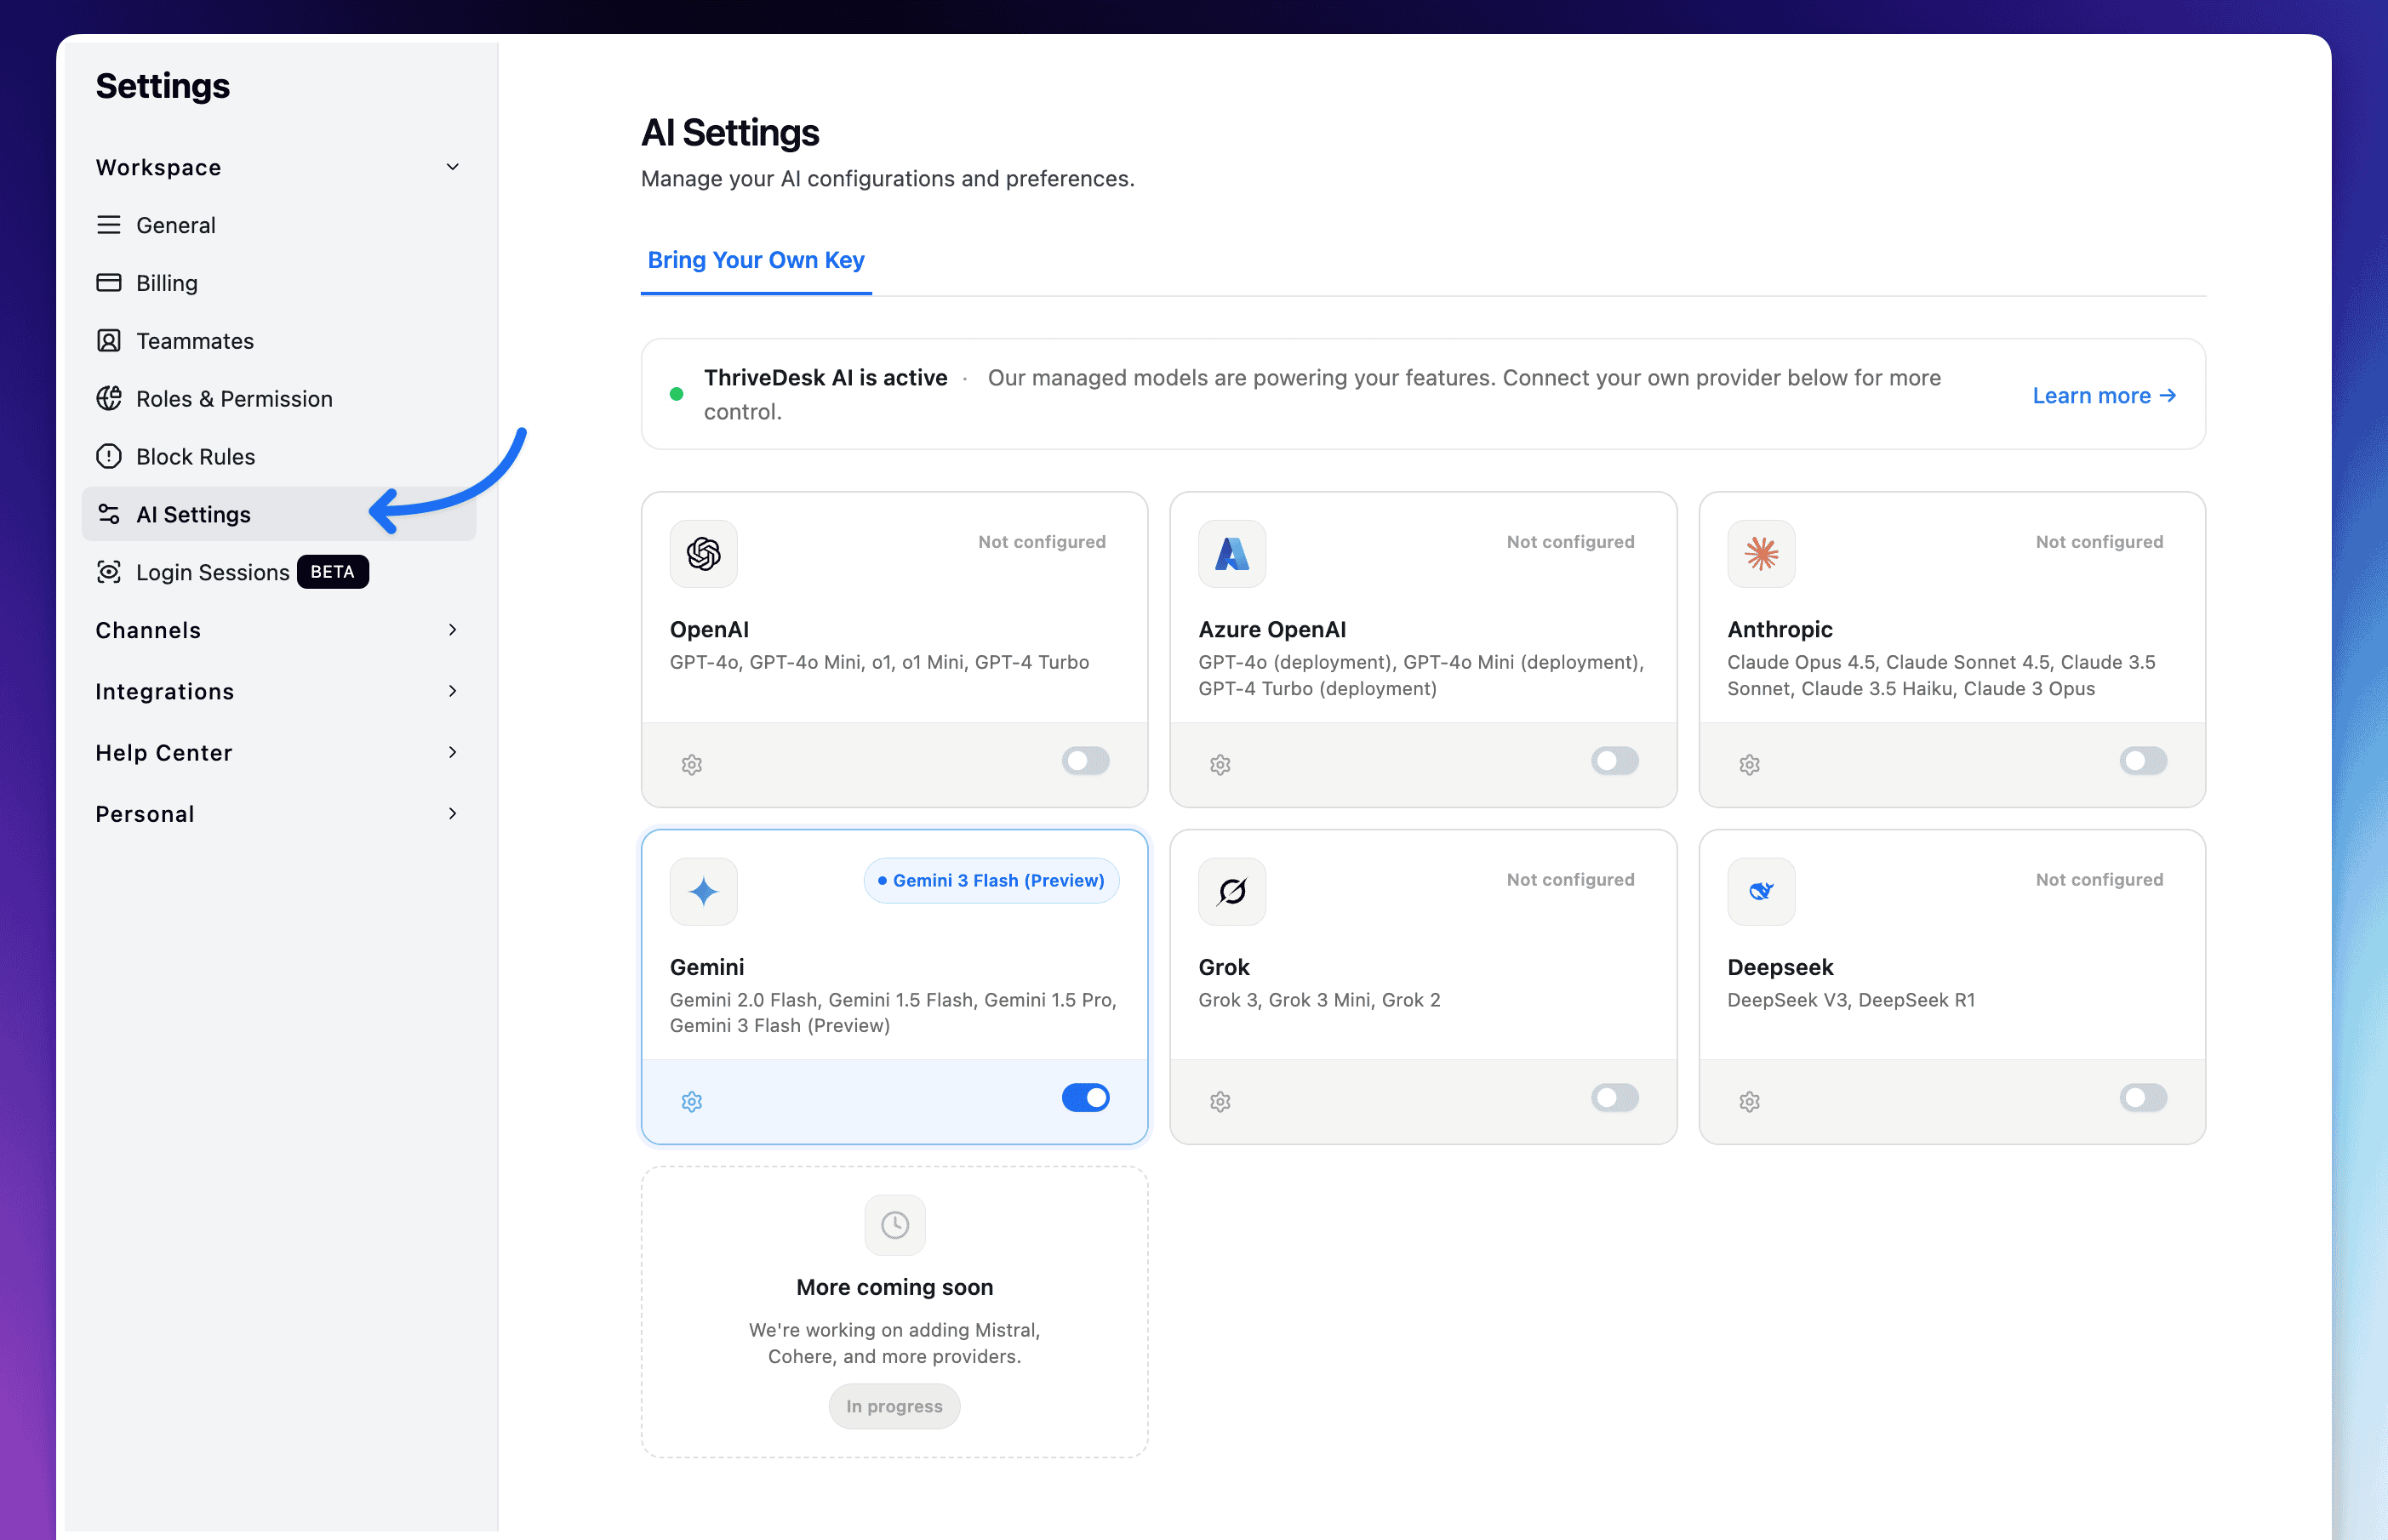
By default, ThriveDesk uses its own managed AI models to power features like AI Assist, Summarization, and Auto-replies. With **Bring Your Own Key (BYOK)**, you can connect your own accounts from providers like OpenAI, Anthropic, or Google.
## Getting Started
To access the AI settings:
1. Log in to your ThriveDesk account.
2. Navigate to **Settings** from the sidebar.
3. Click on **AI Settings** (under the Workspace section).
4. Select the **Bring Your Own Key** tab.
## Connecting a Provider
ThriveDesk supports multiple industry-leading AI providers. Connecting a provider is a two-step process:
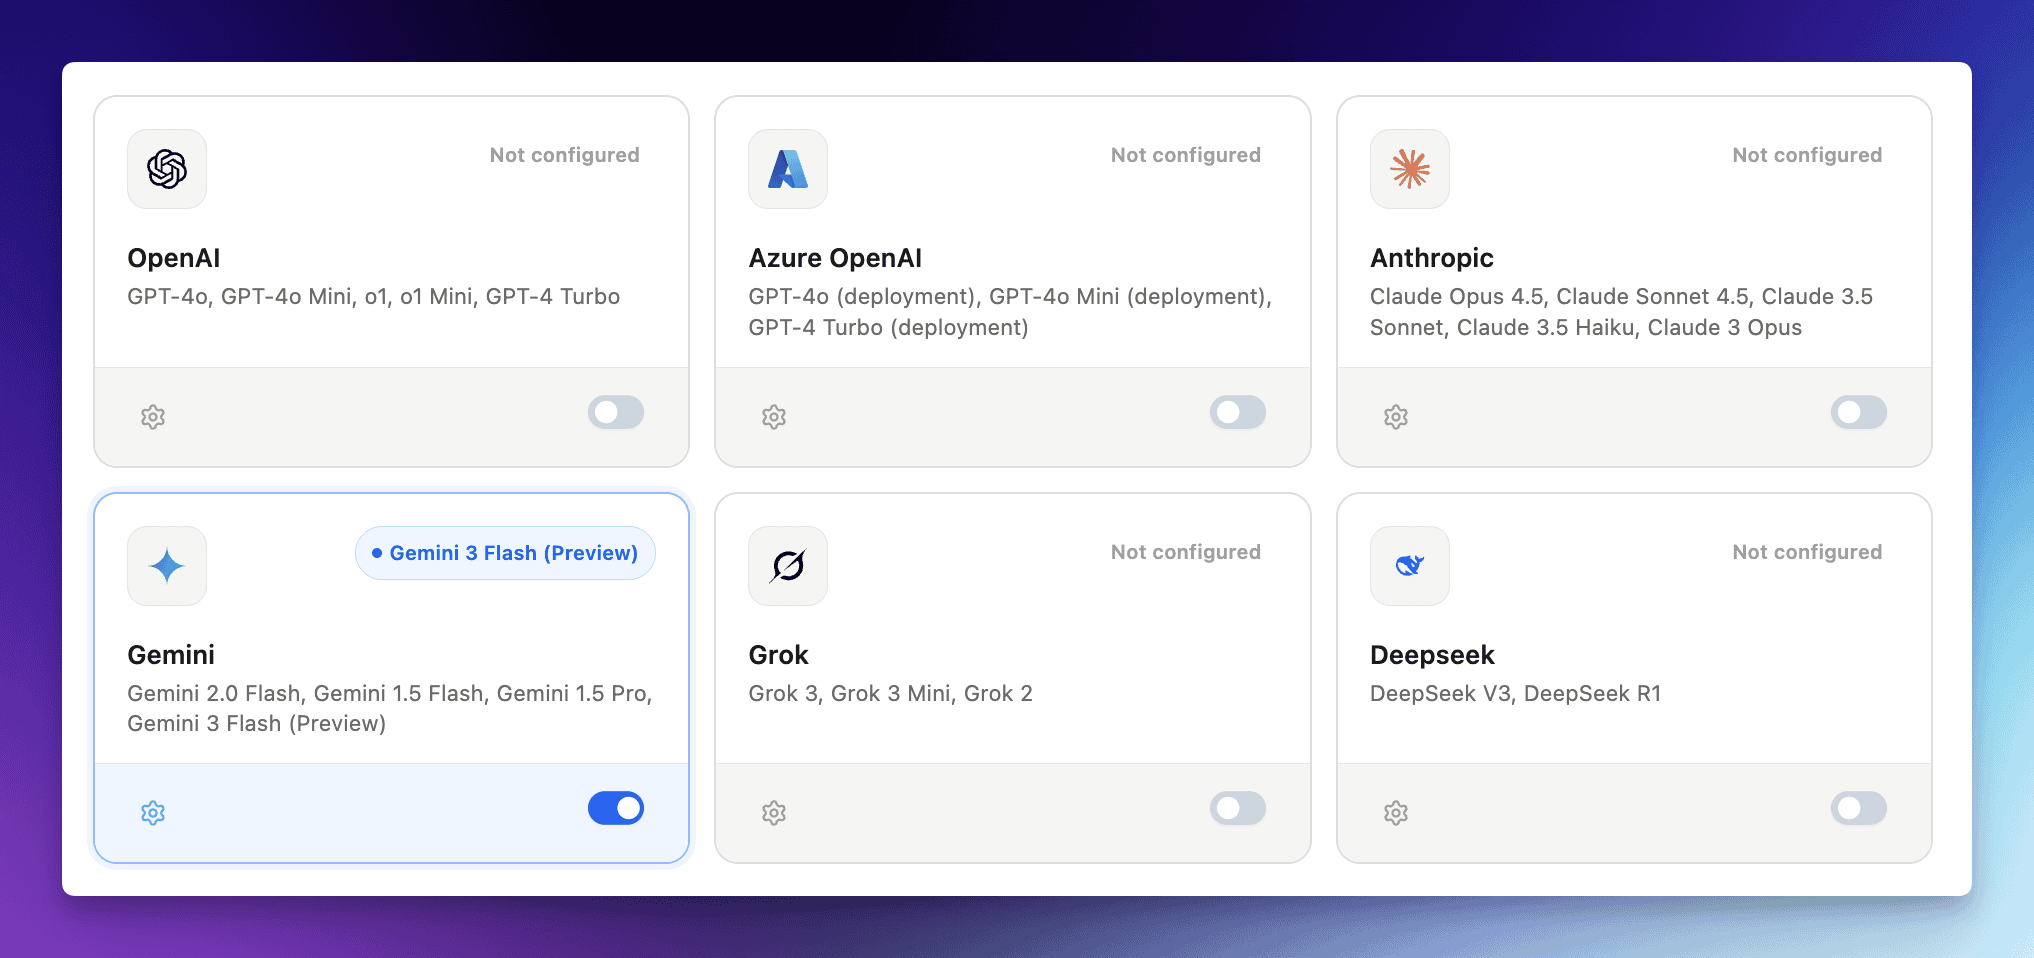### Add Credentials
1. **Select a Provider:** Locate your preferred provider card (e.g., OpenAI, Gemini, Anthropic).
2. **Enter Credentials:**
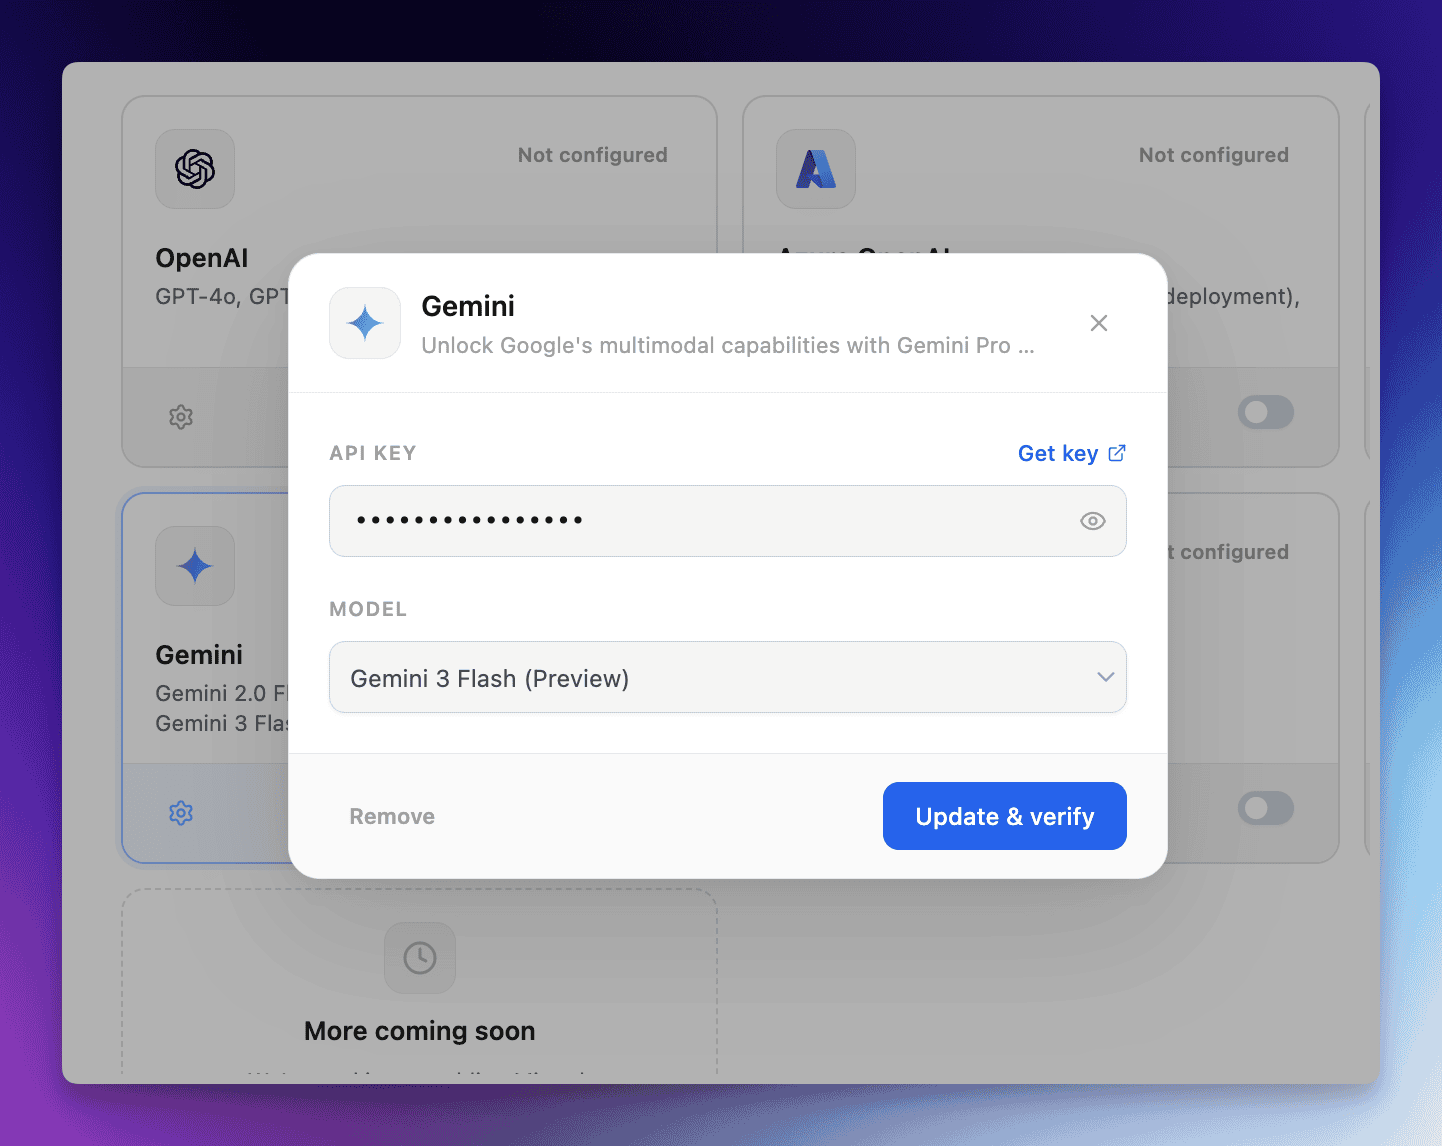* **API Key:** Paste your secret API key from the provider.
* **Additional Fields (if required):** Some providers like **Azure OpenAI** require extra information like your *Endpoint URL* and *API Version*.
1. **Select a Model:** Choose the specific AI model you want to use from the dropdown menu.
2. **Save & Verify:** Click the button to save. ThriveDesk will automatically verify that the credentials are valid.
### Enable the Provider
Once configured, you must manually **enable** the provider using the toggle switch on the provider card. Only one custom provider can be active at a time to power your AI features.
## Supported Providers & Models
| Provider | Popular Models |
|---|---|
| **OpenAI** | GPT-4o, GPT-4 Turbo, GPT-3.5 |
| **Gemini** | Gemini 2.0 Flash, 1.5 Pro |
| **Anthropic** | Claude 3.5 Sonnet, Claude 3 Opus |
| **Azure OpenAI** | GPT-4, GPT-3.5 Turbo |
| **Grok (xAI)** | Grok-3, Grok-2 |
| **Deepseek** | DeepSeek-V3, DeepSeek-R1 |
## Managing Your Connections
* **Toggling Providers:** You can quickly enable or disable a provider using the toggle switch.
* **Switching Models:** To change the model for an active provider, click the **Settings (gear icon)** on the card, select a new model, and save.
* **Disconnecting:** If you no longer wish to use a custom provider, open the configuration and click **"Remove"**.
## Frequently Asked Questions (FAQ)
#### What happens if my API key expires or runs out of credits?
If your custom provider fails (due to invalid keys, expired credits, or service outages), ThriveDesk will send you and **email notification**. To ensure your team isn't interrupted, **ThriveDesk AI (Neo) will automatically start working** for your workspace until you update your credentials.
#### Can I use multiple providers at once?
You can configure multiple providers, but you must choose one active provider to power your AI features at any given time using the toggle switch
#### Is my API key secure?
Yes. Your keys are encrypted and stored securely. ThriveDesk only used them to process AI requests intialted by your workspace
#### What happens when all models are disabled?
If you choose to disable all custom providers, or if you hven't enabeld one yet, **ThriveDesk AI (Neo)** will automatically power your AI features.
#### How does the token count work?
Whe you use your own API key through BYOK, Thrivedesk charges **one [AI credit](https://help.thrivedesk.com/en/ai-credits) for every action** the AI performs. While you still need ThriveDesk AI credits, the credit usage is significantly lower than when using our fully managed models.
Not ready to use your own key? ThriveDesk AI(NEO) is active by default and require no extra setup. You can switch back tat any time by deactivating your custom providers.
# Challenges with using same email for User and Inbox
When registering at ThriveDesk, we highly recommend using a professional email address. However, we understand that users often confuse their mailbox email with their user email. Let's clarify the distinction between a User and a Mailbox:
### User
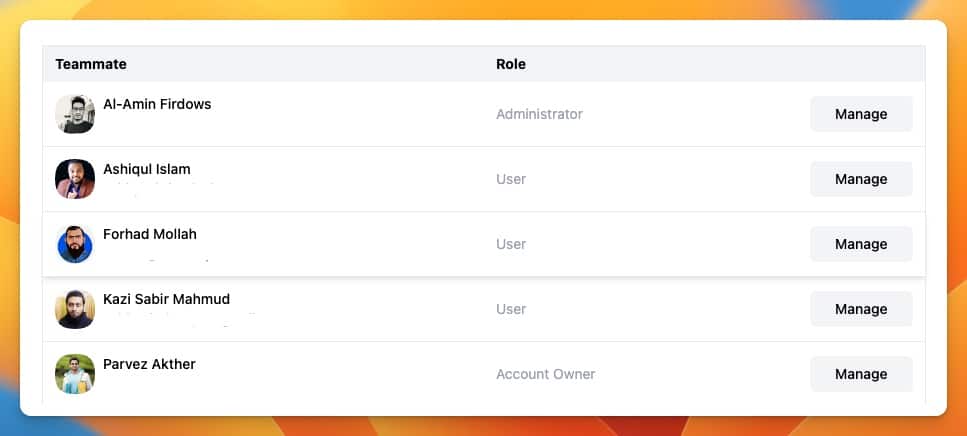
A User in ThriveDesk is an individual who logs in to the app to handle emails. Each User has a unique email address associated with their profile, and this email address serves as their login identifier. Typically, a User's email address will be their personal email within your organization, such as connor.bolton@themexpert.com.
### Mailbox
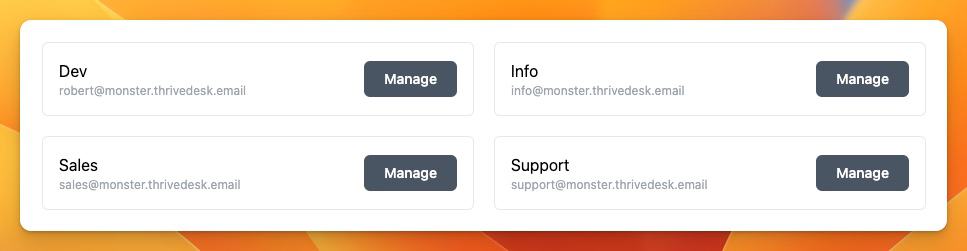
On the other hand, a Mailbox in ThriveDesk is designed to be a shared mailbox managed by multiple team members. It is generally a generic email address like help@themexpert.com.
The User's email address must not be the same as any Mailbox address. Doing so will create an email loop and cause confusion for both you and us. Consequently, email notification features won't function correctly.
### Email notification features won't work
When the User address matches the Mailbox address, we cannot send email notifications for that particular Mailbox to the User. ThriveDesk offers various email notifications to help you stay organized and informed. To learn more about managing ThriveDesk notifications, please refer to the "Manage ThriveDesk Notifications" section.
Email notifications cannot be delivered as they would only circulate between the Mailbox and the User, leading to a chaotic email loop. As a result, you won't receive any email notifications or be able to use features like "Respond to Email Notifications to Take Action in ThriveDesk."
**To ensure smooth communication and efficient email management, it is essential to use distinct email addresses for Users and Mailboxes within ThriveDesk. This way, you can fully leverage the platform's notification capabilities and enhance your overall experience.**
# Change the Contact on a Conversation
Changing the contact associated with a conversation is helpful when a message is linked to the wrong person or when a conversation needs to be reassigned to a different user.
This article is all about how to change the contact directly from the conversation.
### Open the Contact Menu
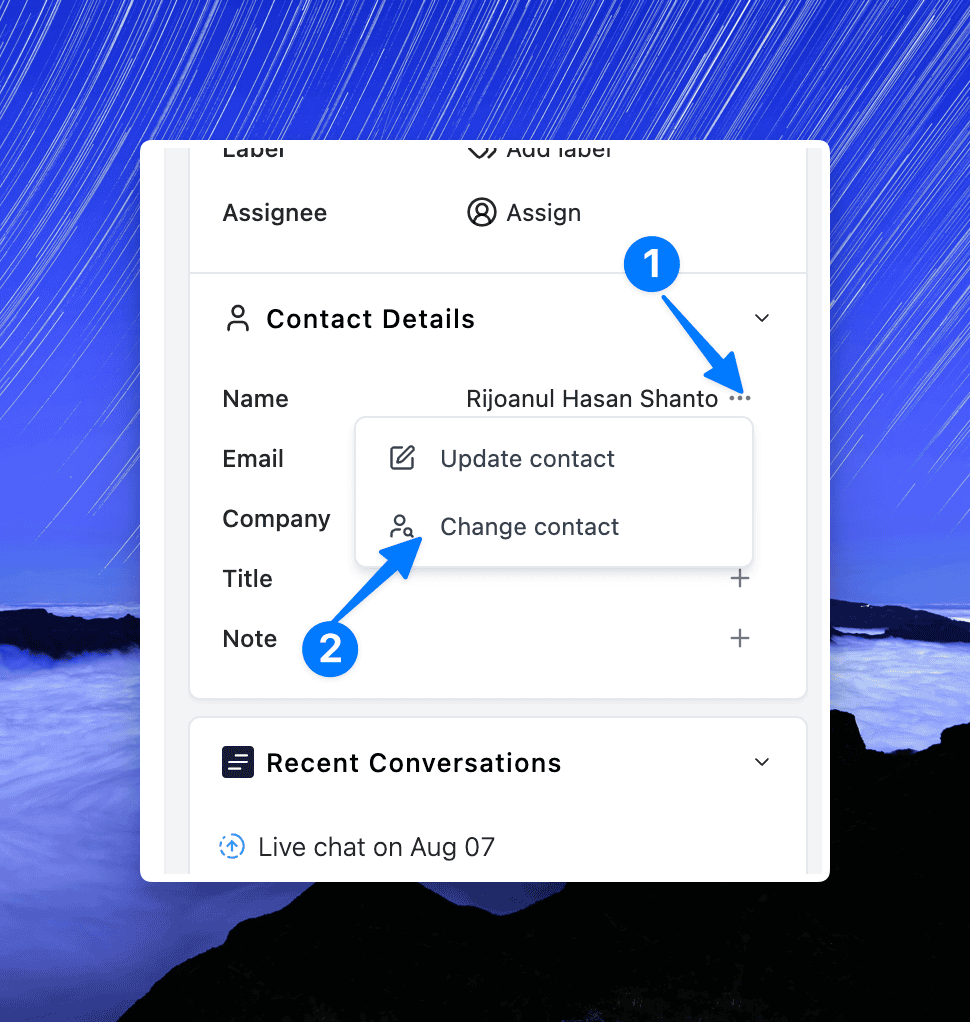
Locate the **Contact Details** section on the conversation sidebar. Click the **three-dot menu** next to the contact's name.
From the dropdown menu, click on **“Change contact.”** This opens a modal allowing you to search for or create a new contact.
### Search for an Existing Contact
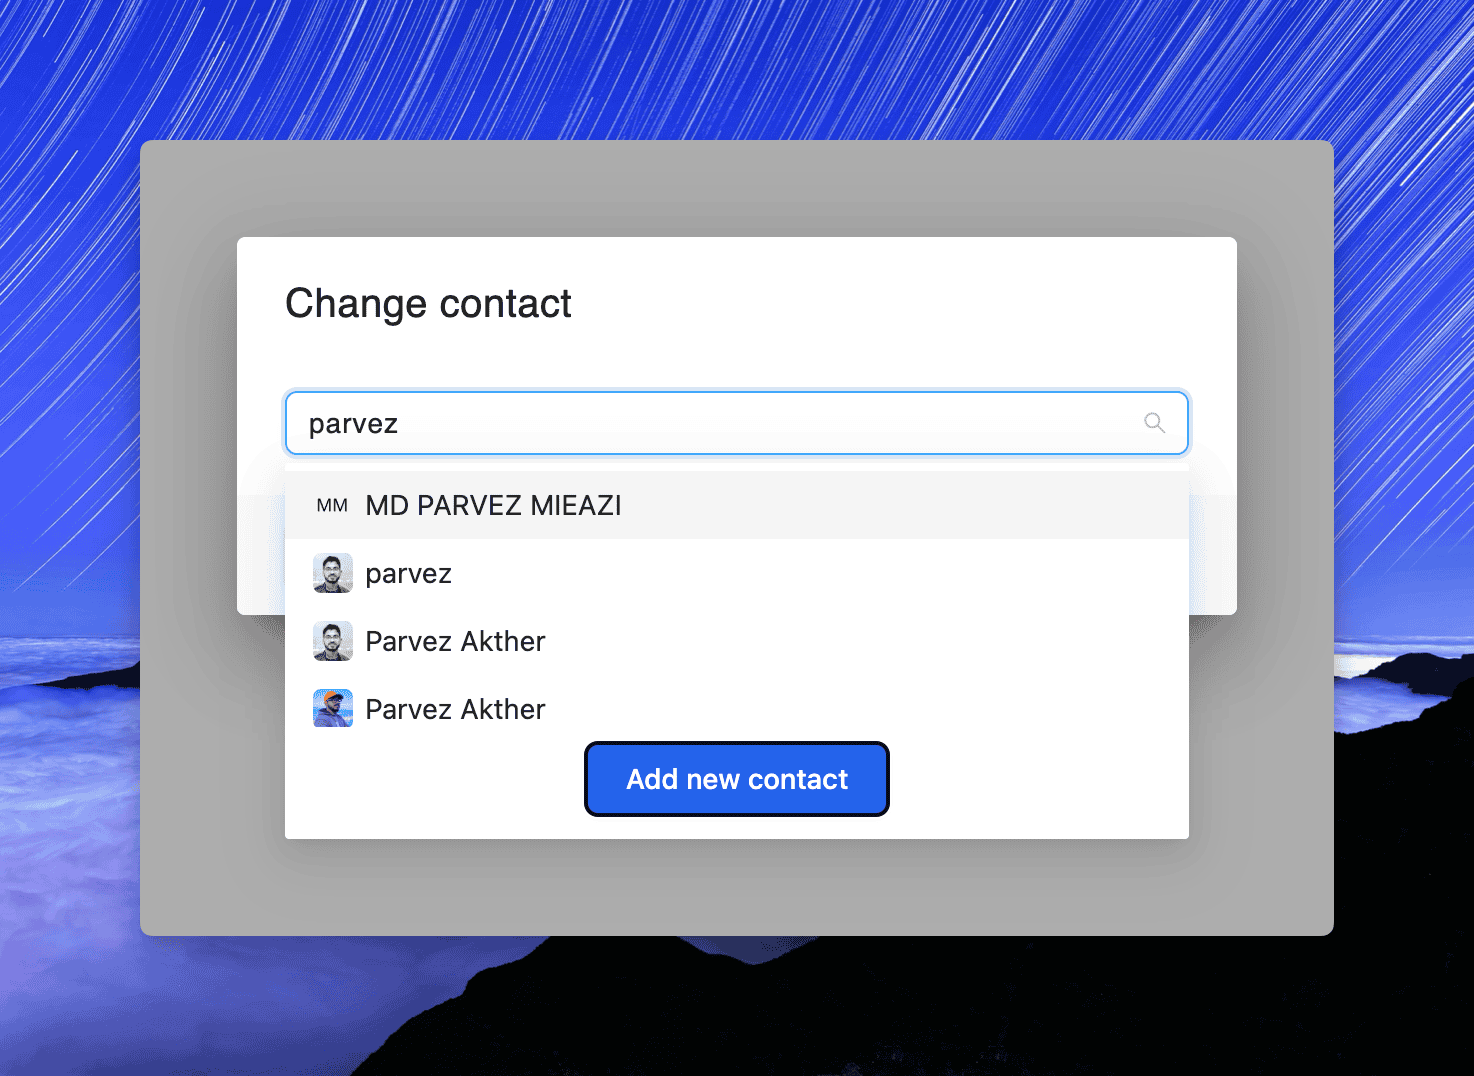
In the modal, type the name or email address of the contact you want to associate with the conversation.
* If the contact **exists**, it will appear in the dropdown. Select the appropriate contact.
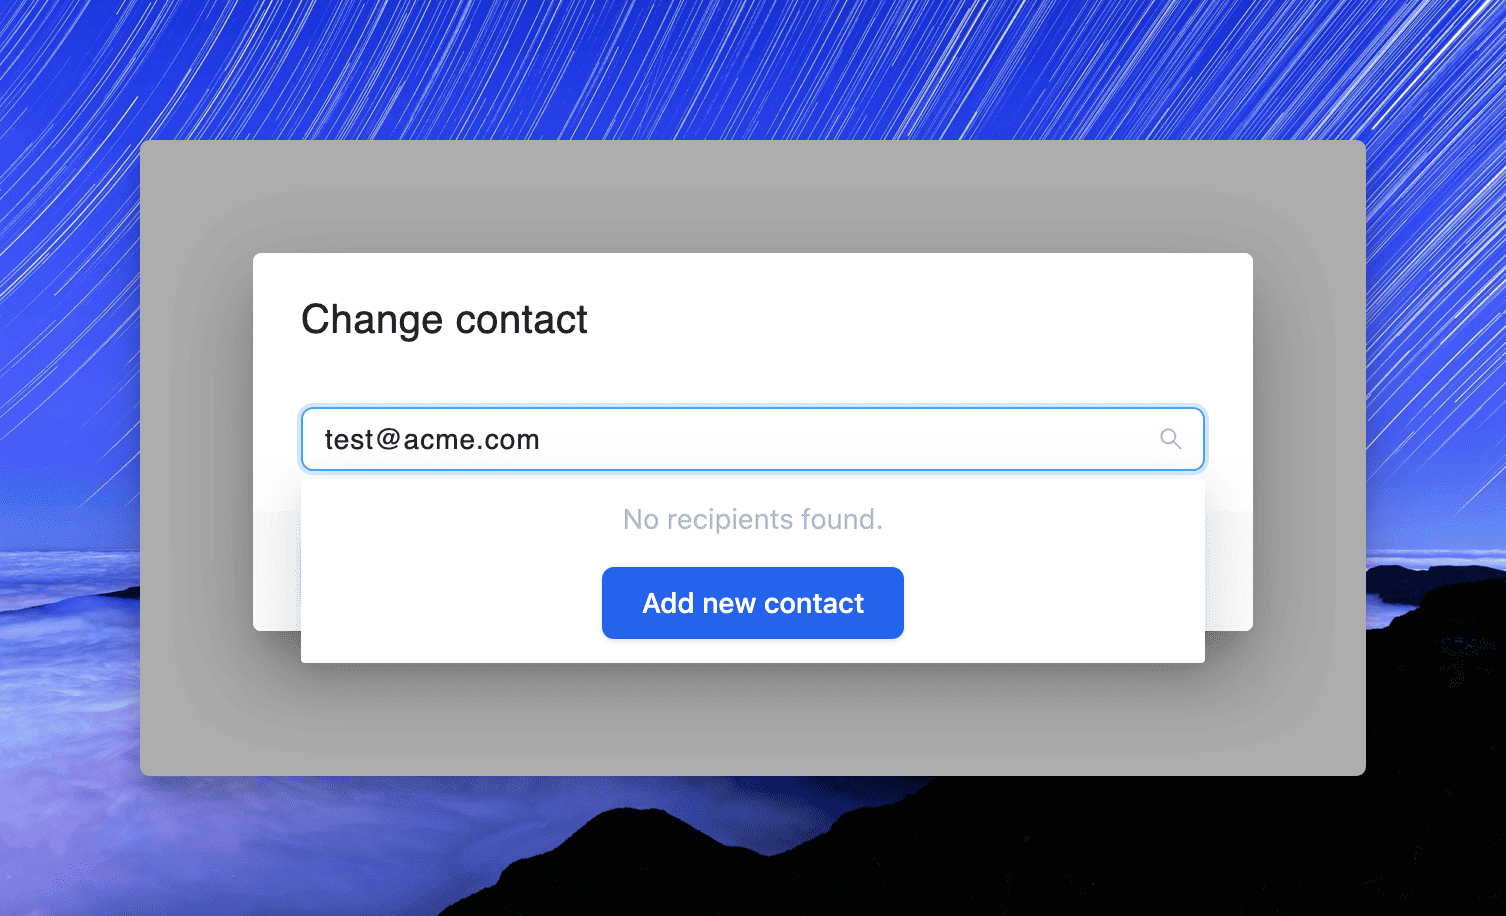
* If the contact **does not exist**, you’ll see “No recipients found.” Click **“Add new contact”** to create and assign a new contact.
### Confirm and Save
After selecting or adding the new contact, the conversation will now reflect the updated contact in the **Contact Details** panel.
### Additional Notes
* **Permissions:** Ensure you have the required permission to update contact information for conversations.
* **Data Integrity:** Changing the contact may affect conversation history and reporting. Make changes carefully.
# Cloudflare Turnstile - Stop Contact Form SPAM
Once you enable the contact form in your Knowledge Base, you may start receiving a high volume of spam emails. To prevent this, we strongly recommend setting up **Cloudflare Turnstile**.
Cloudflare Turnstile helps verify that visitors are real users—not bots—while keeping the user experience fast and seamless.
## Setup Cloudflare Turnstile
* Login in to [Cloudflare](https://dash.cloudflare.com/) and select an account
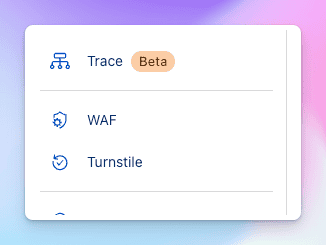
* From sidebar navigation select Turnstile
* Click **Add Widget** button, give it a name
* Click **Add Hostnames** button and select from your existing **hostnames** or add your domain/subdomain here**.**
Each ThriveDesk KB site gets a subdomain like `site.thrivedeskdocs.com`. In Cloudflare’s hostnames box, enter the full subdomain.
If you’re using your own domain or subdomain, enter that instead.
* Select your preferred **Widget Mode** and press the **Create** button
We recommend to use **Managed** mode for the widget.
* After saving the widget you'll get **Site Key** and **Secret Key**.
## Install Cloudflare Turnstile
1. Log into ThriveDesk Knowledge Base(KB) site and go to **Settings > Apps**.
2. Click **Install** button on Cloudflare Turnstile.
3. Put your **Site Key** and **Secret Key** and press **Save Changes**.
# cPanel (Webmail) Email Forwarding
In this article, we will show you how you can set email forwarding from your cPanel (Webmail)
1. Click on **Settings** from your dashboard 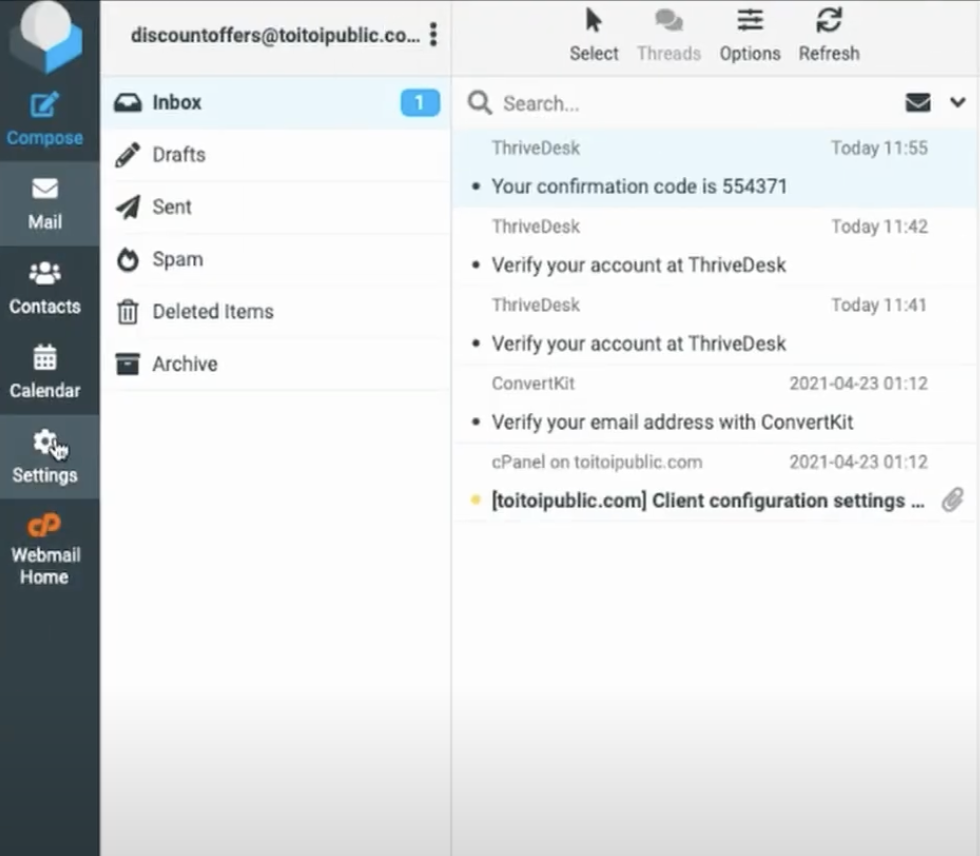
2. On the top right click on **Forwarders** 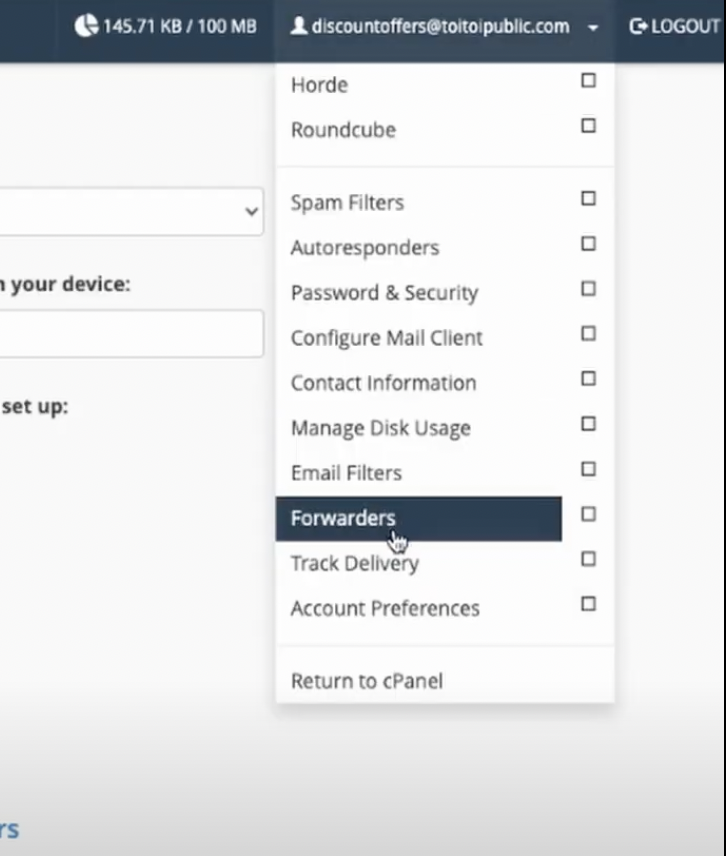
3. Click on **Add Forwarder** to setup a new forwarder. 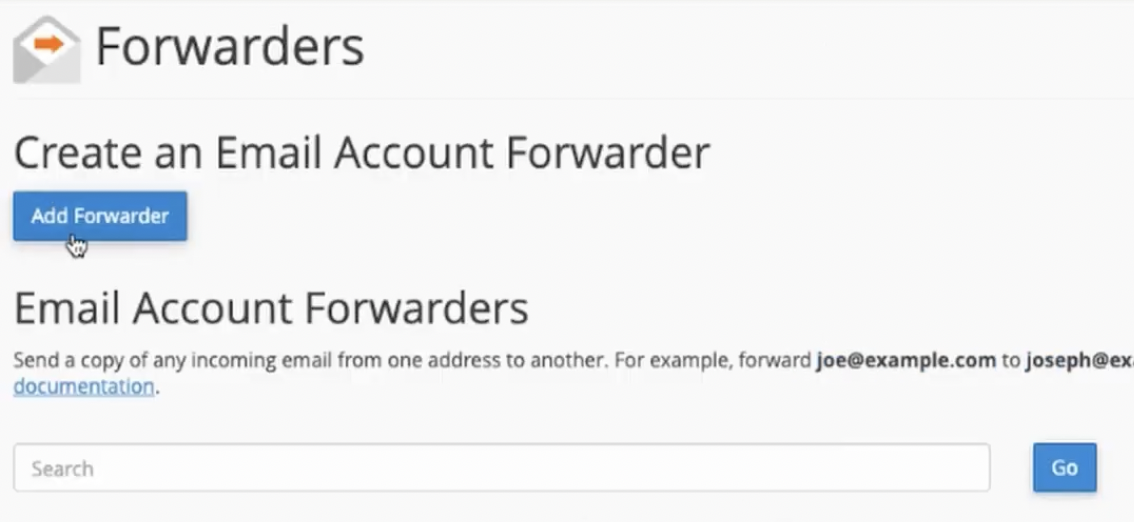
4. Input the **Inbox address** of your ThriveDesk Inbox to which you would like to set your forwarder. 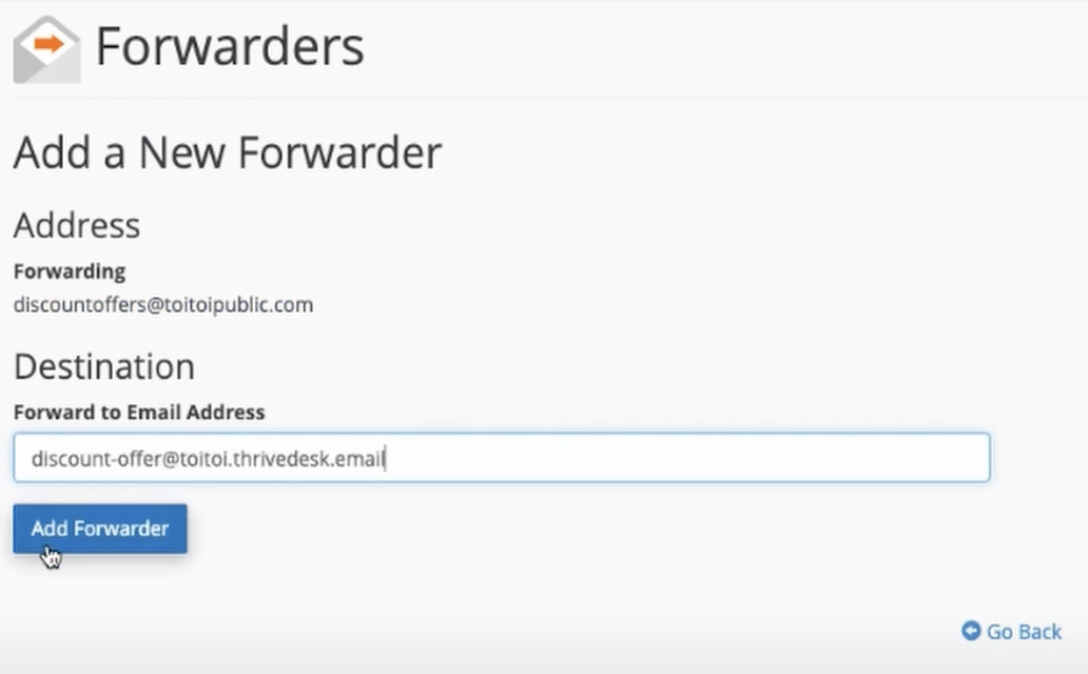
5. Go back to your ThriveDesk Inbox Settings and click on **Verify Forwarder**. 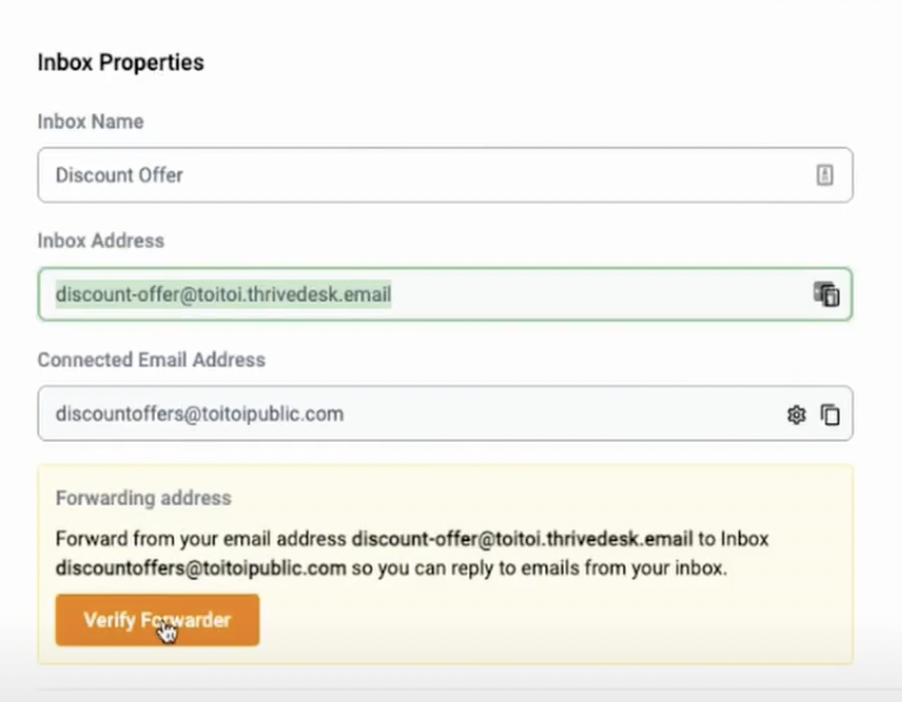
6. Finally, you will receive an email similar to the one below in your webmail inbox. Congratulation, you’ve done it.
# Create a Chat Assistant & Customize It
Administrators and Account Owners can create and manage Assistant. Depending on your plan, you can make a certain number of Assistants, and our Assistant builder makes it quick and easy to get things going.
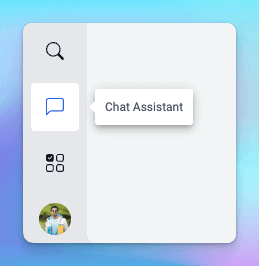
Head to **Chat Assistant** from the bottom left app panel and click on the **New Assistant** button to get started.
## Create new Assistant
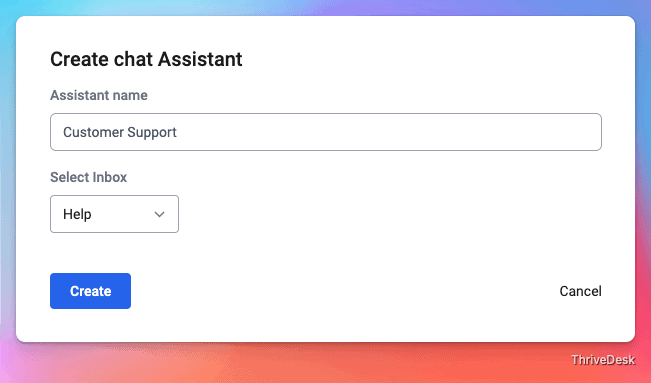
Give your assistant a name and choose Inbox from the dropdown. Chats and contact form submissions from Assistant will appear in this inbox.
## Customize your Assistant
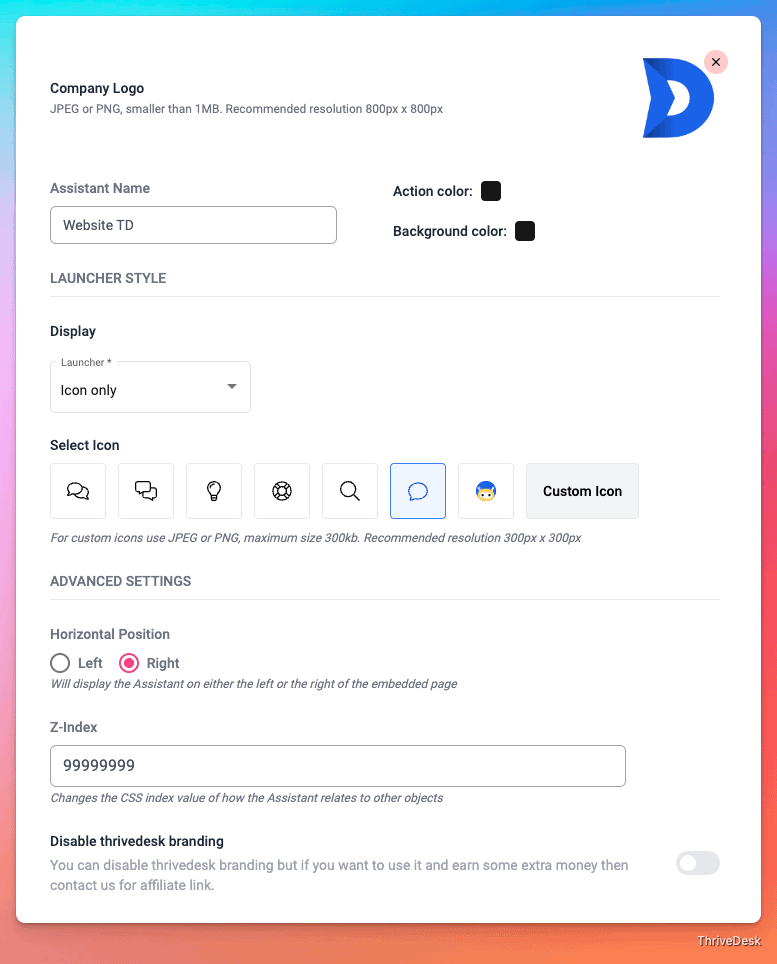
#### Assistant Identity
The Assistant name is for internal use only. Your customers do not see the name of your Assistant when using the Assistant.
Upload your logo, it has to be in JPEG or PNG format and must be smaller than **1MB**.
Select your brand colors for Action or Background color.
#### Button Style
Choose a button style that works best for you. You can select from our icon library or upload your own icon.
#### Advanced Settings
Display the Assistant on the left or right side of the page. Most people opt for the right side, but you might go with a left side embed if you have another widget in the right corner of the page.
#### Z-Index
Adding a z-index value changes the stack order of Beacon so that it’s not bumping in to other elements on the page. There’s no minimum or maximum value, and you can use negative values, too.
#### ThriveDesk Branding
Pro plan customers can toggle ThriveDesk branding on or off. If this option is disabled for you, you’ll see a small Powered by ThriveDesk mark displayed on the bottom of your Assistant.
## Connecting Apps
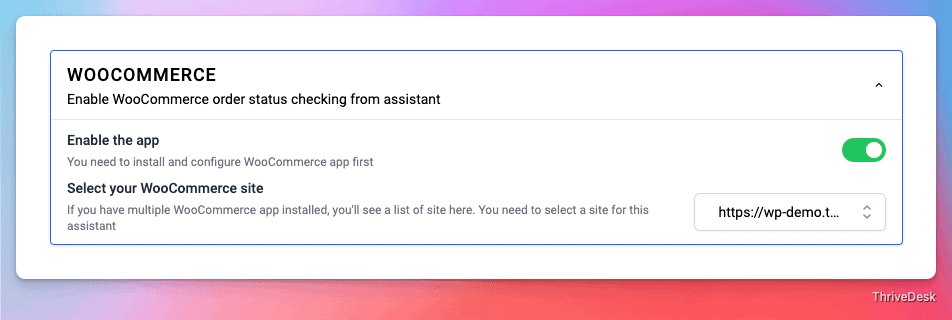
Your **Assistant > Apps** page will show you any apps from the ThriveDesk app store that work with Assistant. By turning on the app, you connect the app to the assistant.
## Connecting Doc
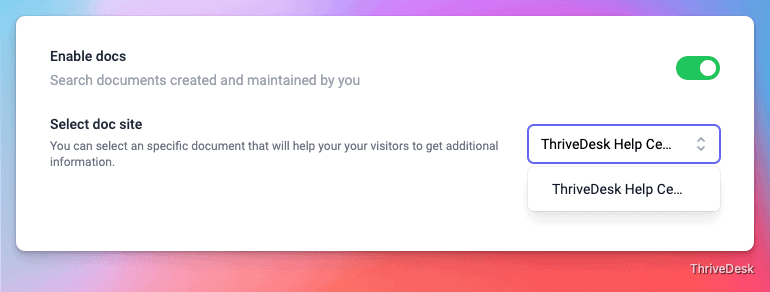
If you do not have a public doc you will not be able to toggle the switch to enable Docs in Assistant. Make sure you have [created a doc site](https://help.thrivedesk.com/en/thrivedesk-docs) first then come back here and try again!
Enable Docs articles to be served in your Assistant. If you have more than one Docs site, choose the site you wish to serve in the Assistant. One Assistant can only connect to one Docs site.
## Contact Form Settings
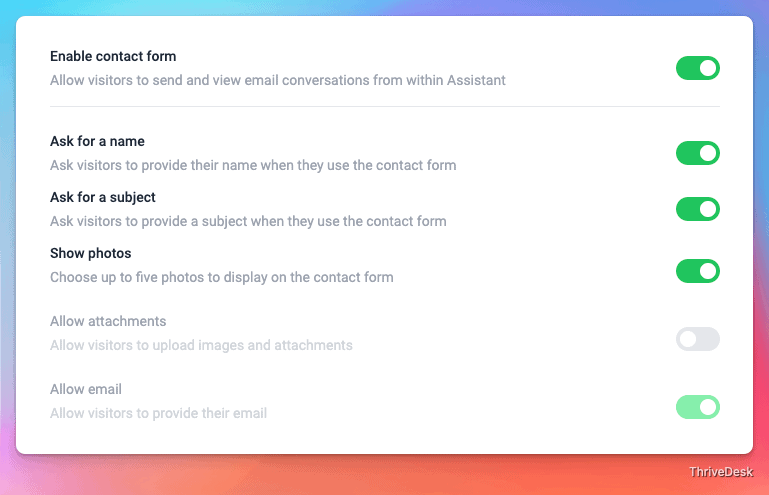
Use the contact form to allow your customers to email you right from the Assistant.
#### Ask for a name
Ask visitors to provide their name when they use the Assistant contact form. If you’re using the [Assistant JavaScript identify](https://developer.thrivedesk.com/assistant/assistant-for-web/javascript-api) feature, the name field is automatically pre-filled.
When you enable this field, it is a required field on your contact form.
#### Ask for a Subject
Ask customers to provide a subject when they use the Assistant contact form. When you enable this field, it is a required field on your contact form.
#### Allow attachments
Allow customers to upload images or attach files when sending a message through the contact form. The maximum file size for any single attachment is 5MB. Customers can attach up to 3 images or files per message.
#### Show photos
Enable Show photos to choose and manage which of your ThriveDesk User's profile pictures show in the Ask screen in Assistant.
## Chat Settings
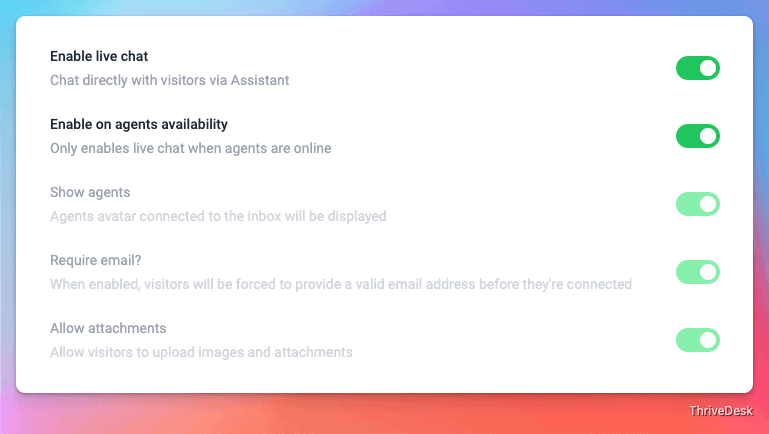
Enable live chat feature so your visitor can chat directly with your support agent from the Assistant.
#### Enabling on agent availibility
Live chat feature enable when an agent logged into ThriveDesk and his status Available for chat. Live chat alwyas visible if you toggle this settings off.
#### Show agents
VIsitor will see which agent he's chatting with. You can't toggel this off.
#### Require email
Enable this feature to require an email address before a chat session begins.
No email transcript will be sent if an email address has not been entered before the chat session has ended, even if the email address is added to the transcript conversation later.
#### Email transcript
Choose to have an email transcript emailed to the customer when the chat has ended.
## Translating Assistant
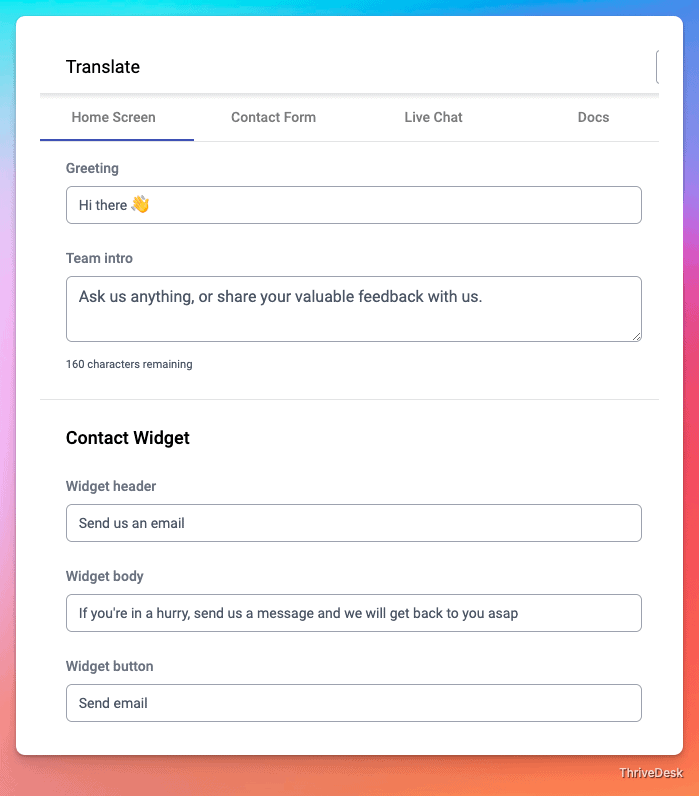
Visit the Translate tab to personalize every label that your consumers see in your Assistant. You may want to translate the content into another language or modify the English wording to fit your own brand and service standards.
## Add Assistant to Your Website or App
The Assistant installation code is just one JavaScript calls that will load the Assistant wherever you want to install it. Head to Chat Assistants > \[Choose your Assistant\] > Installation tab.
Click the Copy button to copy the entire code you see there to your clipboard.

Add that code to your website's code on any pages where you want Assistant to appear. It's that simple!
Obviously, you will need to know how to add it to your website's code in order to do so. If you are unsure how to do so, contact the person or team responsible for maintaining your website and email them the code.
Choose your platform below:
* WordPress
* [Joomla](//help.thrivedesk.com/en/live-chat-for-joomla)
* Shopify
* [Wix](//help.thrivedesk.com/en/add-assistant-to-wix)
* [Webflow](//help.thrivedesk.com/en/add-assistant-to-webflow)
* [Squarespace](//help.thrivedesk.com/en/add-assistant-to-squarespace)
* [Weebly](//help.thrivedesk.com/en/add-assistant-to-weebly)
* [Dorik](//help.thrivedesk.com/en/add-assistant-to-dorik)
# Create a New Ticket
Sometimes you may need to create a ticket on behalf of a customer — for example, when they call you directly, or when you want to start a new email thread from inside ThriveDesk.
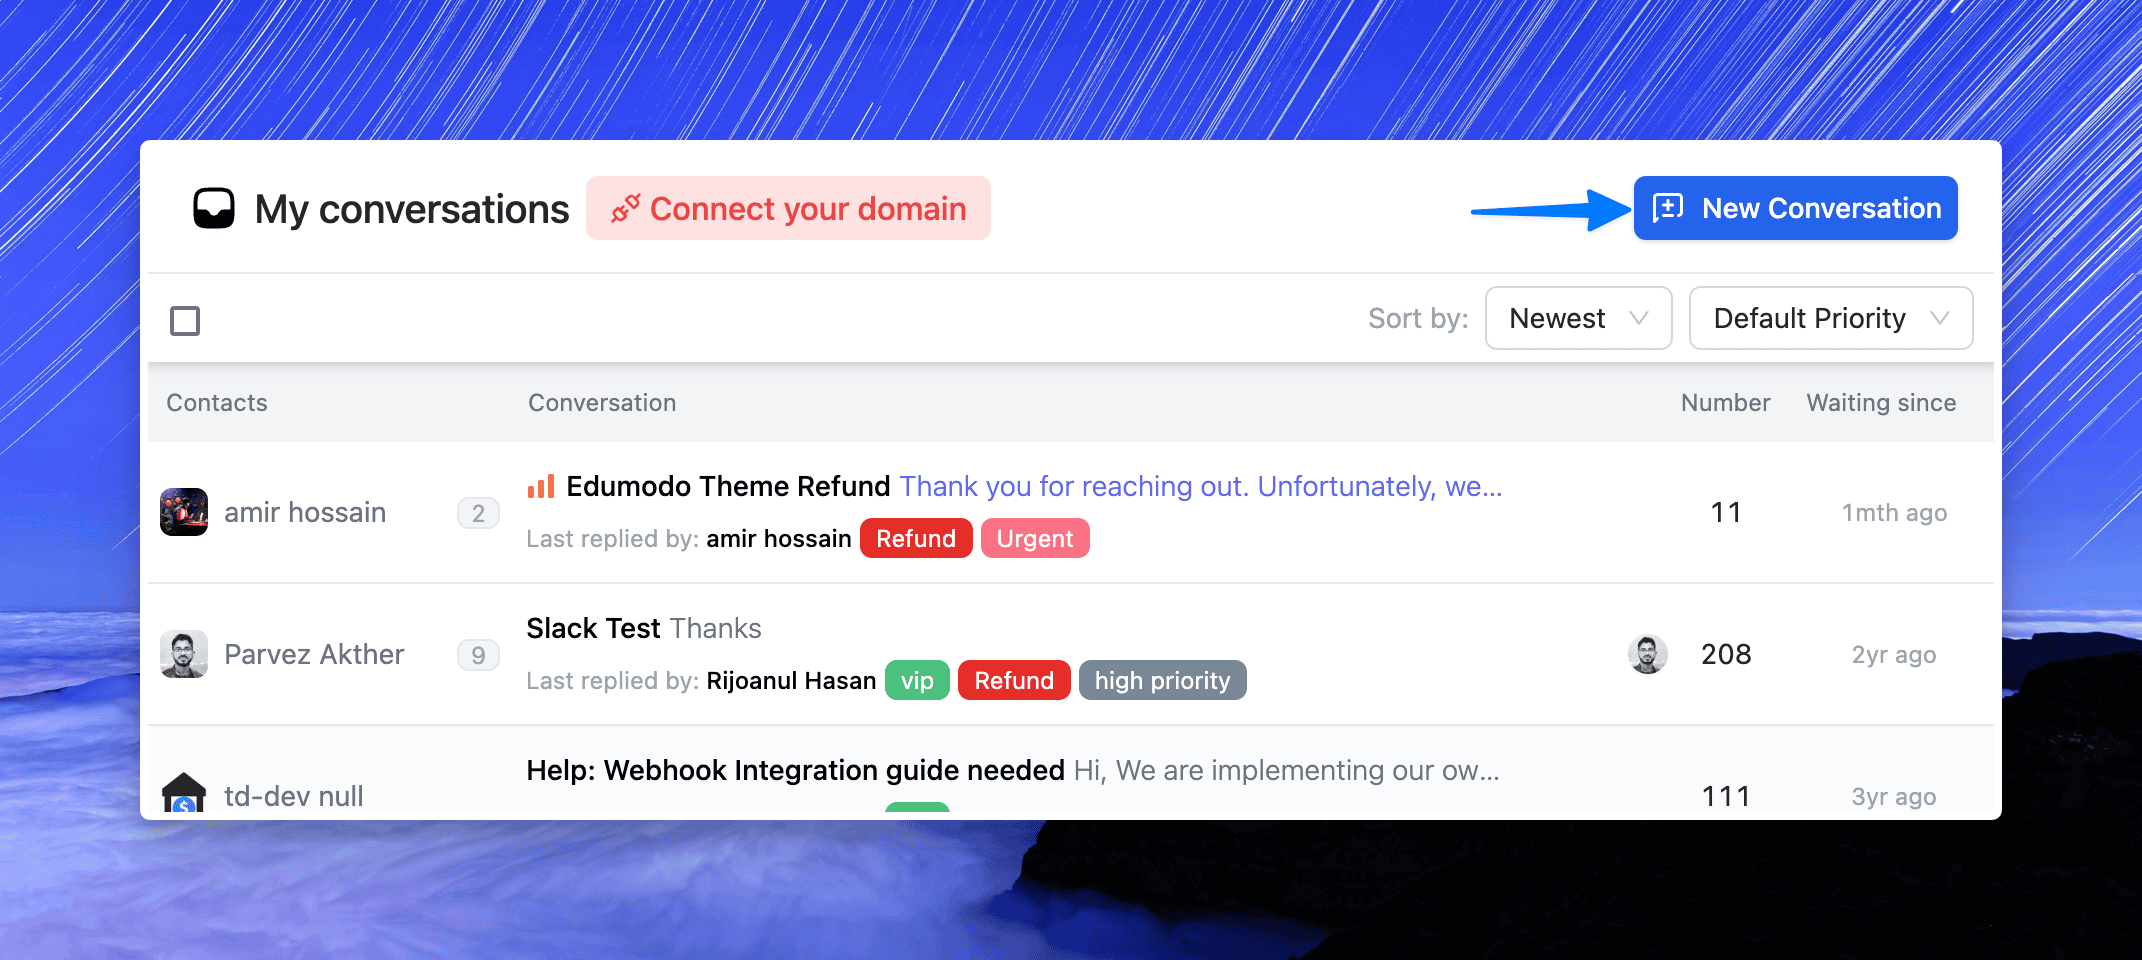
The **New Conversation** button allows you to manually create a ticket and send it to the appropriate recipient.
---
## Creating a New Ticket
1. From the **My Conversations** view (or any inbox), click the **New Conversation** button in the top-right corner.
2. A new ticket form will open.
---
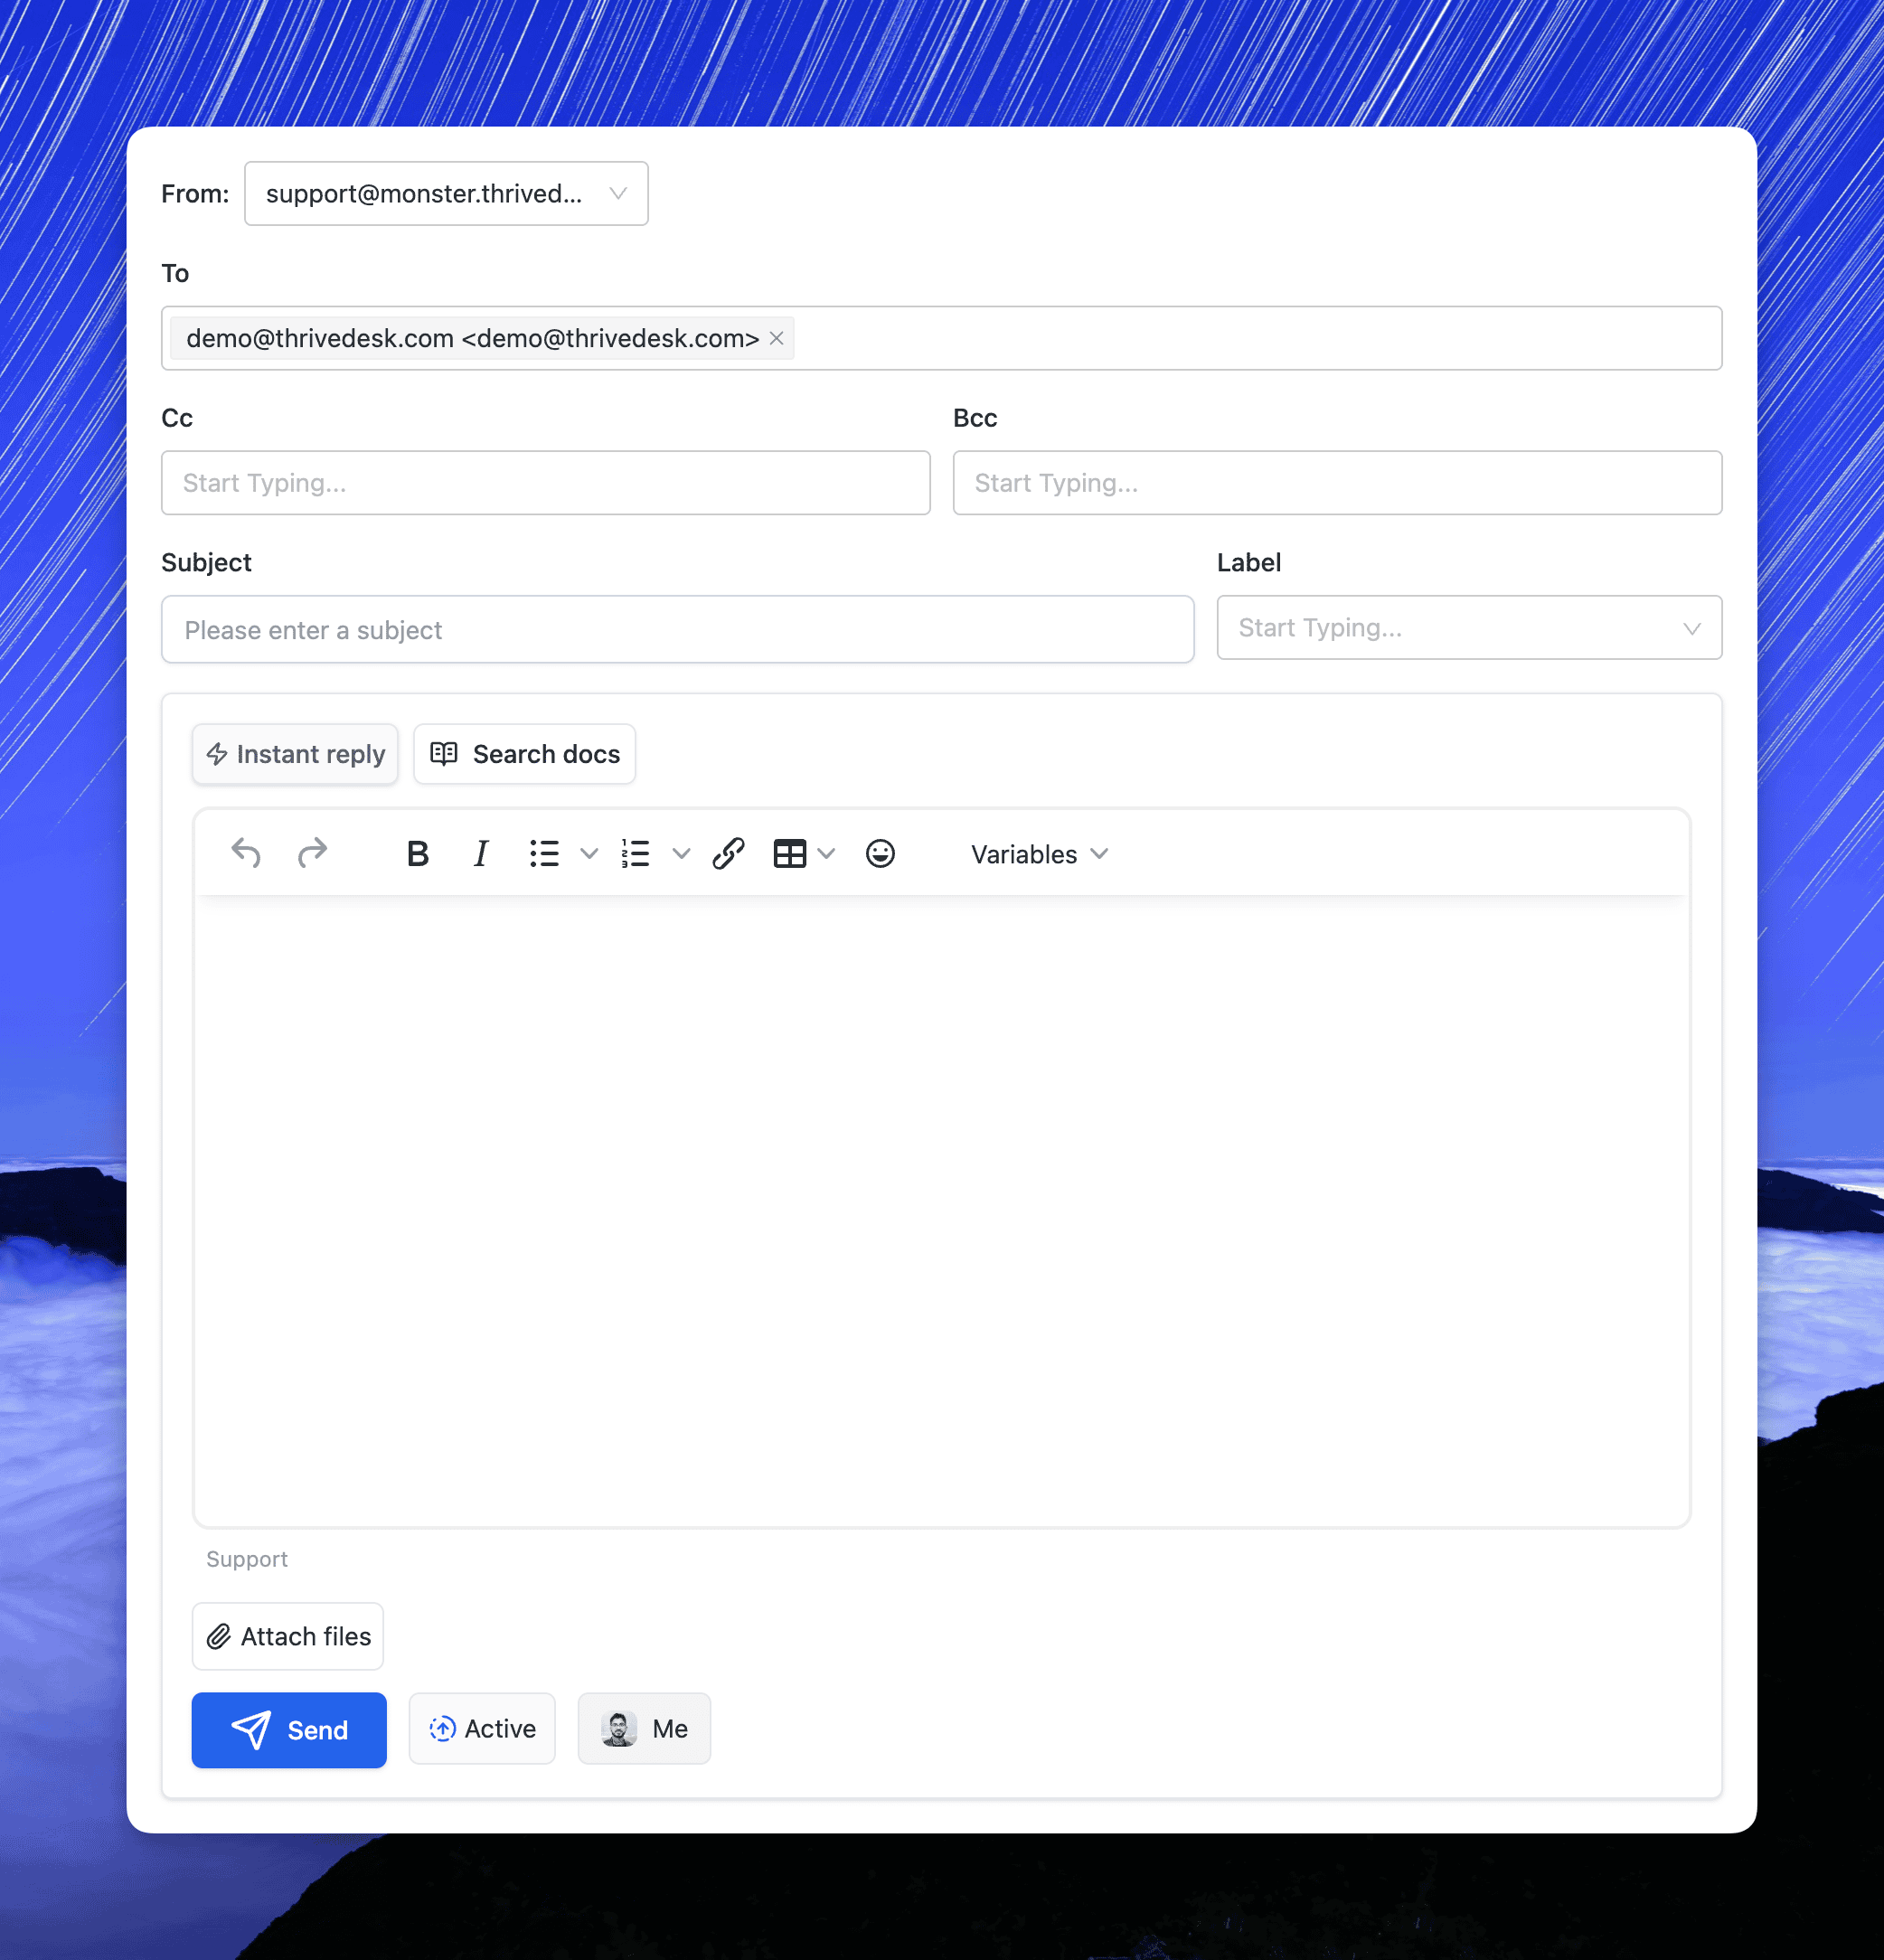
## Ticket Form Fields
* **From** – Select the mailbox (email address) you want to send the ticket from.
* **To** – Enter the recipient’s email address. Press **Enter** after typing the address to confirm it. Multiple recipients can be added.
* **Cc / Bcc** – Add additional recipients (Cc for visible, Bcc for hidden).
* **Subject** – Enter the subject line of the ticket. This becomes the conversation title.
* **Label** – Apply labels to categorize the ticket (e.g., *Urgent*, *Refund*, *VIP*).
* **Message Body** – Compose the main content of your ticket. Use formatting, canned replies, or variables for personalization.
* **Attach files** – Add documents, images, or other files as attachments.
* **Status** – Choose the initial status (default is **Active**).
* **Assignee** – Select who should handle the ticket. By default, it’s assigned to you.
* **Send button** – Click **Send** to create and dispatch the ticket.
---
## Troubleshooting
* **Email not sent:** Ensure the recipient’s email address is confirmed by pressing **Enter** after typing it. If not confirmed, the system will not send the ticket.
* **Ticket appears blank to recipient:** Verify that you added content in the **Message Body** before sending.
* **Attachment not delivered:** Make sure the file size is within your email provider’s limits (commonly 20–25 MB).
* **Wrong sender address:** Double-check the **From** field to ensure you selected the correct mailbox.
* **Ticket not visible to teammate:** Confirm that the ticket was assigned to the correct inbox and teammate.
---
## Best Practices
* Always confirm email addresses before sending.
* Use labels to make filtering and reporting easier.
* Assign tickets right away to the correct teammate.
* Include all relevant details when creating tickets on behalf of a customer
# Setup Custom Domain for Docs
Your Docs site comes with its own URL that's your Sub-domain at `thrivedeskdocs.com`. When you create a new doc site, you can pick your own subdomain as you see fit, eg: `tesla.thrivedeskdocs.com`
You can share that address with your customers, or you can set up a custom domain, e.g. docs.yourdomain.com, to use with your Docs site instead. There is no additional charge to use a custom domain name with your Docs site.
## Enter your custom domain in Doc settings
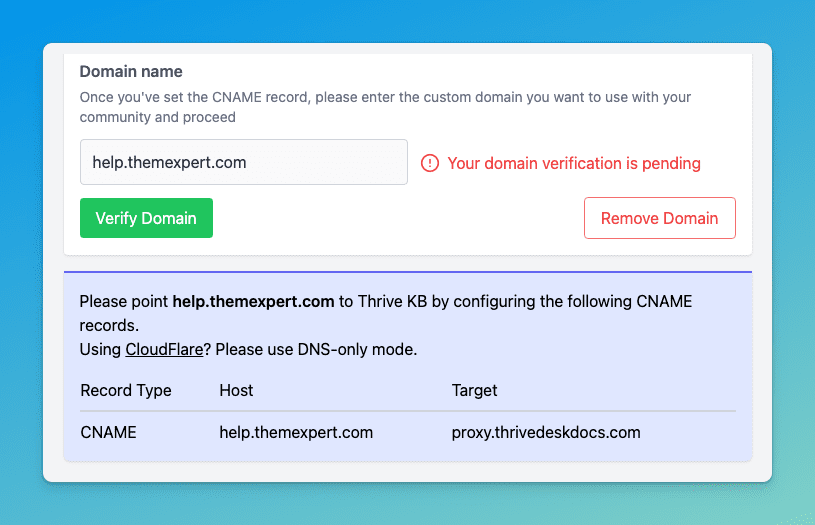
Head over to your Doc site **Settings > Custom Domain** page and enter the custom domain you want to use for your doc site. Let’s use `help.themexpert.com` as an example and press Save changes:
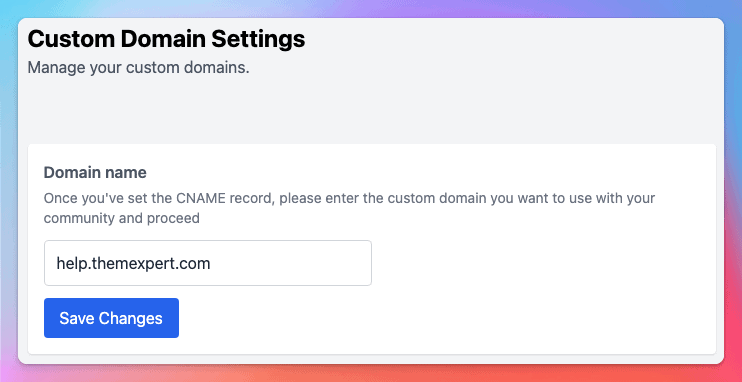
When you save the domain you'll see the DNS configuration settings
## Create a custom CNAME record
* Go to your DNS provider’s website (e.g. GoDaddy or Cloudflare). If you’re choosing one for the first time, go with one that supports SSL.
* Create a CNAME (‘canonical name’) record for your custom domain.
* Point it at ThriveDesk's host domain `proxy.thrivedeskdocs.com`
### How to create a custom CNAME record with Cloudflare
These steps will vary, so check with your own DNS provider for support. As an example, here’s how to set up a CNAME record with Cloudflare:
1. Set up Cloudflare as the resolver for your custom CNAME by [changing your domain nameserver to Cloudflare](https://developers.cloudflare.com/dns/zone-setups/full-setup/setup#step-3--update-your-nameservers).
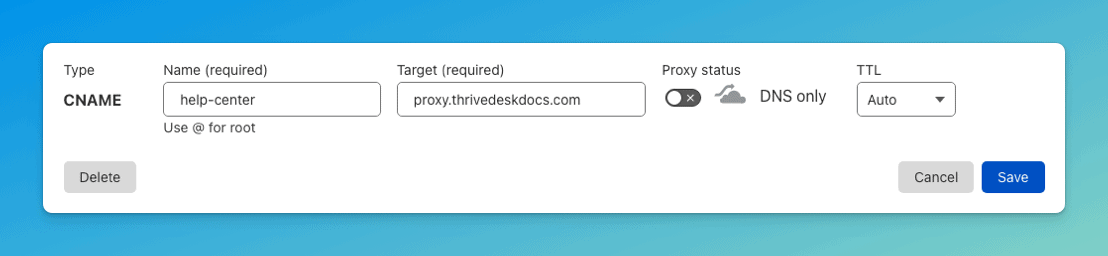
2. Go to the ‘DNS’ section in Cloudflare and add a CNAME record for your Help Center custom domain. Give the CNAME a Name based on the first part of your custom domain e.g. if your custom domain is help-center.example.com, use `help-center`.
3. Point it at ThriveDesk's host domain `proxy.thrivedeskdocs.com`
4. Toggle the Proxy status DNS only
**Note:** In most cases, the SSL certificate for your custom domain will be automatically issued within a few minutes of saving these settings and you're all set. DNS propagation can some times take a little longer, especially if you edited a CNAME record that existed previously. If more than a couple of hours have passed and you're not seeing your Docs site at your custom domain, [reach out to our support team](https://www.thrivedesk.com/contact/) and we will check into things for you!
### Help for your DNS hosting provider
These are some of the biggest DNS hosting providers, but there are thousands, if not millions, more. We've put links to some of the most popular providers' CNAME or DNS help pages below.
If your DNS provider is not listed here, you require more assistance, or you do not know how to log in to your account, you will need to contact customer support for assistance.
* GoDaddy: [Domains Help: Add a CNAME record](https://ie.godaddy.com/help/add-a-cname-record-19236)
* Namecheap: [How to Create a CNAME Record For Your Domain](https://www.namecheap.com/support/knowledgebase/article.aspx/9646/2237/how-to-create-a-cname-record-for-your-domain/)
* Network Solutions: [Host Aliases (CNAME Records)](https://customerservice.networksolutions.com/prweb/PRAuth/webkm/help/article/KC-454/networksolutions)
* DNSMadeEasy: [CNAME Record](https://support.dnsmadeeasy.com/support/solutions/articles/47001001393-cname-record)
* Google Domains: [Create an A or CNAME record](https://support.google.com/a/answer/47283?fl=1)
* Hover: [Managing DNS records](https://help.hover.com/hc/en-us/articles/217282457-Managing-DNS-records-#h_5eab4aa7-b044-4cc6-a3c0-5869f583edc8)
* Rackspace Cloud DNS: [Create DNS records with Cloud DNS](https://docs.rackspace.com/support/how-to/creating-dns-records-with-cloud-dns/)
* Bluehost: [DNS Management: How to Add, Edit, or Delete DNS Entries](https://www.bluehost.com/help/article/dns-management-add-edit-or-delete-dns-entries)
* Cloudflare: [How to manage DNS records](https://developers.cloudflare.com/dns/manage-dns-records/how-to/)
## Common Questions
**Can I have more than one custom domain point to my Docs site?**
One CNAME record can only be pointed to one Docs site at a time. Extra CNAME records that point to the same Docs site won't work as planned and could lead to security vulnerabilities.
**Can I use a directory like https://example.com/help?**
We can only help with Docs if you use a custom subdomain. Your custom domain for your Docs site must be a subdomain of your main domain.
**What steps do I need to take if I want to change my custom name or remove it?**
If you change your custom domain, delete the previous CNAME record you created at your DNS provider first, then create your new CNAME record and update your Docs site settings. The propagation time will apply to this change.
If you want to remove your custom domain name, remove the custom domain from the Docs site settings first, then delete the CNAME record at your DNS provider.
# Adding Custom Fields to Ticket
Custom Fields allow you to collect, organize and use additional data on your tickets (or conversations) beyond the standard fields. With Custom Fields you can capture information such as product version, customer tier, issue category, or any other attribute relevant to your support process. You can then use that information in filtering, reporting, workflows and automation.
Using Custom Fields you will:
* Extend the data you collect on each ticket
* Maintain consistent data across tickets by using predefined field types and options
* Use the collected data in views and reports to improve visibility
* Make certain fields required so that key data is not omitted
Custom fields are available on the **Unlimited** plans.
## How Custom Fields Work
Each Inbox can have any number of Custom Fields but we recommend to keep it low for better management. There are 4 supported field types:
* **Dropdown**: A list of predefined options; user selects one.
* **Single‑line text**: Free text entry on one line.
* **Multi‑line text**: Free text entry over multiple lines.
* **Toggle**: A toggle selector for boolean value.
You can specify that a custom field is required. Users must fill in a required custom field when sending a reply to the conversation. Custom fields appear in a few different places:
* In the sidebar of conversation.
* On the new conversation page when sending a new email, or when logging a new phone conversation.
* In Assistant if you enable the option. See Manage Assistant Contact Settings for the details on using custom fields in Assistant.
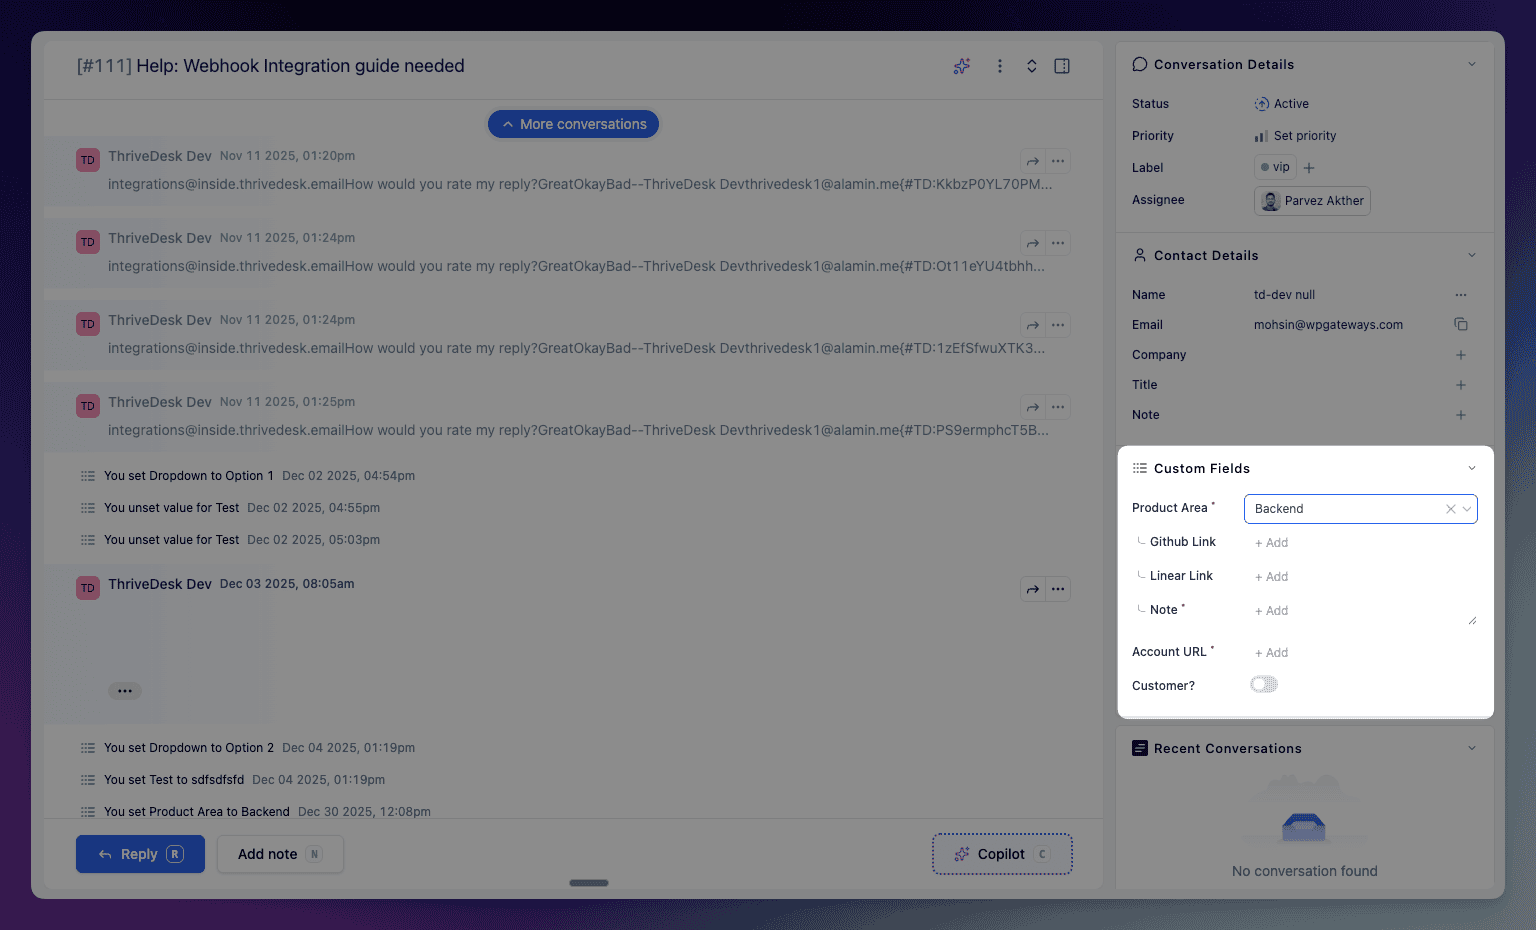Any single custom field belongs specifically to a single inbox. If you move a conversation from one inbox to another, the custom field data will not carry over even if you have custom fields in that inbox with the same name.
## Conditional Fields
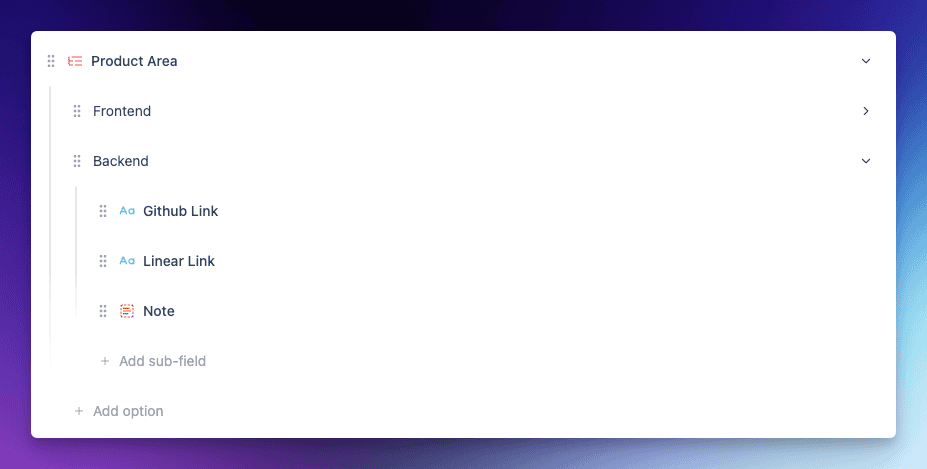Conditional Fields allow you to control the visibility of certain custom fields based on the value selected in a **Dropdown** field. This helps keep your ticket forms clean and relevant, showing only the fields that are necessary for a specific situation.
For example, if you have a dropdown field called **Issue Type** with options such as *Billing*, *Technical Issue*, and *Feedback*, you can configure conditional fields so that:
* When *Billing* is selected, a field called **Invoice Number** appears.
* When *Technical Issue* is selected, fields like **Operating System** and **App Version** become visible.
* When *Feedback* is selected, only a **Feedback Category** field appears.
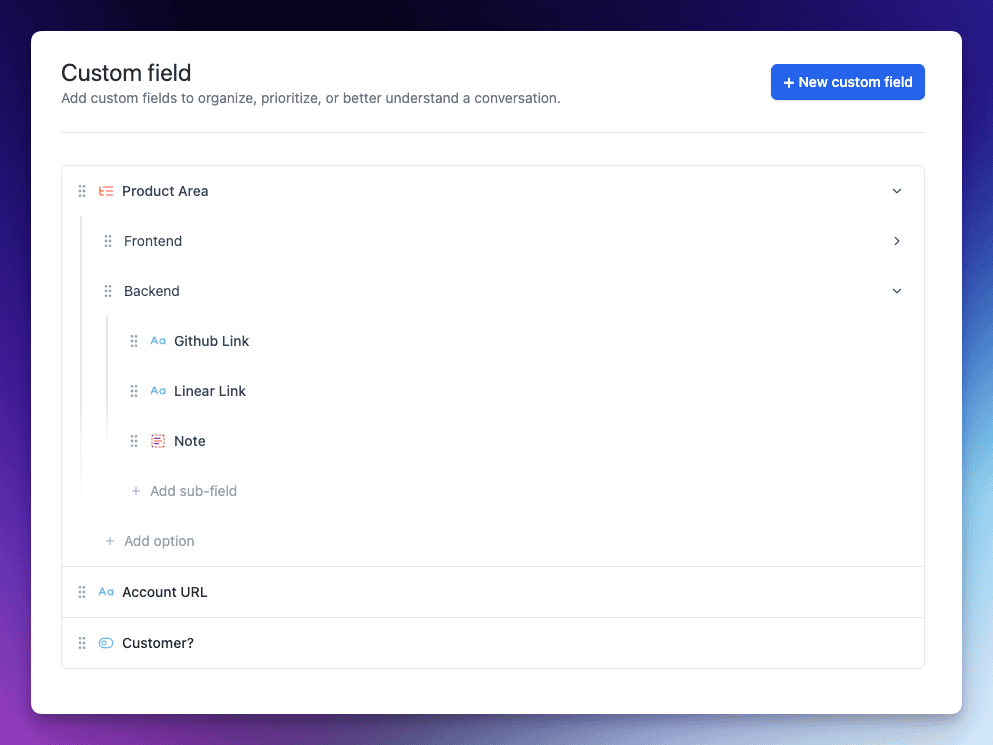
When you create Dropdown field you can easily create options and sub-fields with visual drag and drop interface. Sub-fields will only appear when you select the specific option from parent list.
Conditional logic applies **only** to **Dropdown** fields.
## Create and Edit Custom Fields
Custom Fields is an option in Inbox Settings and only Administrators and Account Owners can add or edit custom fields by default.
### Creating custom fields
Head over to your **Inbox > Settings** **>** **Custom Fields**. Click **+ New Custom Field**.
### Start building the field
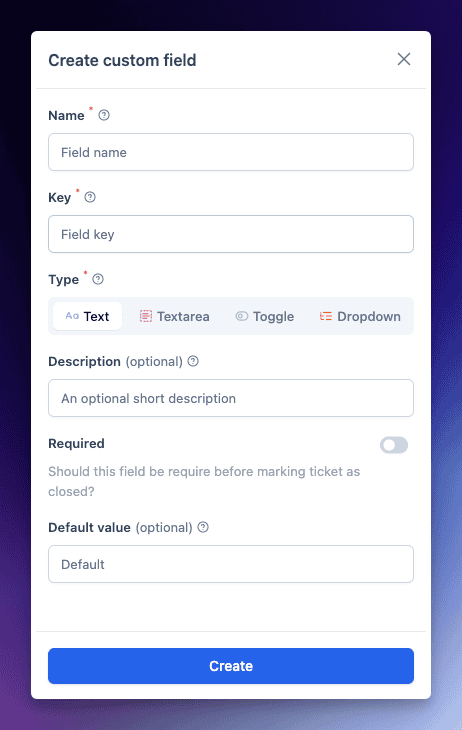
The Name will be visible to agent while replying to ticket and customers when using Custom Fields in Assistant.
Key field will only use on the API and must be unique.
Select a field type. Choose from a dropdown, single line, multi line, or toggle.
Make the field required by flipping the **Required** toggle to the on position. Users must populate a required field before sending a reply.
The example shown here is a dropdown field. You can add new options by clicking the **+** button, then re-order each option by dragging and dropping. Click the **Save Field** button to save the field.
You can select or add default value for the field.
### **Edit existing fields**
Click on the field title bar and edit screen slide from the right. You can change the descriptions, or whether or not the field is required and default value.
You cannot change the field name, type and key.

## **Delete Custom Fields**
Click the red Delete button and you'll be presented with a confirmation screen. Click **Ok** to confirm deletion. All the sub sub-fields associated with the field will also get deleted.
**deletion** is permanent, and all data that was in that custom field on every conversation will be gone forever. There is no option to restore a deleted custom field or retrieve the data.
# Easy Digital Downloads Integration
Easy Digital Downloads (EDD) is a popular and comprehensive WordPress plugin for selling digital products. From eBooks to WordPress plugins, PDF files, and more, you can sell any digital product and manage their licenses from your WordPress dashboard.
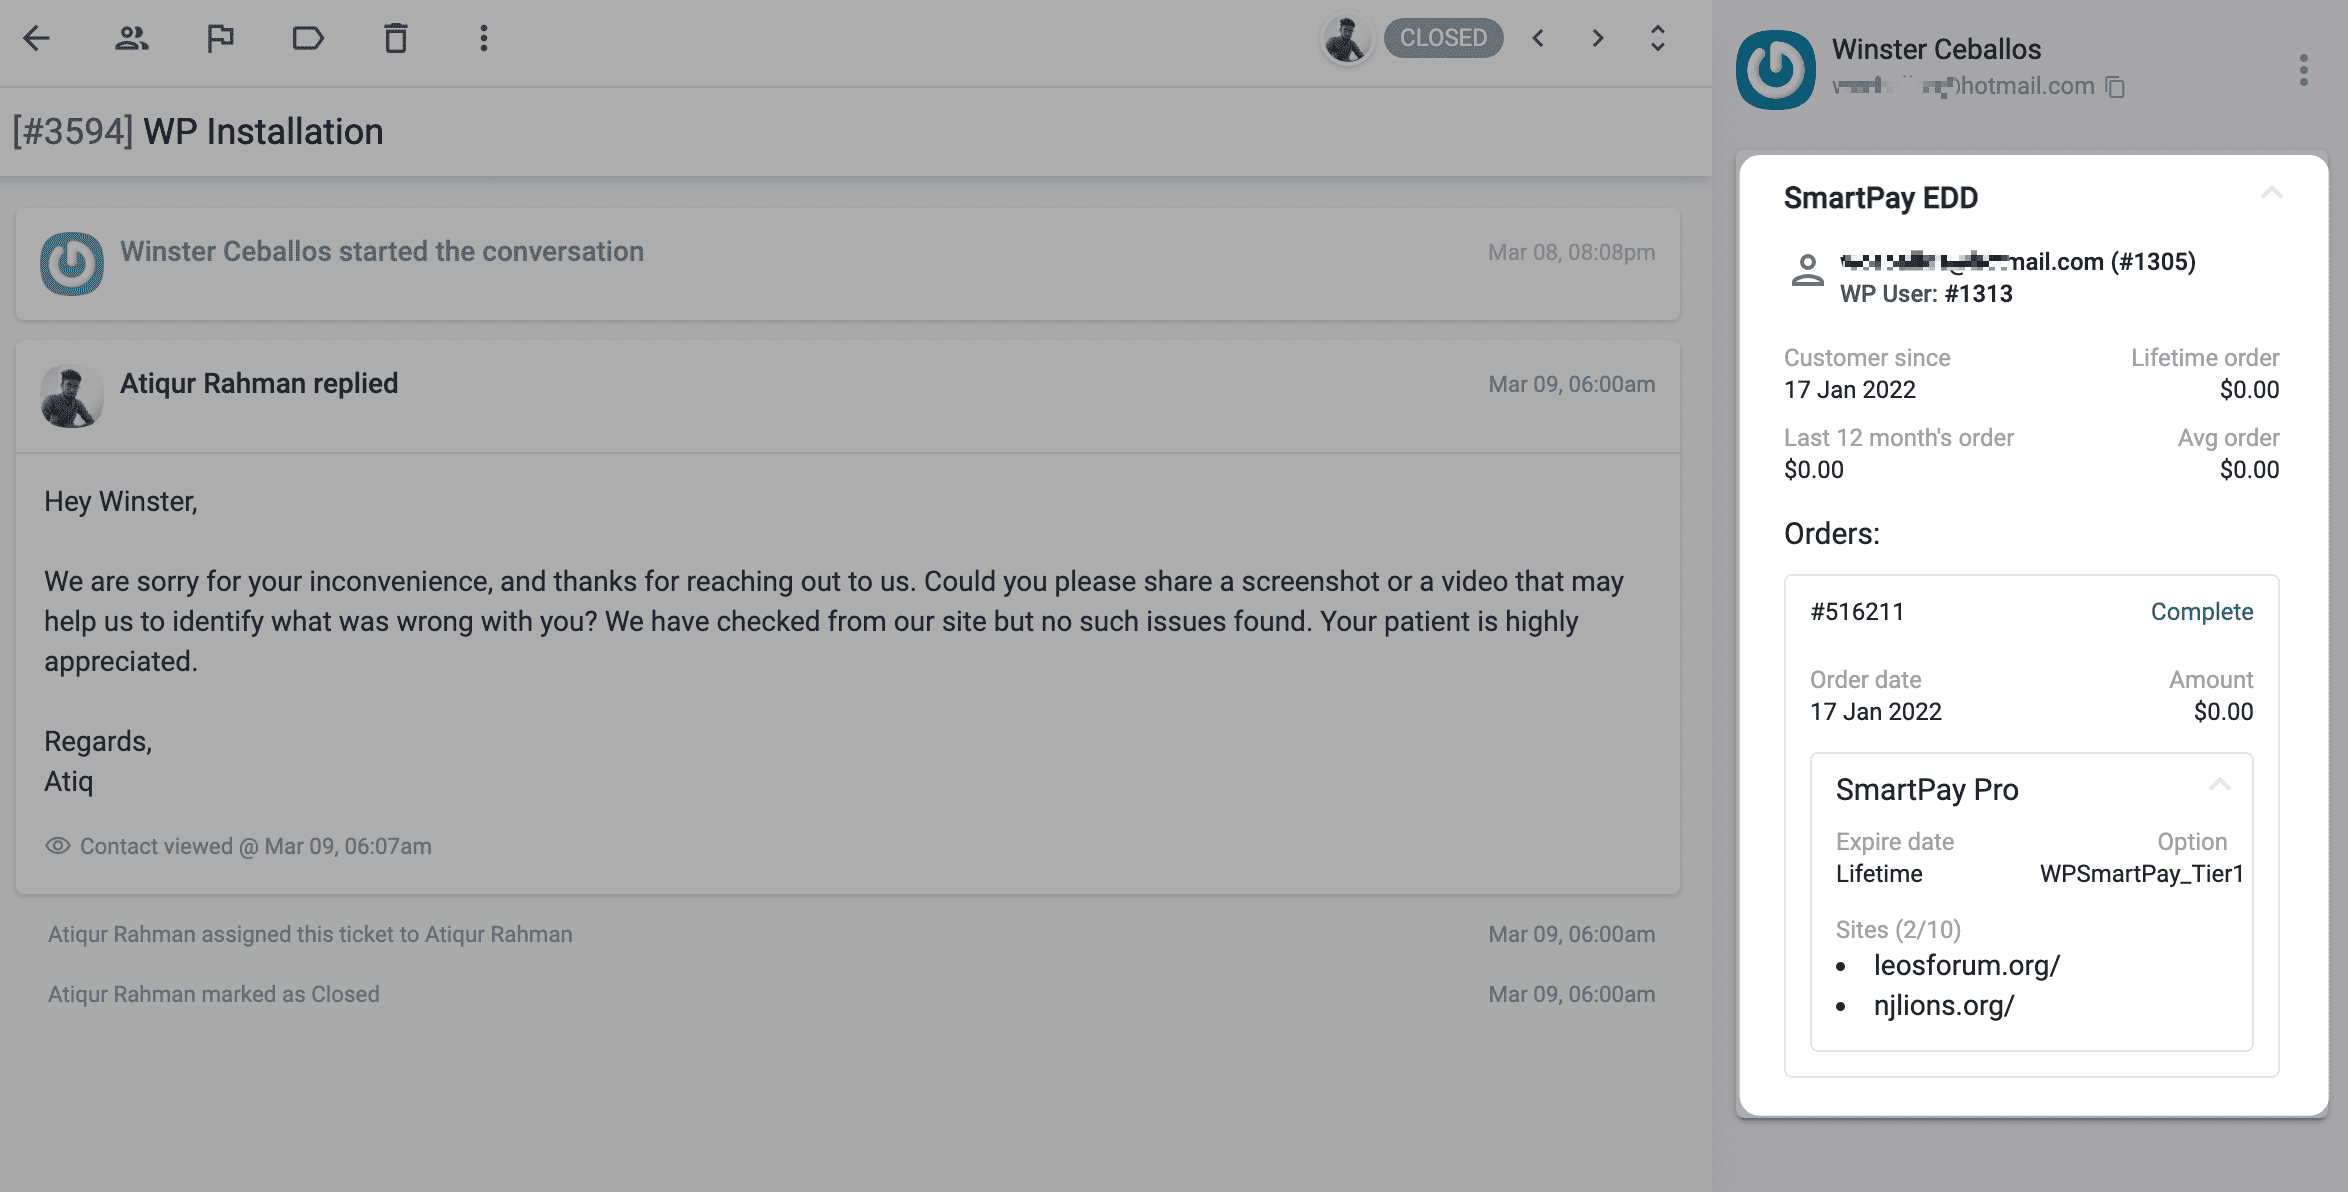
ThriveDesk's app for Easy Digital Downloads brings the data you need directly into conversations with your customers. This app automatically imports your contact information and pulls in key metrics like lifetime value, annual value, average order value, and license information from each order.
If you’re new here, please follow our [Getting Started guide](//help.thrivedesk.com/en/thirvedesk-setup-guide) to set up ThriveDesk correctly.
### Installation and Configuration
1. Login to your WordPress website.
2. Go to **Plugins > Add New** and search for ThriveDesk, or download the ThriveDesk plugin and install it manually.
3. Activate the plugin and navigate to the ThriveDesk page.
4. If you already have a ThriveDesk account, click the **Connect Existing Account** button. If you're starting fresh, click **Create New Account**.
5. Once you complete the on-screen connection process, you'll be returned to the plugin settings screen.
6. If you have Easy Digital Downloads installed, you'll see a connect button.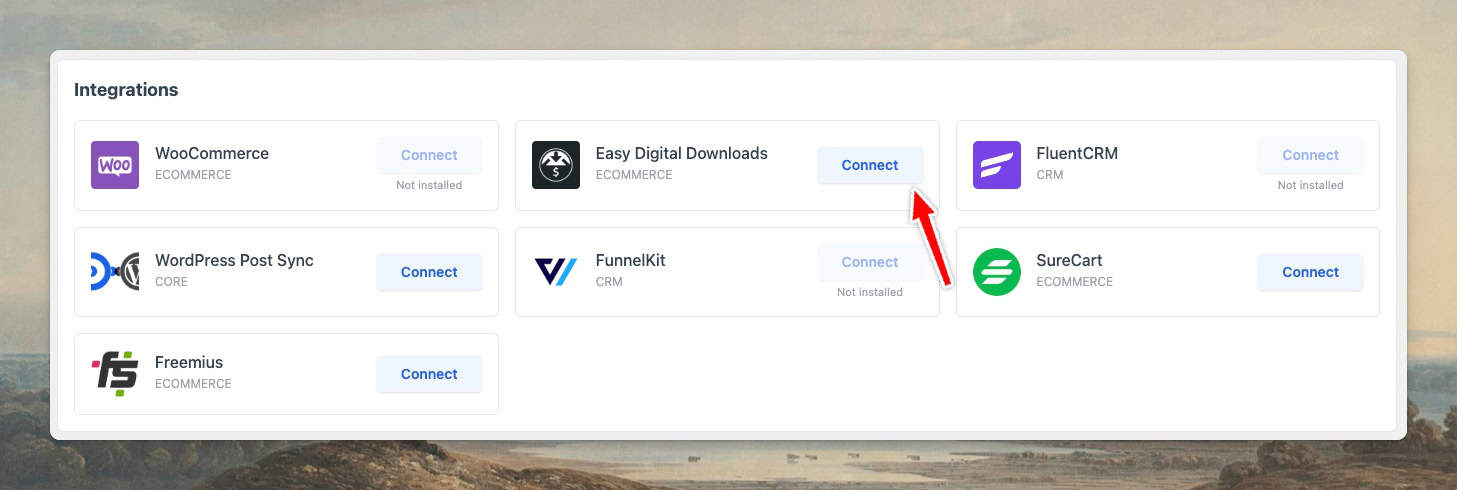
7. Click the **Connect** button, and it will take you to the ThriveDesk app configuration page.
8. Label each app instance to easily distinguish them within the ThriveDesk sidebar.
9. Select the mailboxes where this app will be used. You can select multiple mailboxes.
10. Congratulations! Your EDD app installation process is complete, and you'll be taken back to your WordPress site.
Only workspace owner and admin can install the app. Make sure you have the permission to install the app.
### Adding Multiple Easy Digital Downloads Sites
You can add multiple accounts if you have several EDD stores you'd like to integrate into ThriveDesk. Follow steps 2-3 above and make sure to save your settings for each store.
### Removing Easy Digital Downloads Sites
If you want to remove a store, go to App Store > Easy Digital Downloads, click on the label to expand, then click Delete. To uninstall the app entirely, press the Uninstall button, which will remove all store connections you have.
---
### Troubleshooting
**Unable to install the app**
This is likely a permissions issue. Only the workspace owner and admins can install the app. The workspace owner can grant or revoke permissions in the Rules and Permissions settings. If you’re an admin, ask your workspace owner to grant you the necessary permissions.
**Customer data not displaying**
There could be several reasons for this issue, but it is often due to server firewalls or security plugins that block API requests to your site.
* If your website is protected by Cloudflare's firewall, please refer to our [documentation](//help.thrivedesk.com/en/troubleshooting-with-cloudflare) for guidance.
* If you have a custom firewall installed on your server, ask your system administrator to [whitelist our IP](//help.thrivedesk.com/en/troubleshooting-with-cloudflare) addresses.
* If you have a security plugin installed, ensure that our [IP addresses](//help.thrivedesk.com/en/troubleshooting-with-cloudflare) are whitelisted.
---
### WP Portal
You can setup a help center inside your WordPress website where your customer can see their ticket and create new one. For more information and setup guide follow [WP Portal documentation](//help.thrivedesk.com/en/wpportal).
### Integrations with other WordPress plugins
* [WooCommerce](//help.thrivedesk.com/en/woocommerce-integration)
* [SureCart](//help.thrivedesk.com/en/surecart-integration)
* [FluentCRM](//help.thrivedesk.com/en/fluentcrm-integration)
* [FunnelKit](//help.thrivedesk.com/en/autonami-integration)
* [Envato](//help.thrivedesk.com/en/envato-integration)
* [Freemius](//help.thrivedesk.com/en/freemius-integration)
# Forward Email Aliases to an Inbox
An alias in ThriveDesk is any email address besides your main one that automatically forwards messages to your ThriveDesk inbox. If you have multiple addresses that auto-forward, you should add them to the Aliases field so that ThriveDesk handles them correctly.
This article will explain inbox aliases.
To use aliases in ThriveDesk, your custom email address, like support@mydomain.com, must be connected to your inbox.
## What an Alias is in ThriveDesk
Suppose your main address is support@mydomain.com, but you also use contact@mydomain.com, info@mydomain.com, and billing@mydomain.com. You might want to auto-forward these other addresses into ThriveDesk so you don't miss any support requests.
Not sure whether to use an alias or set up a separate inbox? Check out "When to Set up a New Inbox" for guidance.
By declaring the other addresses as inbox aliases, ThriveDesk knows you're expecting to receive emails forwarded from those addresses. You'll find the Aliases field at **Inbox Settings** after connecting your custom address.
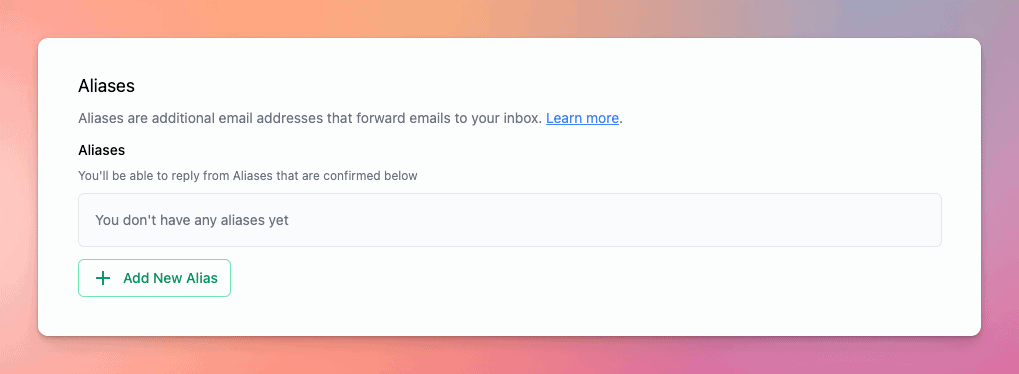
## Why We Need to Know
Let's say auto-forwarding is set up for info@mydomain.com, but you haven't added that address to your Aliases list. If a customer emails that address, the message is forwarded to ThriveDesk. When you reply, info@mydomain.com will be included in the CC field because ThriveDesk doesn't recognize it as associated with your inbox.
This results in duplicate threads of your reply in the conversation in ThriveDesk (one copy sent to info@mydomain.com and one to the customer).
When you declare info@mydomain.com as an inbox alias, ThriveDesk knows it's associated with your inbox, so there's no need to CC that address, avoiding duplicate threads.
### Limitations
* You won't be able to add a specific name for an alias. Your default inbox name will be used.
* You can't add a separate signature for your alias. Your default inbox signature will be used.
* You can't modify the existing connected email address.
* You can't use a single domain in multiple organizations. But a single organization can have multiple domains
## Replying From an Alias
To reply to conversations using an alias address, go to **Inbox Settings > Aliases** and toggle Reply as Alias on.
If using Reply as Alias, the alias must be verified before it can be used in a reply. Aliases matching the domain of your main inbox address will be verified automatically. For aliases with a different domain, you'll need to verify ownership by entering the six-digit code sent to the alias address.
When using Reply as Alias, an email address can only be added as an alias to a single inbox.
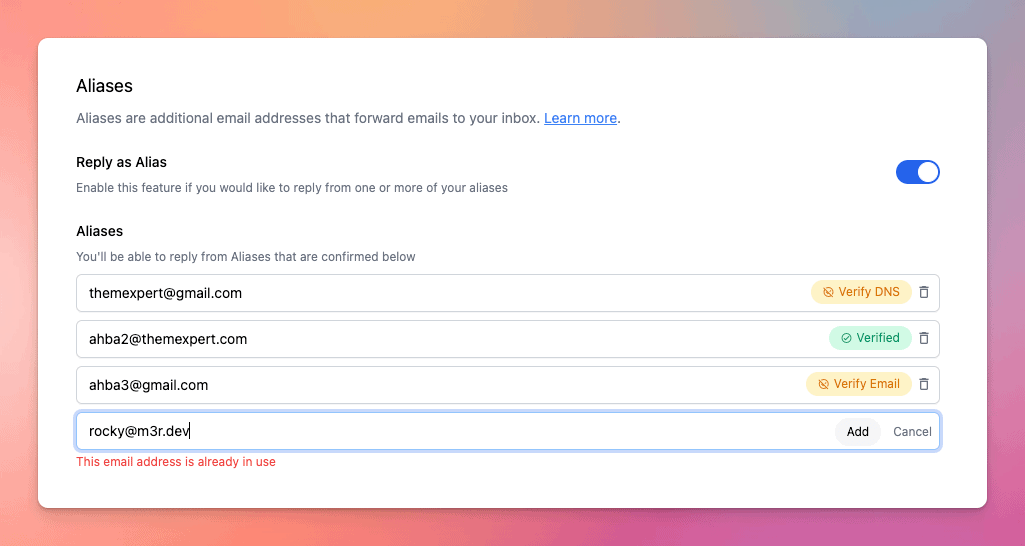
Verify ownership of that email address, and you're ready to reply from it. Whenever an email is sent to your alias address, it will show in the To field in the conversation. For example, if info@mydomain.com is set up as an alias for support@mydomain.com inbox, any email sent to info@mydomain.com will show info@mydomain.com in the To field.
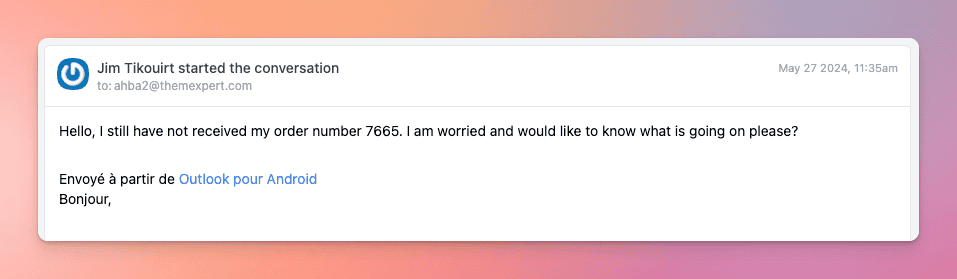
When you reply to that conversation, a From dropdown will appear, defaulting to the alias the email was sent to. Your inbox signature will not appear in emails sent from the alias address.
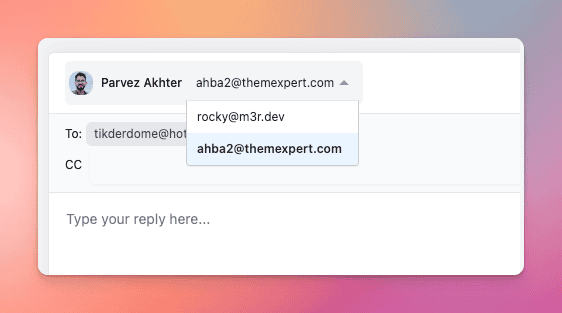
You may choose to send from the inbox address instead, in which case your inbox signature will appear.
Replies sent from any automated or manual workflows will be sent from the main inbox address (e.g, support@mydomain.com).
## Reply as Alias and SMTP
If your alias email is on the same domain as your inbox address, we'll send via SMTP. Depending on your email provider, you may be able to set up Send As permissions to avoid errors. Check with your email admin or provider's support to see if this is possible.
If your alias is on a different domain than the inbox address, whether using Google OAuth or SMTP, emails are sent from ThriveDesk servers. You can set up DKIM for that domain to help ensure those messages are delivered safely. Use [DKIM to Help With Email Delivery](//help.thrivedesk.com/en/adding-dns-records) will guide you through those steps.
# Envato Integration
Envato is a parent company of marketplaces like Themeforest, Codecanyon, GraphiRiver and Videohive. Authors around the world sells their WordPress themes, plugins, graphic and music templates in Envato marketplace. The ThriveDesk app validate the customer purchase code and give insight of their purchase in sidebar. Support agent can view all the information in one place.
## Step 1: Create Envato App
1. Login to [Envato app](https://build.envato.com/) portal and go to My apps page.
2. Click **Create a new token** button.
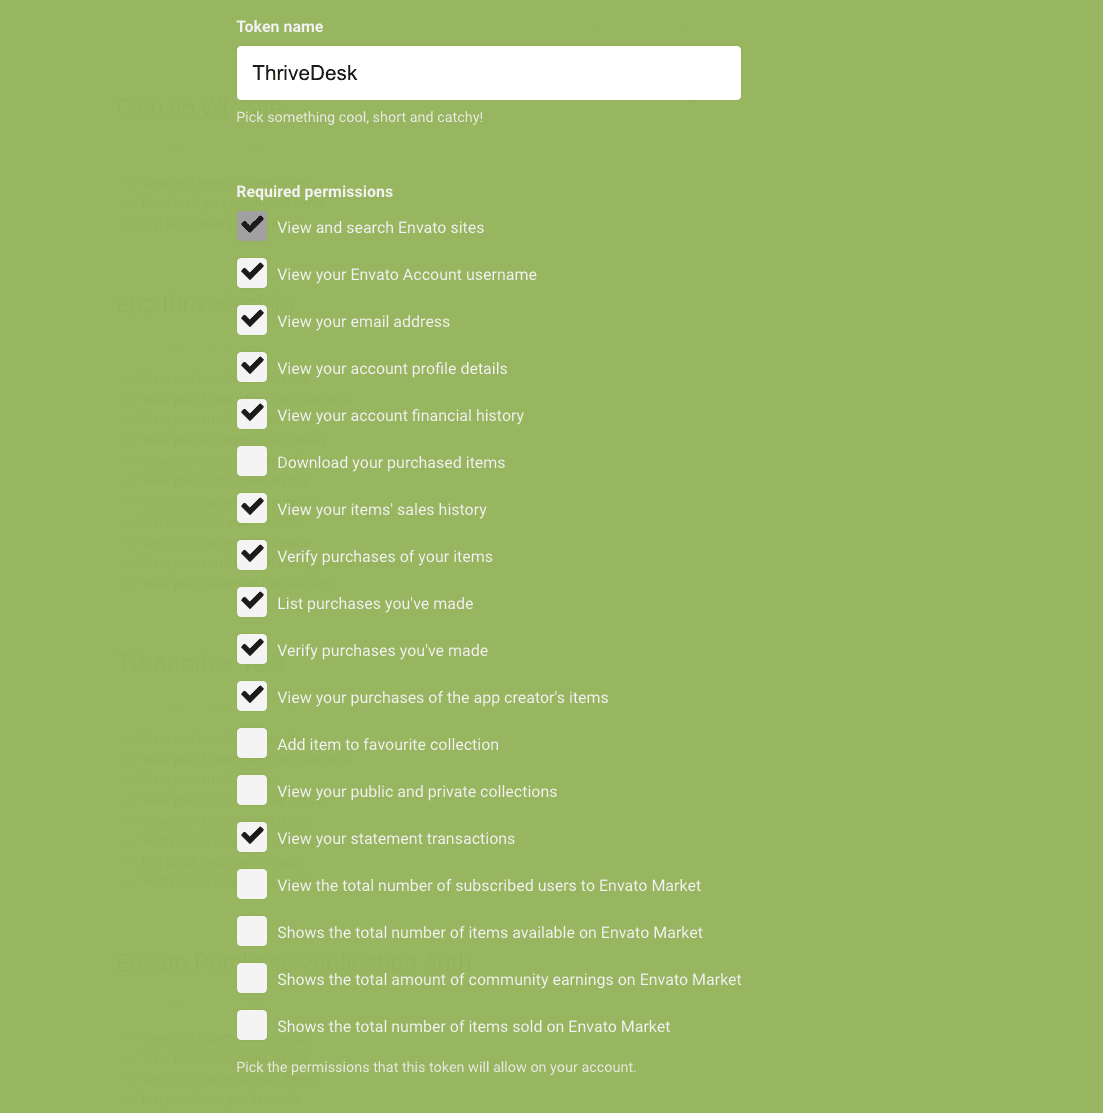
3. Give a Token name and grant following permissions 👇
4. You'll receive a secret token key. Copy the key and follow Step 2.
## Step 2: Install Envato app on ThriveDesk
1. Log into your ThriveDesk account and switch to the workspace you want to install Envato app.
2. Click the **App Store** menu from left sidebar.
3. Open the Envato app and click **Install** button.
4. Give your app a Label and the **token key**.
5. Select Inboxes where this app will be activated and press save.
You can add as many Envato account in your workspace depending on the pricing plane you are in.
## Step 3: Using the App
After successfull installation, when you open a converstion you'll see Envato with purchase code input box. Ask purhcase code form your customer and use the code to search complete purcahse details.
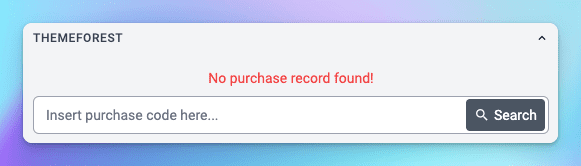
You don't have to ask for same purchase code again for that customer. Whenever the customer ask for support you'll see their purcahse record right inside the conversation.
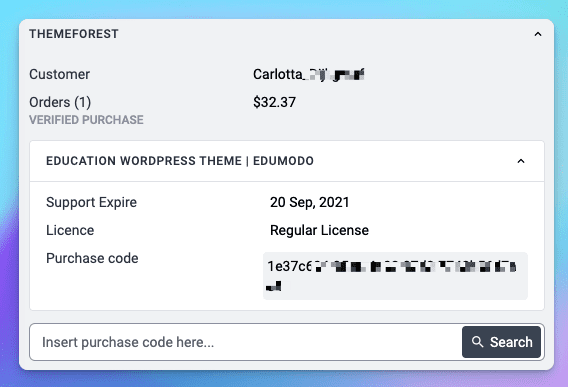
You can add multiple puchase code for same customer if they bought multiple item form your store.
We do not collect or store any **personal identifiable** data of your customers. Purchase data your see inside ThirveDesk pulled realtime from Envato using your API key.
# Fathom Analytics
Fathom Analytics is a privacy-focused web analytics platform that provides comprehensive website tracking without compromising user data. When integrated with ThriveDesk Knowledge Base, you can track visitor behavior, page views, and engagement metrics while maintaining GDPR compliance and user privacy.
## Getting Your Fathom Site ID
* From the dashboard, locate your site in the site list
* Click on the site name to open site details
* Click on **Settings** in the left navigation menu
* In the Settings page, look for the **Site Details** section
* Find the **Site ID** field - it's typically an 8-character alphanumeric code
* Copy this Site ID
## Install Fathom App
1. Log into ThriveDesk Knowledge Base(KB) site and go to **Settings > Apps**.
2. Click **Install** button on Fathom App.
3. Put your **Site ID and press **Save Changes**.
Remember that preview links won’t track analytics by default.
For any technical issues, contact either platform's support team with specific error messages or screenshots for faster resolution.
# FluentCRM Integration
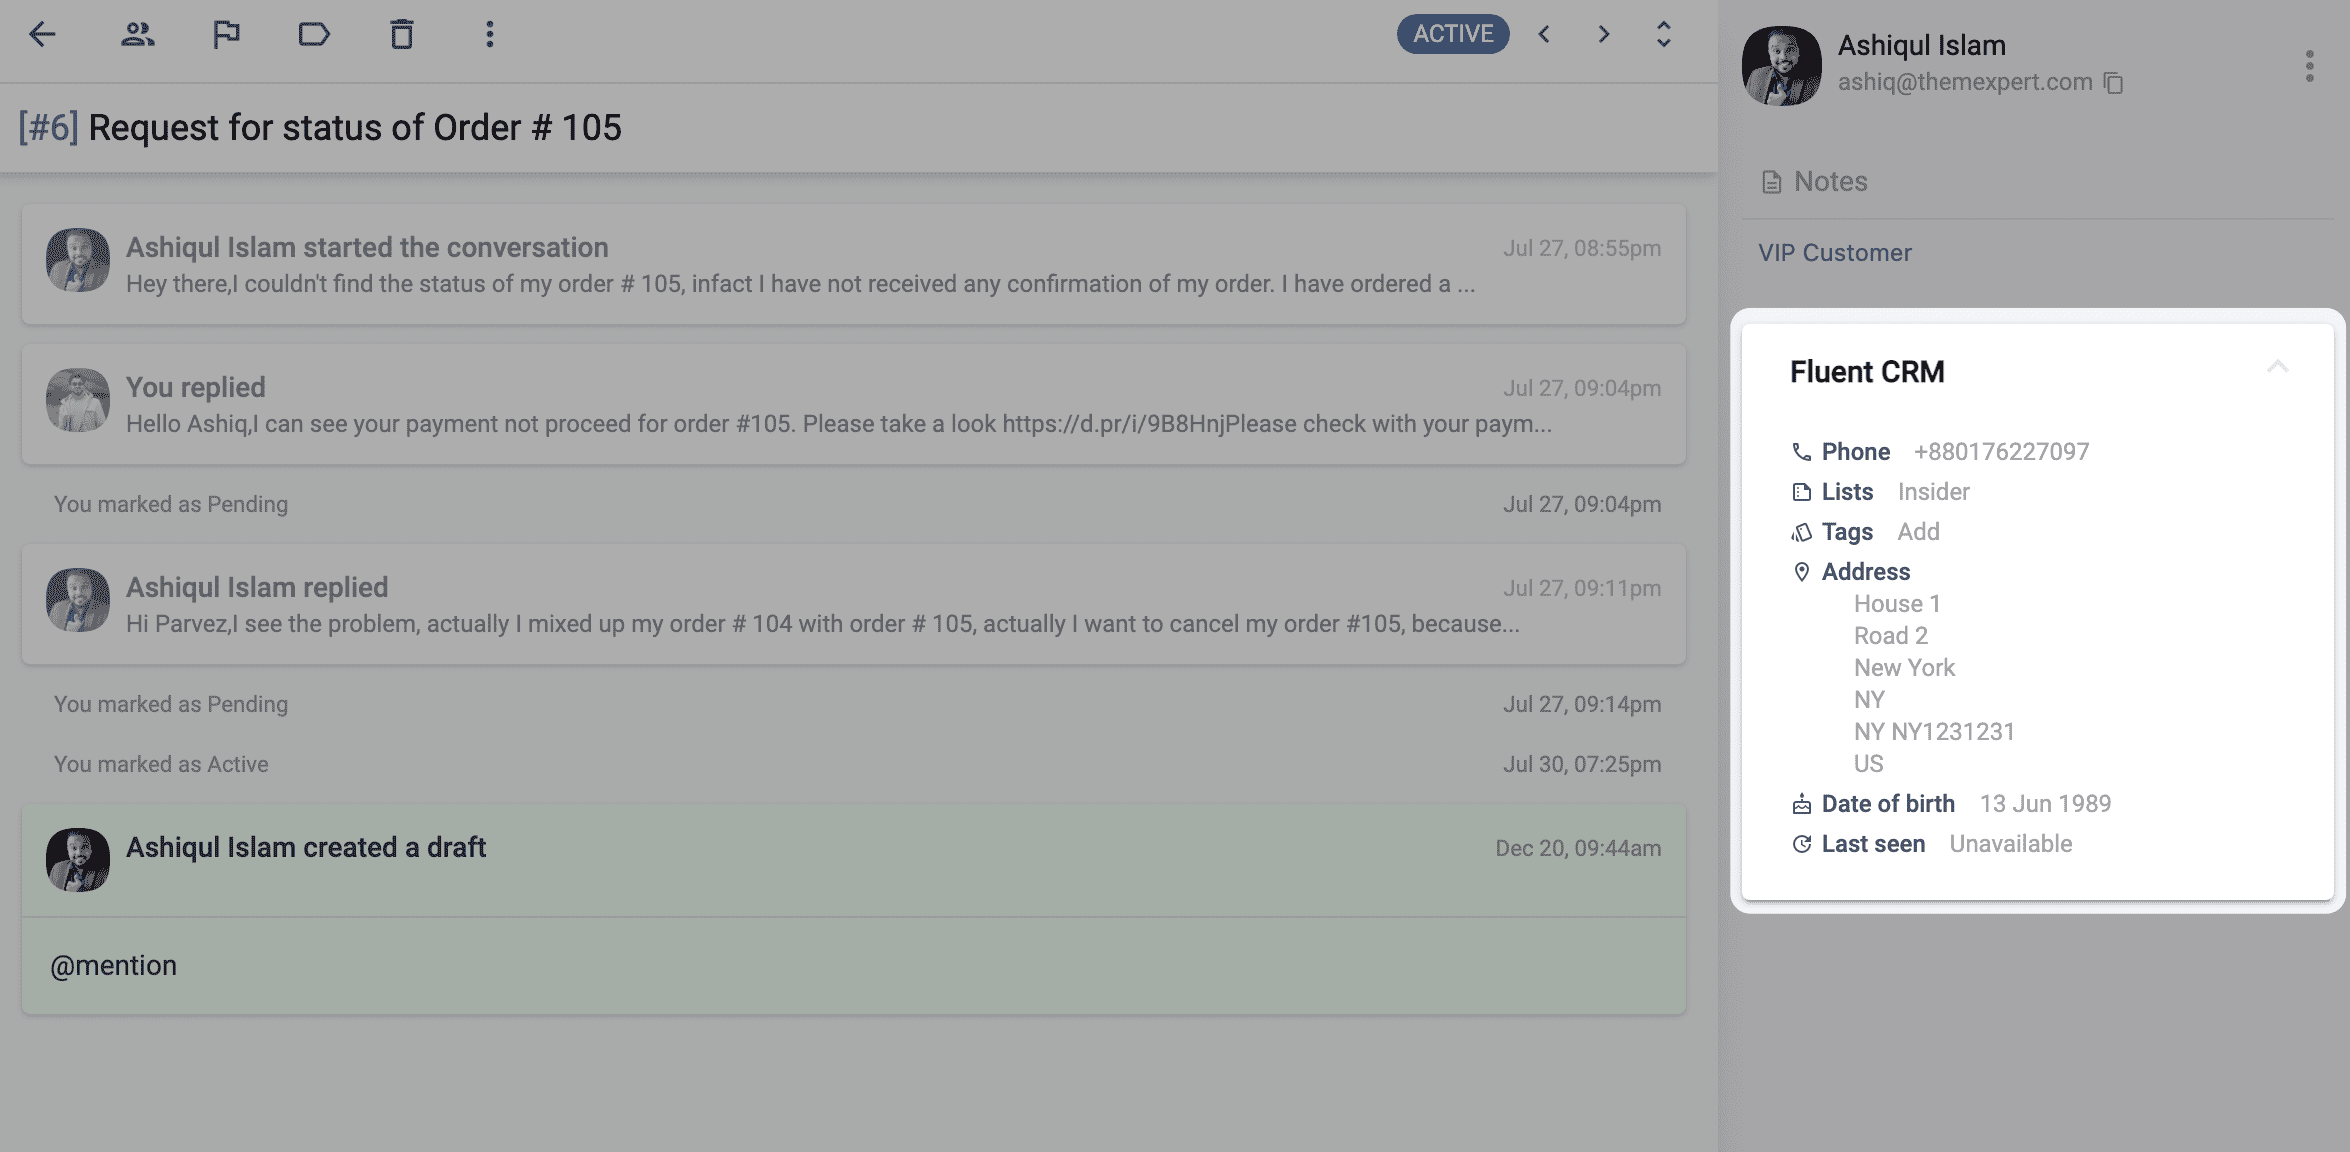
FluentCRM is a self-hosted email marketing automation plugin for WordPress. Manage your leads, customers, emails, automated email sequences, learners, affiliates, and monitor user activities in one place; without having to leave your WordPress Dashboard! The ThriveDesk app instantly connects your customer to their FluentCRM profile. You can see the lists or tag they are subscribed to inside ThriveDesk and their ticket history in FluentCRM.
Here's a snapshot of what it looks like in ThriveDesk
If you’re new here, please follow our [Getting Started guide](//help.thrivedesk.com/en/thirvedesk-setup-guide) to set up ThriveDesk correctly.
### Installation and Configuration
1. Login to your WordPress website.
2. Go to **Plugins > Add New** and search for ThriveDesk, or download the ThriveDesk plugin and install it manually.
3. Activate the plugin and navigate to the ThriveDesk page.
4. If you already have a ThriveDesk account, click the **Connect Existing Account** button. If you're starting fresh, click **Create New Account**.
5. Once you complete the on-screen connection process, you'll be returned to the plugin settings screen.
6. If you have Fluent CRM installed, you'll see a connect button.
7. Click the **Connect** button, and it will take you to the ThriveDesk app configuration page.
8. Label each app instance to easily distinguish them within the ThriveDesk sidebar.
9. Select the mailboxes where this app will be used. You can select multiple mailboxes.
10. Congratulations! Your Fluent CRM app installation process is complete, and you'll be taken back to your WordPress site.
Only workspace owner and admin can install the app. Make sure you have the permission to install the app.
---
### Troubleshooting
**Unable to install the app**
This is likely a permissions issue. Only the workspace owner and admins can install the app. The workspace owner can grant or revoke permissions in the Rules and Permissions settings. If you’re an admin, ask your workspace owner to grant you the necessary permissions.
**Customer data not displaying**
There could be several reasons for this issue, but it is often due to server firewalls or security plugins that block API requests to your site.
* If your website is protected by Cloudflare's firewall, please refer to our [documentation](//help.thrivedesk.com/en/troubleshooting-with-cloudflare) for guidance.
* If you have a custom firewall installed on your server, ask your system administrator to [whitelist our IP](//help.thrivedesk.com/en/troubleshooting-with-cloudflare) addresses.
* If you have a security plugin installed, ensure that our [IP addresses](//help.thrivedesk.com/en/troubleshooting-with-cloudflare) are whitelisted.
---
### WP Portal
You can setup a help center inside your WordPress website where your customer can see their ticket and create new one. For more information and setup guide follow [WP Portal documentation](//help.thrivedesk.com/en/wpportal).
### Integrations with other WordPress plugins
* [WooCommerce](//help.thrivedesk.com/en/woocommerce-integration)
* [SureCart](//help.thrivedesk.com/en/surecart-integration)
* [Easy Digital Download](//help.thrivedesk.com/en/edd-integration)
* [FunnelKit](//help.thrivedesk.com/en/autonami-integration)
* [Envato](//help.thrivedesk.com/en/envato-integration)
* [Freemius](//help.thrivedesk.com/en/freemius-integration)
# Forward email from Amazon WorkMail
Amazon WorkMail is a managed email and calendar service that offers strong security controls and support for desktop and mobile clients. This article will cover setting up email forwarders from [Amazon WorkMail](https://docs.aws.amazon.com/workmail/latest/userguide/web-client.html) to ThriveDesk mailboxes.
This guide is for a Amazon WorkMail(aka business email), and covers forwarding all email that comes to that WorkMail mailbox to a single ThriveDesk mailbox.
We do not support @awsapps.com email address that WorkMail provide by default. You should have setup your own business email on Amazon WorkMail first.
## How to forward emails from WorkMail to ThriveDesk
1. First things first: Make sure you have followed the first steps in [Connect Your Custom Address ](//help.thrivedesk.com/en/getting-your-emails-into-thrivedesk)and you have your ThriveDesk Inbox Address ready.
2. Click on the gear icon in the upper right-hand corner to open the **Settings** pages.
3. Click **Email rules** in the left side navigation menu, then **+ New** to start a New email rule.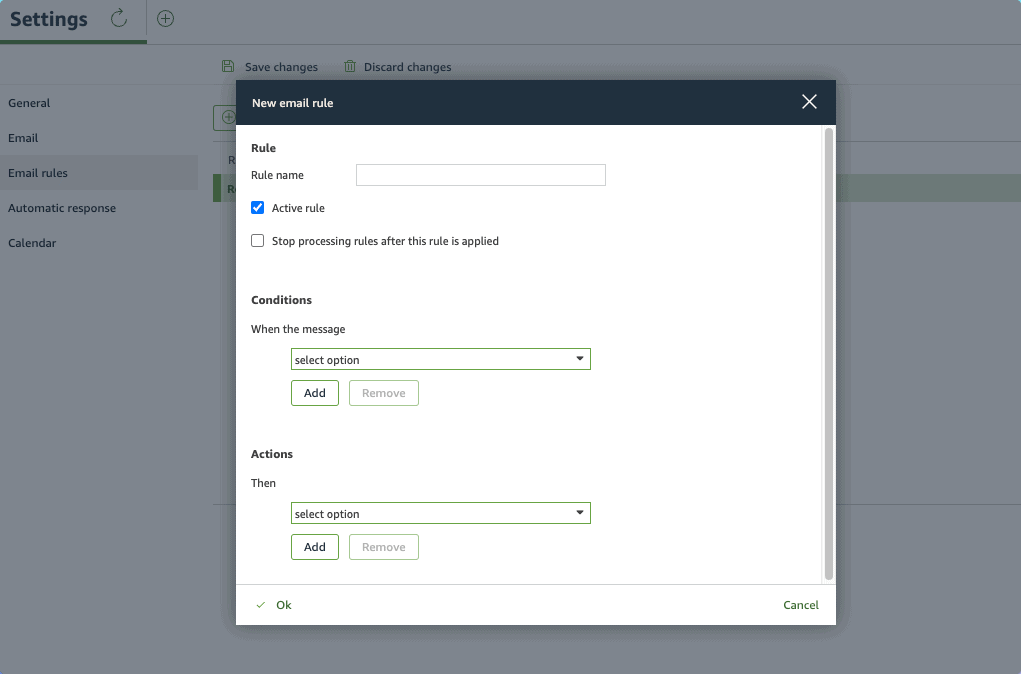
4. Give your rule a name. Select **is sent to**... from the Conditions dropdown list, then click **Select recipient(s)** and select your Mailbox address from the Amazon WorkMail Global Address List. Click the **To** button at the bottom to populate your Mailbox address in the box, then click **Ok**. 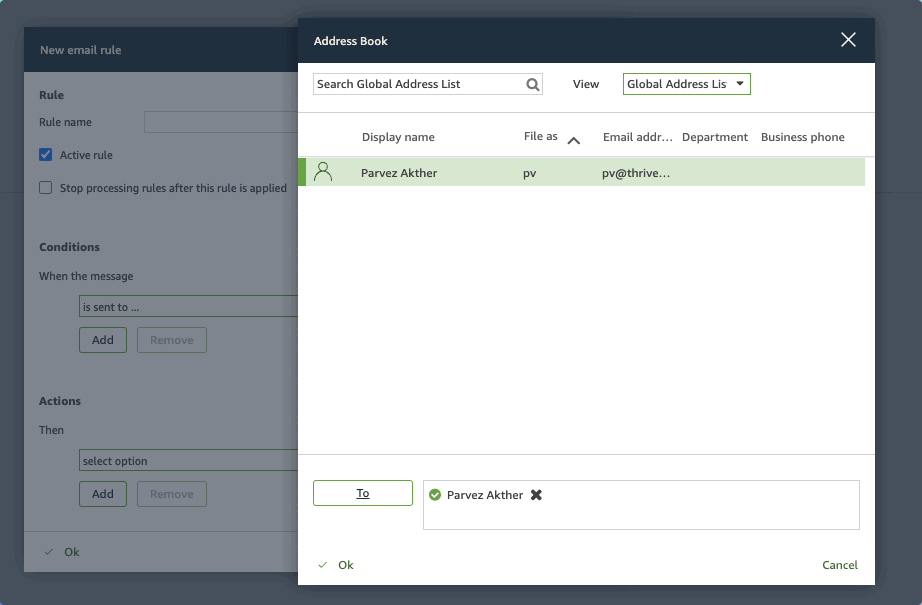
5. Select **Redirect the message to**... from the Actions dropdown list, then click **Select recipient(s)** and paste in the ThriveDesk forwarding address. Click the To button for Amazon WorkMail to validate the address (you will see a green check mark appear before the forwarding address), then click **Ok**. 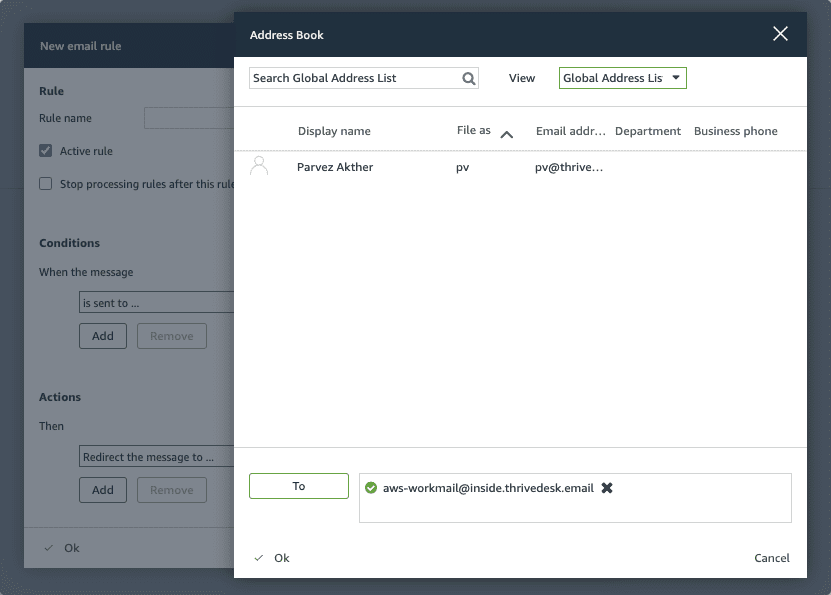
6. Click **Ok** to close the Email rule window, then click **Save changes** to save your rule.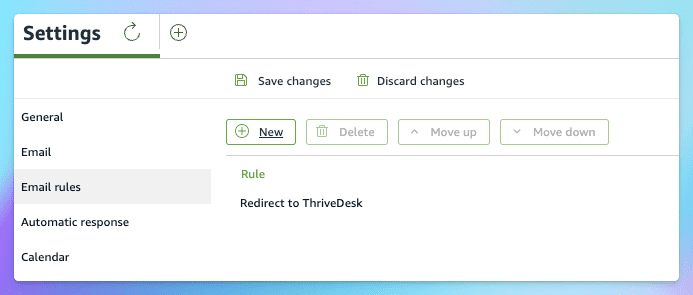
7. Now head back to I**nbox > Inbox Settings** in ThirveDesk and click **Verify Forwarder** button to confirm the forwarding is set up.
That's it! You're set!
Next steps: Set up Return-Path and DKIM to allow ThriveDesk servers to send email on your behalf.
If you have any **Automatic response** setup on WorkMail, turn that OFF and enable **Auto reply** on ThriveDesk Inbox.
# Forward email from Google Workspace (formally GSuite)
Google workspace(formerly known as G Suite) is a productivity and collaboration suite providing fully featured business email service that is equipped with the same interface as Gmail. This article will cover setting up email forwarders from Google Workspace to ThriveDesk mailboxes.
This guide is for a Google Workspace User mailbox(aka business email), and covers forwarding all email that comes to that Gmail mailbox to a single ThriveDesk mailbox.
We do not support @gmail or other public email addresses that google provides.
You might want to look at one of these guidelines instead if you are using a different sort of address at Google for the email you want to forward to ThriveDesk:
* [**Auto-forward From a Google Workspace Group**](../../en/thrivedesk-inbox/auto-forwarding-from-google-group) will help you get things moving if the email address belongs to a Google Group.
* **Auto-forward From Google Workspace Using Routing** is a guide for Google Workspace administrators that would rather route the email to ThriveDesk directly.
## How to forward emails from Google Workspace to ThriveDesk
1. First things first: Make sure you have followed the first steps in [Connect Your Custom Address](//help.thrivedesk.com/en/getting-your-emails-into-thrivedesk) and you have your ThriveDesk Inbox Address ready.
2. Click on the gear icon in the upper right-hand corner of Gmail, then click the **See all settings** option from the drop-down menu. 
3. Click the **Forwarding and POP/IMAP** tab from the top menu. Then click the **Add a forwarding address** button.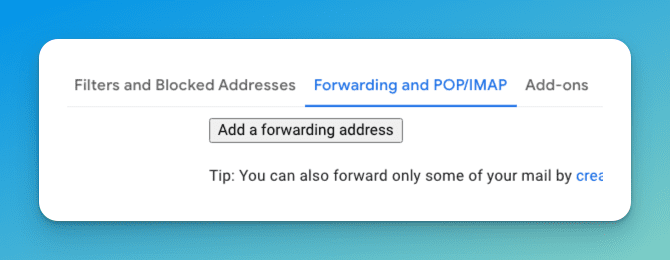
4. You'll see a pop-up window asking for your forwarding address. Paste your ThriveDesk Inbox Address into the text field, then hit **Next**. A pop-up will appear where you will be asked to confirm what you just did, hit **Proceed**, followed by **OK** in the next window to close it out.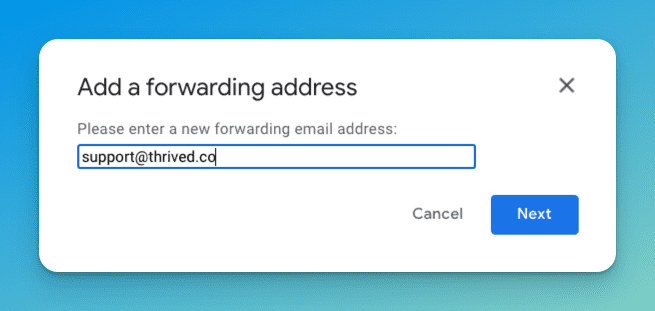
5. Head back to ThriveDesk and wait for a while. You should see a confirmation email containing a code, copy that code.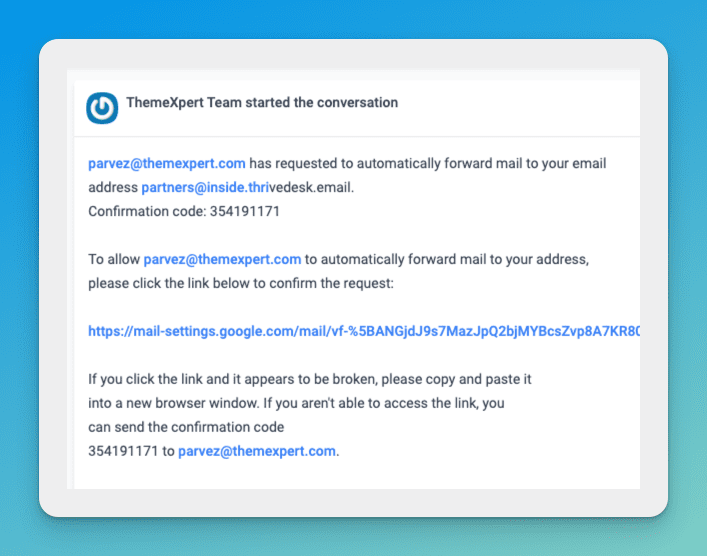
6. Head back to Gmail and paste the code to verify. Google will now allow you to forward to ThriveDesk Inbox.
7. Click the button next to Forward a copy of incoming mail to and make sure the forwarding address in the drop down is your ThriveDesk address. You can choose what to do with the messages in your Gmail inbox as well. We recommend keeping a copy in the inbox, but it's totally up to you. There's a **Save Changes** button hiding at the bottom of the page; don't forget to save when you're done editing your forwarding rule.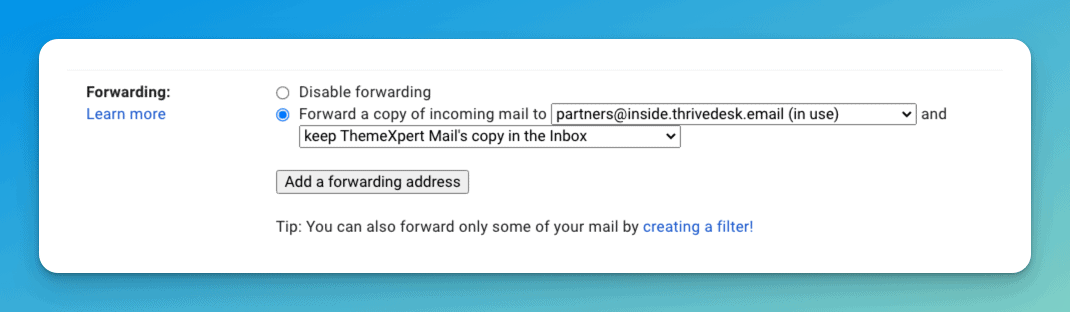
8. Now head back to Inbox > Inbox Settings in ThirveDesk and click **Verify Forwarder** button to confirm the forwarding is set up.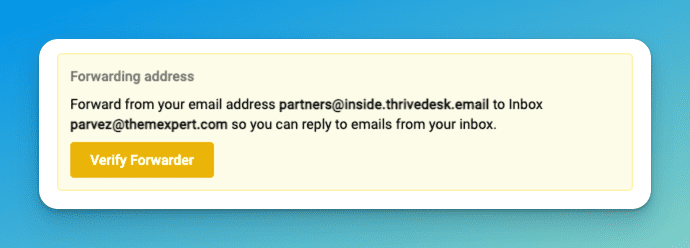
That's it! You're set!
Next steps: Set up Return-Path and DKIM to allow ThriveDesk servers to send email on your behalf.
The Google spam filter can be fairly aggressive. If it determines an email is spam, that email will not be forwarded into ThriveDesk. Check out Inbound Email Issues for more information and our recommendations.
# Forward Email from Outlook.com/Office365
This article will guide you how to forward emails from Microsoft 365's Outlook Web Access (commonly known as OWA), to your ThriveDesk Inbox.
## Setup email forwarder
1. First things first: Make sure you have followed the first steps in [Connect Your Custom](//help.thrivedesk.com/en/getting-your-emails-into-thrivedesk) Address and you have your ThriveDesk Inbox Address ready.
2. Log in to your [Microsoft 365 Outlook Web](https://outlook.office365.com) Access as your custom email address. If you're not able to log in there, check with your email administrator to find out the address for your OWA login page.
3. Click on the gear icon in the upper right-hand corner, then View all Outlook settings at the bottom of that menu.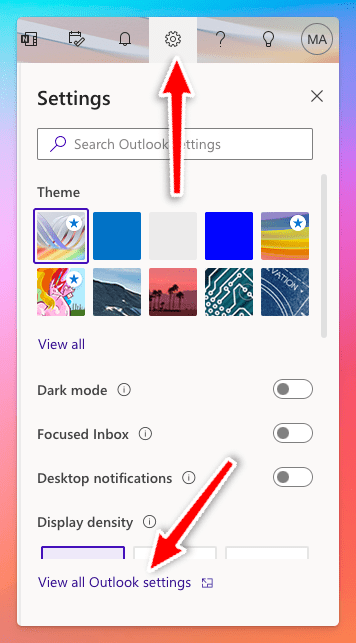
4. Choose **Mail**, then **Forwarding**. Click **Enable forwarding** and paste in your ThriveDesk email address. We recommend also checking **Keep a copy of forwarded messages** as an archive. Click **Save** at the bottom of this screen then close the menu by clicking the x in the top right corner. 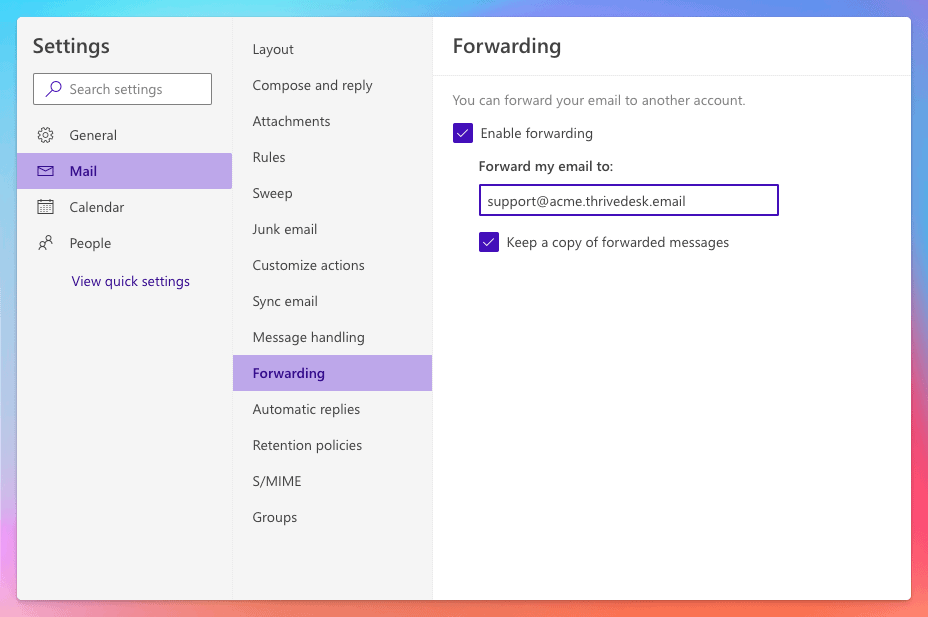
5. That will do it — head back into ThriveDesk to see your emails in your mailbox!
Next steps: Set up Return-Path and DKIM to allow ThriveDesk servers to send email on your behalf.
You may need to take an additional step if you're receiving bounce messages after setting up the forwarding here. Microsoft 365 spam protection might be set to block automatic forwards for your organization. Follow steps below to enable external forwarding in Microsoft 365 👇
## Enable External Forwarding in Microsoft 365
Some Microsoft 365 accounts default to block automatic email forwarding as part of their outbound spam protection. If external forwarding is disabled for your Microsoft 365 account, you will see a specific bounce message in your inbox at Microsoft 365 after attempting to set up forwarding to ThriveDesk. The text of the bounce will include this line:
```
5.7.520 Access denied, Your organization does not allow external forwarding.
Please contact your administrator for further assistance. AS(7555)
```
### Enable Automatic External Forwarding for All Mailboxes
1. Log in to your [Office 365 Security & Compliance portal](https://security.microsoft.com/) for Microsoft 365 and choose **Policies & rules > Threat policies > Anti-spam policies** or head directly to the Anti-spam settings page here: 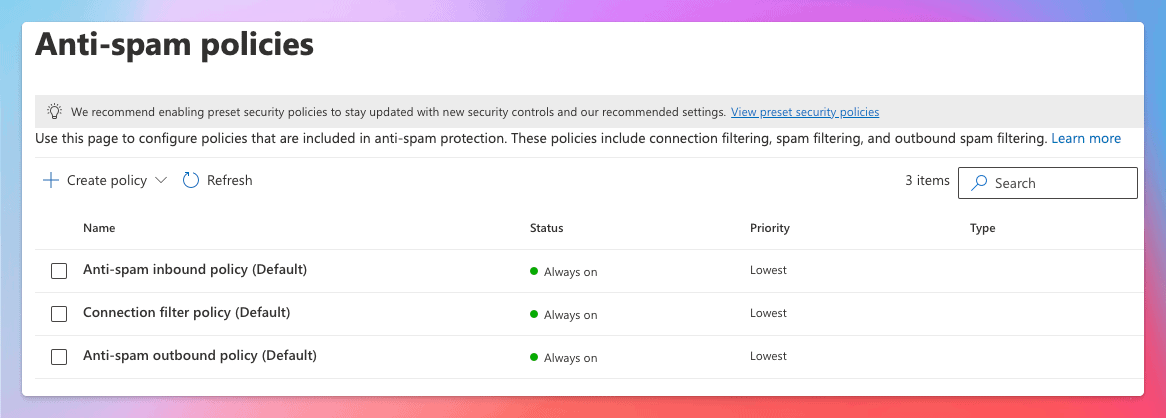Note that the policies you see in your own admin may differ from those shown here, as these are only the default policies.
2. Click on **Anti-spam outbound policy (Default)** and scroll to click the **Edit protection settings** link at the bottom of the sidebar.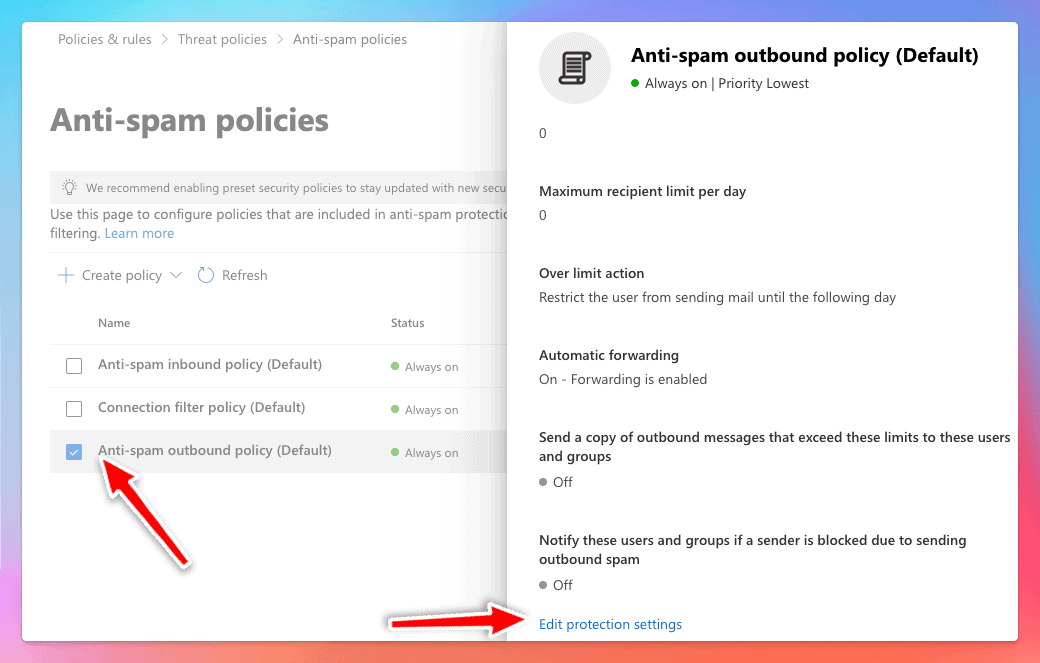
3. Find the section called *Forwarding Rules, and the dropdown list called Automatic Forwarding Rules*. Pull that list down and choose **On - Forwarding is enabled**. Click **Save** at the bottom. 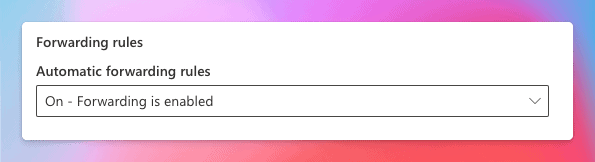
### Enable Automatic External Forwarding for Individual Mailboxes
1. Log in to your [Office 365 Security & Compliance portal](https://security.microsoft.com/) for Microsoft 365 and choose **Policies & rules > Threat policies > Anti-spam policies** or head directly to the Anti-spam settings page here: Note that the policies you see in your own admin may differ from those shown here, as these are only the default policies.
2. Click **+ Create** policy and choose **Outbound**.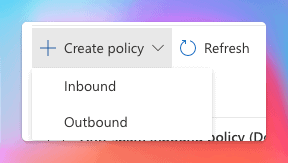
3. Give your new outbound spam filter policy a **Name** and **Description** and click **Next**.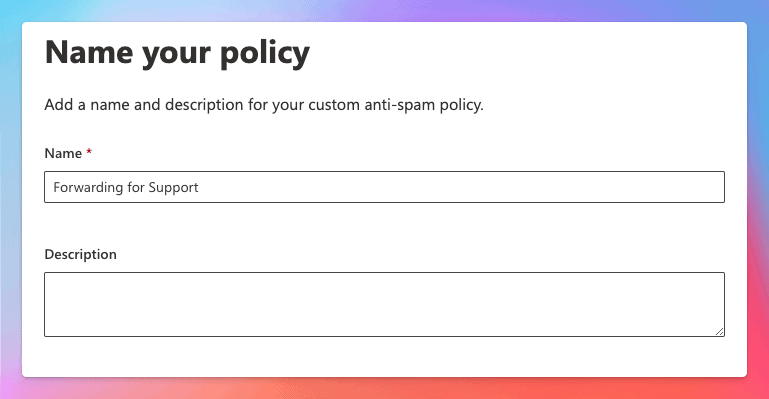
4. Search to find the user account you want to allow to forward, i.e. the email account that you are forwarding to ThriveDesk, which will display under the Users field after you select it. Click **Next** to continue.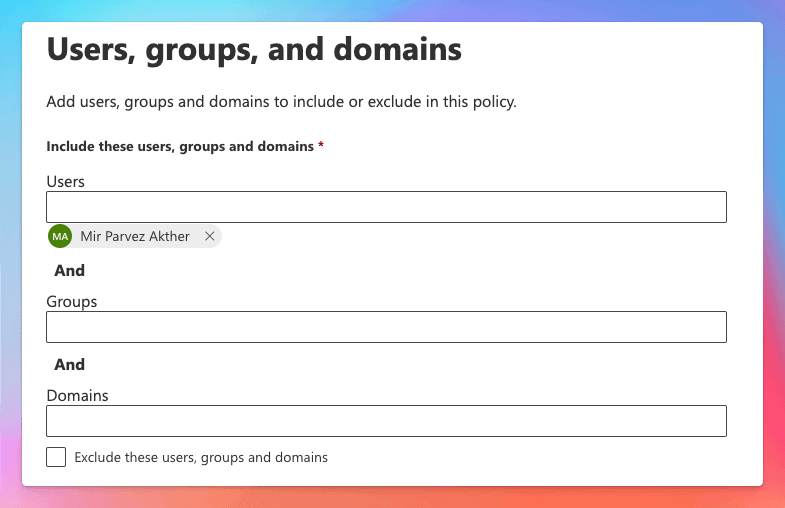
5. Scroll to the Forwarding rules section, and click the dropdown under Automatic forwarding rules. Choose **On - Forwarding is enabled**, then click **Next**. Review the settings on the last screen and click Create to create your new outbound policy for the specified user(s). 
You may have other transport rules or spam policies in place at Microsoft 365 that block external forwarding in addition to the outbound spam filtering we've covered here. If automatic external forwarding is still blocked after adjusting these policies, you will want to reach out to your Microsoft 365 support for assistance in finding any further blocking that has been set up in your Microsoft 365 account.
# Forward email to ThriveDesk Inbox with Cloudflare
Cloudflare provide **Email Routing**. Follow the steps to forward your email to your ThriveDesk email address.
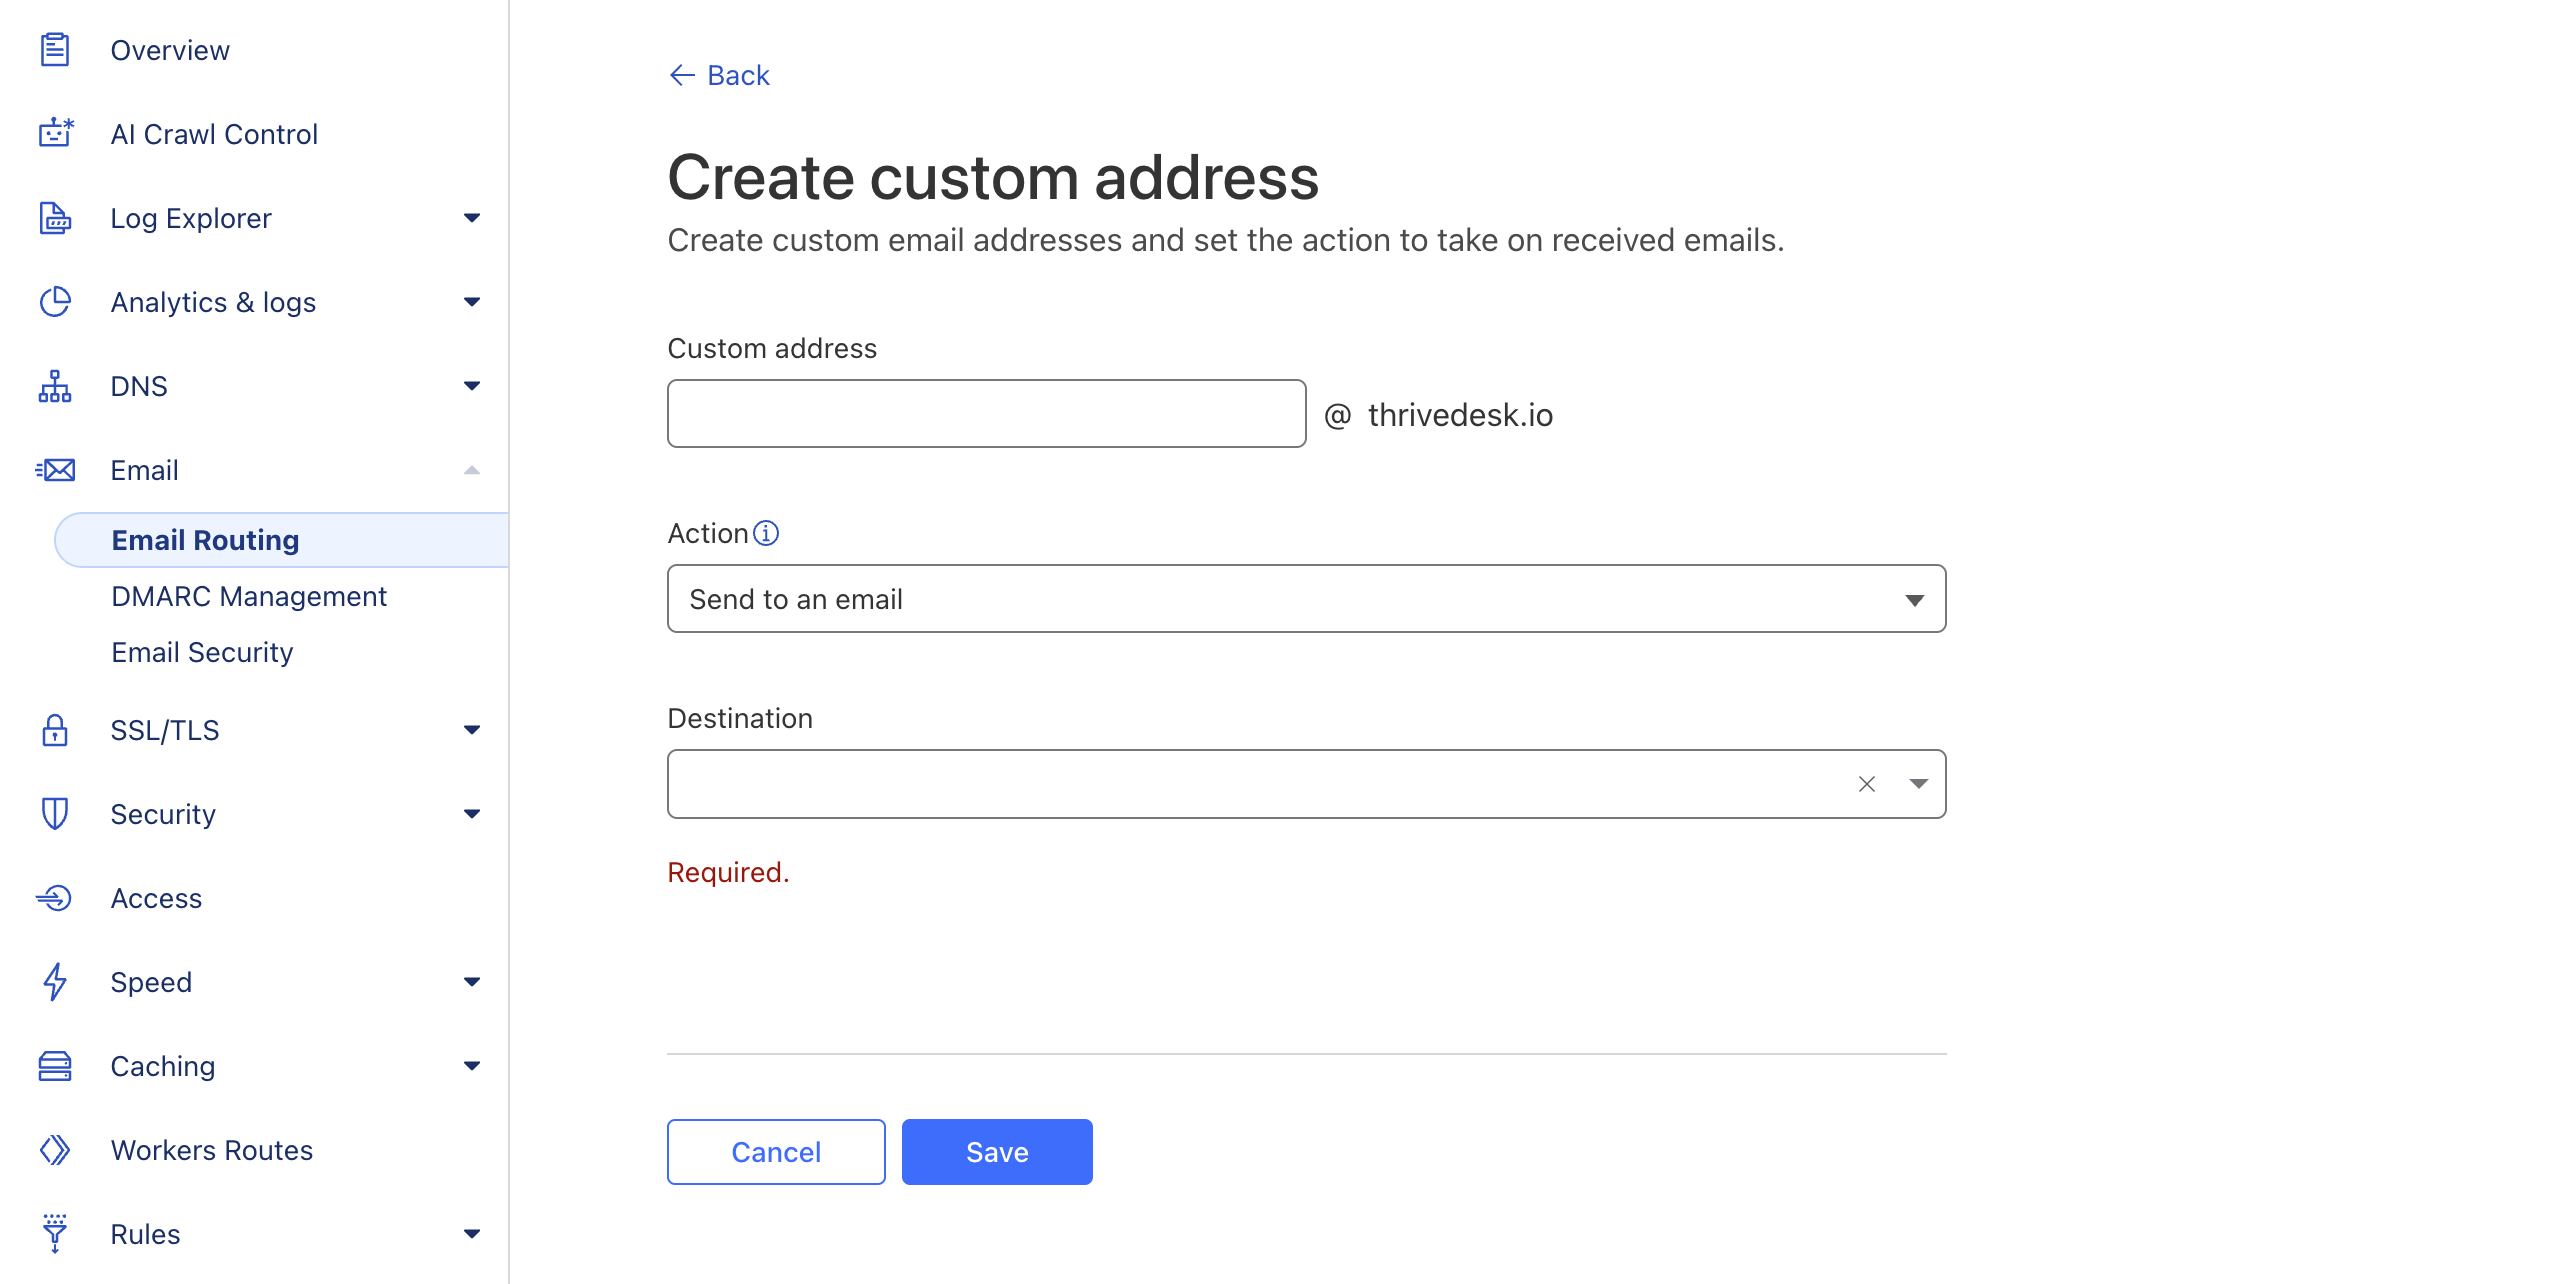### Forwarding Steps with Cloudflare
1. **Log in to Cloudflare** → Select your domain `yourdomain.com`.
2. From the left sidebar, go to **Email → Email Routing**.
3. Enable **Email Routing** (if not already).
4. Add a **Custom Address**:
* Custom email: `support@yourdomain.com`
* Destination address: `support@yourdomain.thrivedesk.email`
5. Cloudflare will show you DNS records you must add:
* **MX records** (to route emails through Cloudflare).
Example (Cloudflare will provide exact values):
```typescript
MX 10 mx1.improvmx.net (example)
MX 20 mx2.improvmx.net
```
* **TXT record** (for verification/SPF).
1. Save & deploy those records in your DNS (Cloudflare usually adds them automatically if you accept).
2. Wait for DNS to propagate (few minutes to a couple of hours).
Now, any email sent to `support@yourdomain.com` will be forwarded to `support@yourdomain.thrivedesk.email`.
### Verify Email Routing address
For security, Cloudflare requires routing address verifications. You will receive an email like this in your ThriveDesk Support Inbox. Check and verify it.
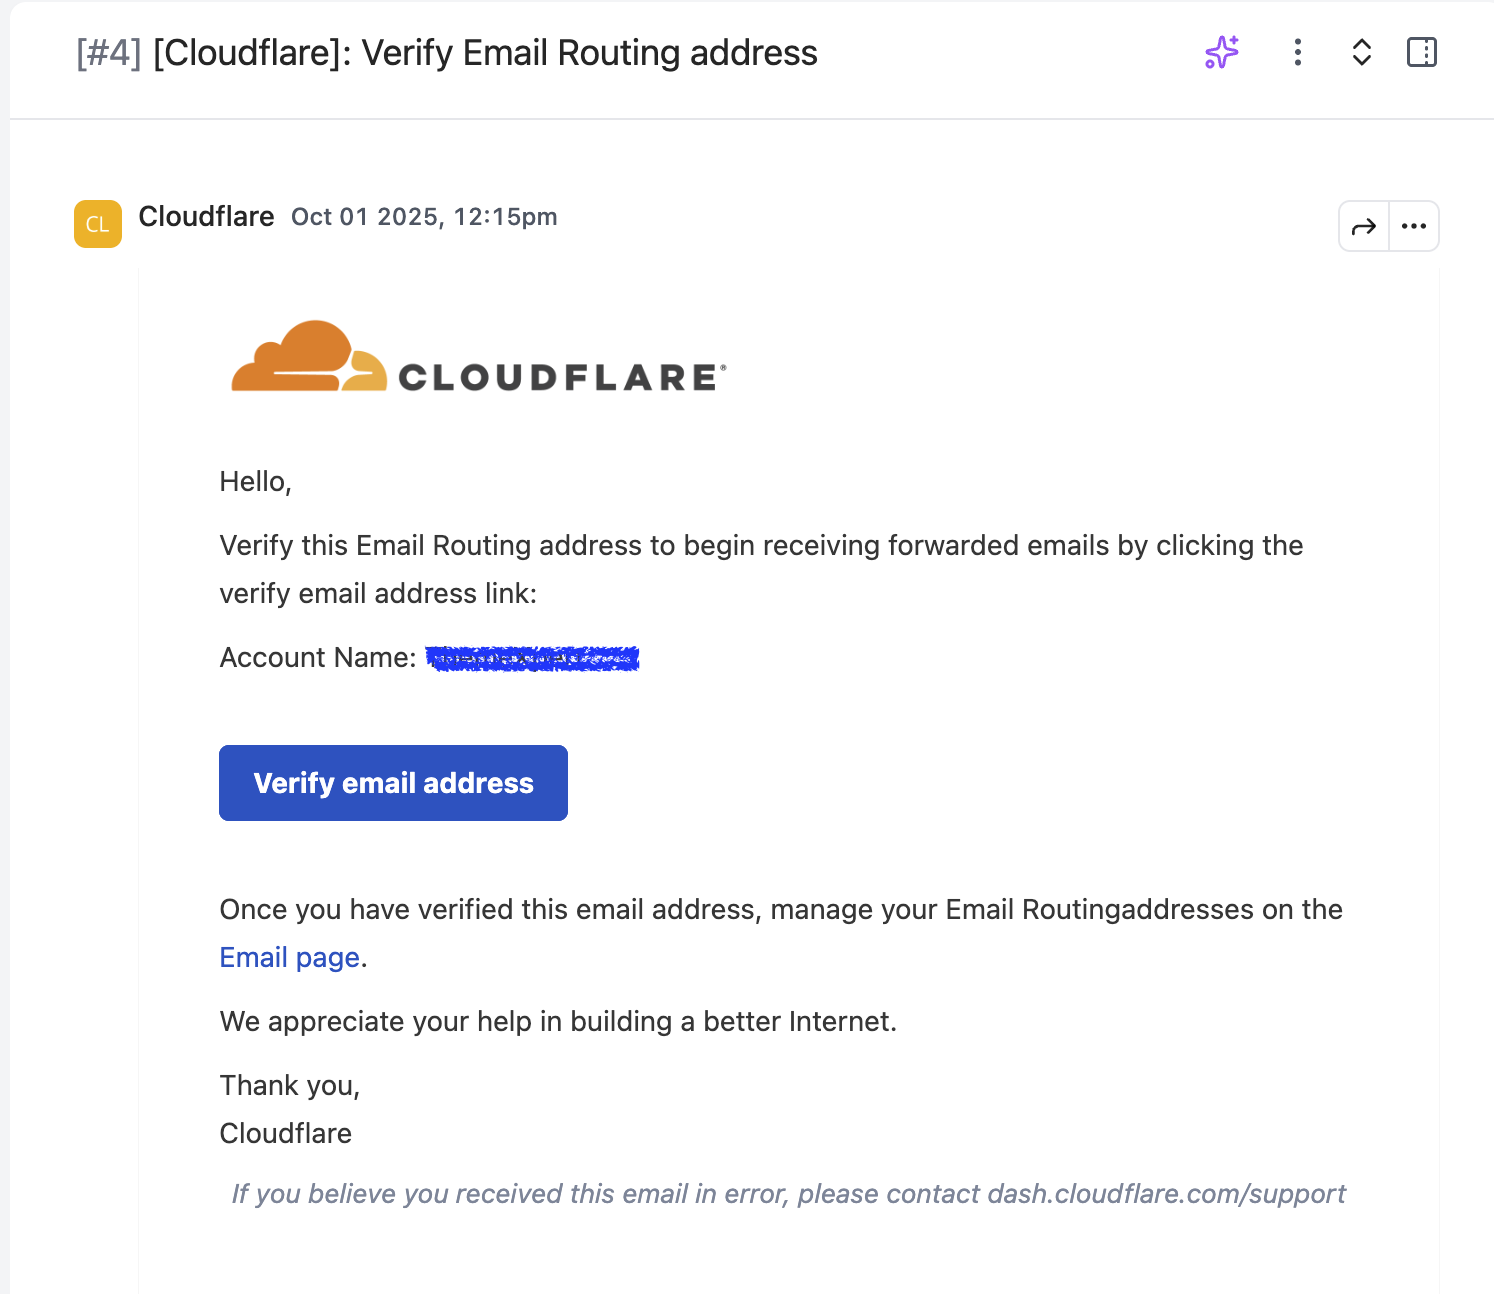---
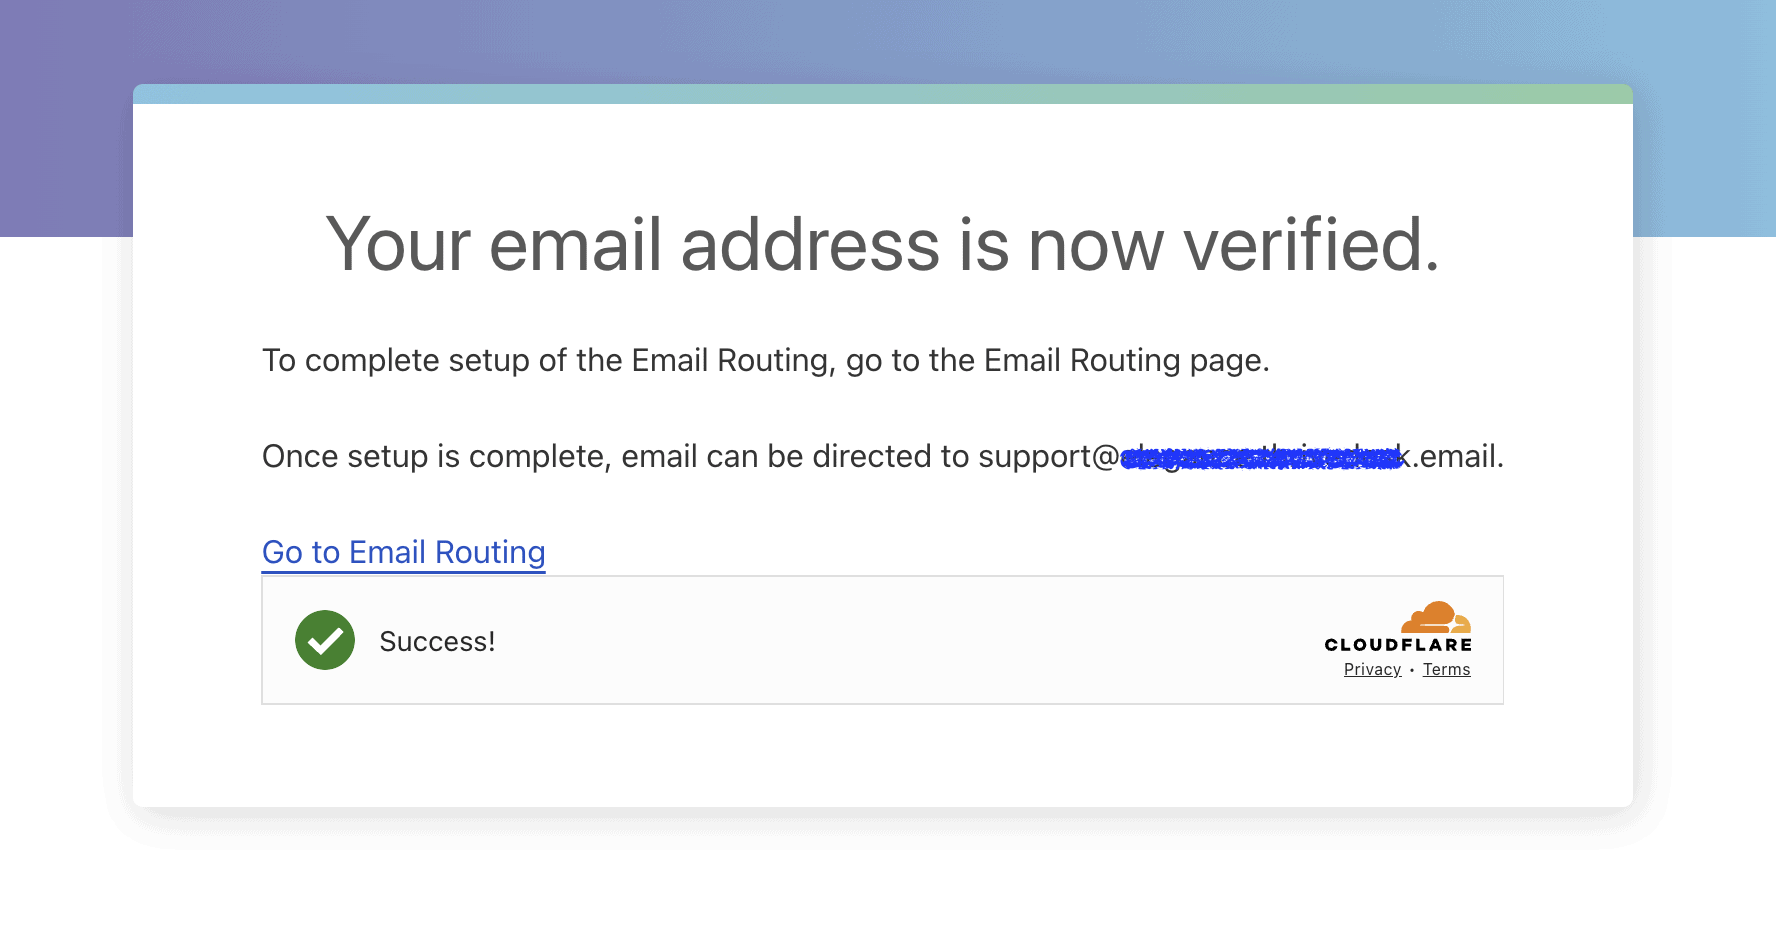### Notes
* Cloudflare **does not store your emails**; it just forwards them.
* **You won’t be able to send as** `support@yourdomain.com` **unless you add DNS records for ThriveDesk**
# Forwarding Conversation and Threads
Sometimes you may need to share a conversation with someone outside your team, such as a partner, vendor, or another department that does not have access to ThriveDesk.
The **Forward** feature makes this easy.
ThriveDesk does **not keep a record** of forwarded conversations. Once forwarded, the conversation will not show tracking information inside ThriveDesk.
## How to Forward a Conversation
* Open the conversation you want to forward.
* Click the **forward icon** in the top-right corner of the message.
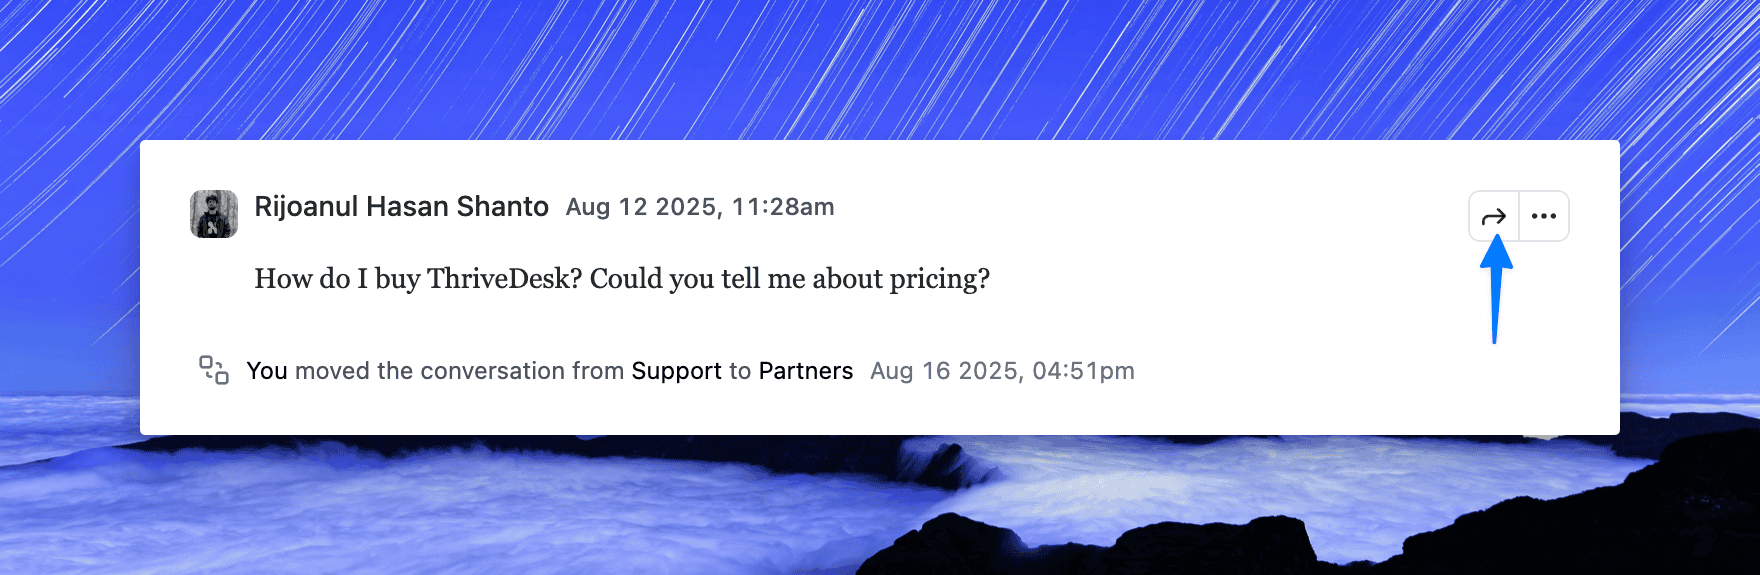* A modal will appear. In the **To** field, type the recipient's email address and press **Enter**.
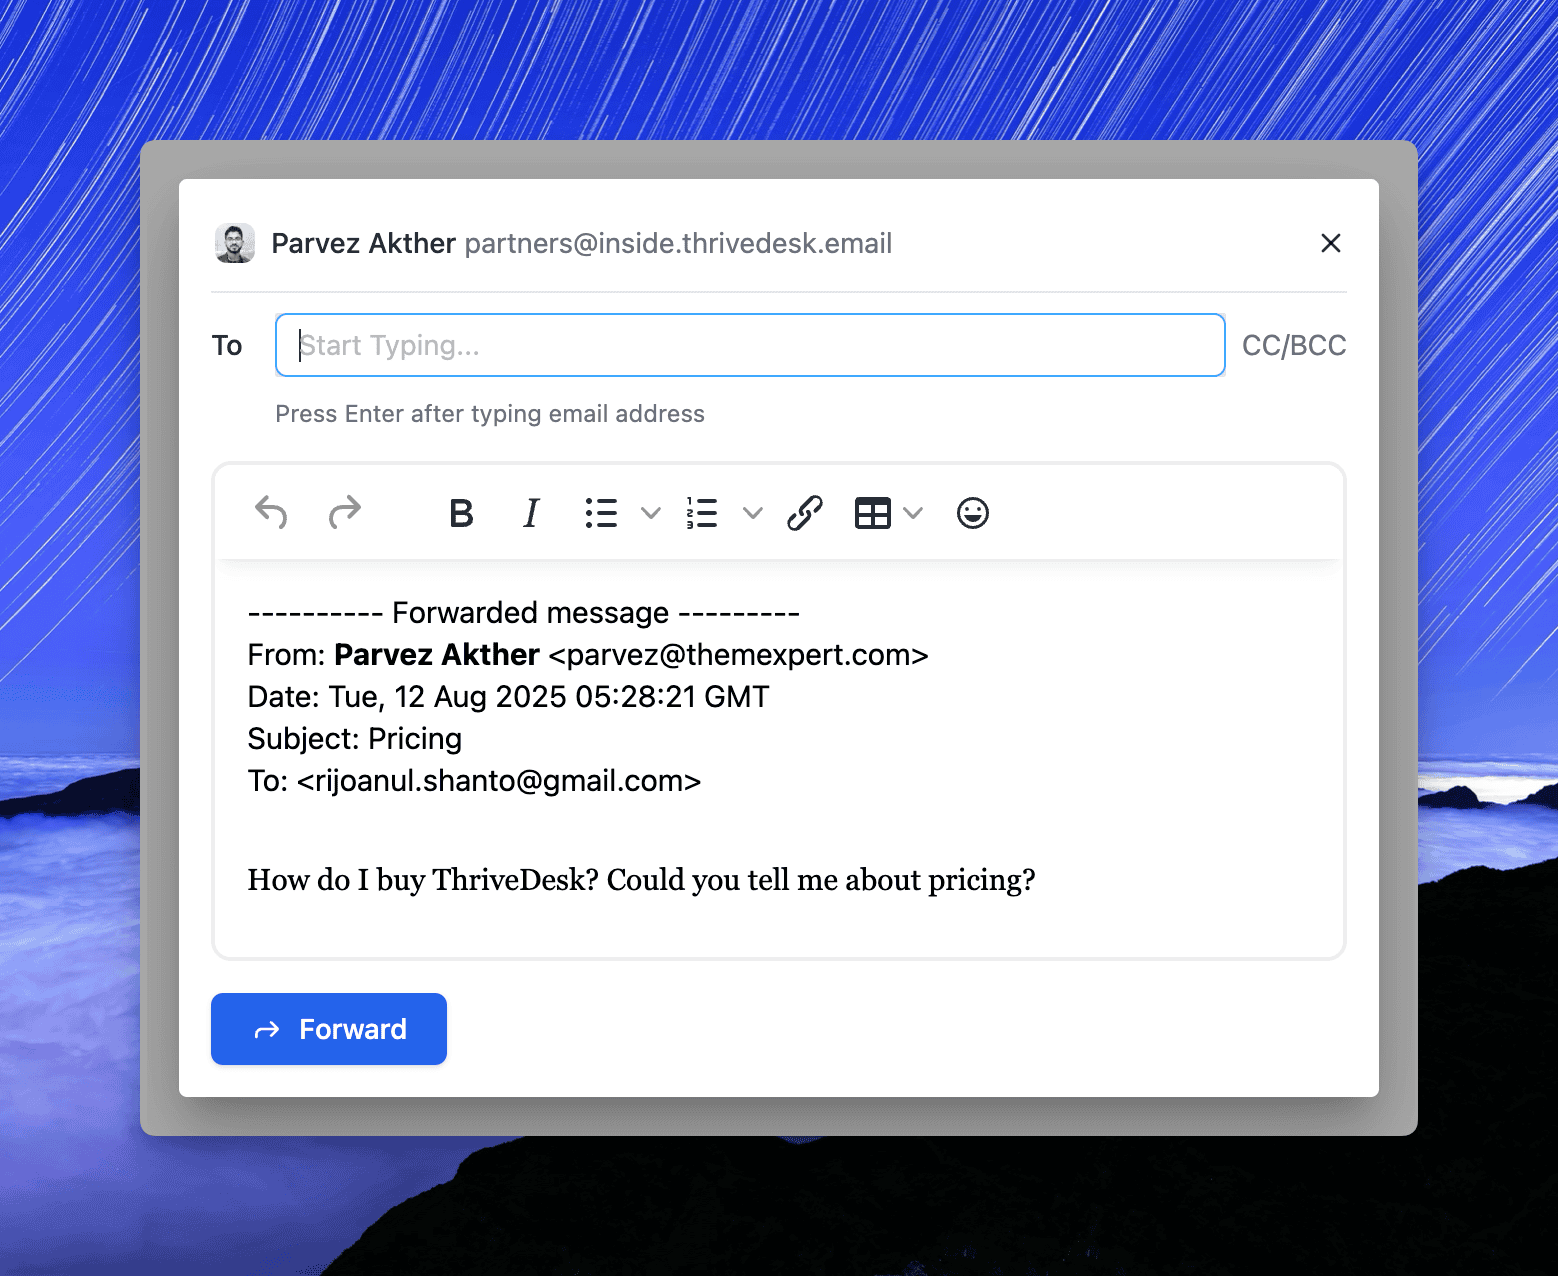This step is very important. The email address must be confirmed with **Enter** before forwarding, otherwise the message will not be sent.
* Add any additional text if needed.
* Click **Forward** to send.
The recipient will receive the full forwarded conversation thread in their email.
---
## Troubleshooting
* **Email not delivered:** Double-check that the recipient's email address was typed correctly and confirmed by pressing **Enter**. If the email is not confirmed, it will not be sent.
* **Recipient did not receive the email:** Ask the recipient to check their spam or junk folder. If the issue persists, verify that your ThriveDesk mailbox has proper [email sending setup](https://help.thrivedesk.com/en/adding-dns-records).
* **Forward button is disabled:** Ensure that at least one valid email address is entered and confirmed in the "To" field.
# Freemius Integration
Freemius is the leading platform for developers and entrepreneurs to sell premium and freemium products with its user-friendly interface and comprehensive tools. It offers an easy and hassle-free way to monetize various products like plugins, themes, templates, and SaaS offerings.
## Video Tutorial:
## Step 1: Freemius Setup
1. Login to Freemius [Developer Dashbaord](https://dashboard.freemius.com/).
2. Go to My Profile page and scroll down to bottom of the page.
3. Under the Keys section you'll see **ID**, **Public Key** and **Secret Key**. You'll need them on Step-2.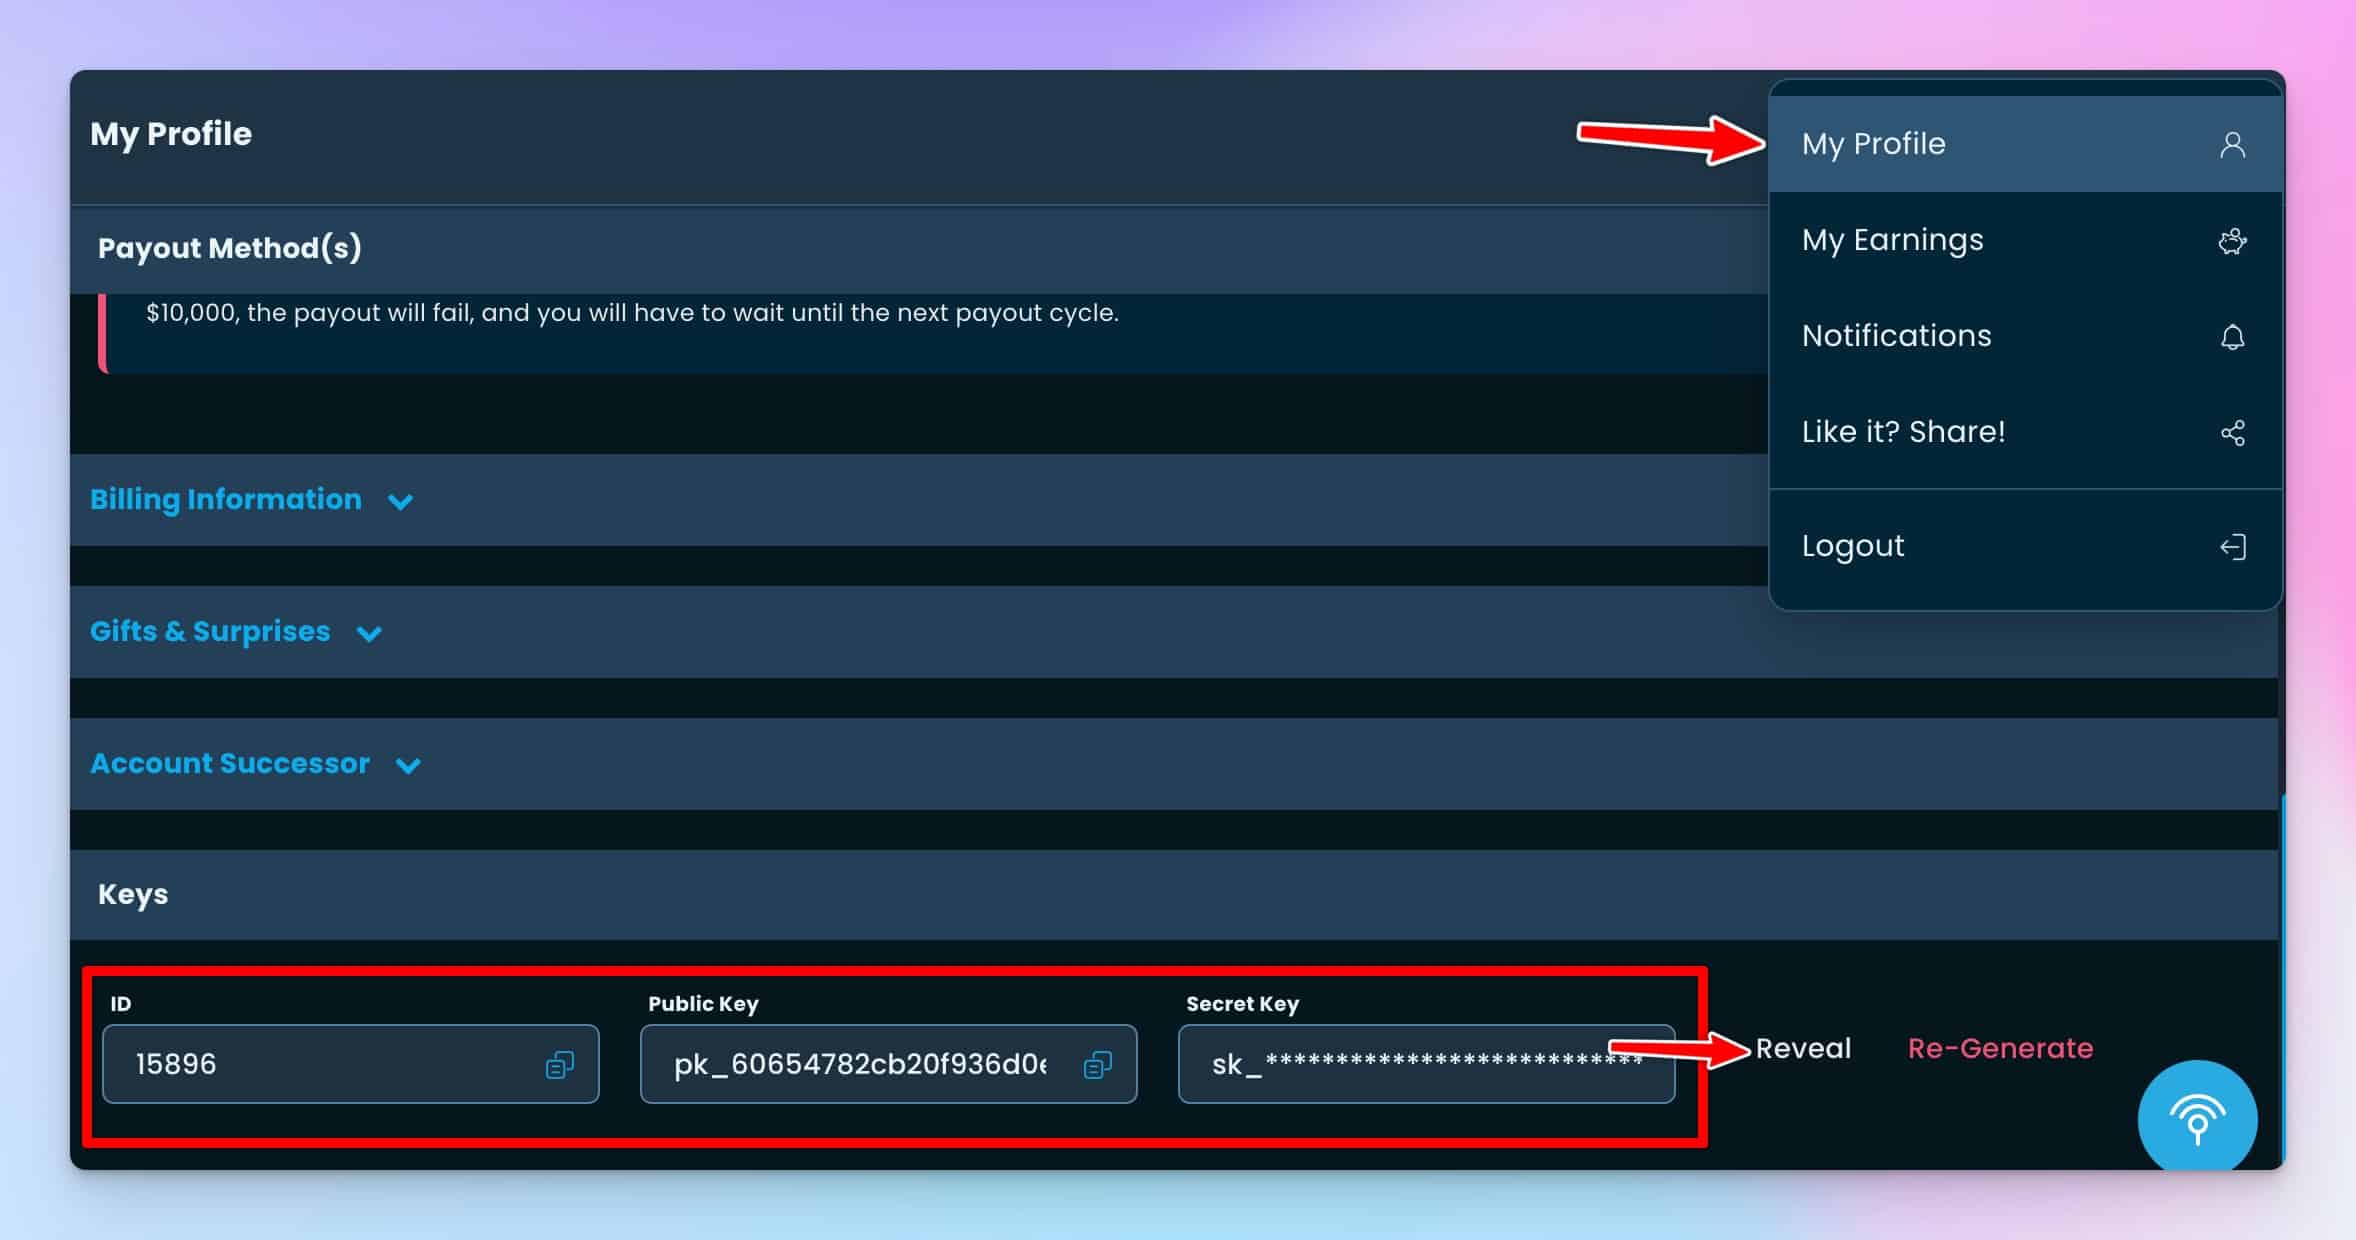
## Step 2: ThriveDesk app setup
1. Login to [ThirveDesk](https://app.thrivedesk.com/) and switch to the workspace you want to install Freemius app.
2. Click the **App Store** menu from left sidebar.
3. Search for **Freemius** app and click Install App button.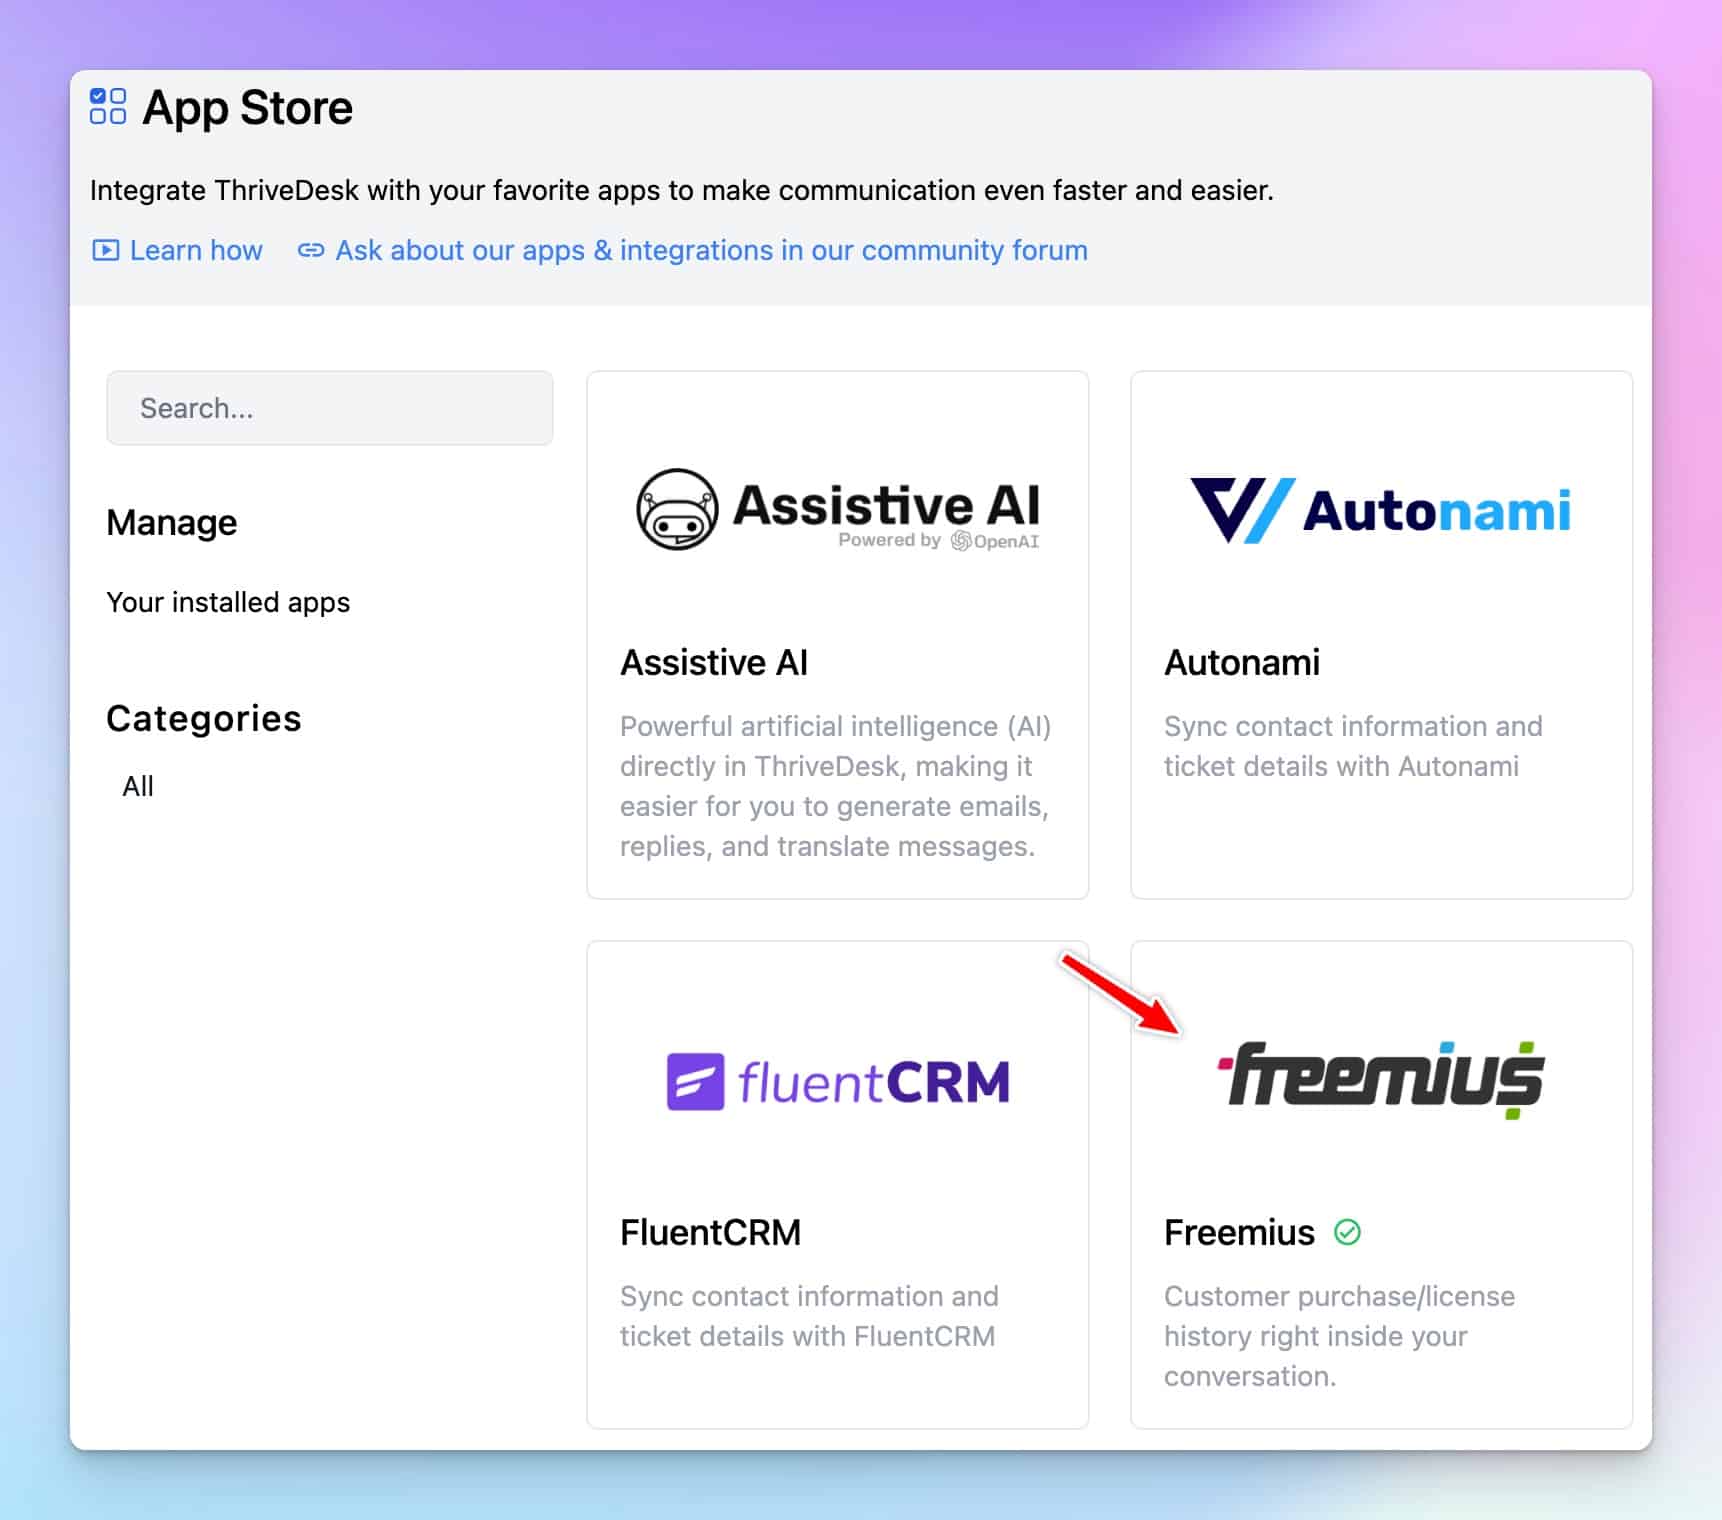
4. On App configuration screen provide Freemius **Developer** **ID**, **Public Key** and **Secret Key**.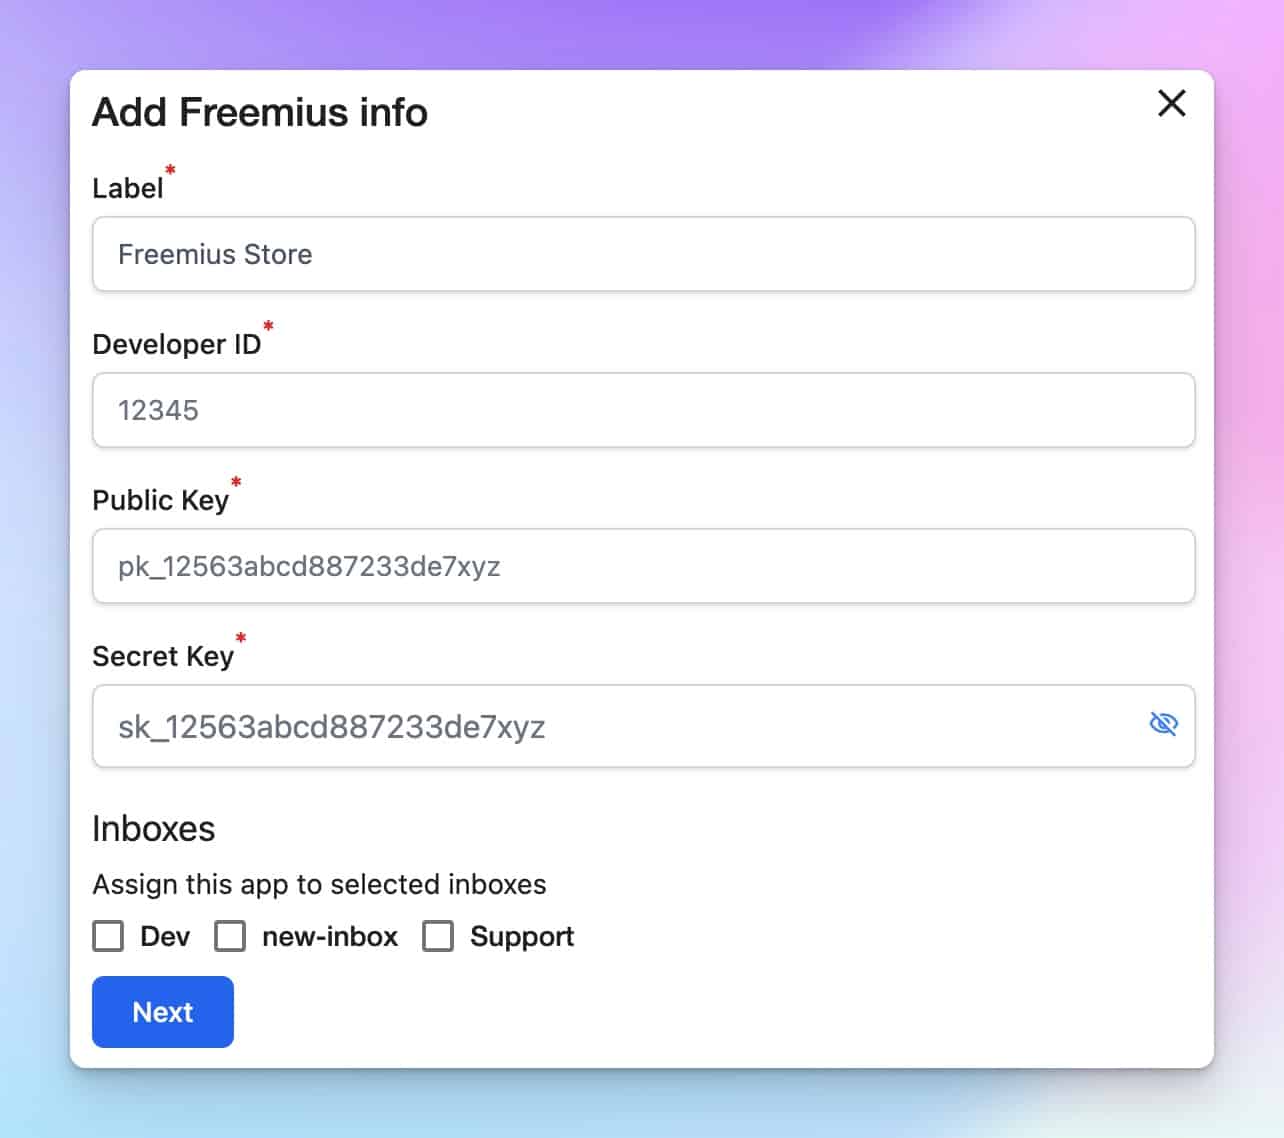
5. Choose the mailbox(es) where you want to use this app. Multiple selections are allowed and press **Next**.
6. Then select the products you want to connect with the mailbox(es). You can select max 2 product per instance.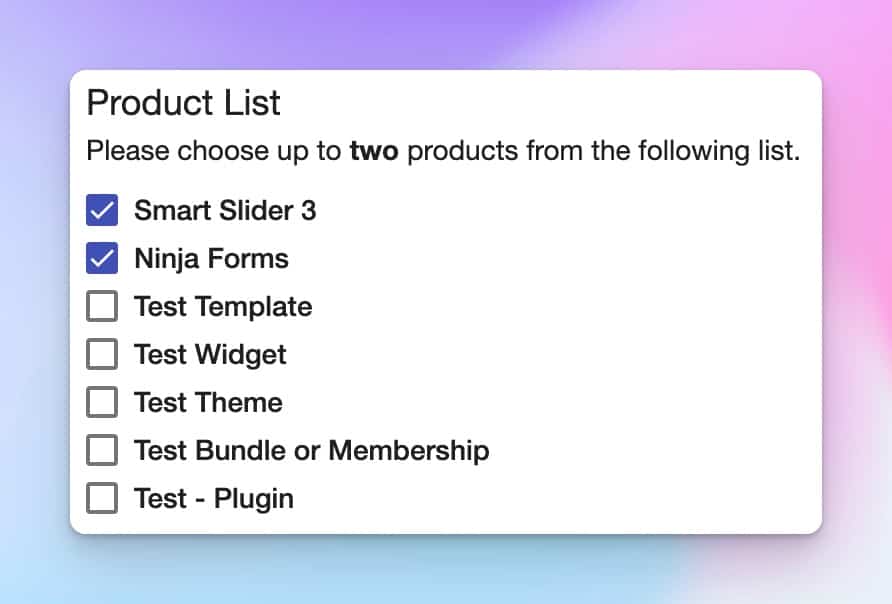
Only workspace owner and admin can install the app. Make sure you have the permission to install the app.
## Removing a Freemius
If you ever want to remove the app, just head back to **App Store > Freemius**, and click on the label to expand then click **Delete**. If you want to uninstall the app entirely, press the **Uninstall** button and it will remove all store connections that you have.
**Disclaimer:** ThriveDesk does not collect or retain any customer data on its servers. All information is displayed through API calls upon request.
# Get Started with Workflow
Workflows in ThriveDesk work like filters in Gmail or rules in other email apps. They help you automate tasks by checking conditions (what to look for) and taking actions (what to do). This guide will explain how workflows work and how you can use them.
Workflows are available in the **Standard** and **Unlimited** plans.
## What is a Workflow?
A workflow is a set of rules that tell ThriveDesk what to do when certain things happen in a conversation. It includes:
* **Conditions** – What you are looking for (like a certain word in an email).
* **Operators** – How the condition is checked (like "contains" or "is equal to").
* **Actions** – What happens next (like tagging an email or sending a reply).
For example, if an email's subject contains "Order Confirmation," a workflow can:
✔ Add a tag
✔ Send an email to the customer
✔ Mark the conversation as **Closed**
Workflows run automatically in the background. They check each new conversation for a match and take action if needed. A workflow only runs **once per conversation** to avoid repeating itself.
## How to Create a Workflow
By default, **only Administrators and Account Owners** can create workflows. If you want all users to manage workflows, update their permissions in **Roles & Permission** settings.
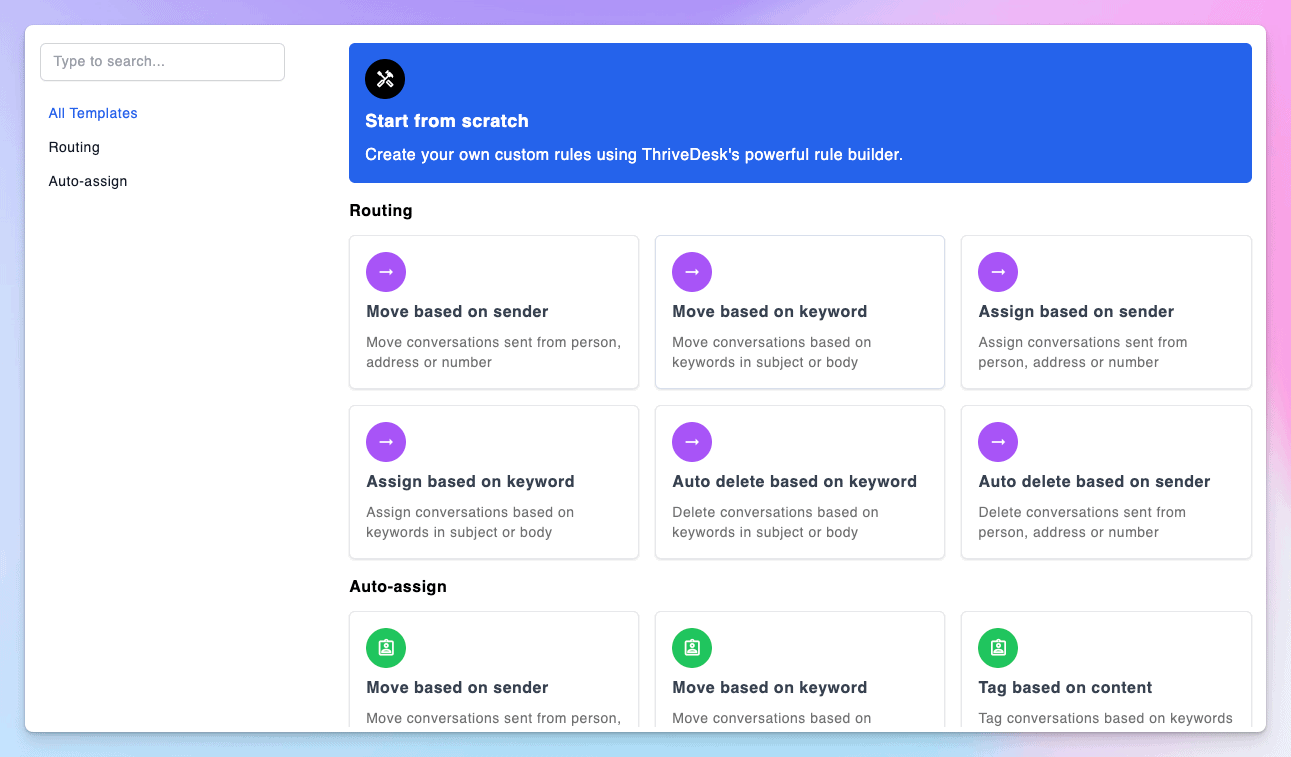### Steps to Create a Workflow
1. Go to the **Workflow** menu and click **Add New**. Automation is Inbox specific, so select the inbox before you hit the Add new button
2. Choose a template or click **Start from scratch**.
3. **Give your workflow a name**.
4. **Set up conditions** – Choose what the workflow should look for (like keywords in an email).
5. **Choose actions** – Decide what should happen if the conditions match. You can add multiple actions.
6. **Review and save** your workflow.
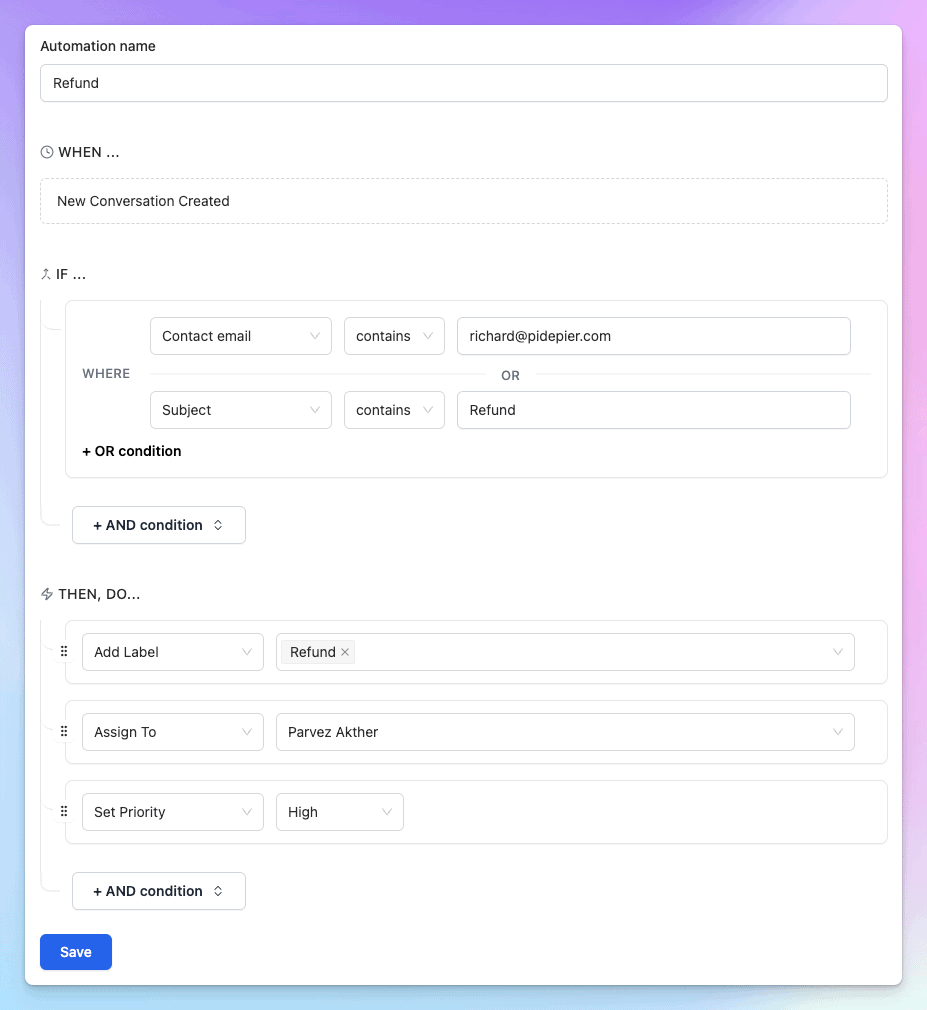## Managing Workflows
* **Turn off a workflow** – Click the toggle switch next to its name.
* **Delete a workflow** – Click the trashcan icon next to its name.
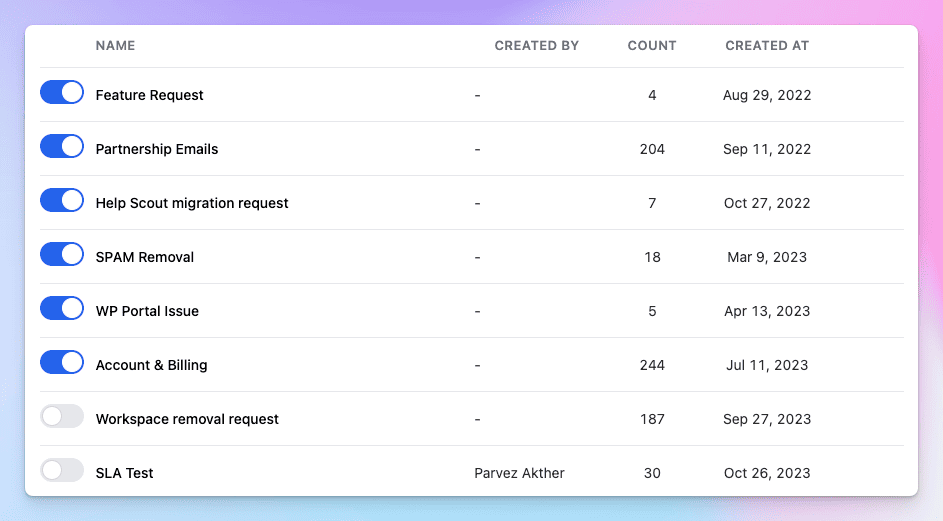**Recover a deleted workflow?** – There’s no undo option, but you can create a new one with the same settings.
## Editing a Workflow
* Click the workflow name or the edit icon.
* Make changes to conditions or actions.
* Save your updates.
Check [Workflow Conditions and Actions](https://help.thrivedesk.com/en/workflow-conditions-and-actions) explains each condition and action available.
That’s it! Workflows help you save time by automating tasks.
# Get your emails into ThriveDesk
If you are utilizing a custom email address with ThriveDesk, you will need to configure forwarding or redirection from your email provider. This email will be forwarded or redirected to the ThriveDesk email address you specified when creating the inbox, such as `support@acme.thrivedesk.email`.
ThriveDesk Administrators and Account Owners have access to create and connect custom email addresses. Read more about user roles and permission [here](//help.thrivedesk.com/en/user-roles-and-permissions).
## Connect Your Custom Address
1. After login to ThriveDesk, head over to the inbox you want to connect your custom email address. You will find **Connect your domain** button on several places, click any of it. 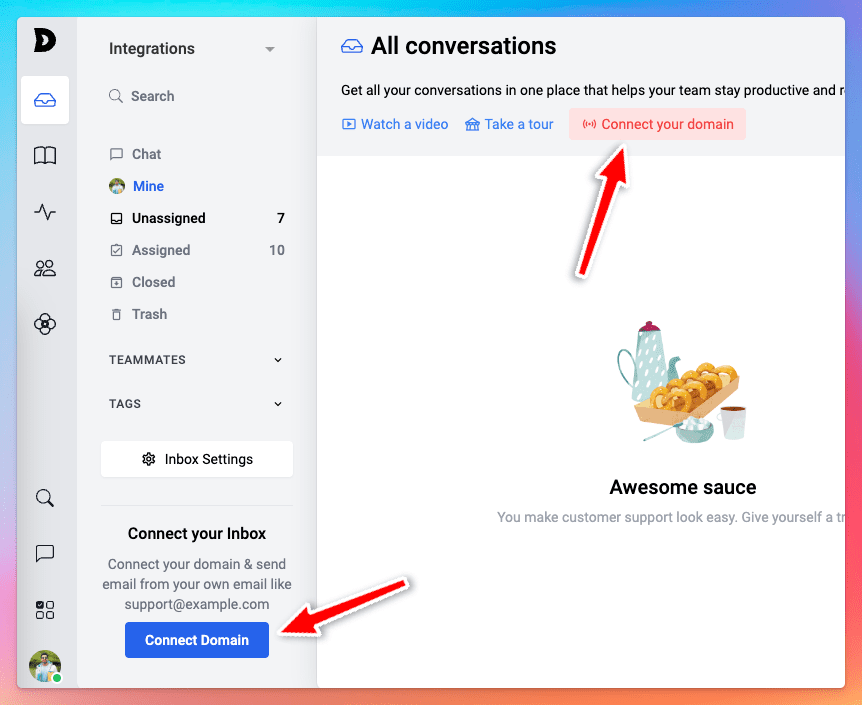
2. Enter the address you'd like to use, and click **Send Code**. 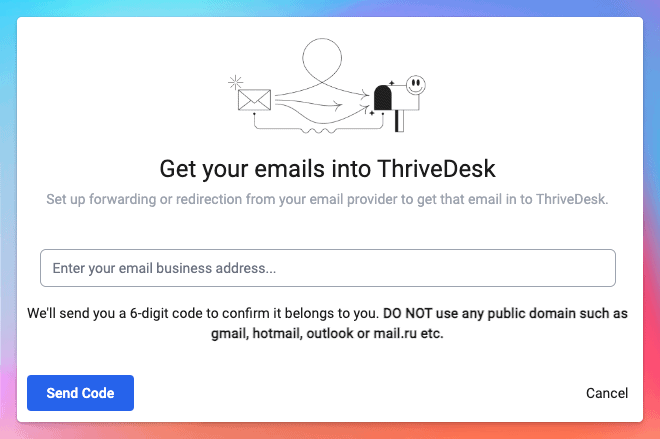
3. Check your email at your email provider for this address to obtain the code. Enter the code you receive and click **Verify**. Then head to your provider to set up the forwarding or redirection to get your email over to us, and you're all set! 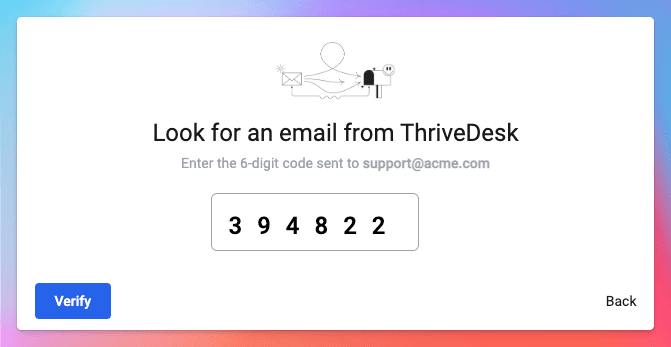
The confirmation code is sent immediately, however depending on your email service provider, it may take up to 10-15 minutes to arrive. If you haven't received the code within 15 minutes, check your provider's Spam or Junk Email folders or quarantine system. You may need to contact your IT department or email administrator to have them add thrivedesk.email and thrivedesk.com to your whitelist of approved senders. Please try again.
## Help Forwarding or Redirecting From Your Provider
How you set up forwarding or redirection will depend on where your email is coming from, so let’s start there:
### Forward or redirect from an Email Provider
* [Google Workspace (formerly known as G Suite)](//help.thrivedesk.com/en/forward-email-from-google-workspace)
* [Google Workspace Group](//help.thrivedesk.com/en/auto-forwarding-from-google-group)
* [Office 365 Outlook Web Access (OWA)](//help.thrivedesk.com/en/forward-email-from-outlook-office365)
* [Amazon WorkMail](//help.thrivedesk.com/en/forward-email-from-amazon-workmail)
* [Zoho Mail](https://www.zoho.com/mail/help/email-forwarding.html)
* [Yahoo! Small Business](https://help.yahoo.com/kb/new-mail-for-desktop/enable-automatic-email-forwarding-yahoo-mail-sln29133.html)
### Forward or redirect from a Host
If you don't see your provider listed here, your best bet is to reach out to the support team for your email provider to ask about automatic forwarding — they should be able to help you get things set up!
* [Bluehost](https://www.bluehost.com/hosting/help/email-forwarders)
* [Namecheap](//help.thrivedesk.com/en/namecheap-email-forwarding)
* [cPanel](//help.thrivedesk.com/en/cpanel-webmail-email-forwarding)
* [GoDaddy](https://www.godaddy.com/help/forward-copies-of-my-incoming-email-8050)
* [Dreamhost](https://help.dreamhost.com/hc/en-us/articles/215724207-Add-a-forward-only-email-address)
* [InMotion Hosting](https://www.inmotionhosting.com/support/email/set-up-email-forwarder/)
* [Web.com](https://customerservice.web.com/prweb/PRAuth/webkm/help/article/KC-307/Web.com) (AppSuite or Megamail)
* [Media Temple](https://mediatemple.net/community/products/grid/204643330/how-do-i-create-an-email-alias-forwarder#gs)
* [Rackspace](https://docs.rackspace.com/support/how-to/set-up-rackspace-email-forwarding/)
### Importing from Another Help Desk
* Help Scout
# Google Analytics 4
Integrating Google Analytics 4 (GA4) with ThriveDesk Knowledge Base (KB) lets you track visitor behavior and interactions on your help center. This connection provides insights into which articles users visit most, how they navigate the content, and where improvements can be made.
With this step-by-step guide, you'll learn how to set up GA4 for your ThriveDesk KB, retrieve your Measurement ID, and add it to your KB configuration. Following these steps will ensure seamless tracking and valuable data for enhancing user experience.
## Create a Google Analytics GA4 Property
1. Log into Google Analytics, click on the **cog icon** in the lower left corner to open **Admin** settings.
2. Under **Data collection and modification**, select **Data Streams**, then click **Add stream > Web** to create a new web stream.
3. Enter the URL of your documentation site.
4. After creating the web stream, locate your **Measurement ID** (formatted as G-XXXXXXX) in the stream details.
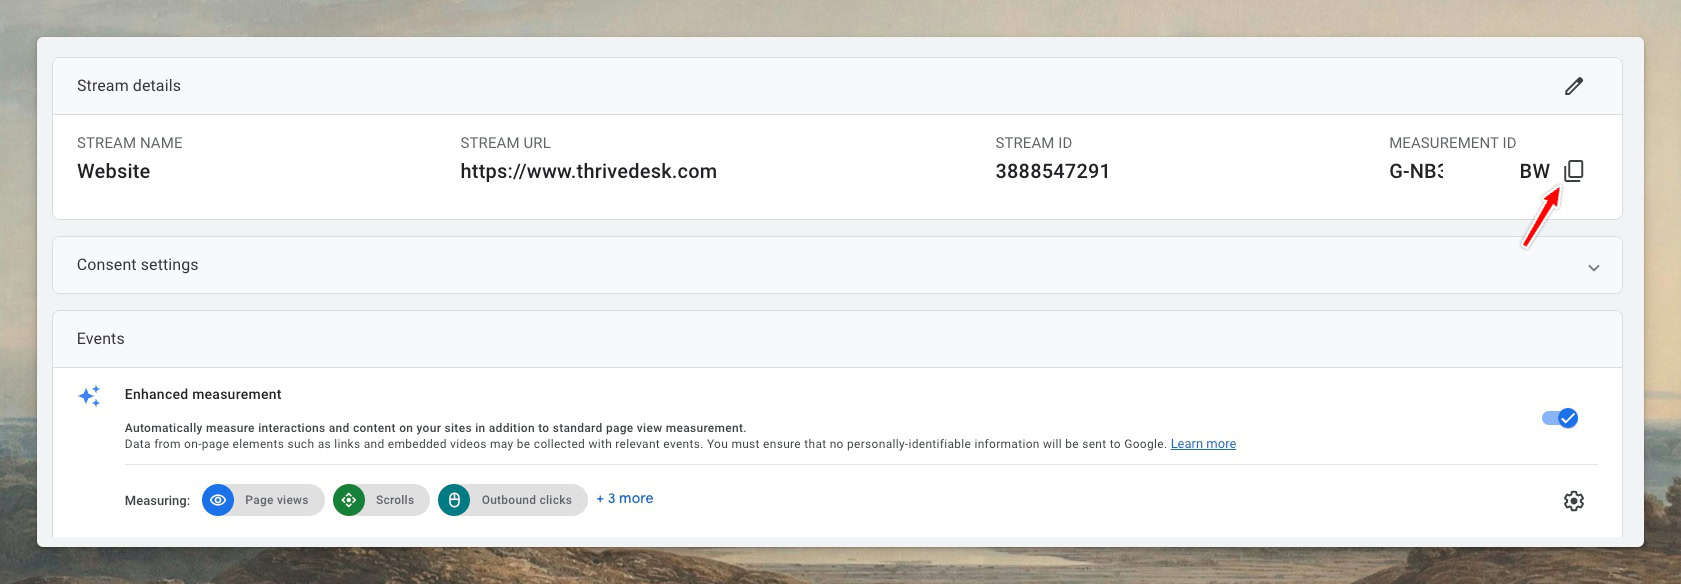
## Install Google Analytics App
1. Log into ThriveDesk Knowledge Base(KB) site and go to **Settings > Apps**.
2. Click **Install** button on Google Analytics App
3. Put your **Measurement ID** and press **Save Changes**.
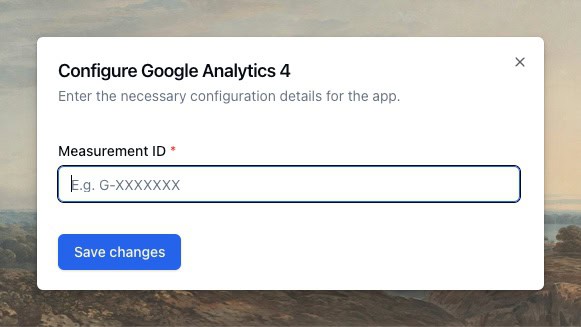
## Confirm & Verify Analytics Setup
Google Analytics can take a few days to start showing data. Check back after a few days to see the data within Google Analytics.
Remember that preview links won’t track analytics by default.
# Google Tag Manager
Google Tag Manager(GTM) lets you easily add and manage marketing and analytics tags on your website—without needing to edit code. Track user behavior, conversions, and more in just a few clicks.
## Getting Your GTM ID
* Login to your [GTM Dashbaord](https://tagmanager.google.com)
* You'll see a list of accounts and container in it
* If this is a fresh account then click **Create Account** button and create your first **Web Container**
* Copy the Container ID from the toolbar, beside Preview and Submit button. It looks like **GTM-XXXX**
## Install Google Tag Manager
1. Log into ThriveDesk Knowledge Base(KB) site and go to **Settings > Apps**.
2. Click **Install** button on Google Tag Manager.
3. Put your **Container ID** and press **Save Changes**.
Preview and debug your configuration before pushing any changes live in Google Tag Manager.
For any technical issues, contact either platform's support team with specific error messages or screenshots for faster resolution.
# How do Live Chat email notifications work?
ThriveDesk notifies you of pending (unread) messages from your visitors. Email notifications are not delivered to your inbox in real-time (eg: right when you receive a message); thus you may wonder why.
ThriveDesk waits for 3 minutes before delivering an email notification to operators for pending messages. You receive email notifications only for messages that don't get read before that 3 minutes delay. If the pending message gets read before that delay, no email will be delivered.
This delay makes the system convenient for contextual use: your inbox doesn't get flooded when you are active on an app and you reply from chat, while you can still fallback on email replies in some contexts (eg: apps are still open, but you leave your desk and rely on another computer or mobile device that don't have the ThriveDesk app).
The notification will be sent to one operator, following these rules by order of priority:
* To the assigned operator (if any, whether online or offline)
* To one of the online operators
* To one of the offline operators
# How to use @mention in Notes
The @mentions feature enables you to alert another user or team in a conversation note, sending them a notification without needing to assign the note to them. This article explains how @mentions function.
## How @mentions Work
When you type the @ symbol in a note, an inline dropdown will appear showing Users and Teams with access to your current Mailbox. This list narrows down as you continue typing. You can select a User by clicking on their name or use arrow keys and Tab for keyboard navigation.
Mentions will only work within the note editor specifically. To mention a User or team:
1. Open a conversation, then click the "Add Note" button or press (N) from your keyboard to access the note editor.
2. Type the @ symbol in the Note field and begin typing the name you want to @mention. A dropdown menu will appear with names that match as you type. Hit return/enter on your keyboard to select the top option, use the arrow keys to highlight other options then hit return/enter, or use your mouse to click any option in the list.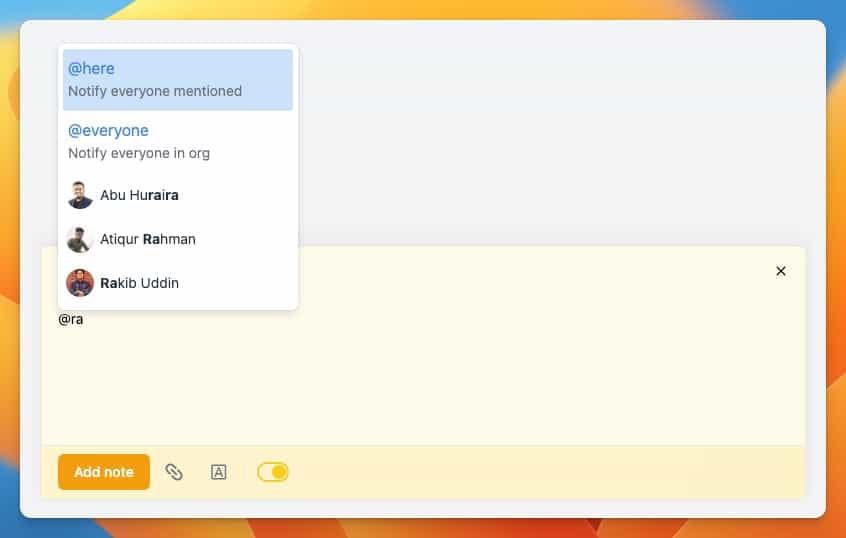
3. Complete the note's message. Include an @mention anywhere within the note, and feel free to @mention multiple users or teams. Click 'Add Note' to save your note along with the @mentions.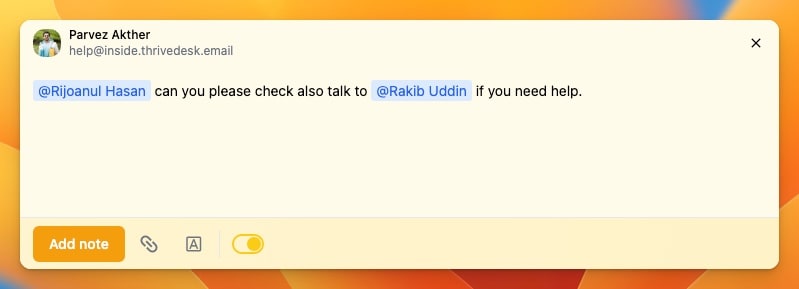
4. Your note indicates the @mentioned names is highlighted on conversation, and the User(s) mentioned will receive notifications. 
## How @here and @everyone work
**@here:** A ticket may require collaboration from multiple team members. By using @here, all individuals associated with that ticket will receive notifications.
**@everyone:** Using this tag will notify everyone in the workspace. Use it only when absolutely necessary.
## @mention Notifications
Whenever you're @mentioned in a note, a notification will appear in the Notification Center Mentioned tab. You can also choose to receive email, browser, or mobile notifications for @mentions through your Notification Settings.
#### In-app notifications
Check the Notification Center Mention tab for all of your @mentions.
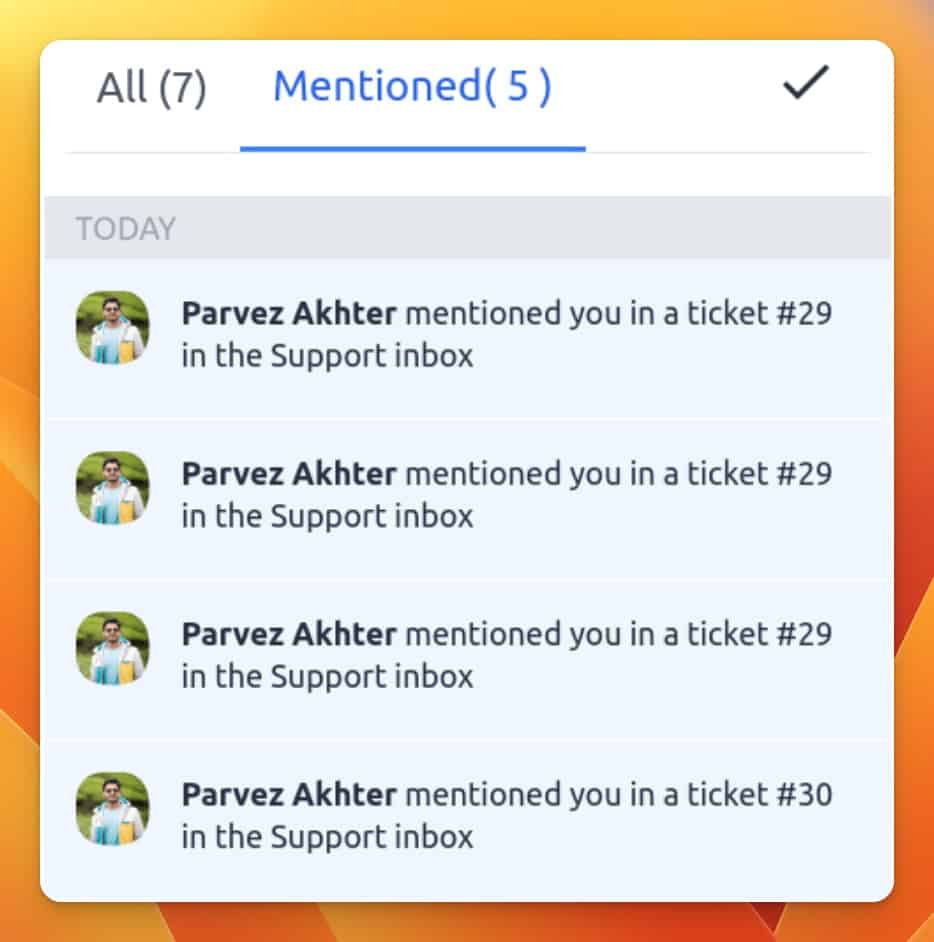
#### Email notifications
You'll also receive an email notification if you enable that option in your notification settings.
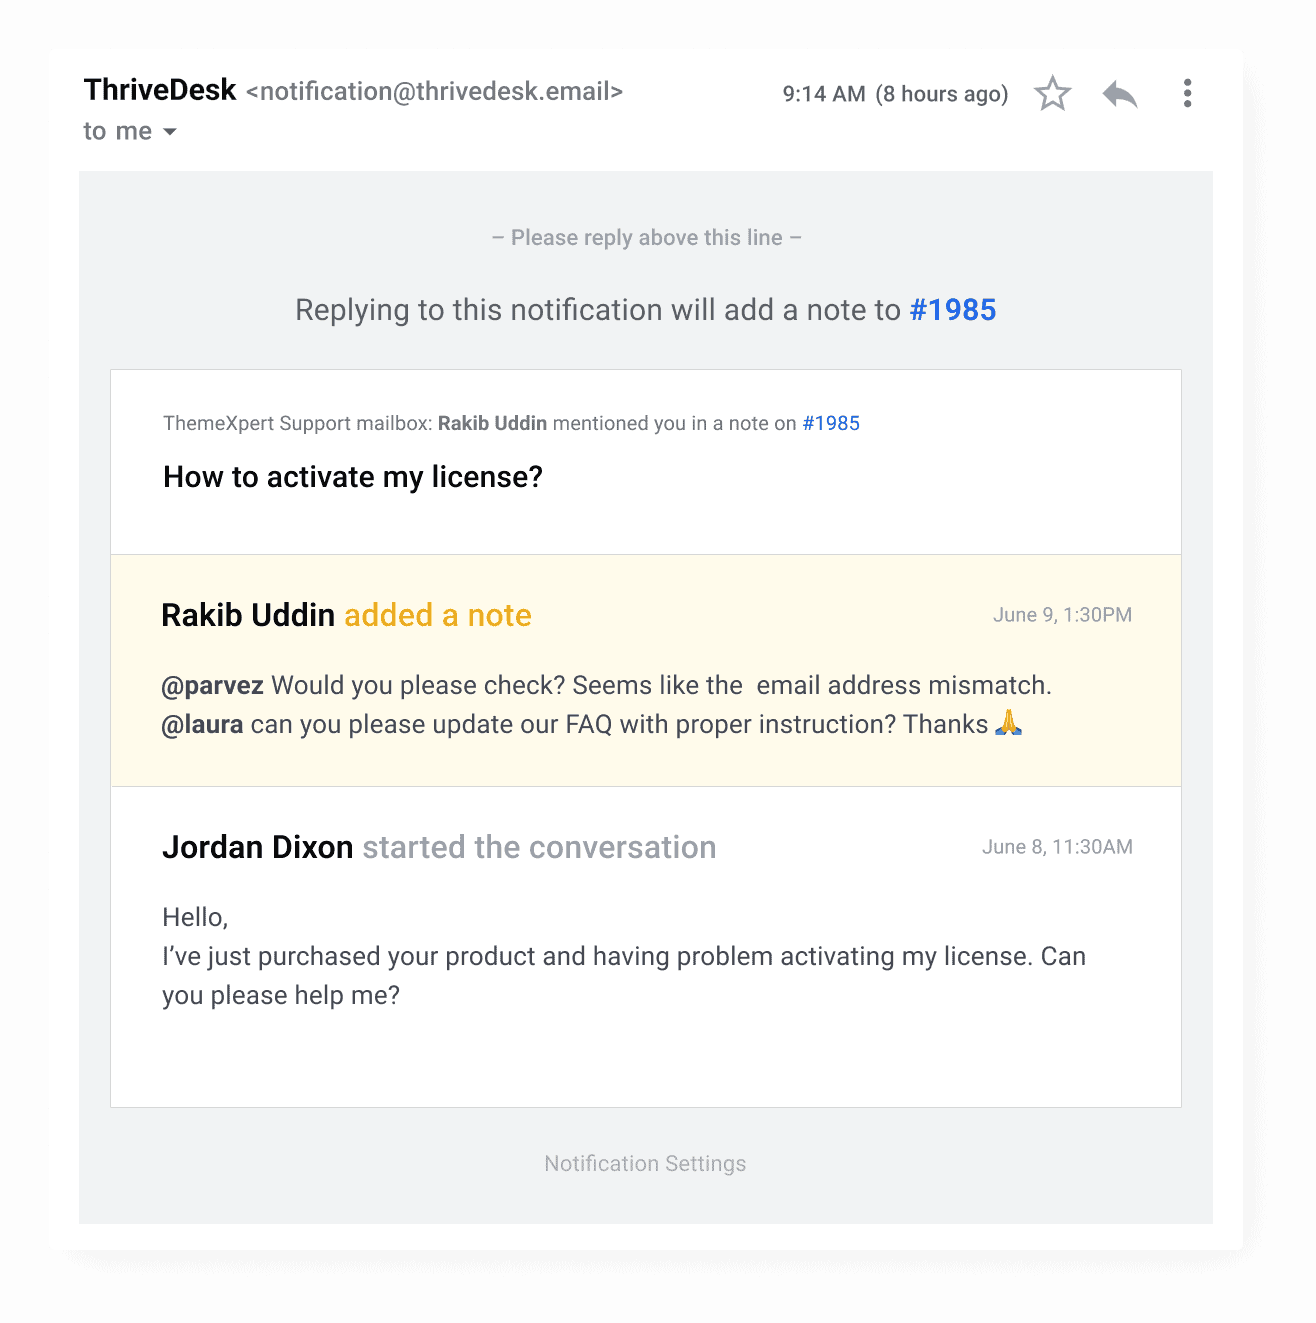
You can reply to the notification email to reply to that note, or log in to ThriveDesk to reply.
# Inbox Overview
In this guide we will go through with many of the basic features of Shared Inbox which allows a smooth flow for giving customer support or carrying on conversations, which as follows:
## Toggle between folders
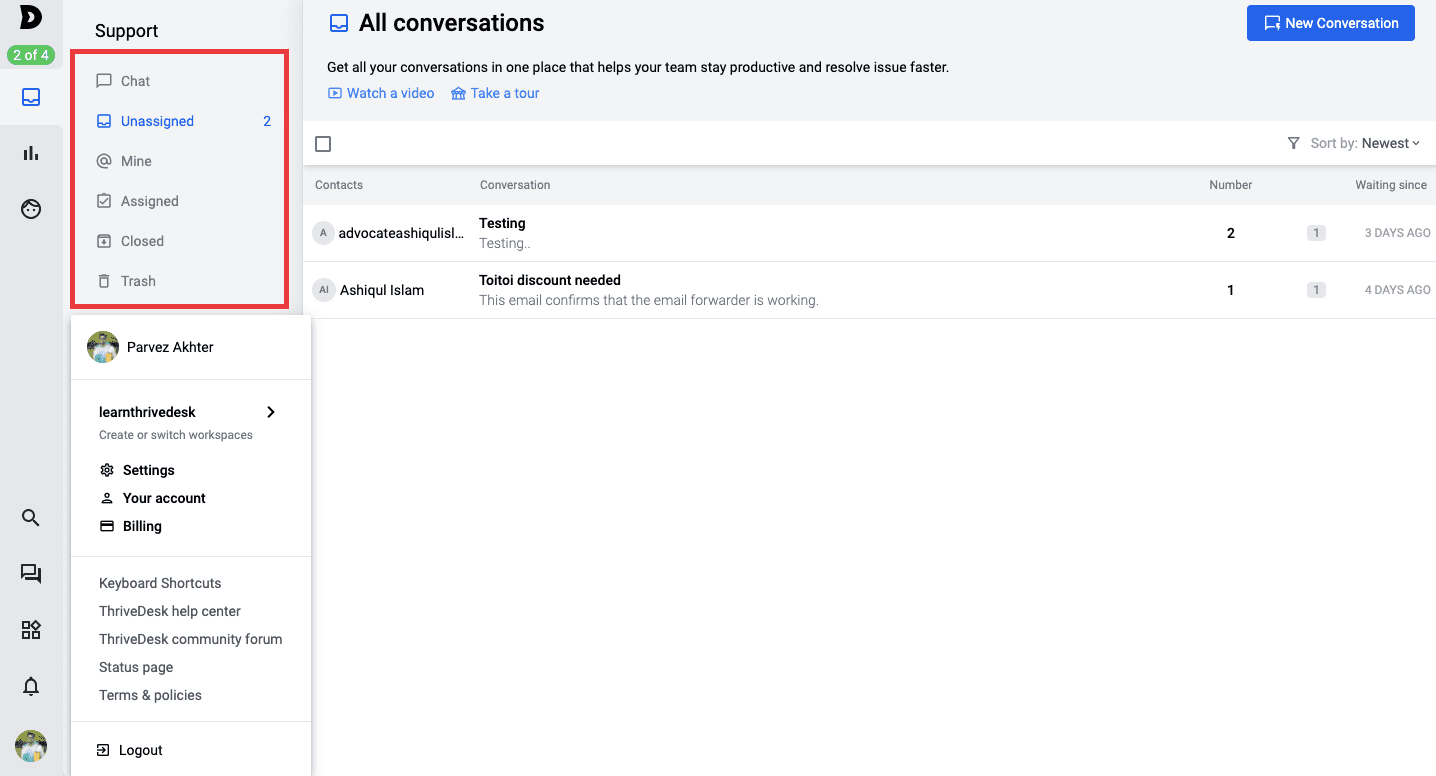It’s important to have a birds eye view of all the queries coming in and out of your support, which also means that you need the most convenient mode of navigating from one folder to another and also check out the “unattended” or “attention needed” queries in numbers without even getting into the folder.
As a matter of fact followings are the list of folders you can toggle between and figure out the queries and the source of such queries:
* Chat - all chat queries are compiled and received in this folder.
* Unassigned- means that in default scenario, all the queries that you have received but neither it has not been assigned to any one nor any else has given a reply to it and are currently Active, will be found here.
* Mine- all queries that are assigned to you will be found here.
* Assigned- all the queries that are assigned to all the other members of the your team except yourself and are not done or Closed are to be found here.
* Closed- All the queries that has been answered goes here.
* Trash- Self explanatory, all the deleted queries before getting permanently deleted goes here.
**New Conversation**
Isn’t that cool that you don’t really even have to get inside your webmail or email service provider to send out a New Email if you are using ThriveDesk. Yes, thats true, with the “New Conversation” option you can send out a fresh email or queries or start a new conversation with your customers for the first time.
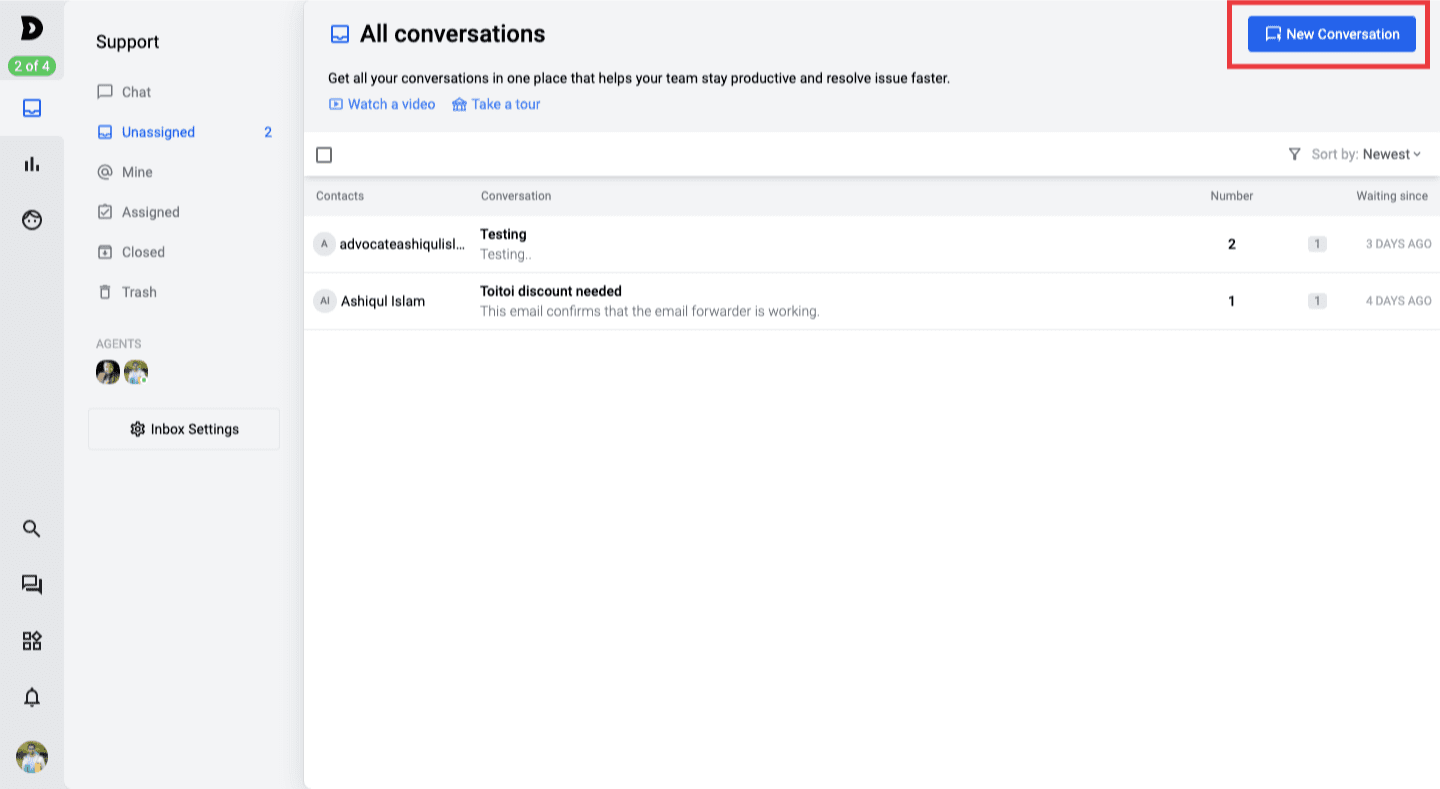Basic features that ensure a smooth Support workflow
When it comes to replying to the queries of the customers or proceed on with the conversations, there are certain features that is important to understand for ensuring a smooth yet an effective customer support system, which are as follows:
**Assigning (without reply)**
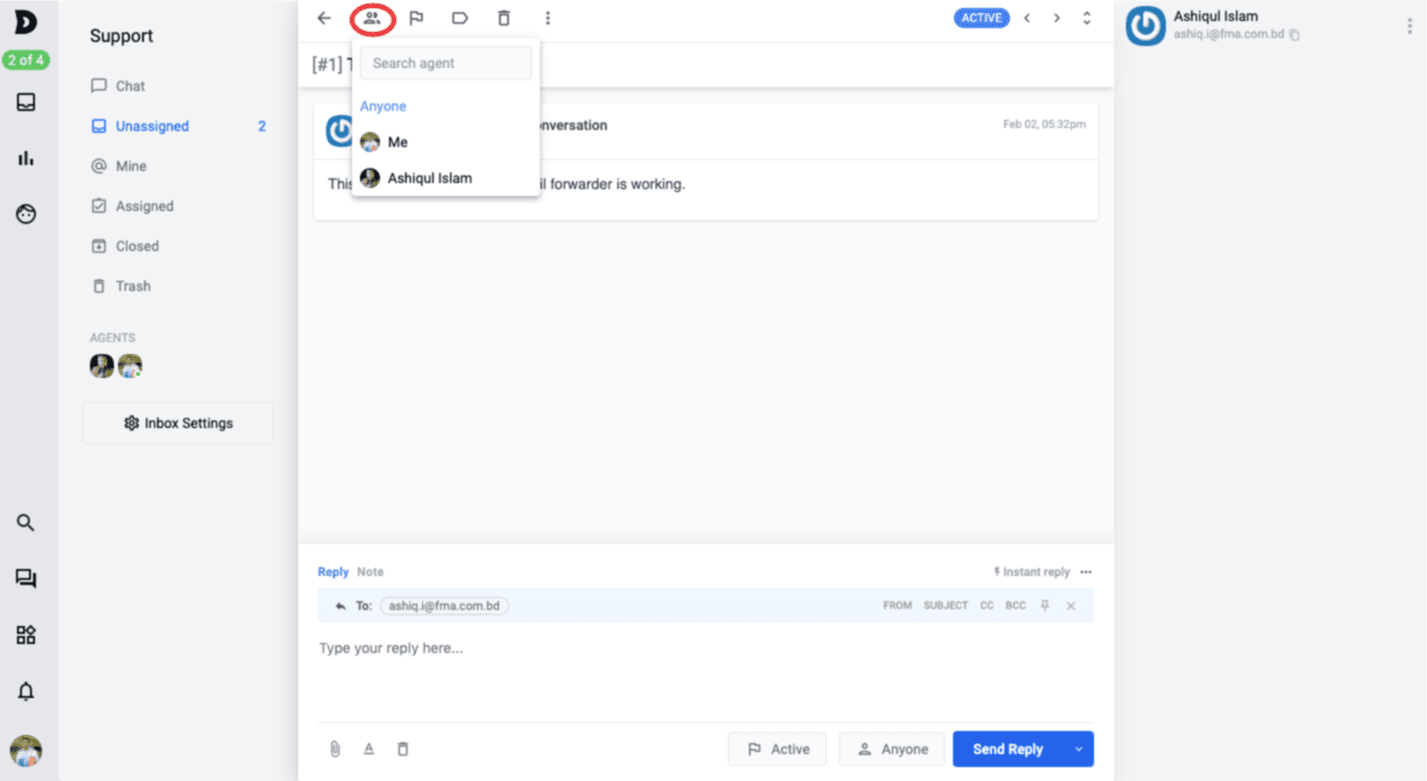Well to be honest there are two ways to assign someone else to any ticket or queries straight out of inbox interface, although there are two ways to do it, the purpose is completely different from one another.
Lets talk about the first method, which is Assigning (without a reply), it means that once you open the queries it appeared that there is no need to even give an initial reply rather someone else should directly assist on this then use this option to assign that person.
**Assigning (with reply)**
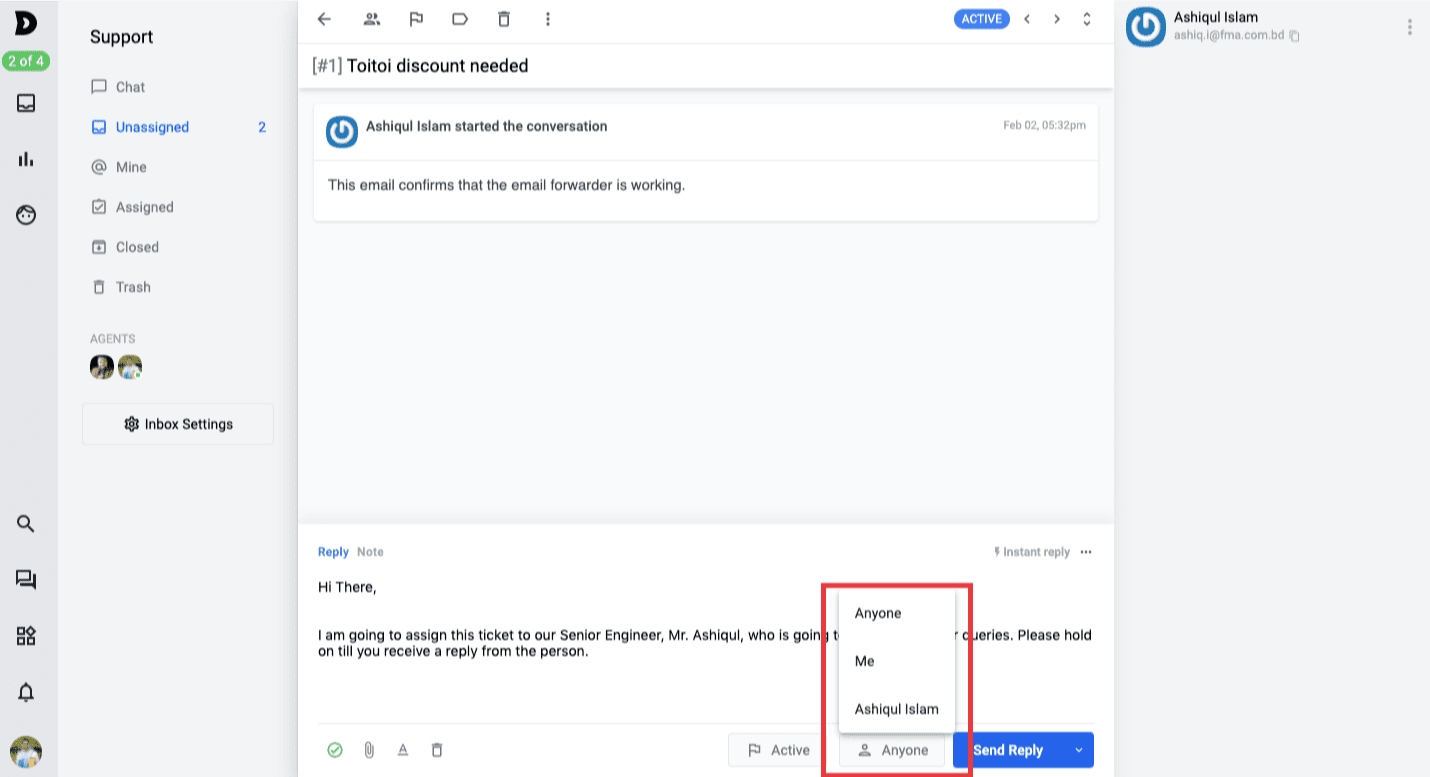Moving on to the second option, which is Assigning with reply, it also means that when you need to send an initial answer where you have actually referred it to a senior engineer or to someone else in order for that person to resolve it then you are not truly closing the ticket rather just Assigning someone else after your initial reply.
**Status change - Active, Closed, Pending (without reply)**
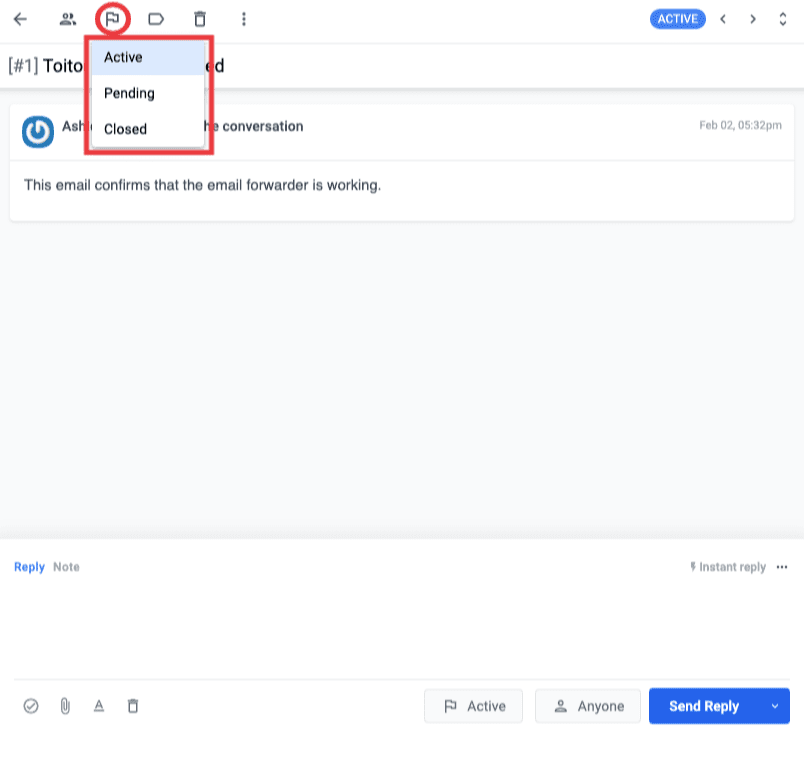Right after you got inside a ticket and realise it doesn’t need any reply, may be because its a spam or simple verification email. Therefore, send it directly to the closed item or make its status active or pending straight out of here.
**Status change - Active, Closed, Pending, Trash & Spam (with reply)**
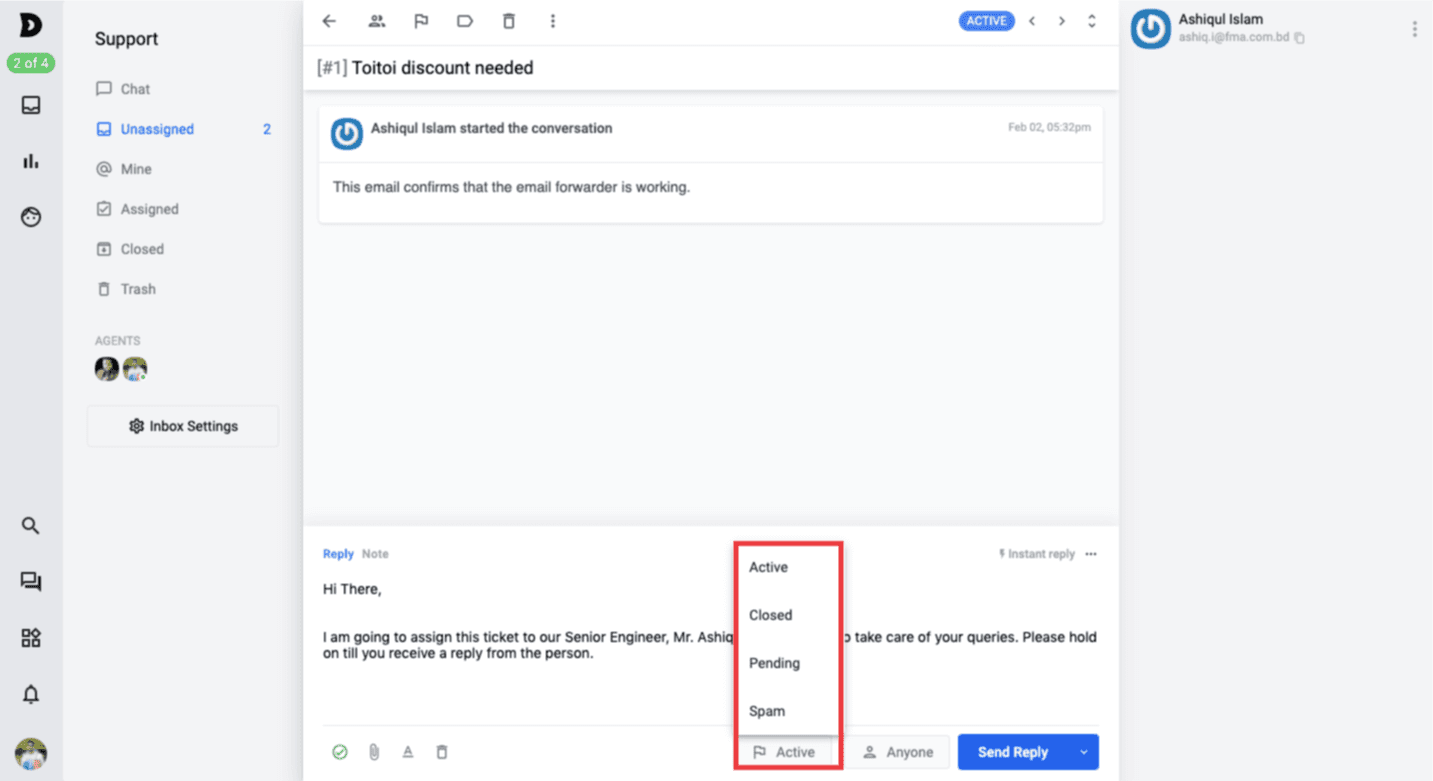What happens to your ticket once a reply has been given? Where does it go? well you can set its destinations from the menu shown above. Active - tickets goes to Assigned tab if assigned to someone else or mine tab if assigned to yourself and the ticket stays active, Pending - tickets goes to Assigned tab if assigned to someone else or mine tab if assigned to yourself and the ticket stays Pending, Closed - tickets goes to the closed folder once it has been replied. Spam - it goes away and mark that email as spam, kindly note that once its marked spam you cannot unmark it spam (please contact the support team should you need to mark it as spam).
**Move On**
You can simply move on right after reply has been made, use this menu option with the self explanatory options
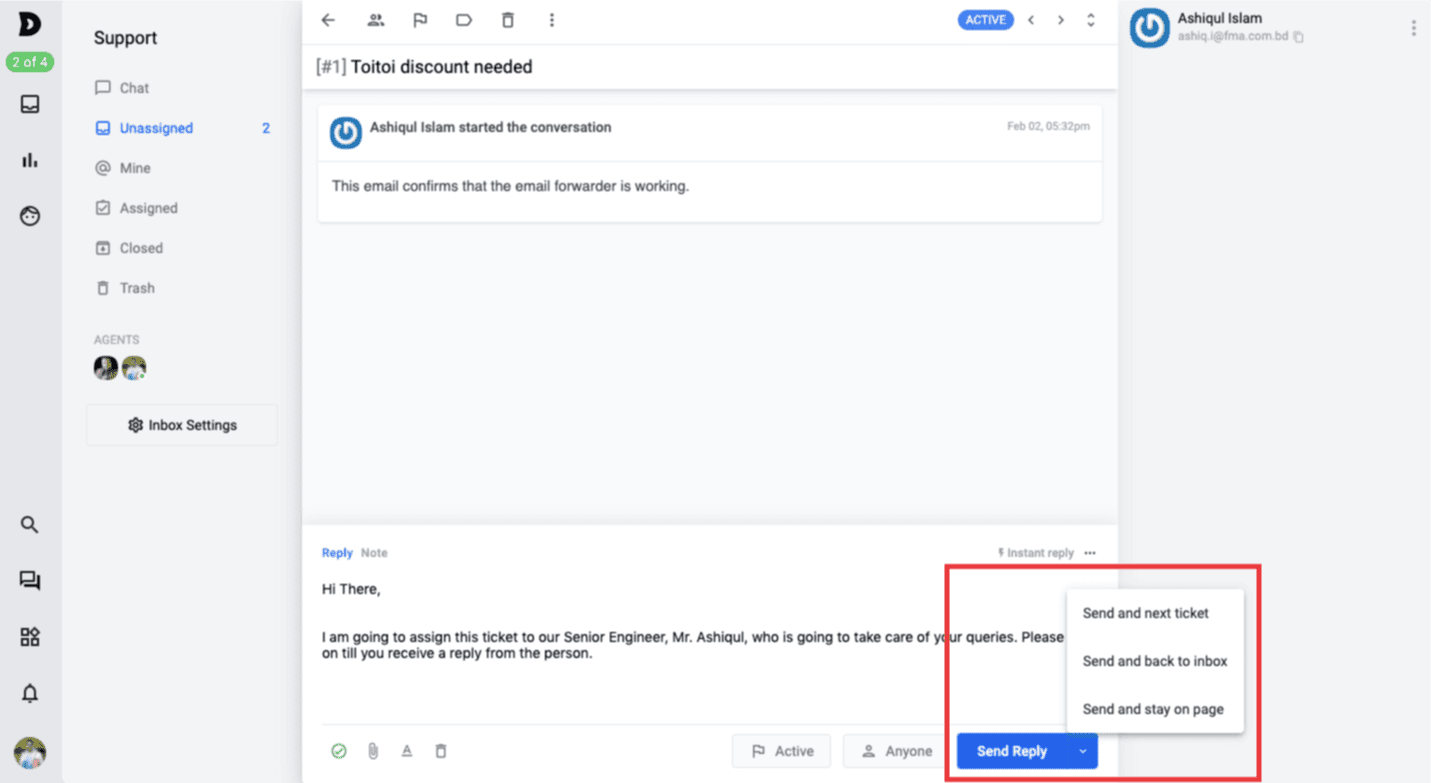**Internal Notes**
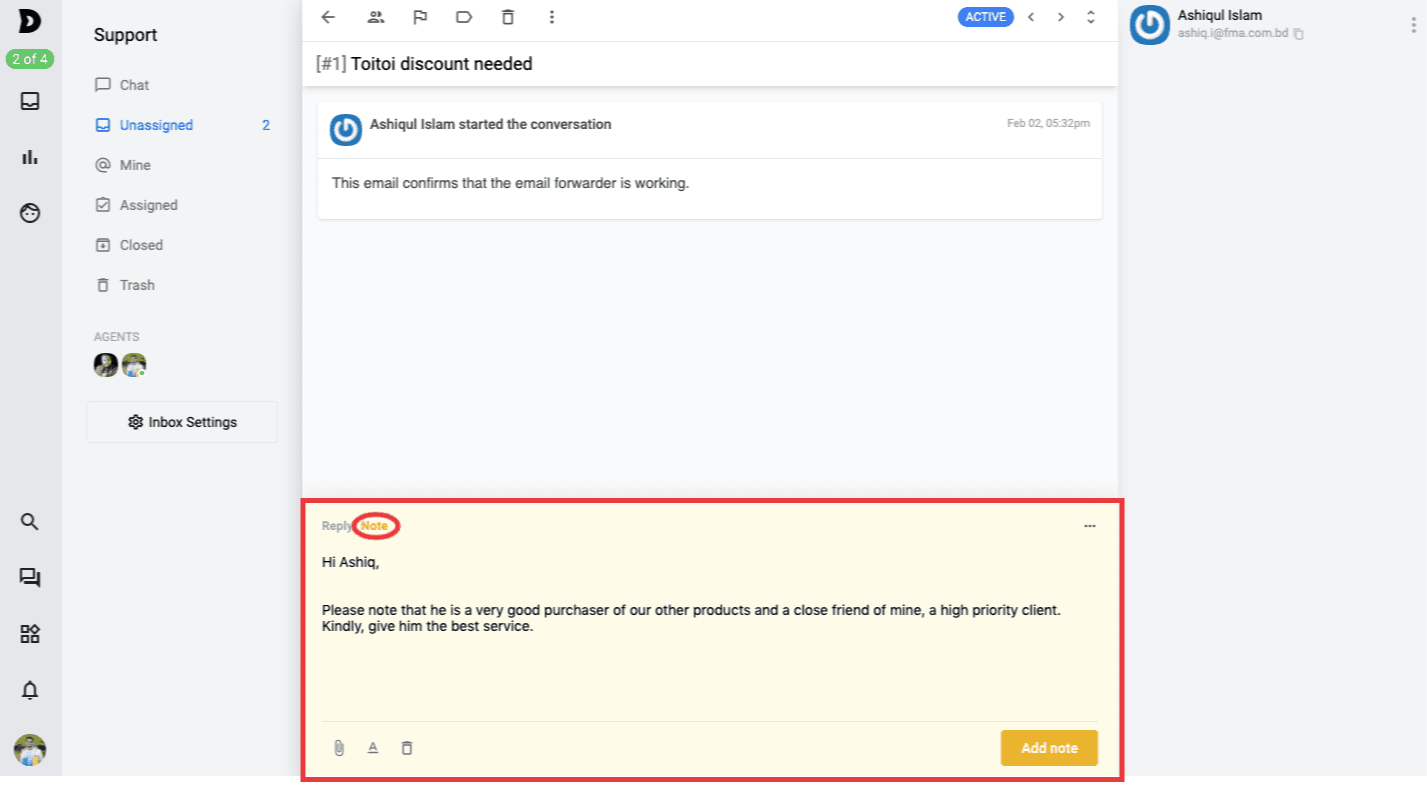No need to call your team members and say “hey I have assigned you a ticket of a high priority customer, we need to get him onboard, here are the tips to proceed with him correctly....”.
Apparently, you can communicate with your own team members through internal notes only visible to the team members and kept it completely hidden from the customers.
**Subject- CC - BCC - From - To**
Although the information regarding the sender From and To along with the Subject is available only CC and Bcc are editable, see below:
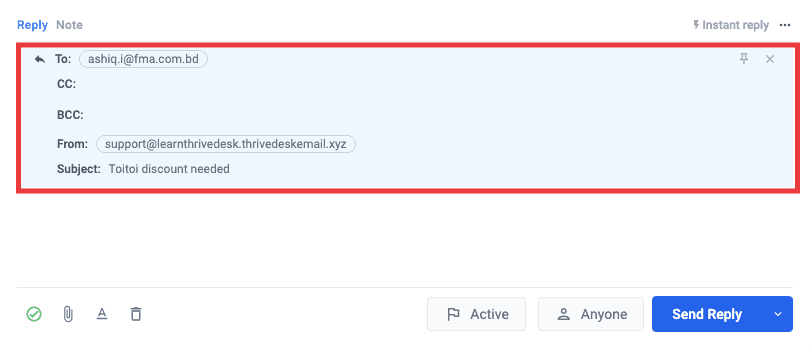**Tags**
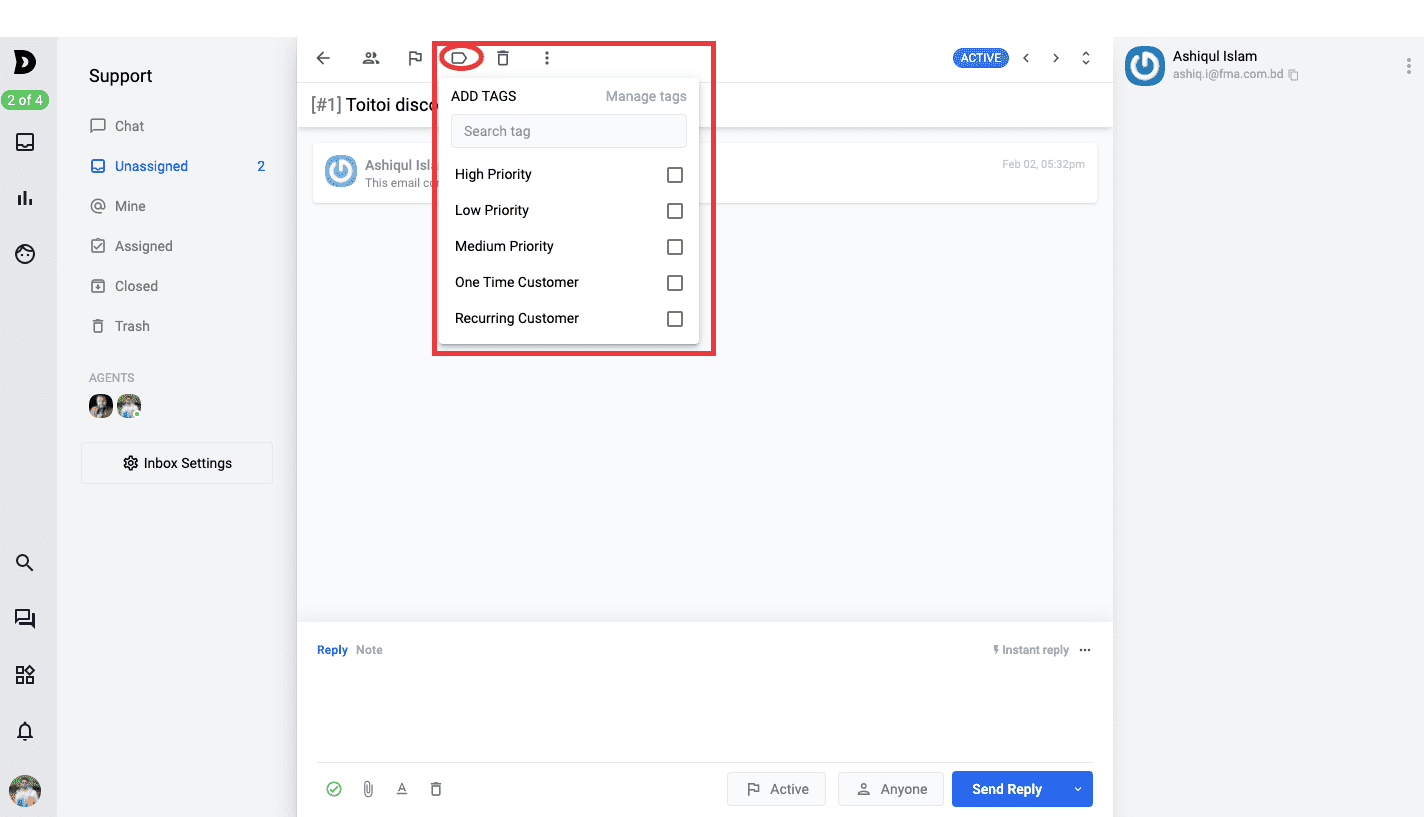Worried about losing your answers or queries or wish to manage your customer tickets in a a much more organised manner, this is why we have tags.
tags assist on organising your customers with priority or segments as you wish, because you can create your own tags and in order to create one click on Manage from the above picture and you will be directed to the below page, as follows:
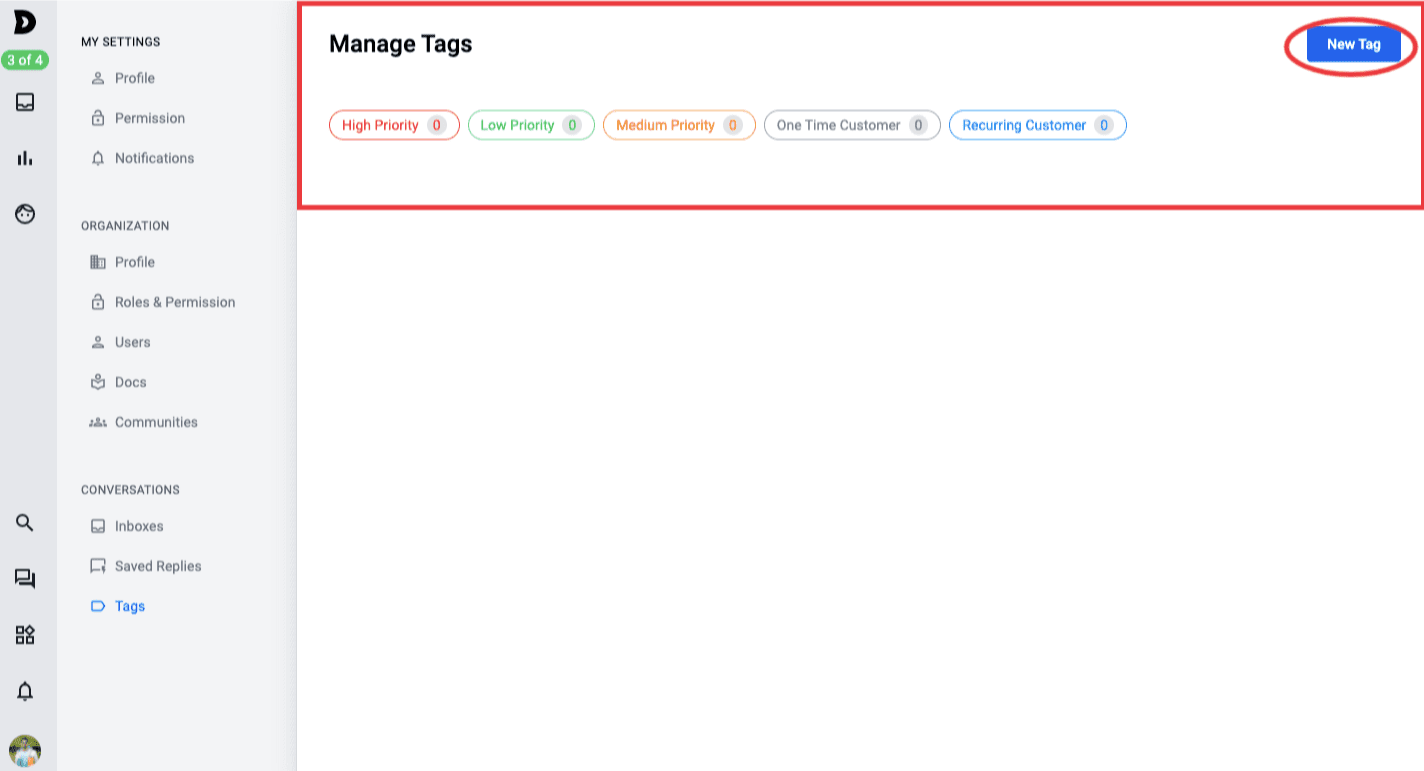You can create and manage Tags here. You can also find this menu in ths general settings section under Conversations.
**Trash, “Move to” or Set Priority”**
Trash - If you wish to delete a query or conversation you can simply do so click on the Trash icon and after clicking on the icon you can confirm the delete after clicking on the same as per the below image:
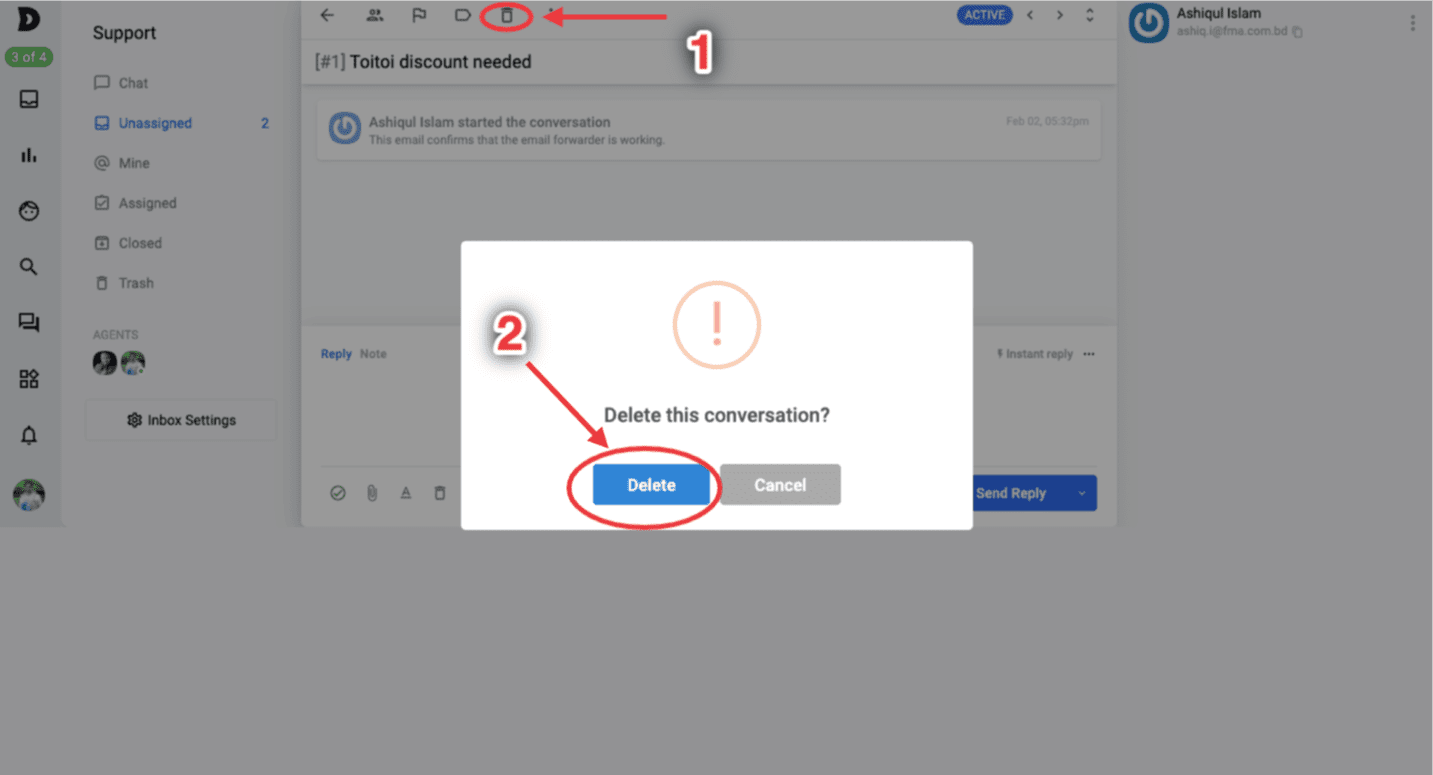**Move To**
One of the amazing feature of using ThriveDesk is having the flexibility to move tickets or queries from one folder to another folder and also from one inbox to another. Let’s say a customer knocked at your sales inbox related to issue concerning support of a technical issue, asking the customer to send it to the right inbox could be a hassle, hence with ThriveDesk you can simply move it to the other inbox or inboxes, see the image below:
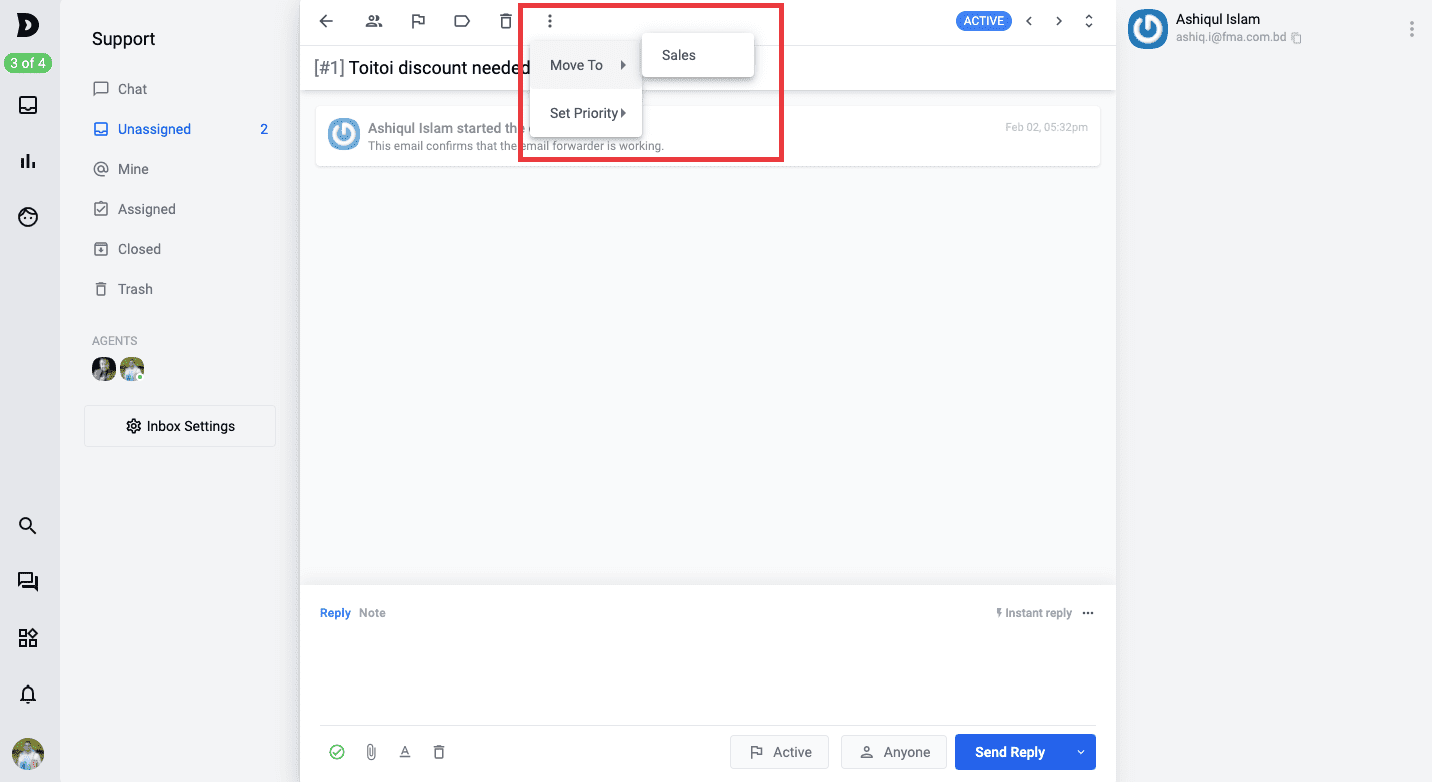**Set Priority**
Apart from Tags, you can also set Priority straight out on the conversation you are making with your customers. Check the image below:
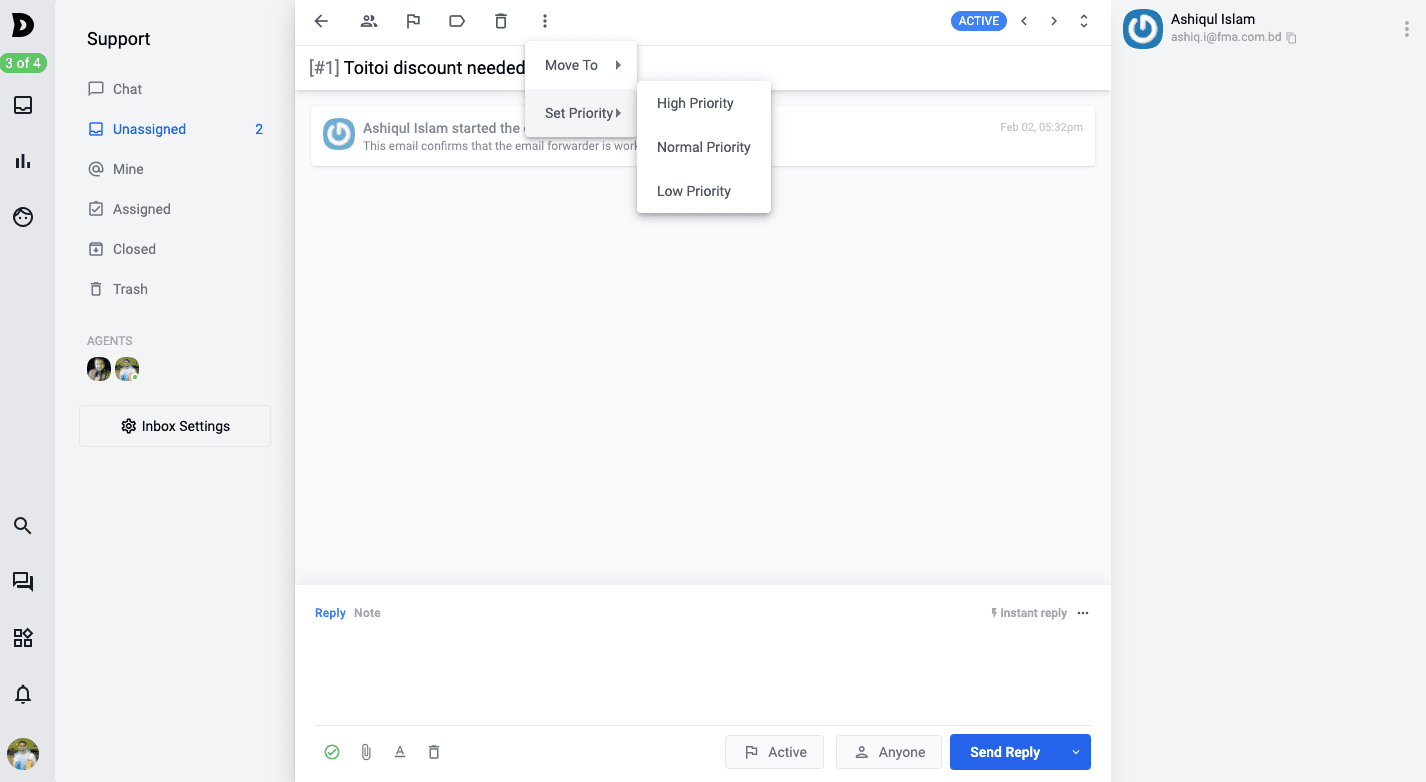
# Inbox Settings Explained
In this article the scope of the Inbox Settings as well as the process of changing the settings will be addressed.
Let’s begin with the navigation, in order to find the Shared Inbox settings, go to **SETTINGS** and click on **Inboxes**.
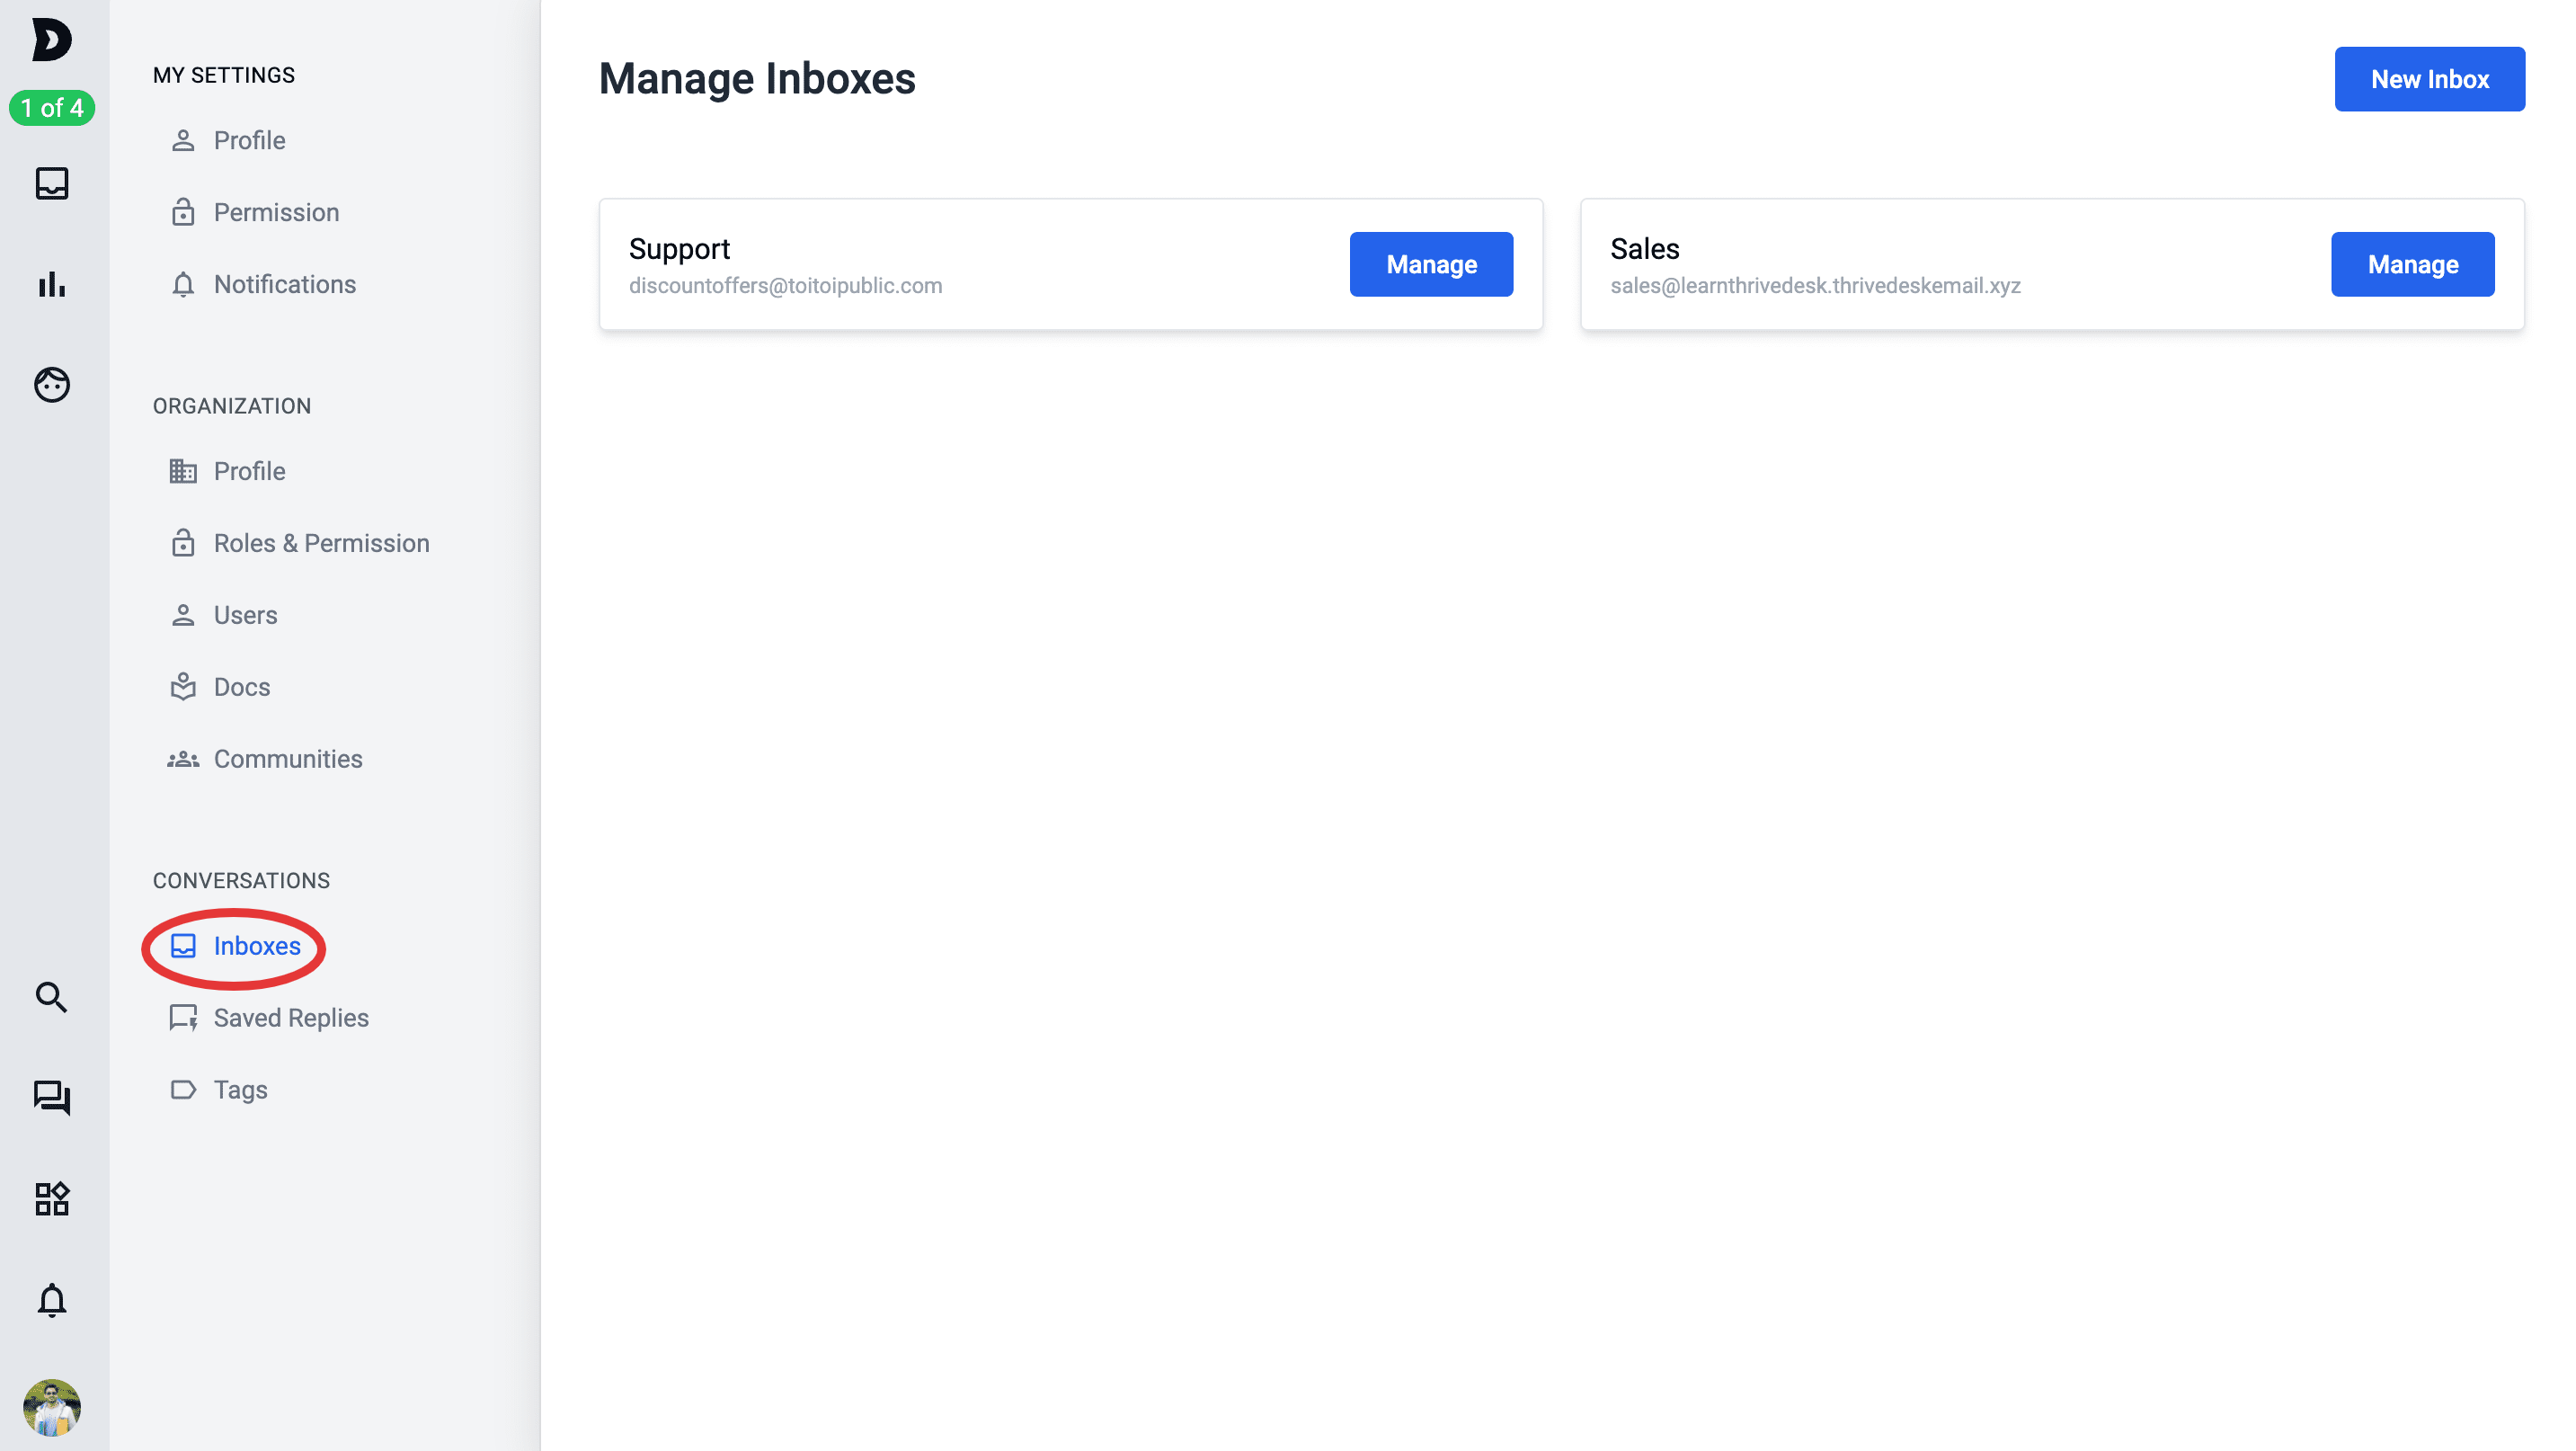
So each and every inboxes that you have created has their distinct settings and many of the features available in ThriveDesk are inbox specific, for example, you can have separate signatures and set separate roles and permission for your team as per Inboxes separately.
In order to manage each of these inboxes, click on Manage from the respective inboxes available as per the image above. Inside the Manage section of each of the inboxes you will have the following options and settings available:
## **Basic Settings**
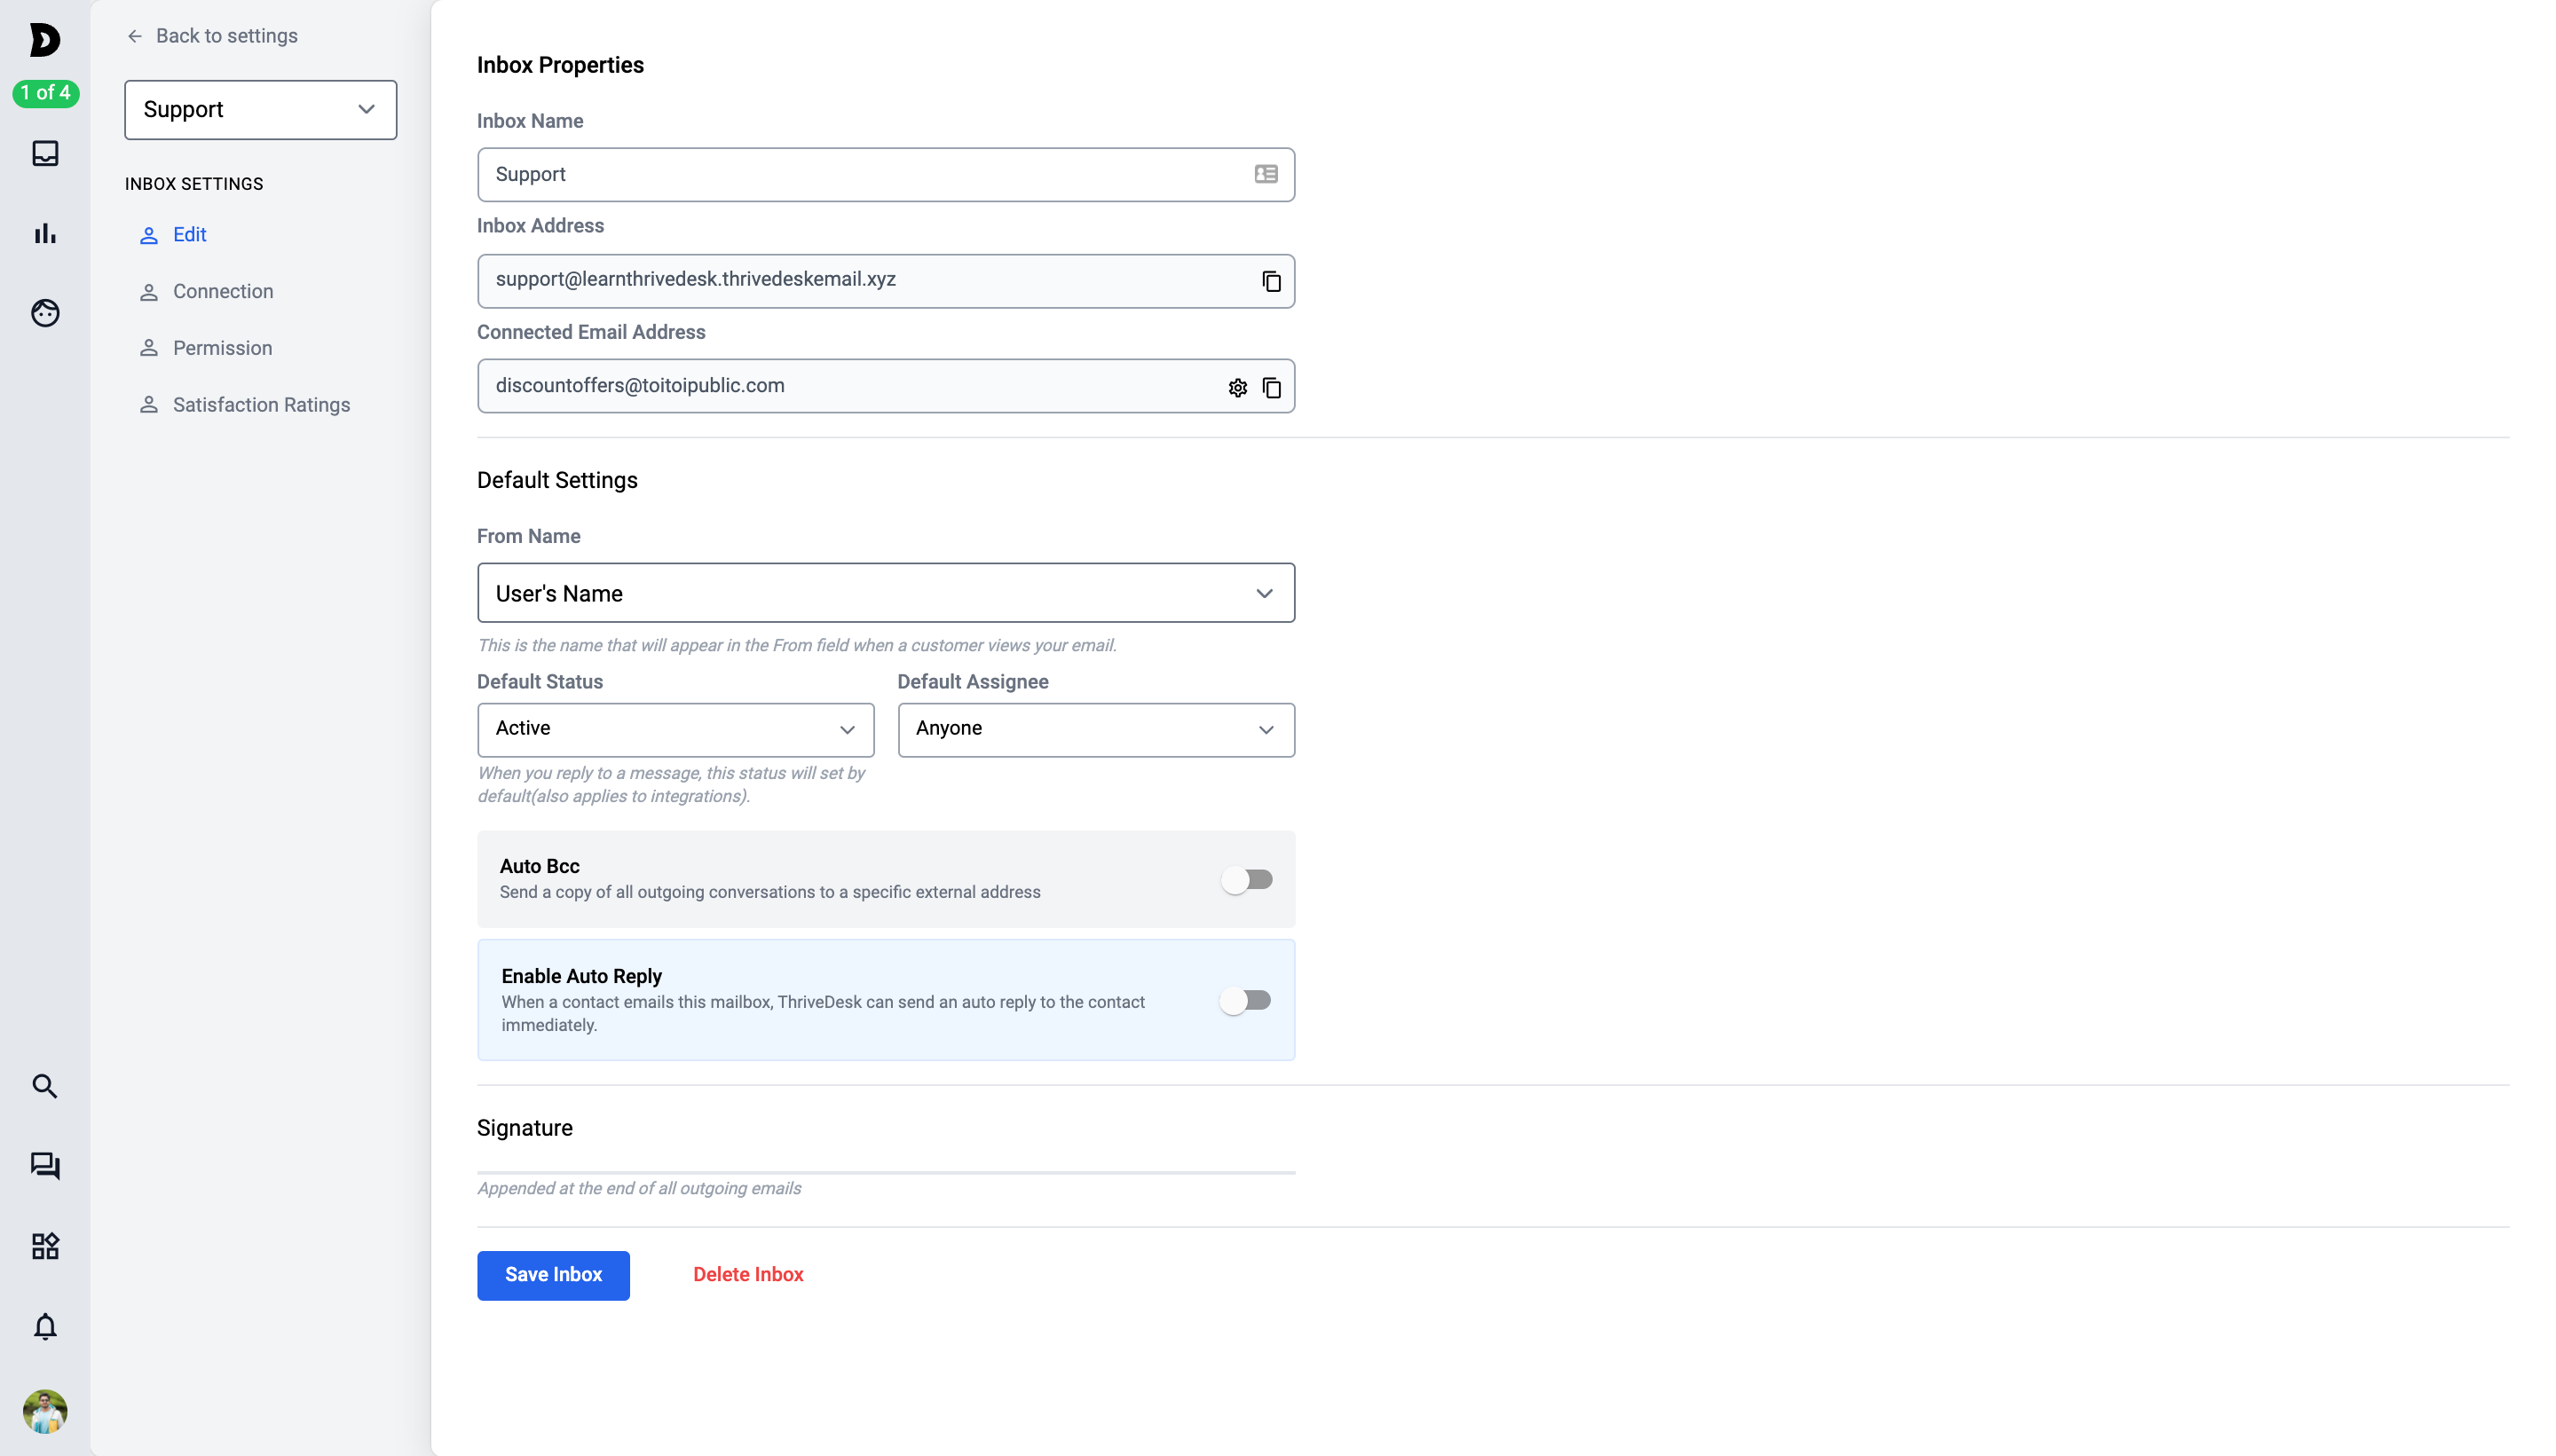
**Inbox Name**: this is the name given to your inbox from your end, you can change the name as you desire. Note that, the name is not visible from the end of the customers unless From Name (See below) of senders name are set as Inbox, it is just to segregate the number of inboxes available for edit.
**Inbox Address:** This is an auto generated email address from our end, this email address is attached with this inbox and cannot be changed. Therefore, all the emails or customer queries that are sent to your domain based email/Connnected Email Address are forwarded to the Inbox Address, if the forwarders are set correctly, and it is only then the queries will land on the designated inbox.
**Connected Email Address**: This is your domain based email address where you would like your customers to send queries. This email address is changeable.
## **Default Settings**
### **From Name**
You have three different options available for From Name, they are Inbox Name, User’s Name, Custom Name.
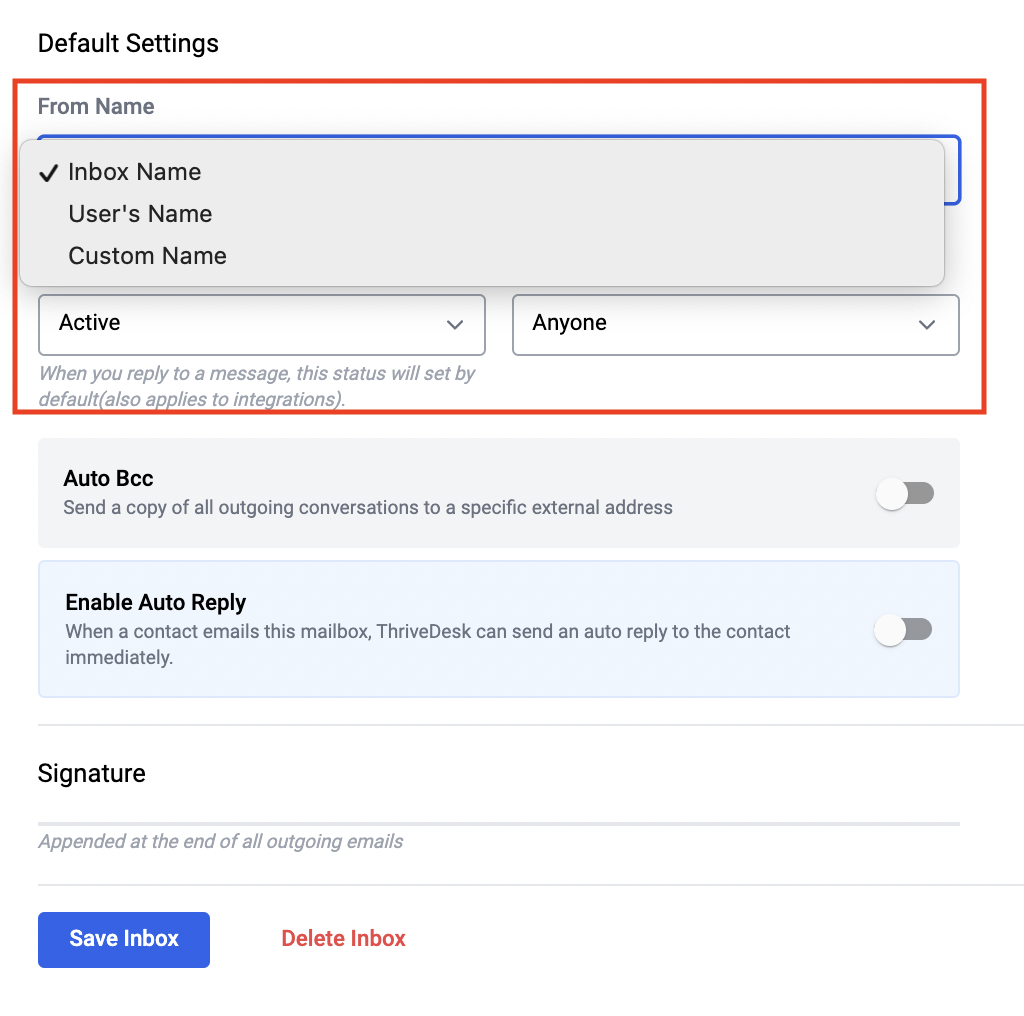
These sets the name of the sender, therefore, when the customers receive an email they see the name set here, for example I have set User’s Name and when the customer receive the email it will show that the email sent from “Parvez Akhter” as I am the user here.
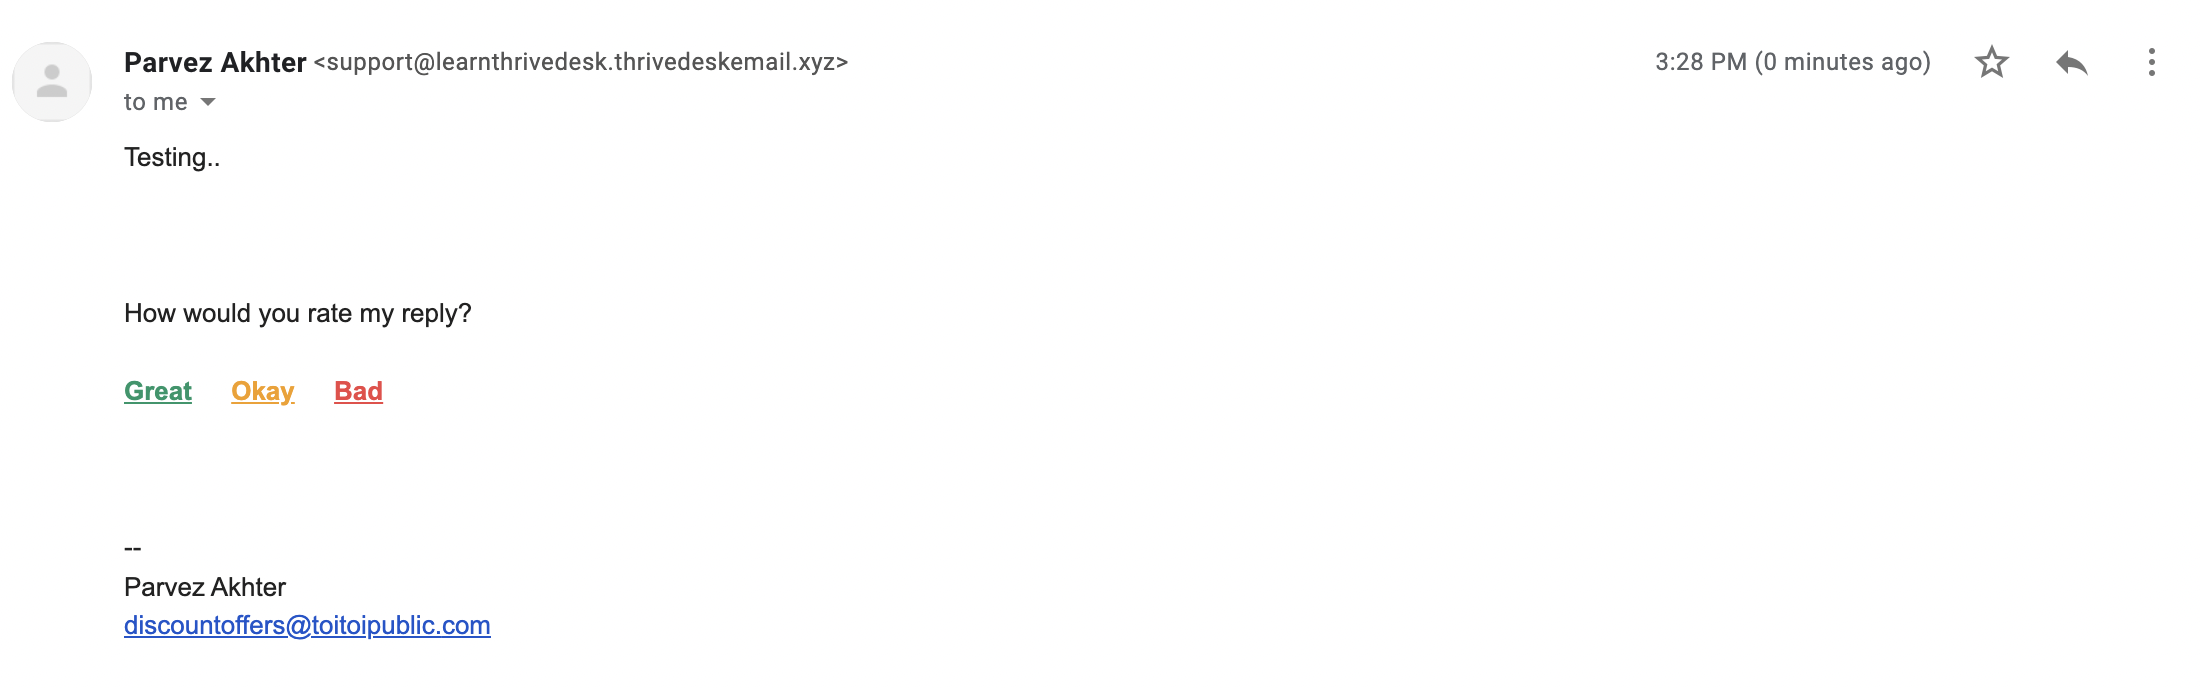
In case you have set the From Name as inbox name, it will display inbox name as the sender. As oppose to that, if set it as Custom Name then a new field will pop up where you can use a name of your preference.
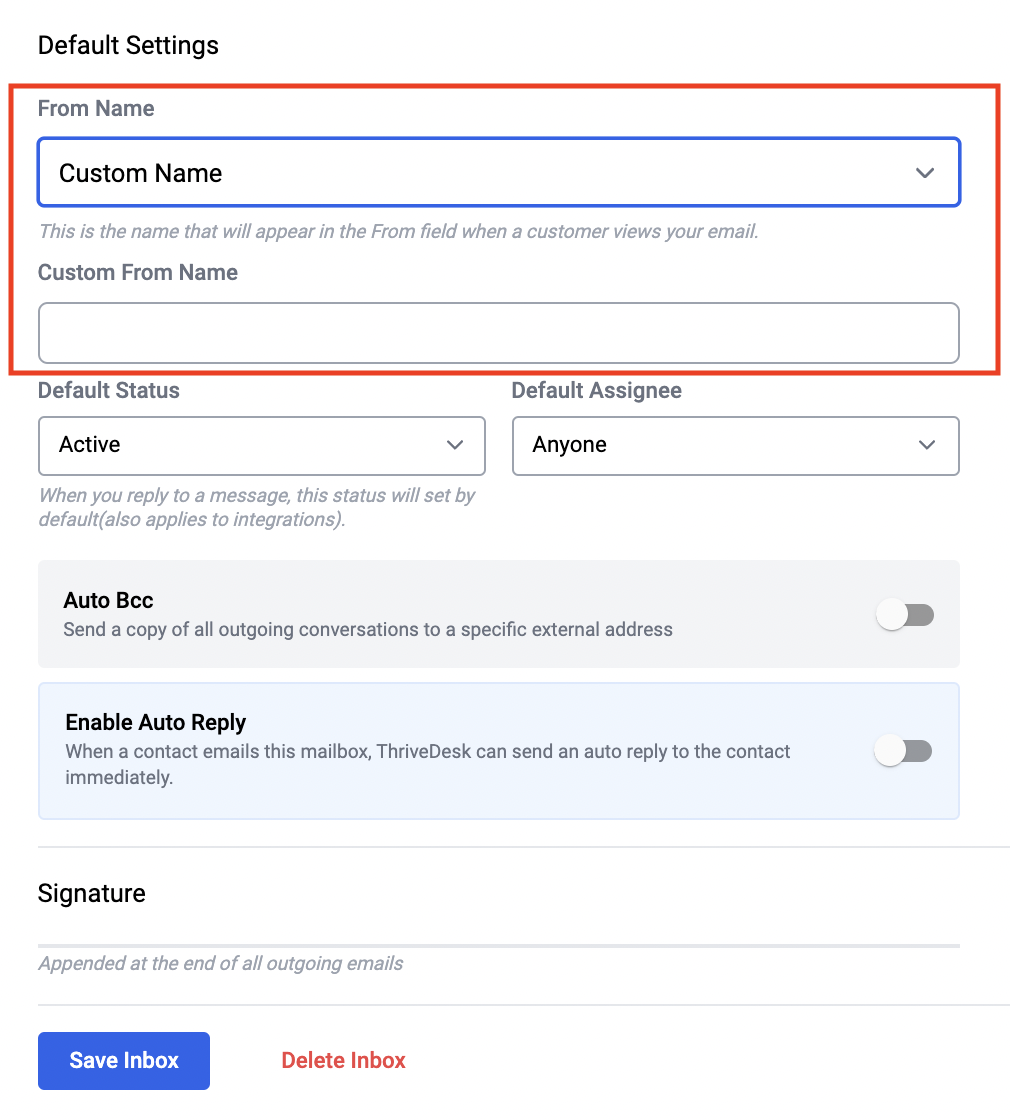
Before we jump straight into the functionality of this option, lets visualise the inbox dashboard, here how it looks:
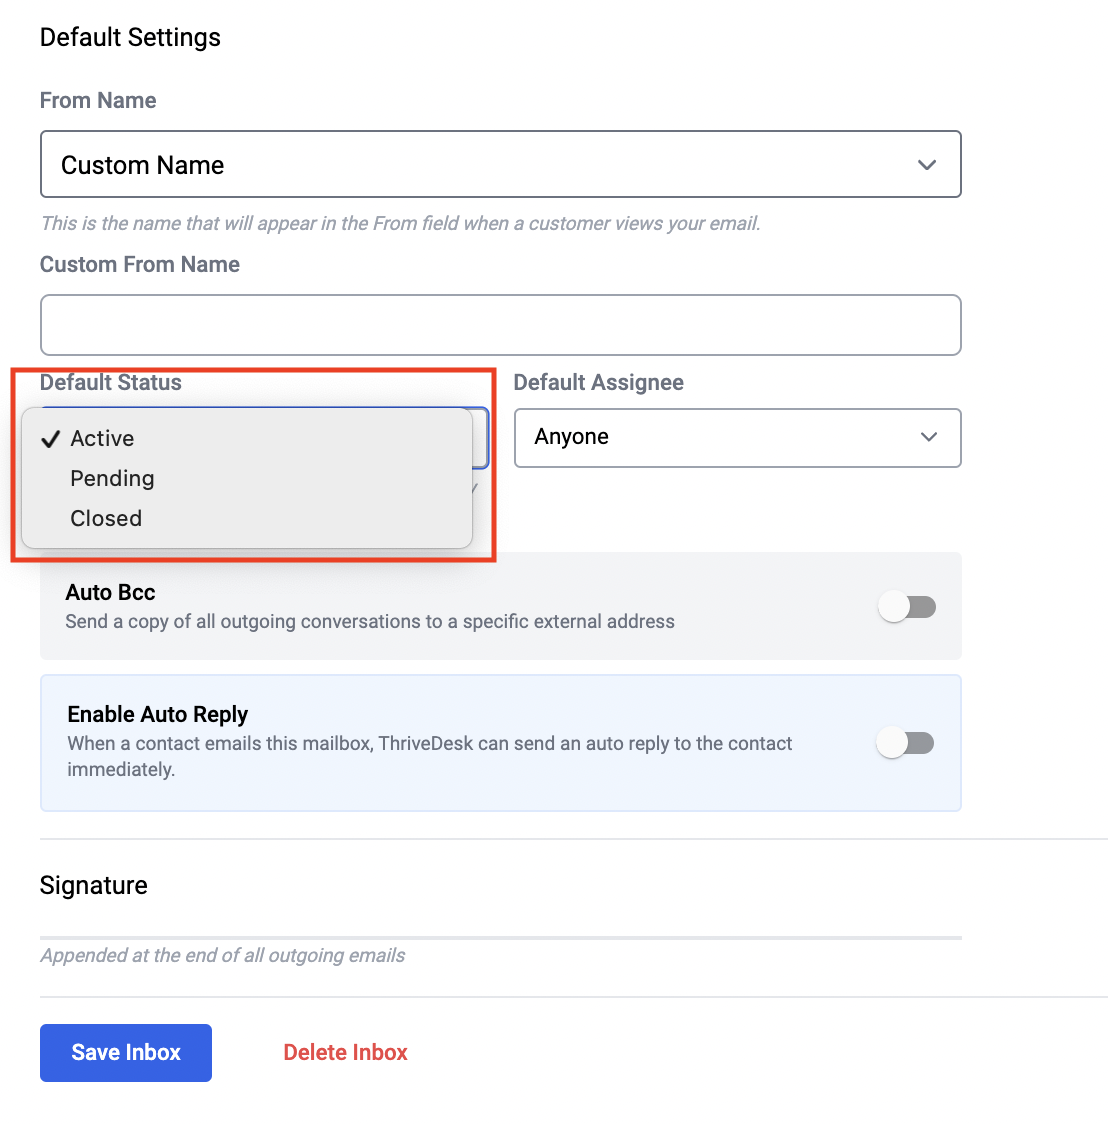
As you can see that there are certain folders pre-configured folders created for the convenience of this support workflow, lets understand what are these folders for:
* **Unassigned**- means that in default scenario, all the queries that you have received but neither it has not been assigned to any one nor any else has given a reply to it and are currently Active, will be found here.
* **Mine**- all queries that are assigned to you will be found here.
* **Assigned**- all the queries that are assigned to all the other members of the your team except yourself and are not done or Closed are to be found here.
* **Closed**- All the queries that has been answered goes here.
* **Trash**- Self explanatory, all the deleted queries before getting permanently deleted goes here.
Now come to the Default Status, there are basically three different default status available, they are **Active**, **Pending** & **Closed**, however, you can manually change it at the time of replying the queries.
* Active - It means whenever queries are replied, by default the status of the conversation will stay active and it will not go to the Closed folder.
* Pending - It means that the queries are neither active nor closed, rather it is currently pending and requires action from the end of your support team, the queries when replied with this status will also not go to the Closed folder, it will stay in the Mine folder for the person to whom it is assigned and will stay in Assigned folder for everyone else giving a birds eye view to the support team as to how many of the queries are still pending.
* Closed - It means that once the queries are replied it will directly got to the Closed folder by default.
As stated above, irrespective of what you have set in the default you still can change it at the time of replying the queries.
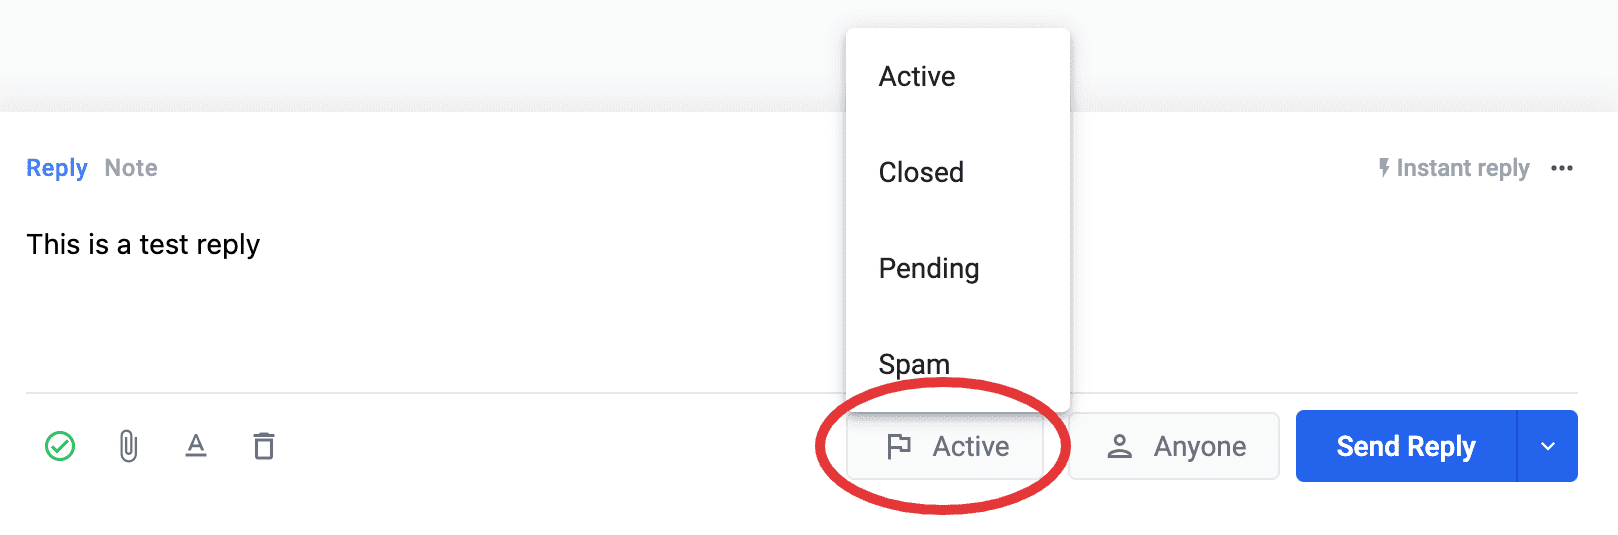
### **Default Assignee**
It means by default to whom the queries will be assigned to after reply. It have three options namely:
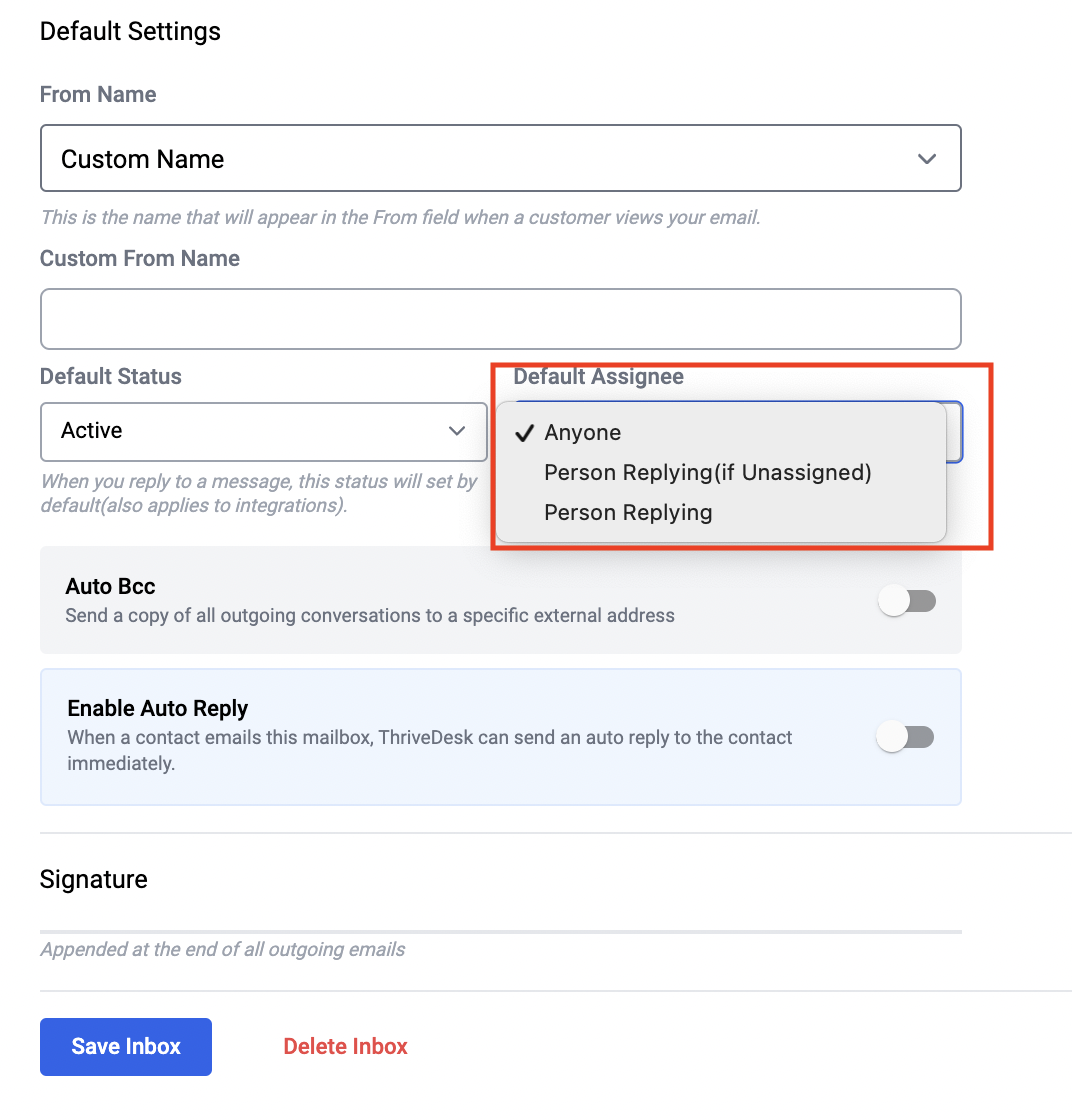
* **Anyone** - it means no one is assigned to the queries, it will pop up in the unassigned folder every time a new queries comes in from the same customer regarding the same subject matter.
* **Person Replying (if Unassigned)** - if set, when a team member reply to the queries it will come back to the Mine folder of that person and will be assigned to him, but only when the queries were unassigned and afresh.
* **Person Replying** - irrespective of whether the queries were assigned to someone else or not, if this is set, then whenever you have replied to any queries it will be automatically assigned to you.
Nevertheless, you can also set it differently at the time of replying from the editor.
### **Auto Bcc**
You want each of the queries, replied or answered to be forwarded to another email address, then no worries, you can set Auto Bcc for your inbox, so whenever someone replies to a ticket your designated email address given in this section will receive a copy of it.
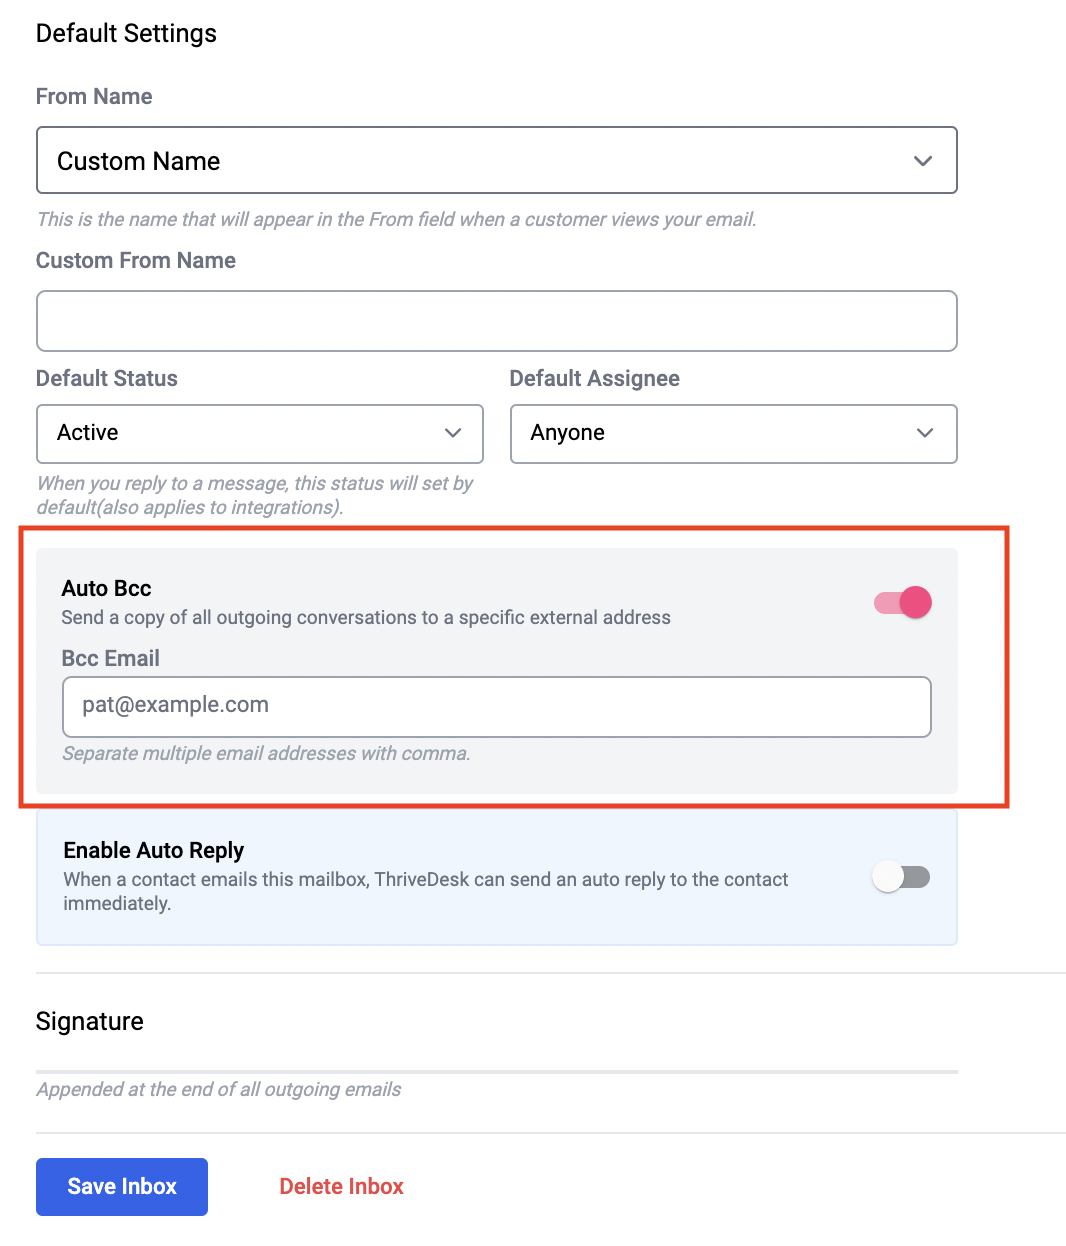
### Auto Reply
The first auto generate message or reply when customer sent a queries to you can be set through this option. So use your imagination and set the autoresponder as per you desire (note that the auto replies does not include your mailbox signature so be sure to add your contact information if necessary).
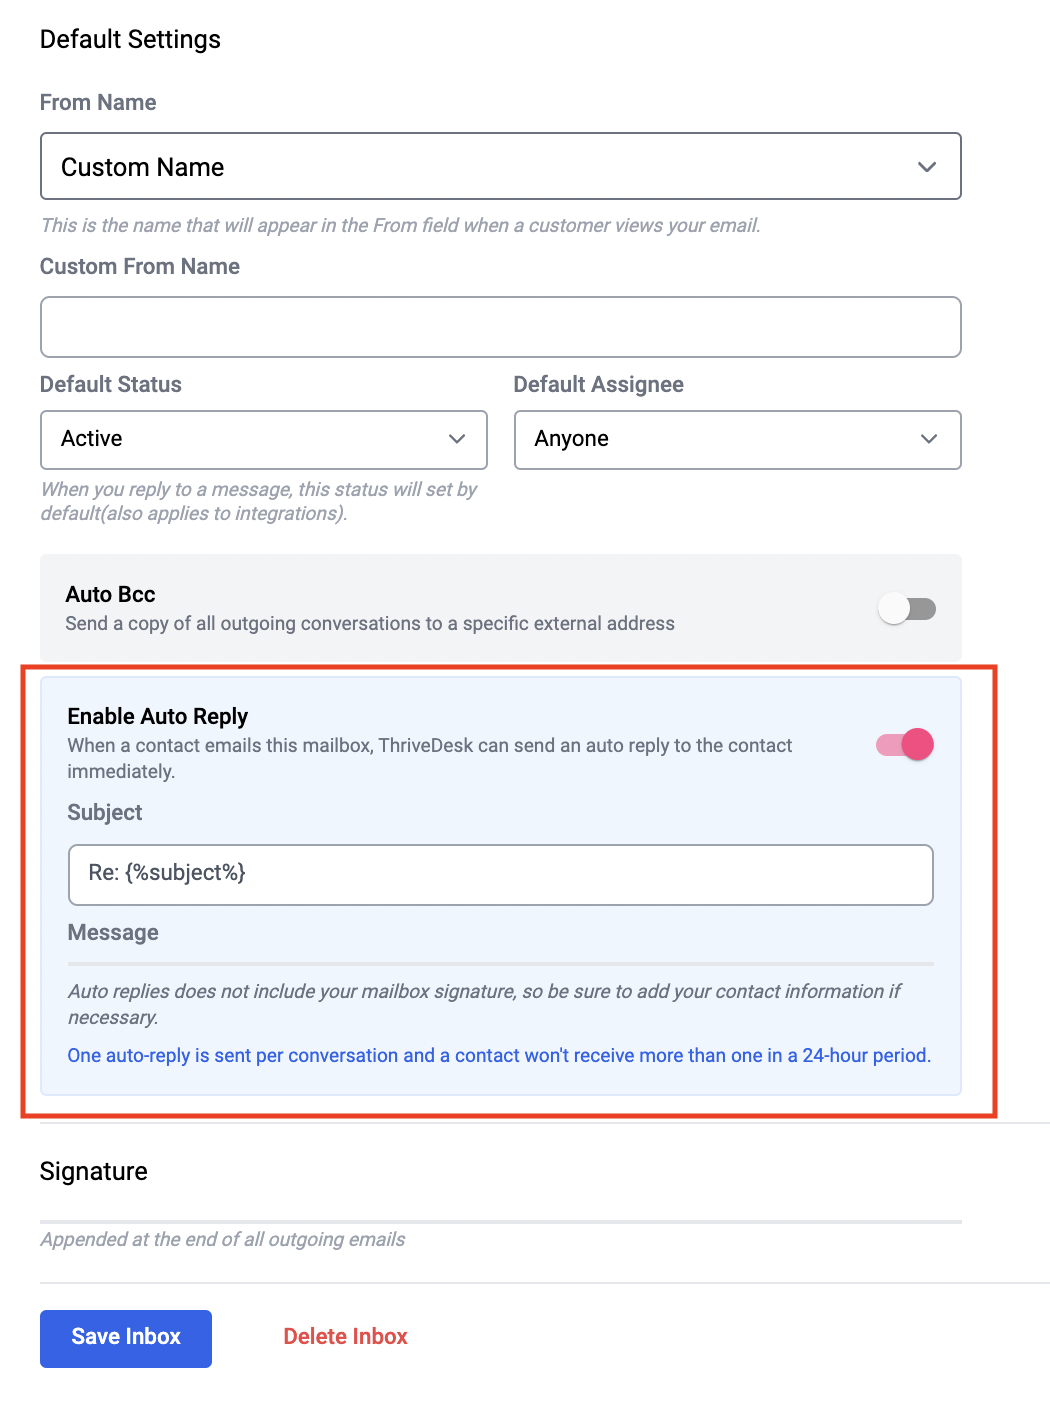
### Signature
You can set your signature for the respective inbox from this menu option as well.
Permission
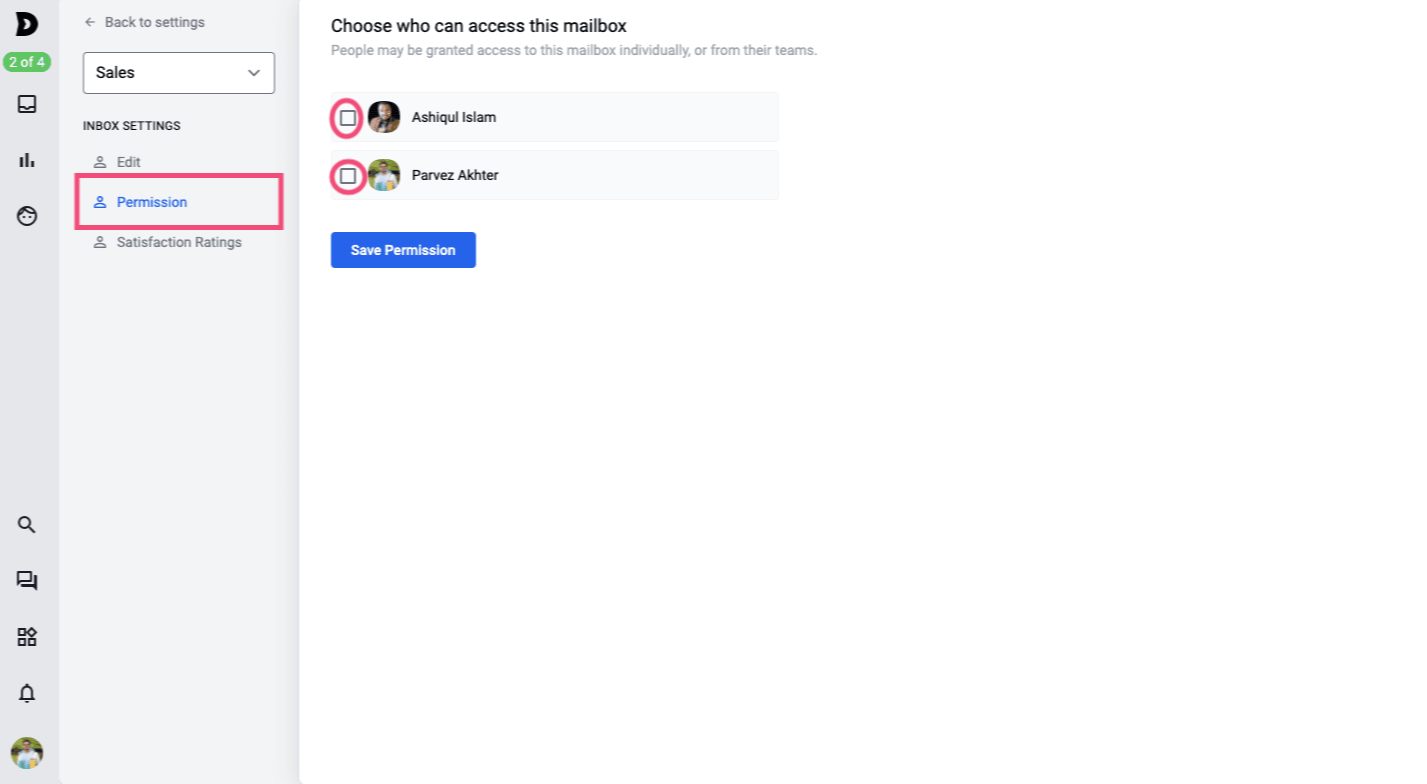
Welcome to inbox permission settings. You can set the inbox permission level or grant access to the particular inbox from the Permission menu as shown in the above pictures. As you can see that the agents have tickbox besides their name, so ticking any of these boxes would mean that you have granted access to that particular inbox.
## **Satisfaction Survay**
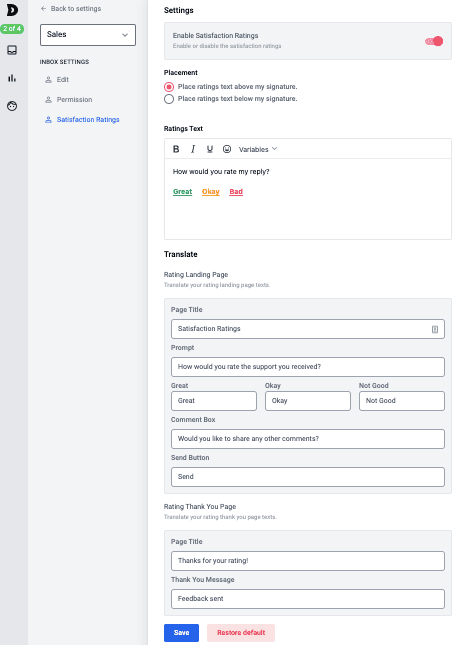
In this menu you will be able to set the following things as per the markup given on the image above and that too in your own language, so just copy paste the language you want to set here and it would work, the settings are:
1. Enable Satisfaction Ratings - Enable the satisfaction ratings by clicking on the knob.
2. Placement - Where do you want to place the satisfaction ratings bar? is it before or after the signature on the email? the choices are yours and you can change it from here
3. Rating Text - This is where you can edit the text that gets sent out automatically with each and every replies asking the customers for providing a ratings.
4. Rating Landing Page - This section constitutes of the titles and the text that can be used for the rating landing page or form, which means when the customers goes through the ratings process they will have to answers or comment or address these issues.
5. Rating Thank You Page- This is the message which pops up once ratings have been given, you can certainly edit the message from here.
Last but not the least you can also jump from the settings menu of one inbox to another inbox, see below:
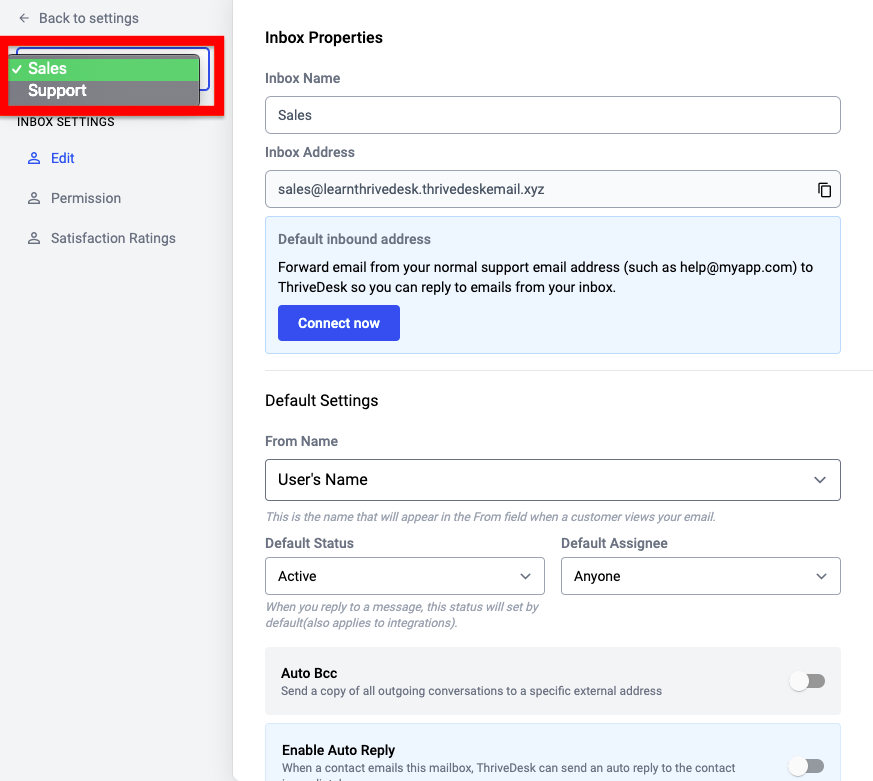
# Install Assistant with Google Tag Manager
Google Tag Manager (GTM) provides an efficient means of managing tags and JavaScript snippets that transfer data to third-party services, such as ThriveDesk, from your website or application. By utilizing GTM, you can seamlessly add or remove snippets without the need for developer intervention.
Implementing ThriveDesk Assistant via GTM enhances your ability to comprehend customer behavior by tracking their actions on both your website and application. Furthermore, it represents the easiest way to load the Intercom Messenger on your website.
**Important**
* You must have Google Tag Manager installed on your website.
* To edit your Google Tag Manager configuration, you need permission. If unsure who manages it, check with your website, SEO, or marketing team.
## Install ThriveDesk with GTM for *logged out* visitors on your website
1. From the ‘Tags’ section of your GTM account, click ‘New’ to create a new tag. 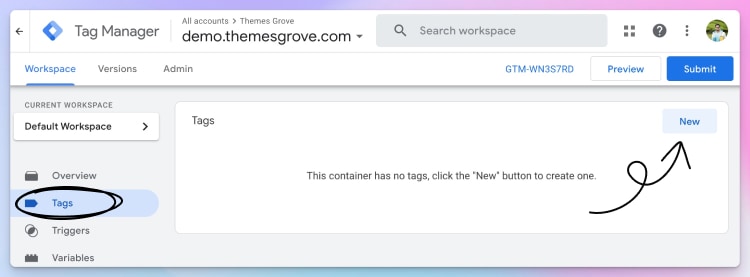
2. Give your tag a name, like “ThriveDesk Assistant”, then edit the Tag configuration.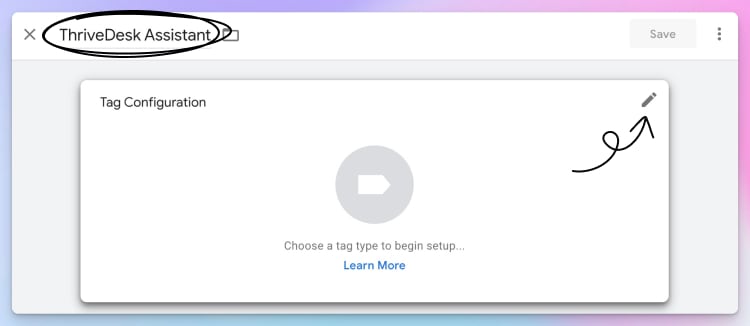
3. Next, click **Custom HTML** from Custom section.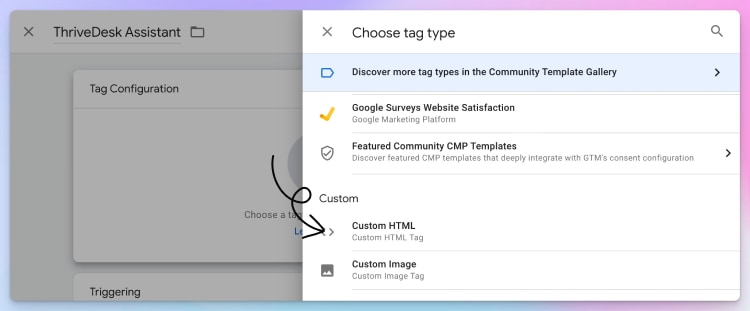
4. Paste the Assistant installation script you copied from ThriveDesk Assistant settings.
5. After adding your Assistant code, open the **Triggering** section, and choose the trigger for loading the Assistant.
6. You can choose an existing trigger, or create a new one with the ‘+’ icon in the top right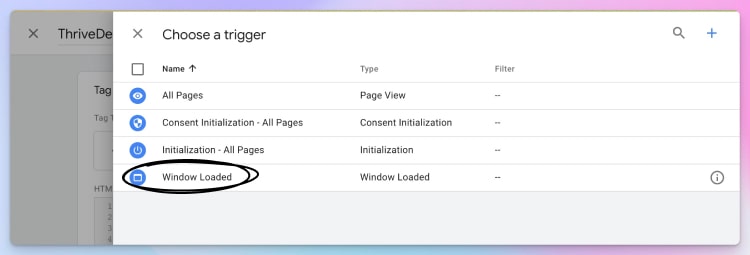
7. **Tip:** For optimal user experience we recommend choosing **Window Loaded**, so your website loads as fast as possible.
8. Your tag is now configured for logged out users. 🎉
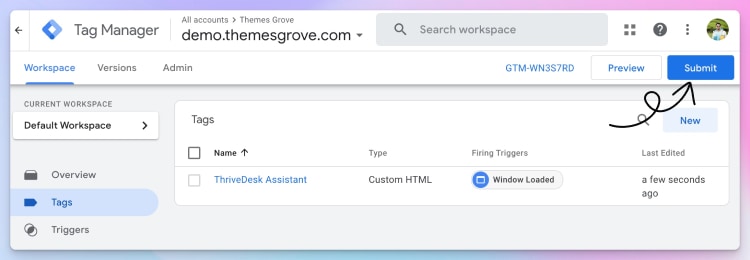
All that is left to do is to **Submit** the changes to your container for them to take effect. However, it is highly recommended to verify your work using **Preview** mode beforehand.
# Install Live Chat to Shopify
Shopify is the best commerce platform for merchant of all size. Assistant is a help widget that lets you add on-demand Docs, chat, and an email contact form to your Shopify store.
## Installation
* [Create a new Assistant](//help.thrivedesk.com/en/create-a-new-chat-assistant) or navigate to the Installation page of an existing Assistant to retrieve the embed code. Simply click the Copy button to get the code copied to the clipboard.
* Go to Online **Store->Theme->Edit code**
* Open `theme.liquid` file under `layout` folder.
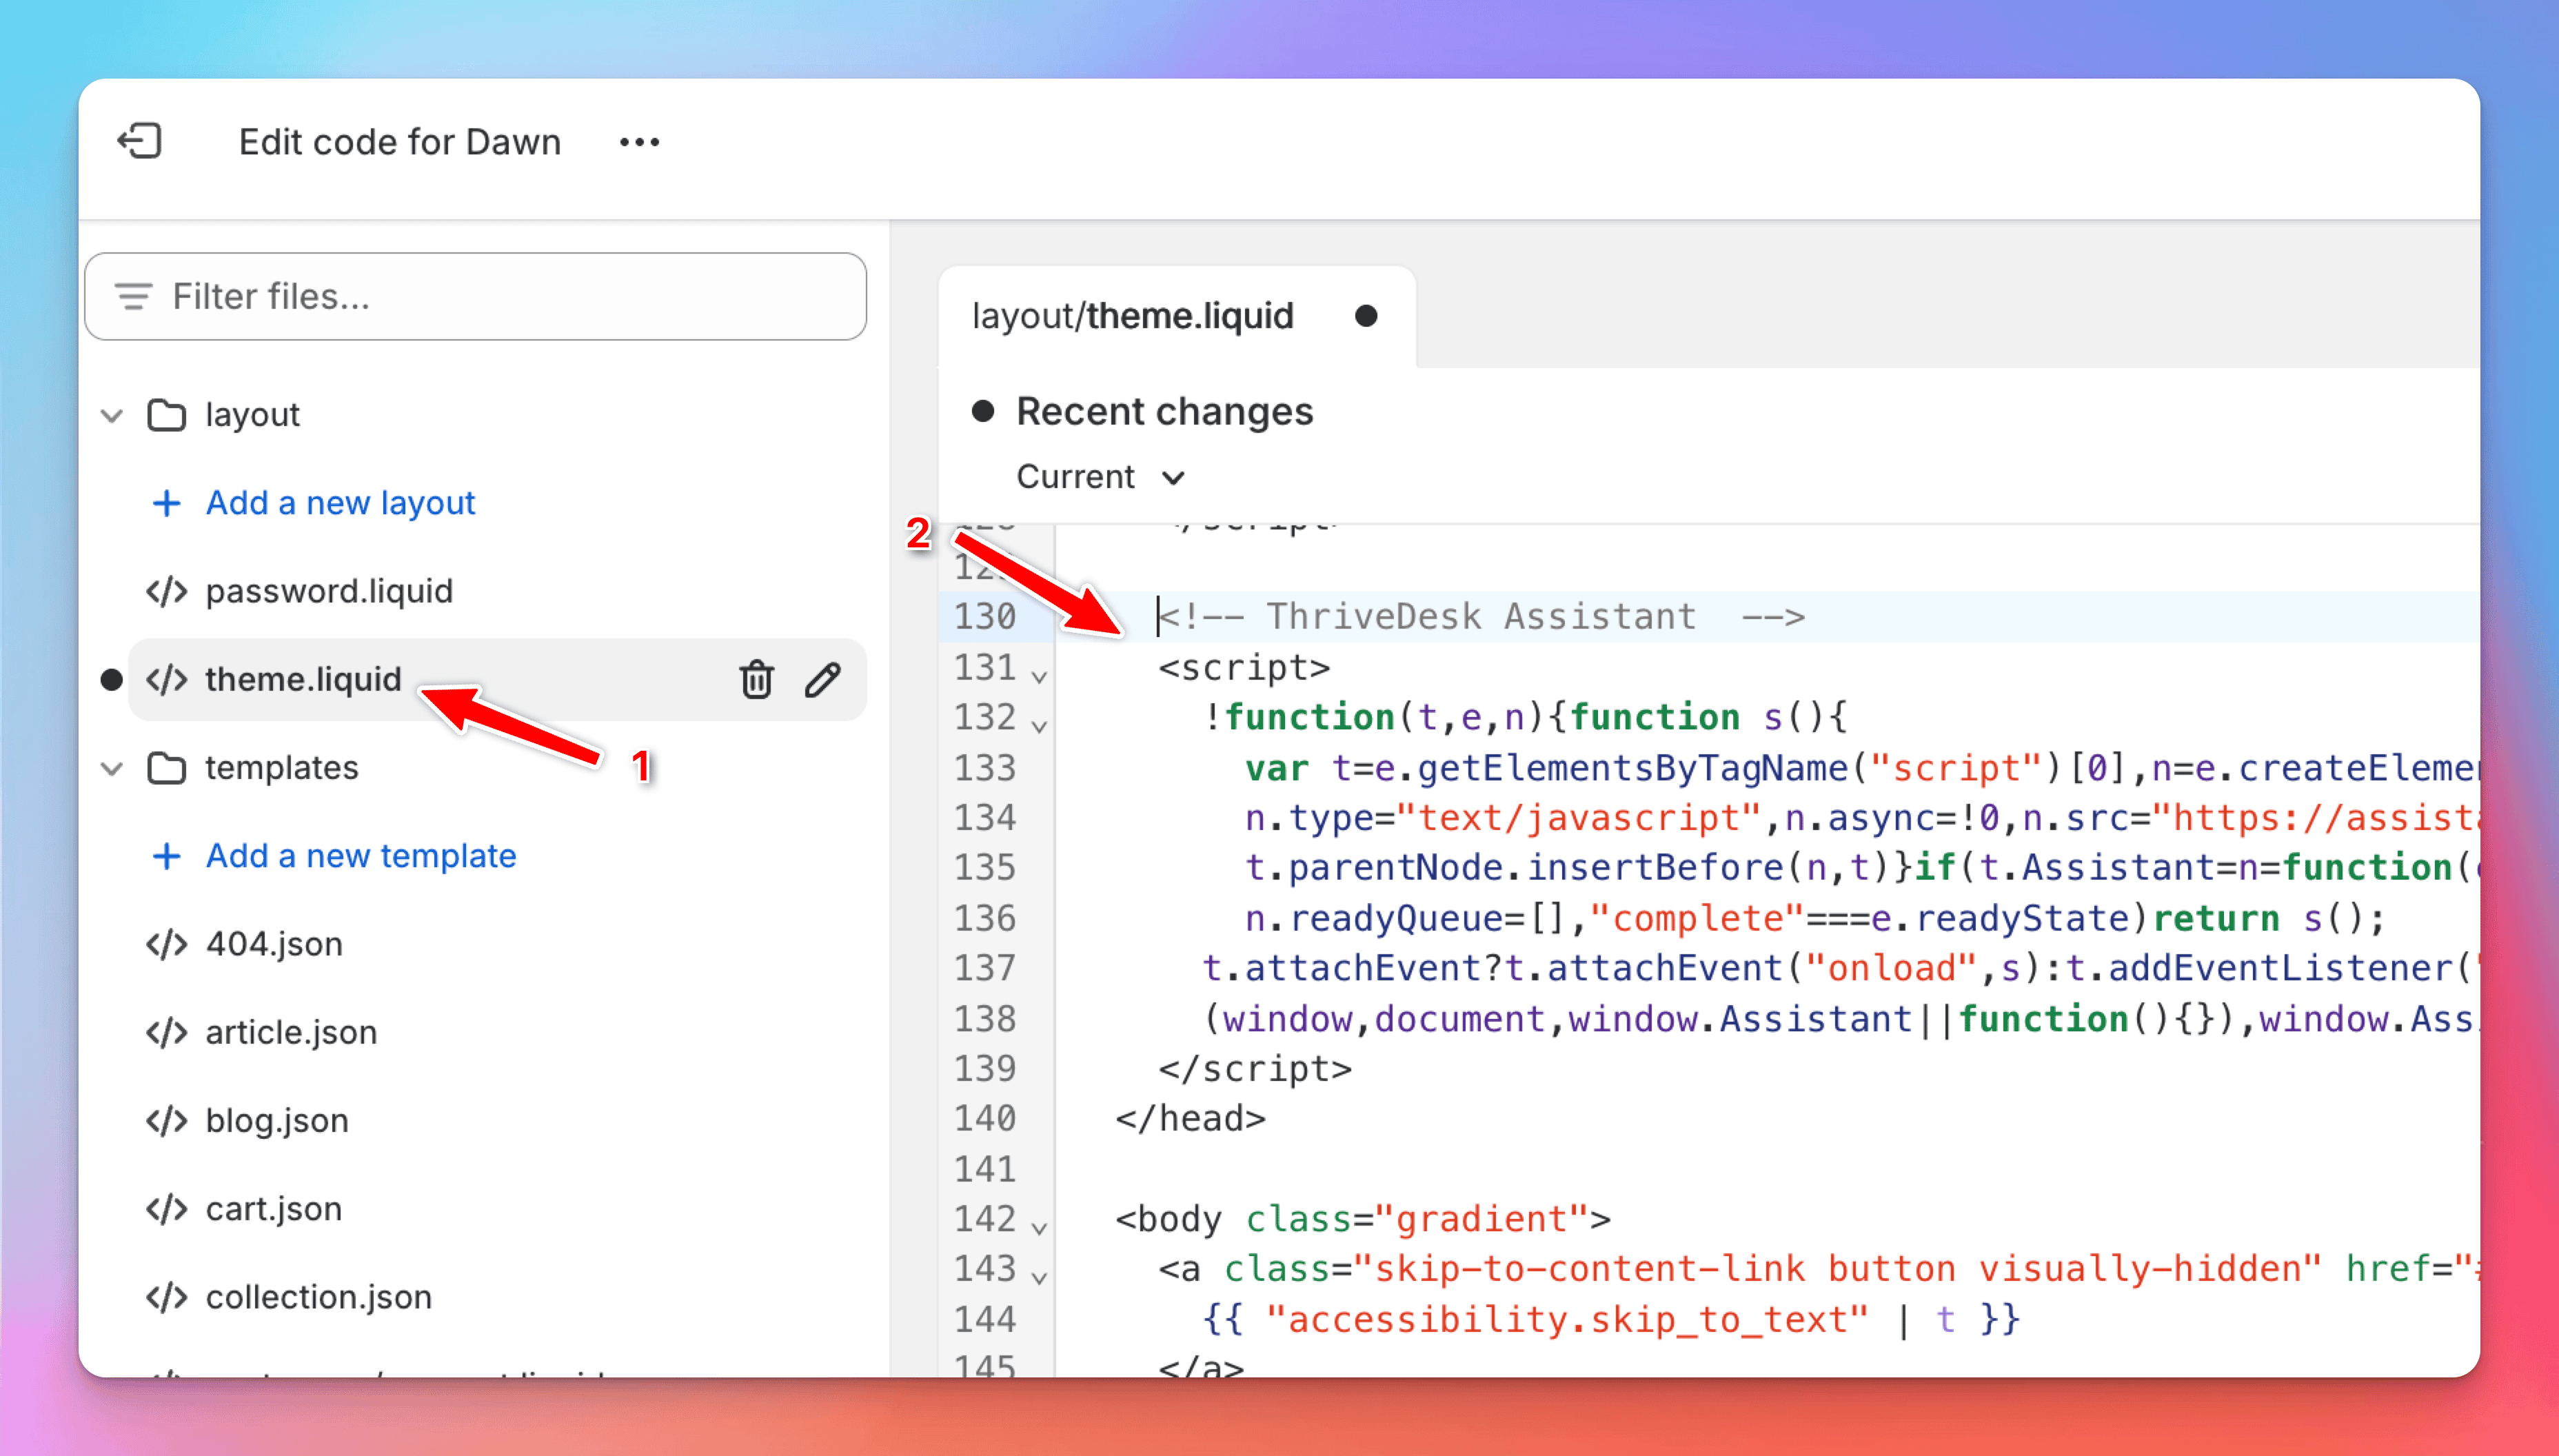* Paste the Assistant embed code you copied in step 1 before ``, and click **Save** button.
* Preview your store and you'll see ThriveDesk assistant is loaded.
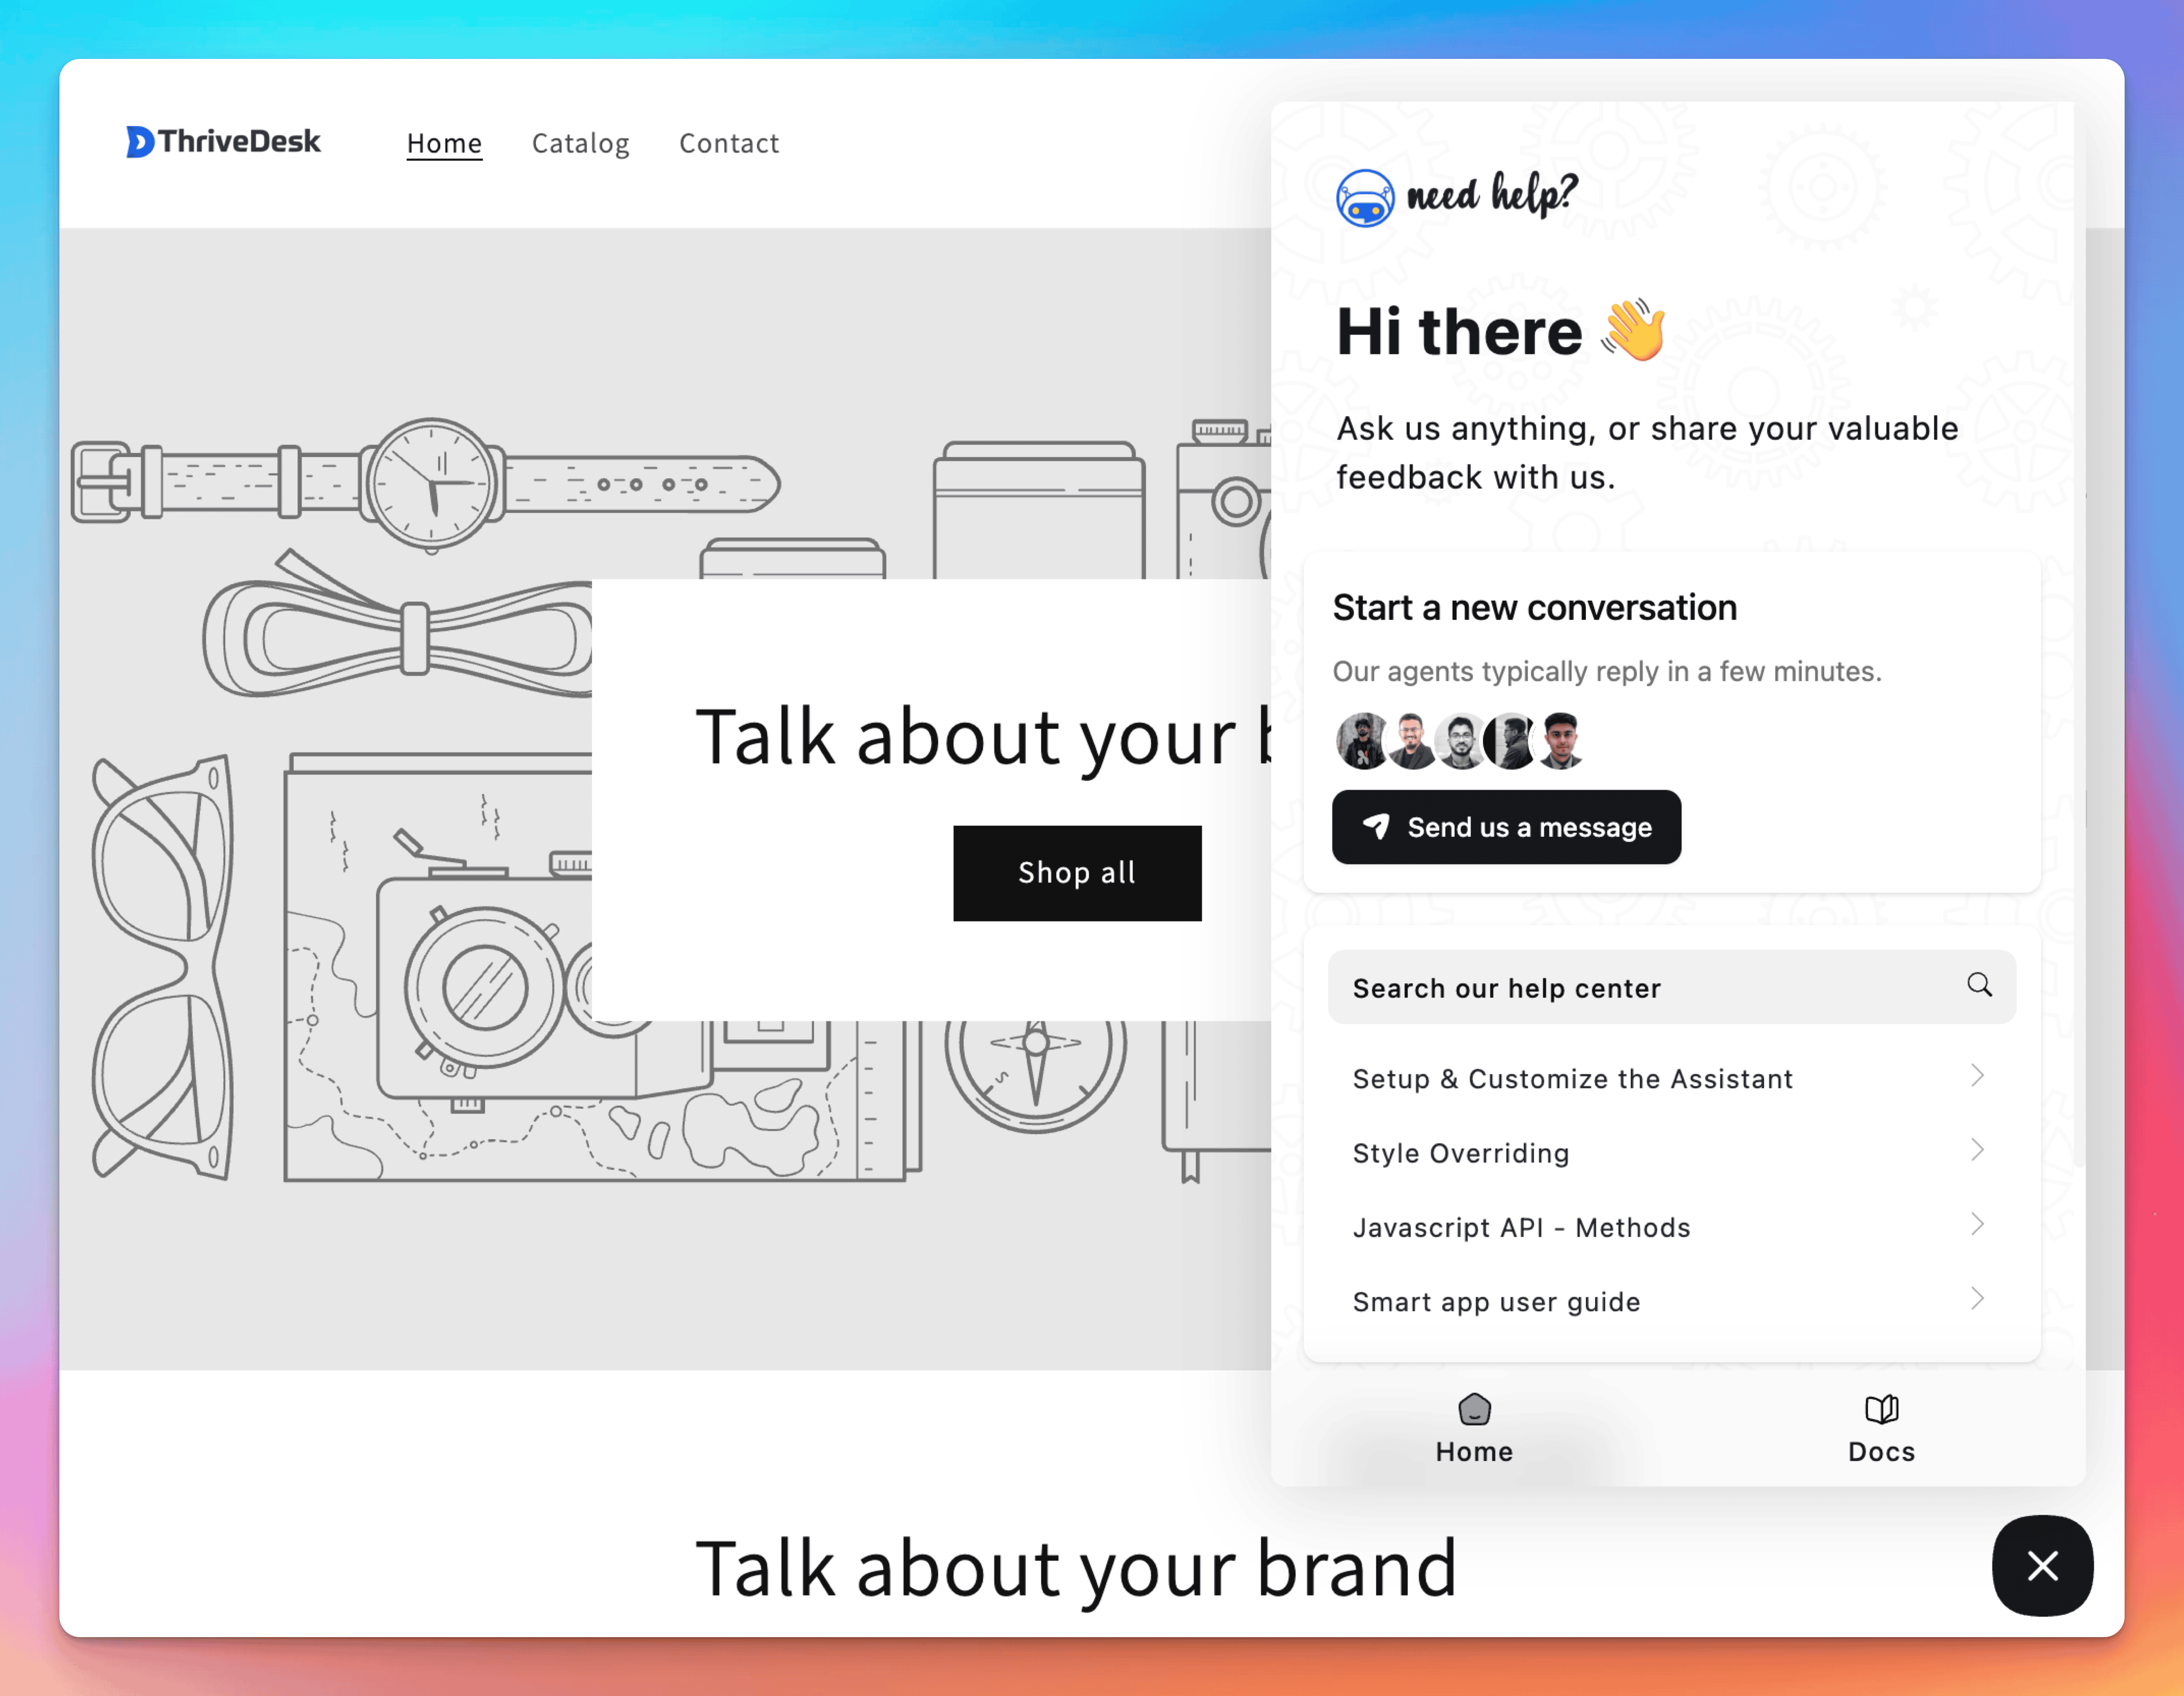
# Javascript API - Methods
The Assistant JS API exposes the following methods to the global object: `Assistant`. You can use them to control your Assistant programmatically.
### **Assistant('init', assistantId)**
Call this method to load the Assistant
```javascript
Assistant('init', 'YOUR_ASSISTANT_ID_HERE');
```
Example use case:
```html
```
*N.B You can use this any way you want with your own logic and everything.*
---
### **Assistant('trigger-less-init', assistantId)**
If you want to initialize assistant without launcher or trigger button, then use this.
```javascript
Assistant('trigger-less-init', 'YOUR_ASSISTANT_ID_HERE');
```
Example use case:
```html
```
*N.B You can use this any way you want with your own logic and everything.*
---
### **Assistant('triggerLess')**
Call this method to hide/disable the trigger/launcher button for the Assistant. You might want to use this feature if you are trying to trigger assistant programmatically and don't want to display the launcher button in the bottom.
```typescript
Assistant('triggerLess');
```
Example use case:
```html
```
*N.B You can use this any way you want with your own logic and everything.*
---
### **Assistant('open')**
Use this methods to manually open the Assistant
```typescript
Assistant('open');
```
Example use case:
```html
```
*N.B You can use this any way you want with your own logic and everything.*
---
### **Assistant('close')**
Use this methods to manually close the Assistant
```typescript
Assistant('close');
```
Example use case:
```html
```
*N.B You can use this any way you want with your own logic and everything.*
---
### **Assistant('toggle')**
Use this methods to manually toggle the Assistant
```typescript
Assistant('toggle');
```
Example use case:
```html
```
*N.B You can use this any way you want with your own logic and everything.*
---
### **Assistant('chat')**
Use this methods to manually open the chat. You must have `Chat` option enabled from your settings panel. Otherwise this command won't work.
```typescript
Assistant('chat');
```
Example use case:
```html
```
*N.B You can use this any way you want with your own logic and everything.*
---
### **Assistant('contact')**
Use this methods to manually open the contact. You can pass any subject and body that will auto populate the form, which can be edited therefore. You must have `Contact` option enabled from your settings panel. Otherwise this command won't work.
```javascript
Assistant('contact', {
subject: 'Issue title',
body: 'Issue details',
});
```
Example use case:
```html
```
*N.B You can use this any way you want with your own logic and everything.*
---
### **Assistant('order-status')**
Use this methods to manually open the contact. You must have `OrderStatus` option enabled from your settings panel. Otherwise this command won't work.
```typescript
Assistant('order-status');
```
Example use case:
```html
```
*N.B You can use this any way you want with your own logic and everything.*
---
### **Assistant('identify', userObject)**
It tells Assistant that we know the name and email address of the visitor. We use their name and email address to pre-populate and hide the fields on the `Contact Form` screen. We also use their name and email address to skip asking some questions at the start of a Assistant chat.
```typescript
Assistant('identify', {
name: 'Parvez Akhter',
email: 'demo@email.com',
});
```
Example use case:
```html
```
*N.B You can use this any way you want with your own logic and everything.*
---
### **Assistant('article')**
There are two ways to open a Knowledge Base article using the `Assistant('article')` method on your site. This method lets you display an article either **within the Assistant** itself or in a **sidebar**, depending on your needs.
All you'll need is the Article's ID, which can be found in Thrivedesk by navigating to the docs, opening the article in the editor, and copying the ID from there.
This `article` method is useful when:
* The trigger isn't a direct user interaction with the Assistant.
* You want to display an article automatically using your custom logic.
If you use the standard `article` method (without extra options), it will automatically open the Assistant interface.
**Examples**
**Open an article in the Assistant:**
```javascript
Assistant('article', 'ARTICLE_ID');
```
or
```html
```
**Open an article in the sidebar:**
```javascript
Assistant('article', {
articleId: 'ARTICLE_ID',
mode: 'sidebar'
});
```
or
```html
```
**Demo Usage**
* Use `Assistant('article')` to display an article directly in the Assistant.
* Add the `mode: 'sidebar'` Option to show the article in a sidebar instead.
### Assistant.clearSession()
Clears the Assistant Session and resets the assistant to a fresh state. This method removes all chat history, messages, and conversation context from the current session.
```typescript
Assistant.clearSession()
```
**Use**
If you need a fresh state of the assistant on every logout or for any custom need, you can call this method alongside your logout call, and it will clear the state, providing a fresh live chat experience.
**Example**
```javascript
function handleLogout() {
// Clear the assistant state
Assistant.clearSession();
// Proceed with your logout logic
logoutUser();
}
```
### Assistant('ready')
Registers a callback function to be executed when the Assistant widget is fully initialized and ready to use.
```typescript
Assistant('ready', callback: () => void)
```
**Parameters:**
* callback (function) — A function to execute when the Assistant is ready
**Use**
Use this method when you need to perform actions only after the Assistant has fully loaded. This ensures the Assistant is available before attempting to interact with it (e.g., opening the chat widget, identifying users, etc.).
```typescript
// Wait for Assistant to be ready, then open chat
Assistant('ready', () => {
console.log(' Assistant is ready opne the chat');
Assistant('open');
});
```
# Live chat for Joomla! websites
ThriveDesk allows you to [chat](https://www.thrivedesk.com/live-chat/) with your visitors, collects contact information when you are offline or unavailable to chat, so that you can get back to customers even if they left your site.
[Joomla!](https://www.joomla.org/) is second most popular content management system (CMS) in the market, which enables you to build web sites and powerful online applications.
There are number of ways you can add ThriveDesk live chat to a Joomla! website 👇
Before you began, you need to [create a Chat assistant](//help.thrivedesk.com/en/create-a-new-chat-assistant) in ThriveDesk.
## Manual chat installation on Joomla 3 default template
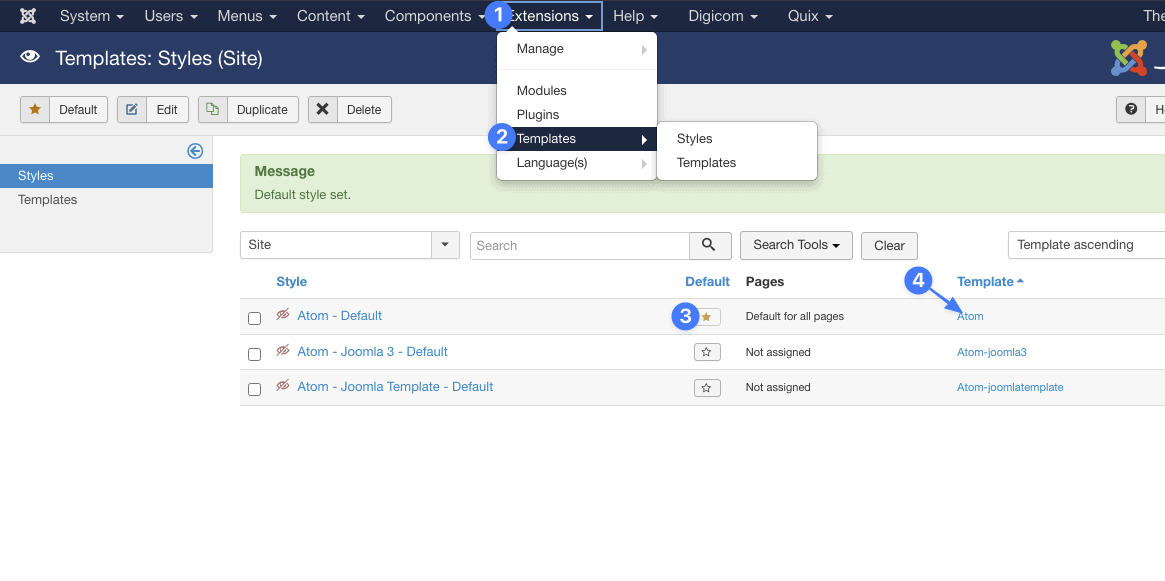
1. Log into your Joomla admin panel and go to **Extensions** → **Templates**.
2. Find site template which you use in the template list (it’s marked with the yellow asterisk).
3. Open it by clicking it's name from template column
4. Choose ***index.php*** in the menu on the right.
5. Copy the widget code from the Assistant editing screen.
6. Scroll template code to the </head> tag, paste the code and press Save button.
7. Done!
## Helix Ultimate
1. Log into your Joomla admin panel and go to **Extensions → Templates.**
2. Click on default template anme(it’s marked with the yellow asterisk).
3. Click **Template Options** button
4. Click Custom Code menu and paste Assistant code on **Before</body>** field.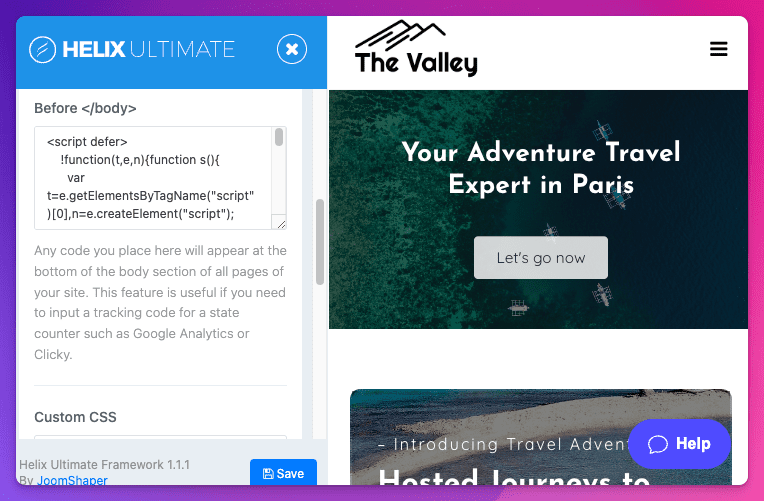
5. Save and your are done.
## Gantry Framework
1. Log into your Joomla admin panel and go to **Components → Gantry 5 Themes** or **Extensions → Templates.**
2. Click on default template anme(it’s marked with the yellow asterisk).
3. Select **Base Outline** from global presets.
4. Go to **Page Settings** tab and paste Assistant code under **Head Properties > Custom Content** field. 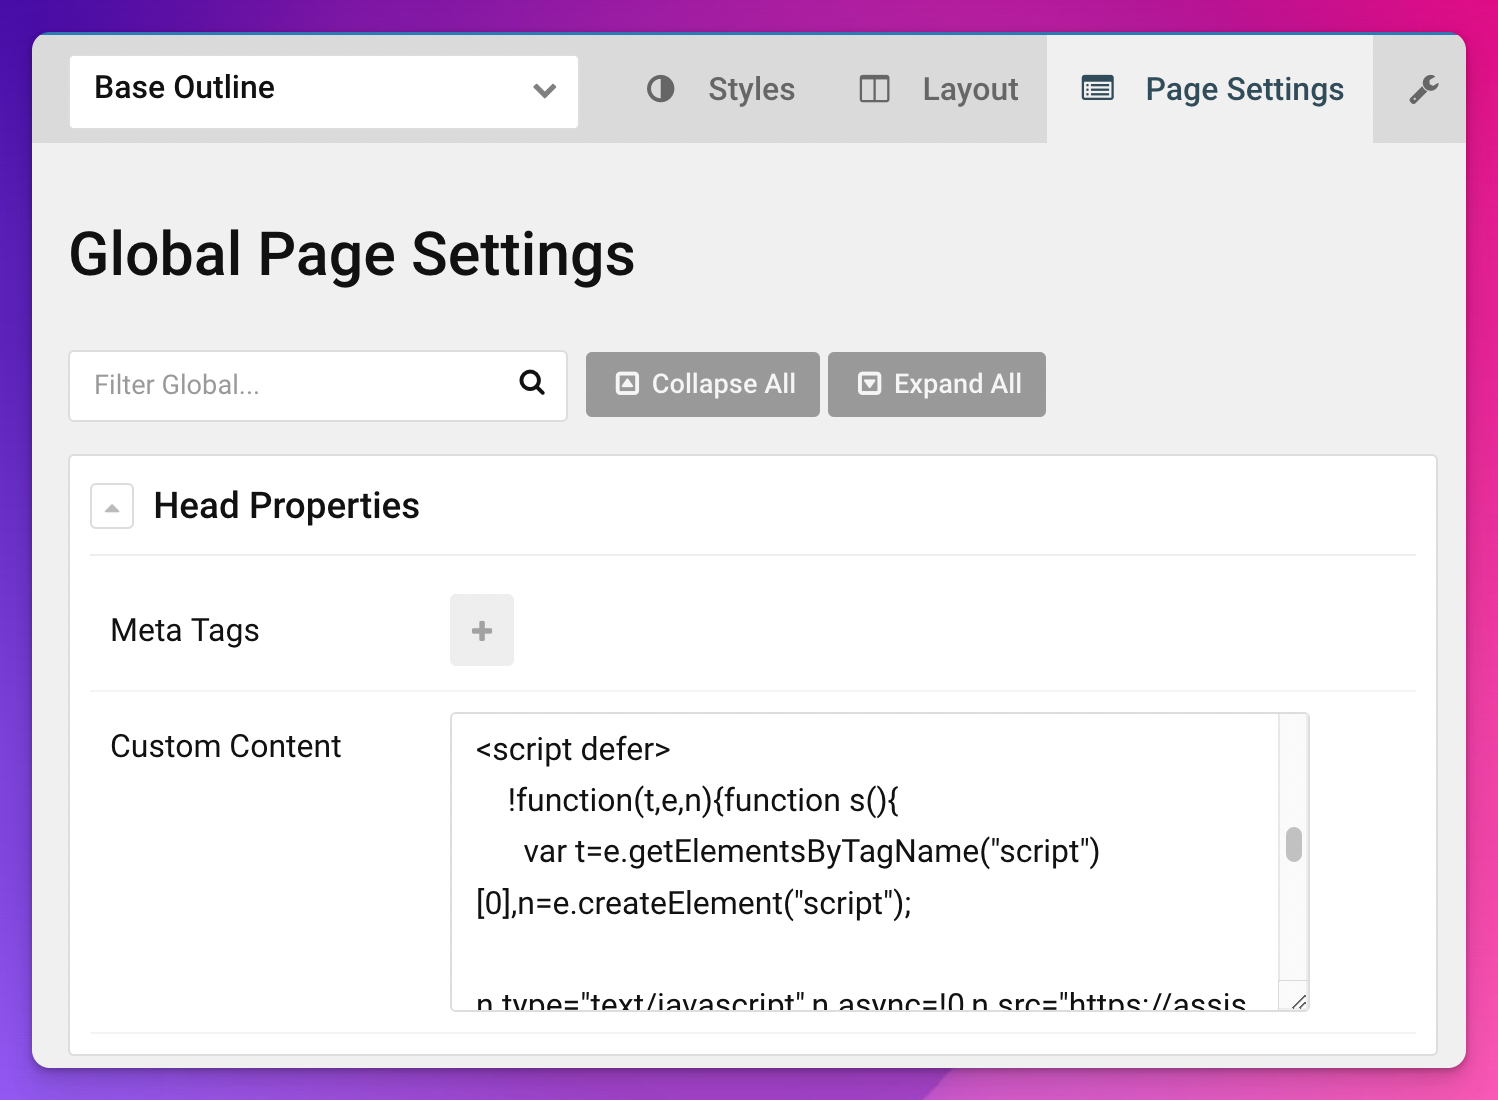
5. Save and you are done.
## T4 Framework
1. Log into your Joomla admin panel and go to **Extensions → Templates.**
2. Click on default template anme(it’s marked with the yellow asterisk).
3. Click Global Settings menu > Custom code and paste Assistant code on **Before</body>** feild.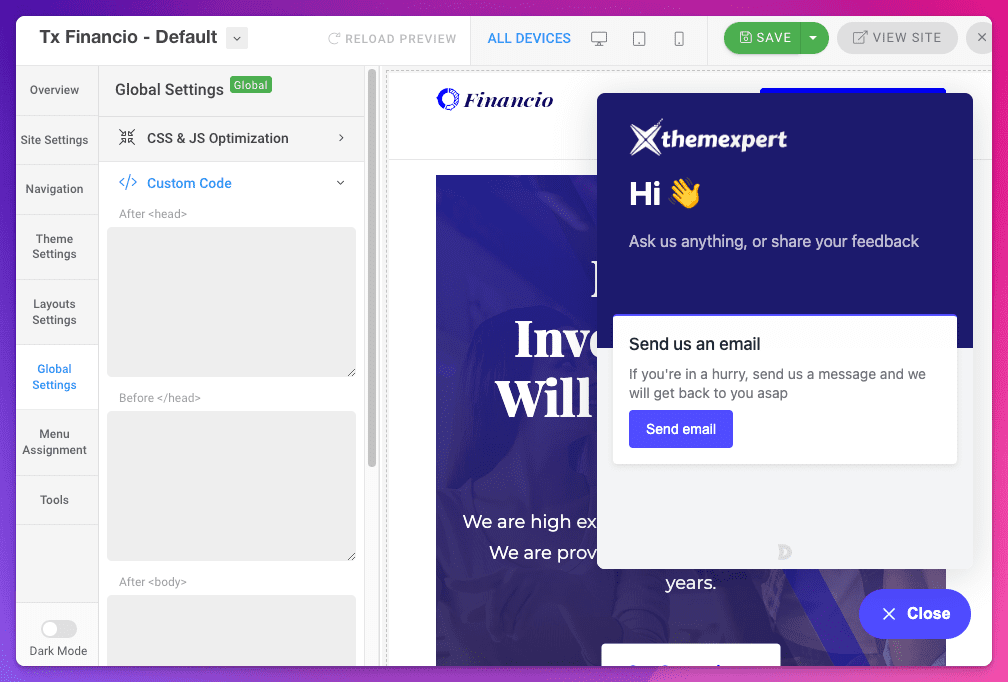
4. Save and you are done.
Our parent company ThemeXpert makes the best [Joomla templates](https://www.themexpert.com/joomla-templates) and [page builder](https://www.themexpert.com/quix-pagebuilder). If you need any help installing live chat on your Joomla website, [contact them](https://www.themexpert.com) for help.
# Managing ThriveDesk notifications
This documentation provides a comprehensive overview of ThriveDesk's notification settings, offering precise guidance on configuring alerts, updates, and communication preferences. Designed to enhance customer support experiences, these settings empower teams to stay informed and responsive, ensuring timely interactions and seamless collaboration throughout the customer journey.
## Enable or Disable Notifications
Each User in your account can set up notifications based on their personal preferences.
1. Click the Account icon in the bottom left corner of ThriveDesk, followed by the Your Profile option.
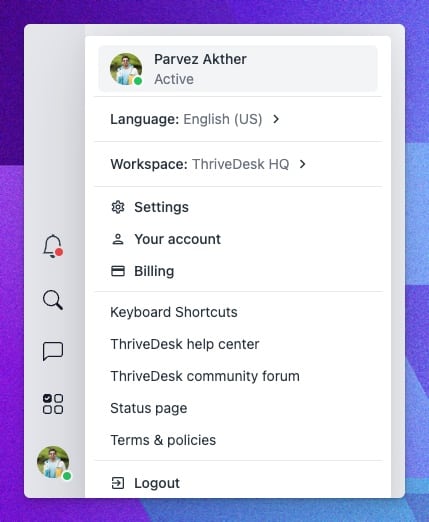1. Choose **Notifications** from the left sidebar menu.
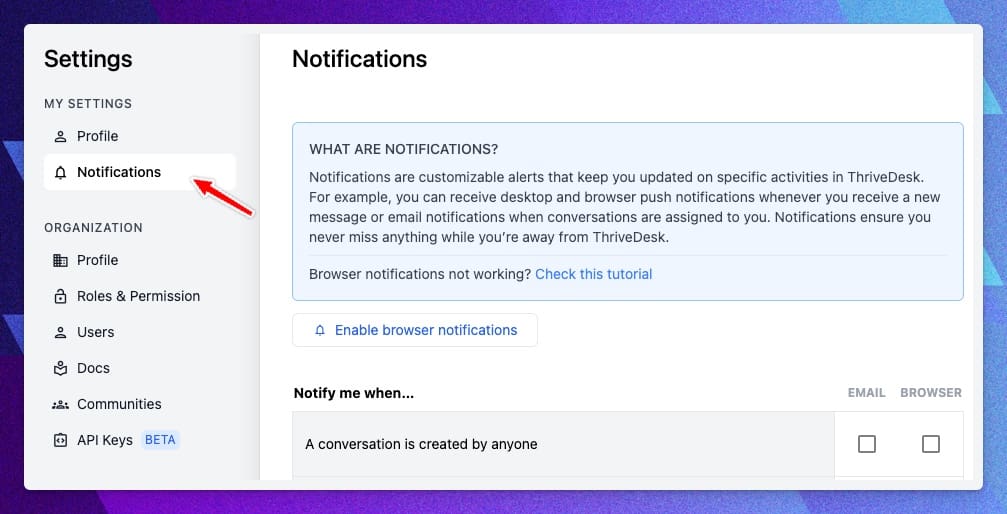1. Check the events you'd like to get a notification for, then hit the **Save Notifications** button at the bottom of the page.
To disable notifications, uncheck the box and hit **Save Notifications** to confirm the changes.
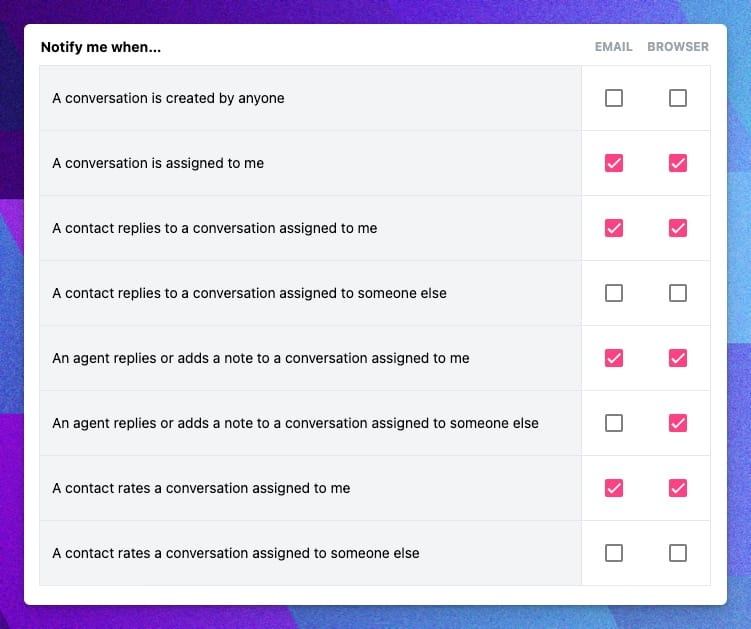## Notification Events
* **A conversation is created by anyone** - You will be notified whenever a new conversation or ticket is created by anyone.
* **A conversation is assigned to me** - You'll be notified immedietly when a conversation is assigned to you.
* **A contact replies to a conversation assigned to me** - When a contact replies to a conversation assigned to you, you will receive a notification..
* **A contact replies to a conversation assigned to someone else** - When a contact replies to a conversation assigned to someone else on your team, you'll receive notificaiton.
* **An agent replies or adds a note to a conversation assigned to me** - When a team member reply to a conversation or add note to in, you'll receive notification.
* **An agent replies or adds a note to a conversation assigned to someone else** - When a team member reply or add note to a conversation that assigned someone else, you'll receive notification.
* **A contact rates a conversation assigned to me** - When a contact rates your reply that assigned to you, you'll receive notification.
* **A contact rates a conversation assigned to someone else** - When a contact rates anyone reply, you'll receive notificaiton.
## Email Notifications
ThriveDesk emails you updates for specific conversation events. You can respond to a conversation or add a note directly from your personal inbox, without needing to log in.
ThriveDesk email notifications are specific to each user and conversation. Only the recipient of the notification can respond to it, meaning you cannot forward your own email notification to another user or a third party.
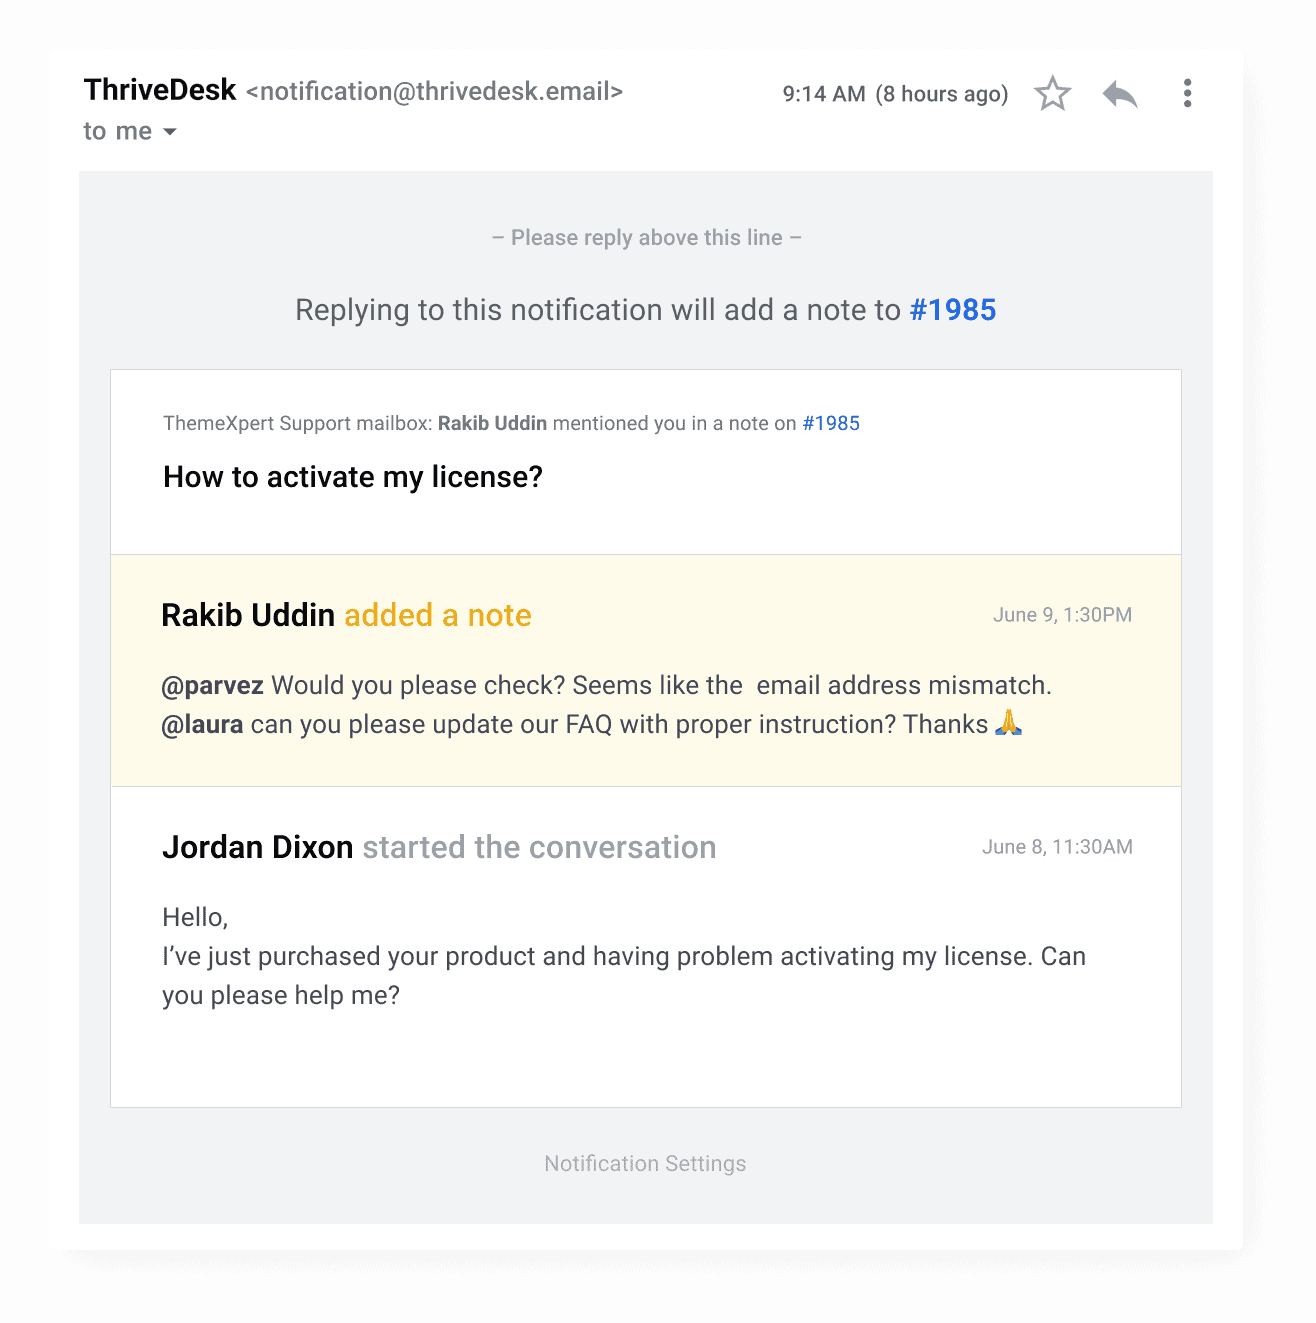## Enable Browser & Mobile Notifications
Enabling browser notifications results in the same settings being automatically applied to mobile notifications as well. This synchronization ensures that the preferences you establish for browser alerts seamlessly translate to your mobile device, maintaining consistency and ensuring you stay updated across both platforms.
Before activating browser notifications in ThriveDesk, ensure your browser permits website notifications. Refer to provided links for enabling/disabling instructions in popular browsers.
* [Google Chrome](https://support.google.com/chrome/answer/3220216)
* [Mozilla Firefox](https://support.mozilla.org/en-US/kb/push-notifications-firefox)
* [Apple Safari](https://support.apple.com/en-gb/guide/safari/sfri40734/mac)
* **Arc Browser**: When in notificaiton page, click Site Control Center and click the Notifications button to enable browser notificaiton.
On Windows, Chrome browser notifications in versions 68 and higher are sent through Windows Action Center. Make sure your [Windows Notification & actions settings](https://support.microsoft.com/en-us/windows/change-notification-settings-in-windows-8942c744-6198-fe56-4639-34320cf9444e) allow Chrome to send through here in addition to the Chrome settings.
To activate notifications, click the "**Enable Browser Notifications**" button. Afterward, your browser will request permission. Once granted, the button will change to a gray color, accompanied by the message: "**Your browser notifications are now enabled**" This indicates successful activation.
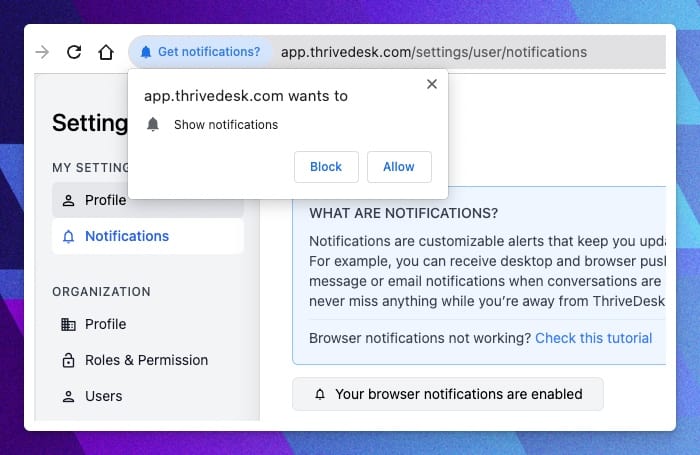## Mobile Notification
Mobile notifications are useful for tracking conversation updates on the move. You can find more information at [Mobile Notifications](//help.thrivedesk.com/en/mobile-notifications).
# Manage Voice Messages in ThriveDesk
ThriveDesk supports voicemail notifications directly within your inbox. No installation is needed — just forward voicemails to your ThriveDesk mailbox and manage them like any other conversation.
## How the Integration Works
Configure your phone or voice service provider to forward voicemail notifications to your ThriveDesk inbox. You can either use your custom support email or your default ThriveDesk mailbox address.
Voicemails are recognized and processed when the email:
1. Contains **Voice Message** or **Voicemail from** in the subject line (case sensitive)
2. Includes an **MP3** or **WAV** audio attachment
When both conditions are met, ThriveDesk categorizes the message as a **phone log**, just like any other conversation.
## Viewing Voicemails as Phone Logs
Voicemails appear in your **Unassigned** folder like regular messages. Any call metadata included in the provider’s email is automatically added as a note. You can listen to the voicemail directly in ThriveDesk or download the file.
## Linking Voicemail to the Right Customer
ThriveDesk intelligently extracts the contact name and email address from the voicemail metadata to associate the message with the correct customer. However, in some cases, this detection may fail and the conversation will default to the voicemail provider's email address.
If this happens, you can manually update the contact by using the **[Change Contact](https://help.thrivedesk.com/en/changing-contact)** feature. This ensures the voicemail is properly linked to the right customer profile before continuing the conversation.
All call-related details will appear as internal notes and are not visible to the customer.
## Recommended Voicemail Providers
ThriveDesk works with any provider that sends the required subject line and audio attachment. In addition, the following providers are fully supported with enhanced handling:
* [3CX](https://www.3cx.com/)
* [8x8](https://www.8x8.com/)
* [AltiGen](https://www.altigen.com/)
* [Answer](https://answer.co.uk/)
* [Asterisk](https://www.asterisk.org/)
* [CallRail](https://www.callrail.com/)
* [CloudTalk](https://www.cloudtalk.io/)
* [Cisco](https://www.cisco.com/)
* [dmClub](https://www.dmclub.net/)
* [eReceptionist](https://www.ereceptionist.co.uk/)
* [eVoice](https://www.evoice.com/)
* [FluentStream](https://www.fluentstream.com/)
* [Fonality](https://www.fonality.com/)
* [FortiVoice](https://www.fortinet.com/products/business-phone-systems/fortivoice-fortifone)
* [FreedomVoice](https://www.freedomvoice.com/)
* [Google Voice](https://www.google.com/voice/)
* [Gradwell](https://www.gradwell.com/)
* [Grasshopper](https://www.grasshopper.com/)
* [Intermedia](https://www.intermedia.net/)
* [jConnect](https://www.efax.com/jconnect)
* [Kall8](https://kall8.com/)
* [Line2](https://www.line2.com/)
* [Mitel](https://www.mitel.com/)
* [mVoice](https://www.mvoice.com.au/)
* [Nextiva](https://www.nextiva.com/)
* [Onebox](https://www.onebox.com/signup/)
* [Onsip](https://www.onsip.com/)
* [Ooma](https://www.ooma.com/)
* [Optimum Voice](https://www.optimum.com/home-phone-service/)
* [OVH](https://www.ovh.com/)
* [Phone.com](http://Phone.com)
* [Phonebooth](https://www.phonebooth.com/)
* [PhoneTag](https://lp.youmail.com/phonetag/)
* [Placetel](https://www.placetel.de/)
* [PureJam](https://www.jam.co.uk/)
* [RingbyName](https://www.ringbyname.com/)
* [RingCentral](https://www.ringcentral.com/)
* [Ringio](https://www.ringio.com/)
* [SendHub](https://sendhub.com/)
* [Sipgate](https://www.sipgate.de/basic)
* [Soho66](https://soho66.co.uk/)
* [Sonetel](https://www.sonetel.com/)
* [SwitchboardFREE](https://www.switchboardfree.co.uk/)
* [SpeakUp](https://www.speakup.nl/)
* [Twilio](https://www.twilio.com/)
* [YouMail](https://www.youmail.com/)
* [Virtual PBX](https://www.virtualpbx.com/)
* [VoiceCloud](https://www.voicecloud.com/)
* [VoiceNation](https://www.voicenation.com/)
* [Voip.ms](http://Voip.ms)
* [Voipfone](https://www.voipfone.co.uk/)
* [Vonage](https://www.vonage.com/)
* [Windsor](https://www.windsor-telecom.co.uk/)
Providers not listed here can still be used if they meet the subject line and attachment criteria.
# Create and Manage User Accounts
Users are members of your organization or team who have access to ThriveDesk. Account Owners and Administrators can create and manage all aspects of a user account. This article will cover all of the details of user accounts.
## Create Users
Account Owners and Administrators can add new users to your workspace from [Settings > Users](https://app.thrivedesk.com/settings/users).
1. Click **Invite Member** button from top.
2. Enter the user's email address and [set the role](//help.thrivedesk.com/en/user-roles-and-permissions). Select the Inboxes the user should have access to.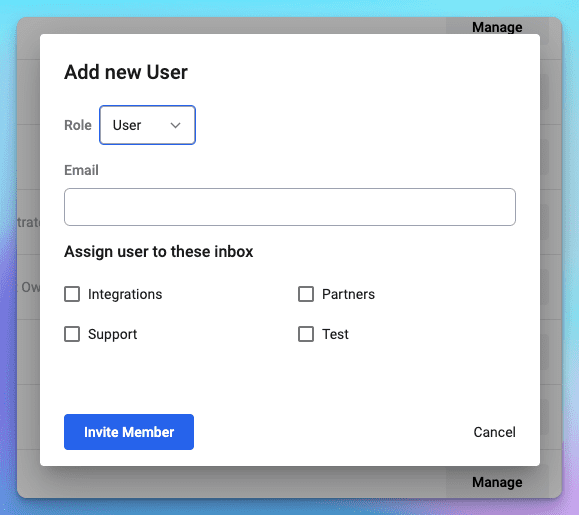
3. Click the **Invite Member** button to create the account.
## Manage Users
Head to Settings > Users to see all active and invited users. Each user shown here counts for your monthly per user billing.
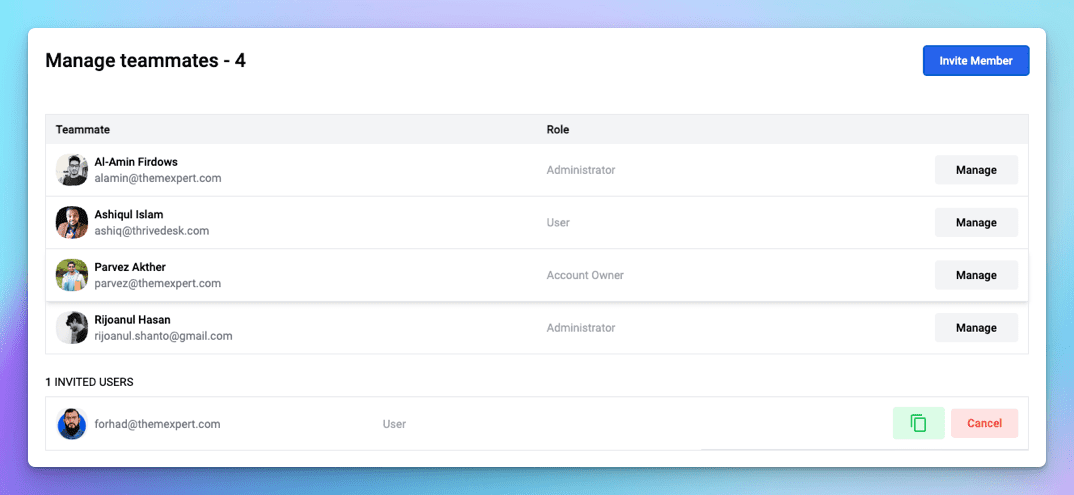
Remember that you will still be charged for invited users who have not joined the workspace.
Click the **Manage** button to navigate each user profile.
## User Profile
Account Owners and Administrators can manage all of a user's profile information here. This is the same profile data that the user can manage themselves.
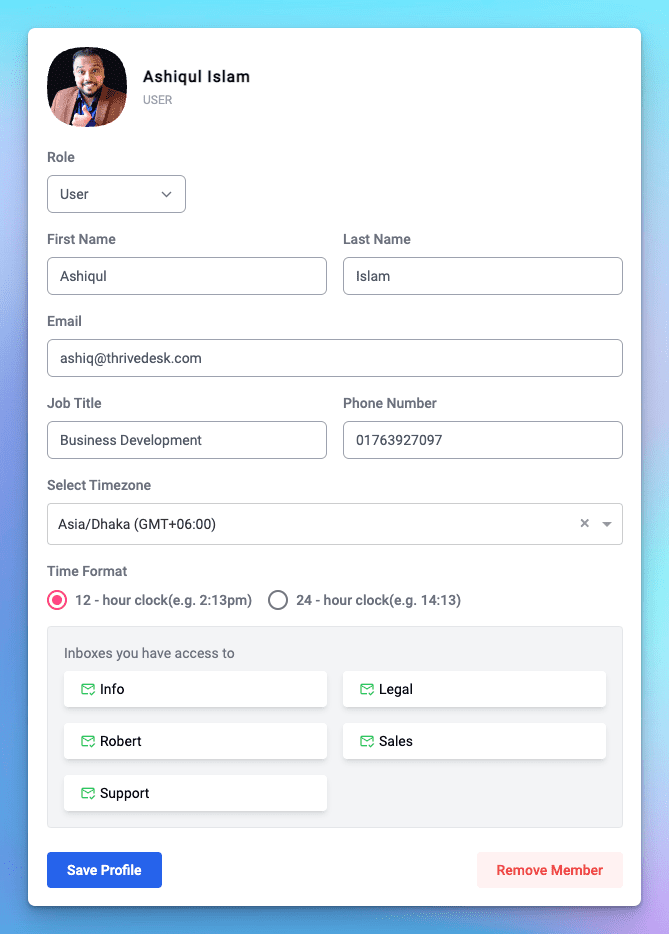
### Role
Select the Role from the dropdown menu. See [User Roles and Permissions](//help.thrivedesk.com/en/user-roles-and-permissions) for more information.
### Profile Information
Include your name, email address, job title, and phone number (optional) to complete your profile. Customer will be able to determine which user responded to their email based on the user name and job title included in the email notification of reply.
## Delete Users
When a user is deleted, their tickets must be transferred to another user. Click **Remove Member** button and select the user from the dropdown and press **Remove** button to finish the transfer.
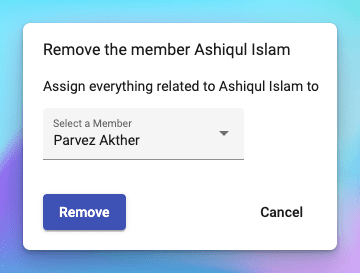
When you delete a user from ThriveDesk:
* All previous replies and notes added to conversations remain in place but transfered to selected user.
* Reporting is not affected in any way.
* Workflows and/or tags that were created by that user will not be affected.
* Conversations that are assigned to the user will automatically assigned to designated user.
* Status values will not change for any conversations that the user has touched.
## Change User Passwords
Account owner or Administrators in ThriveDesk are unable to manually reset user passwords. You can send a password reset email from **Settings > Users**. Click the user's Manage button, then from **Password** tab click the **Send** button.
## Deleting Own Account
You can delete your own account from **Settings > My Settings > Profile** page. Click the **Delete Account** tab enter your password and press **Delete Account** button.
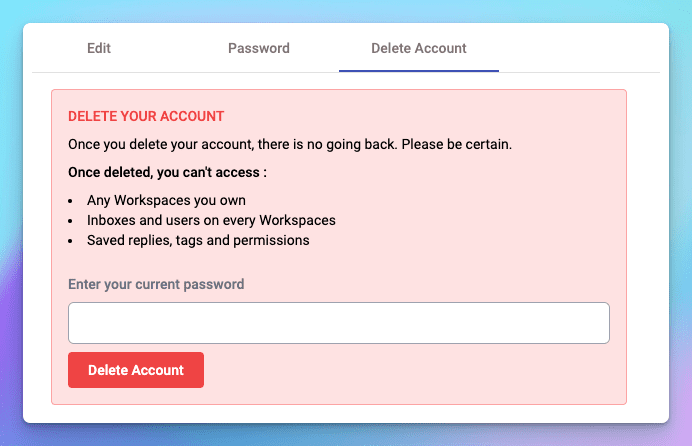
When you delete your own account:
* Your own workspace will be removed.
* Inbox, users, Knowledge base associated with that workspace will be removed.
* If you have access to another workplace, your account will also be deleted from that workspace.
Once you delete your account, there is no going back. All your account data will be removed automatically.
## Frequently Asked Questions
**Can I deactivate a User temporarily if they will be out for a while?**
There isn't a way to deactivate a user temporarily.
**My user is getting an error when trying to accept the invite or trying to reset their password. What can I do?**
For security considerations, the invitation and password URLs in these emails are only active for a short period. If the timeout period has expired, arrange with the user to inform them, then navigate back to **Settings > Users** and select the user. You will select either **Resend invitation** email for new users or **Reset password** for current users.
# MCP - Connect your AI assistant to ThriveDesk
The ThriveDesk MCP connector lets an AI assistant work inside your helpdesk: search conversations, draft and send replies, tag and assign tickets, look up contacts, and read your reports. You decide exactly which of those it may do, and you can take the access back at any time.
MCP (Model Context Protocol) is an open standard for connecting AI assistants to the tools you already use. Connecting ThriveDesk this way means your assistant acts on real tickets instead of guessing from what you paste into a chat window.
Once connected, you can ask your assistant things like:
* What is still open in the Billing inbox from this week?
* Summarise ticket #2841 and draft a reply, but do not send it.
* Tag every unassigned refund request with `needs-finance` and assign them to me.
* Look up this customer and tell me what they have contacted us about before.
* How many conversations did each agent resolve last month?
## Before you begin
You need three things:
* **A ThriveDesk account** that belongs to at least one workspace. Any role can connect. Your role decides what you are able to grant.
* **An AI client that supports remote MCP servers.** This article covers Claude (web, desktop, and Claude Code), ChatGPT, and the popular code editors. The supported clients are listed under Add ThriveDesk to your assistant below.
* **A browser signed into ThriveDesk**, or your password to hand. You approve the connection on a ThriveDesk page, not inside the assistant.
There is nothing to install, no API key to generate, and no developer setup. The connection is made with your normal ThriveDesk sign-in.
## Set up the connection
### Copy the ThriveDesk server address
Your assistant needs one address. It is the same for every ThriveDesk customer:
```shellscript
https://mcp.thrivedesk.com
```
That is the whole address. No path, no key, nothing to fill in.
### Add ThriveDesk to your assistant
#### Claude on the web or desktop
1. Open **Settings**, then **Connectors**.
2. Choose **Add custom connector**.
3. Name it **ThriveDesk** and paste `https://mcp.thrivedesk.com` as the URL.
4. Choose **Add**, then **Connect**. A ThriveDesk window opens.
#### Claude Code
Run this once in your terminal:
```shellscript
claude mcp add --transport http thrivedesk https://mcp.thrivedesk.com
```
Then type `/mcp` inside Claude Code, pick **thrivedesk**, and choose **Authenticate**. Your browser opens on the ThriveDesk approval page.
#### ChatGPT, VS Code, Cursor and other supported clients
Add a **remote** (HTTP) MCP server pointing at `https://mcp.thrivedesk.com`. Sign-in is handled automatically, so the client sends you to ThriveDesk to approve it. The menu wording differs between clients and versions, but the address never changes.
Supported clients today are Claude (web, desktop, mobile, and Claude Code), ChatGPT, VS Code, and Cursor. If your client is not listed, contact ThriveDesk support and we will tell you whether it is supported yet.
### Approve the connection
ThriveDesk shows an approval page with your name and the name of the assistant asking for access. Three things happen here, in order.
#### Choose the workspace
If you belong to more than one ThriveDesk workspace, pick the one this connection is for. The connection is tied to that single workspace. To use a second workspace, add a second connector and approve it for that one.
#### Choose how much access to grant
Pick a preset, then adjust it if you want:
| Preset | What it grants | Good for |
|---|---|---|
| Read-only | Everything you can view. Changes nothing. | Reporting, triage, asking questions |
| Standard | What your role can do by default. | Everyday work. Start here. |
| Full access | Everything you personally can do in this workspace. | Power users who want no friction |
Below the presets, every permission is listed by area (Conversations, Contacts, Inboxes, Reports, Live Chat and so on). Turn a whole area on or off, or open it and pick individual permissions. Grant the least you need. You can always reconnect with more later.
#### Authorize
Choose **Authorize**. You are returned to your assistant and the connection is live. Choosing **Deny** cancels it and nothing is shared.
**Check the name.** The approval page shows which application is asking. If you did not just start this setup, or the name is unfamiliar, choose **Deny**.
### Check that it works
Ask your assistant something harmless that needs real data:
```shellscript
List my ThriveDesk inboxes.
```
You should get your actual inbox names back. If you do, you are done. If the assistant says it has no ThriveDesk tools, see Troubleshooting below.
## What it can do
The connector exposes 28 actions. Your assistant picks the right one for what you asked. Anything your grant does not cover simply is not available to it.
| Area | Actions |
|---|---|
| Conversations | Search and list, open a full thread, reply to the customer, add an internal note, save or delete a draft, schedule a reply for later, set status, snooze, assign, tag, set custom fields, move to another inbox, forward to an external address, create a new conversation |
| Contacts | Search contacts, open a contact with their recent conversations, create or update a contact |
| Inboxes | List the inboxes you can access |
| Live chat | List chats in progress, open a transcript, reply to a visitor, accept a chat, close a chat |
| Knowledge base | Search your help centre articles and answers |
| Saved replies | List the saved replies available to you |
| Notifications | List your notifications, mark them read |
| Reports | Per-agent conversation and resolution counts, agent and team summaries over a date range |
| Attachments | Get a temporary download link for a conversation attachment |
**What reaches the customer.** Replying to a conversation, replying in live chat, and forwarding a message all send immediately. Internal notes, drafts, and creating a conversation never reach the customer, because creating only stages the conversation for you to review and send. A scheduled reply is queued and goes out at the time you set.
## How permissions work
Three rules, in order of strength. Each one can only narrow access, never widen it.
1. **Your own permissions come first.** The approval page only ever offers what you personally hold in that workspace. If your role cannot delete conversations, no preset on that page can grant it, and no assistant connected as you can do it.
2. **Your grant narrows it further.** Whatever you left switched off is refused, even though you could do it yourself in the web app.
3. **Inbox membership still applies.** The connector reaches the same inboxes you do. An inbox you are not a member of stays invisible to it.
Nothing here changes your account. Granting a permission to a connector does not give it to you, and revoking a connector does not take anything away from you.
## Review and revoke access
Everything you have connected is listed in one place inside ThriveDesk:
1. Open **Apps**.
2. Choose the **Authorized OAuth Apps** tab.
Each card shows the application name and the date you connected. Choose **Revoke** to cut it off. Access stops immediately and the assistant loses every ThriveDesk action until someone authorizes it again.
**Worth a habit.** Review this list now and then, and revoke anything you do not recognise or no longer use.
## Limits and safeguards
| Safeguard | What it means for you |
|---|---|
| Rate limit | Up to 60 actions a minute. A runaway assistant is throttled, not left to flood your inbox. |
| Session length | Your assistant refreshes its access quietly in the background. After 90 days without use you approve it again. |
| Repeat protection | Sending actions accept a request key. When an assistant attaches one and then retries after a timeout, ThriveDesk replays the original result instead of sending a second time. |
| One workspace per connection | A connection can never reach across into another workspace's data. |
| Full audit trail | Replies, notes, assignments and status changes appear in the conversation thread under your name, exactly as if you had done them in the app. |
**A word on judgement.** An assistant with send access can email your customers. Until you trust how it behaves, grant **Read-only**, or ask it to draft rather than send. Drafts wait in the conversation for you to approve.
## Troubleshooting
| What you see | What to do |
|---|---|
| The assistant has no ThriveDesk tools at all | The connection was added but never approved. Reopen the connector and choose Connect or Authenticate to finish sign-in. |
| Your token was not granted the capability required for this tool | You left that permission switched off when approving. Revoke the connection under Apps, then connect again and include it. |
| Your token is not authorized for this resource | Your own role does not allow the action, or the ticket is in an inbox you are not a member of. Ask an administrator for access. |
| Conversation not found | Ticket numbers like #2841 are not the same as the internal id. Ask the assistant to search for the ticket first, then act on the result. |
| This request is not scoped to an organization | The connection lost its workspace. Revoke it and connect again, choosing the workspace on the approval page. |
| The approval page will not load, or says authorization failed | Approval requests expire after ten minutes. Start the connection again from your assistant. |
| It worked before and now asks you to sign in again | Normal after a long gap, or after someone revoked the connection. Approve it again. |
Still stuck? Contact ThriveDesk support with the name of the assistant and the exact message you saw.
## Questions
Does this give an AI company access to all our customer data?
No. The connector responds to specific requests your assistant makes on your behalf, within the permissions you granted, for the one workspace you chose. It does not hand over a copy of your helpdesk, and nothing is transferred in bulk or in the background.
Will my teammates see what the assistant does?
Yes. Replies, notes, assignments and status changes land in the conversation thread under your name, the same as work you do in the app.
Can I connect more than one assistant?
Yes. Each one is approved separately, with its own permissions, and each appears as its own card under Apps so you can revoke them independently.
I have two workspaces. Can one connection cover both?
No, and that is deliberate. Add a second connector and approve it for the other workspace.
Can an administrator connect this for the whole team?
No. Each person connects their own assistant, because every action runs as that person and respects their inbox access. There is no shared or workspace-wide connection.
What happens when I leave the workspace?
The connection stops being able to do anything. It carries your access, so when your membership ends, every action it tries is refused.
# Merge Multiple Conversations From One Customer
Sometimes a customer may send multiple emails about the same issue, which results in duplicate conversations in your inbox. To keep everything organized, you can **merge conversations** in ThriveDesk.
This combines messages into one thread so your team can manage the discussion more efficiently.
## Important Notes
* **Merging is permanent.** Once two conversations are merged, they cannot be unmerged.
* The merged conversation will appear under a single thread with all messages combined.
* Only **individual conversations** can be merged, bulk merging is not supported.
---
## How to Merge Conversations
### Locate Recent Conversations
Open the conversation you want to keep as the main thread. In the **Conversation Details** panel, scroll to the **Recent Conversations** section. Here you will see a list of other conversations from the same contact.
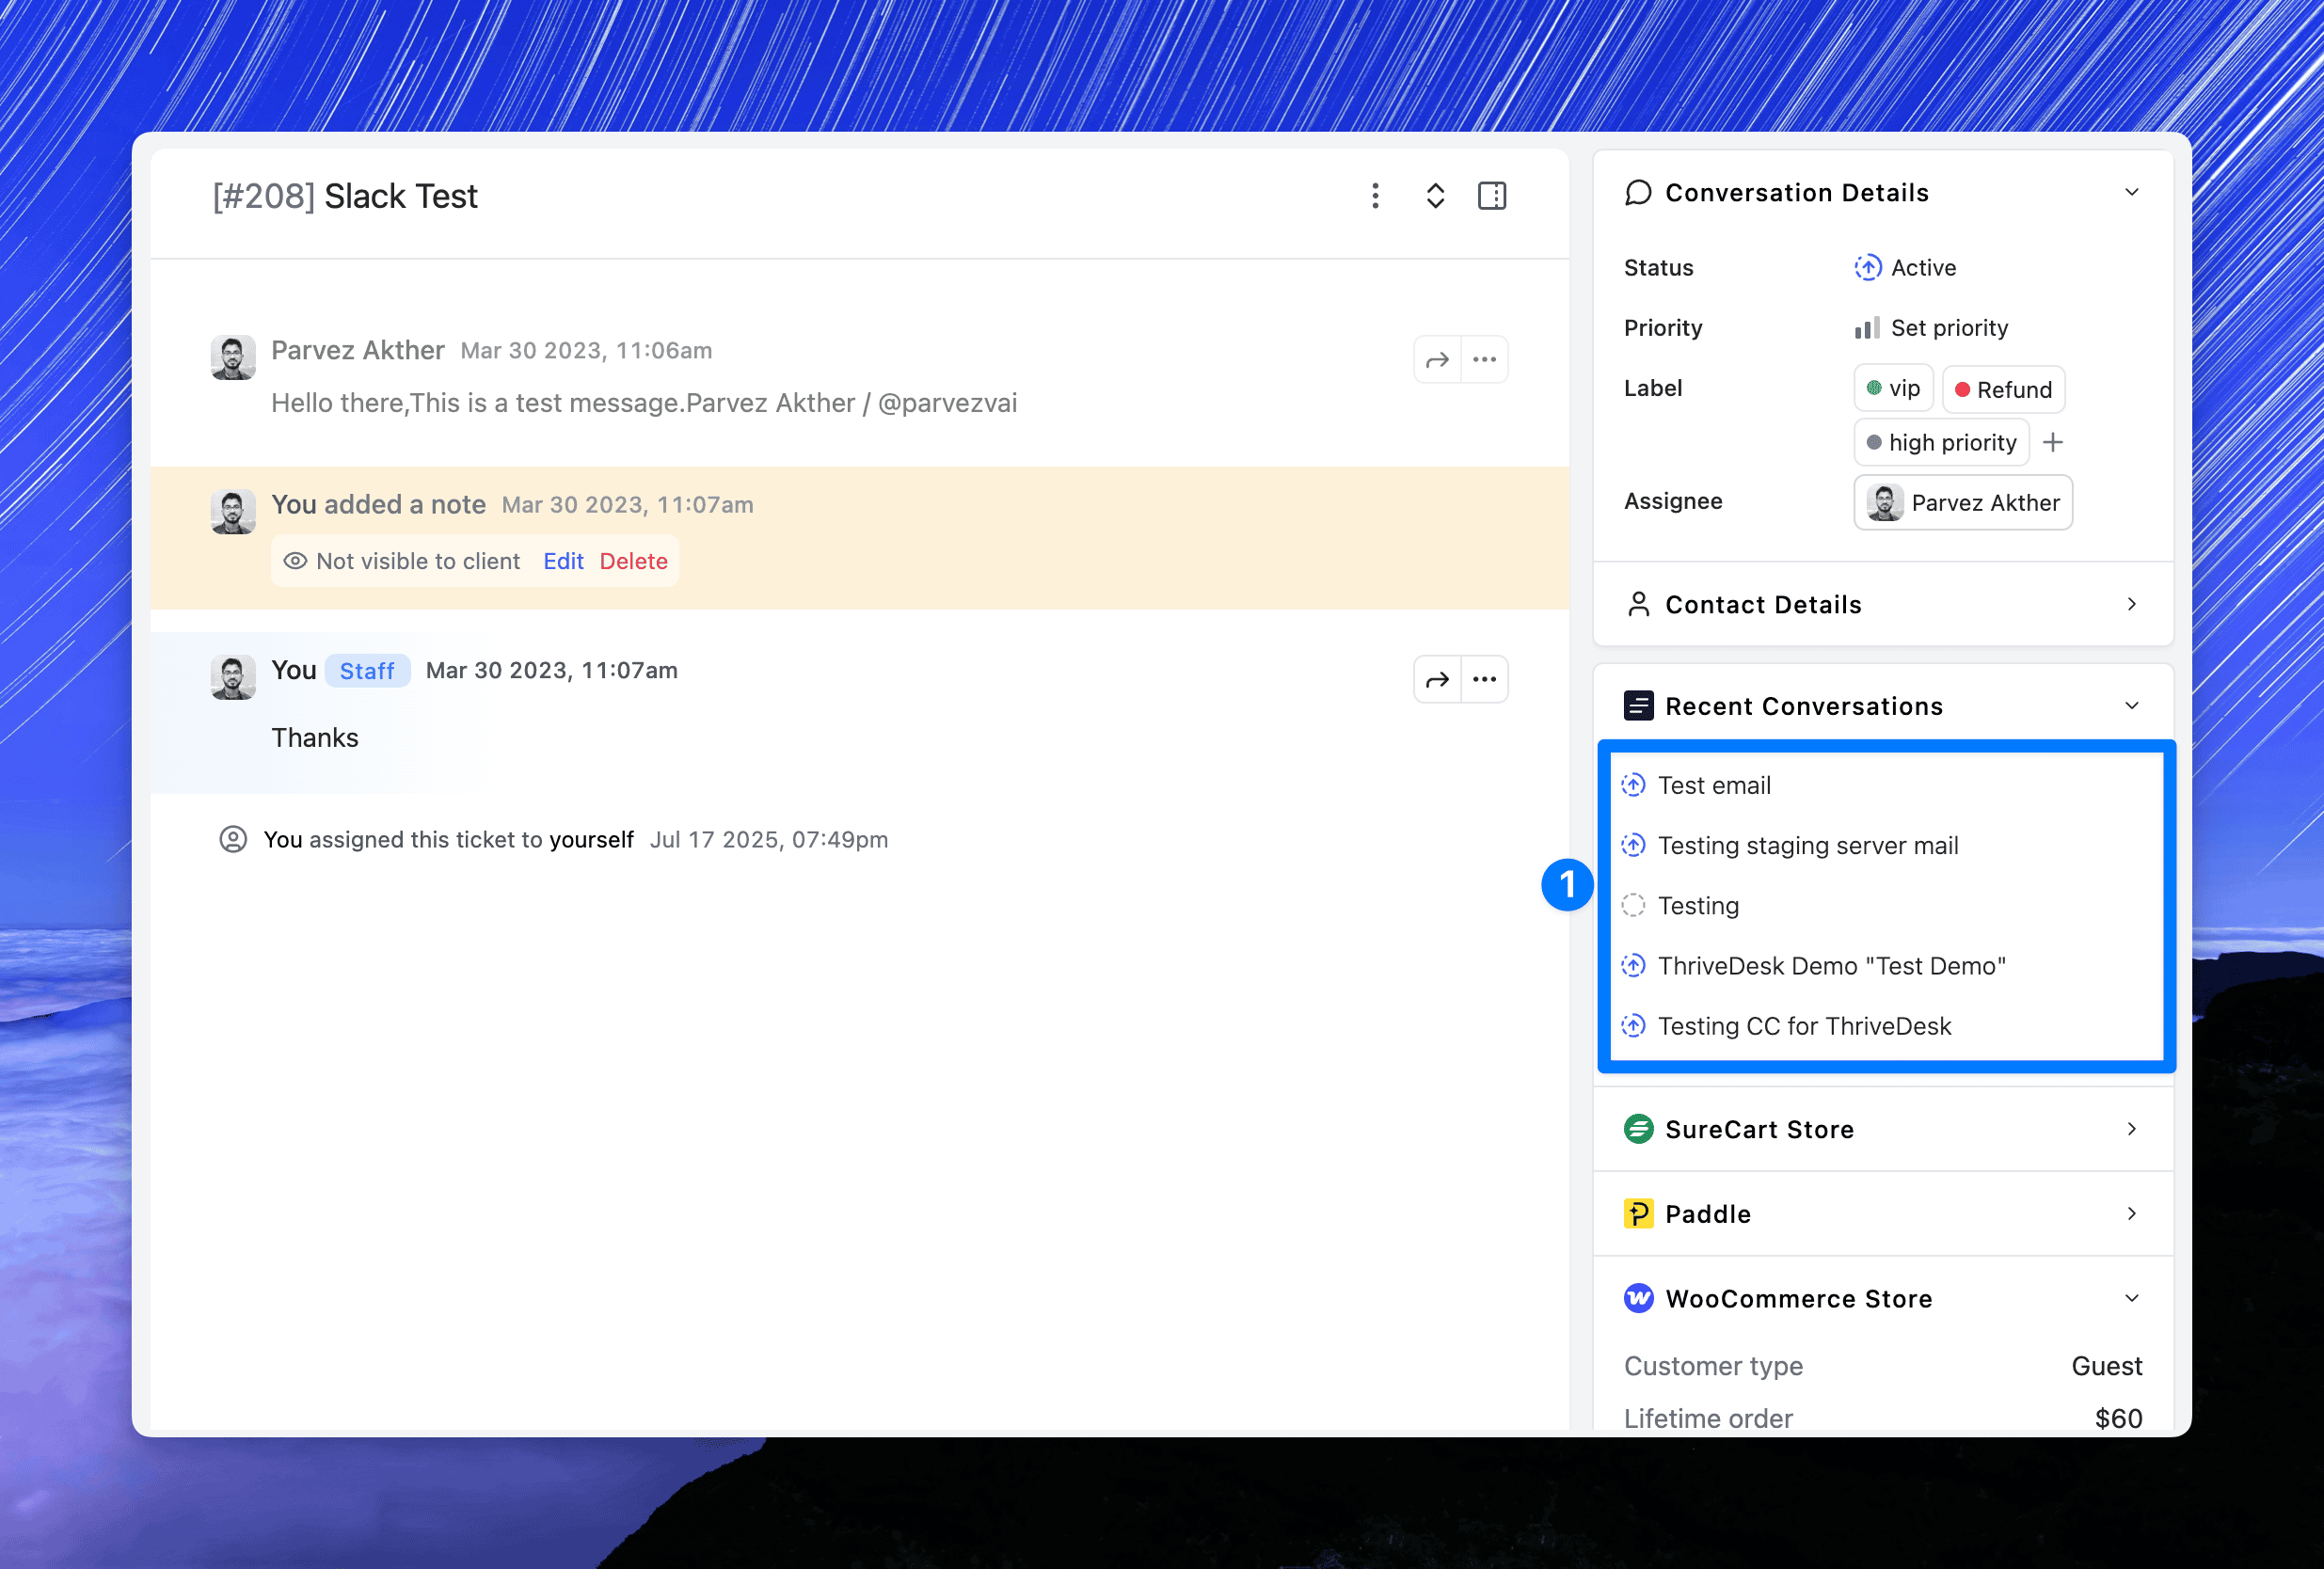### Select the Conversation to Merge
Click on the conversation you want to merge. A preview window will appear.
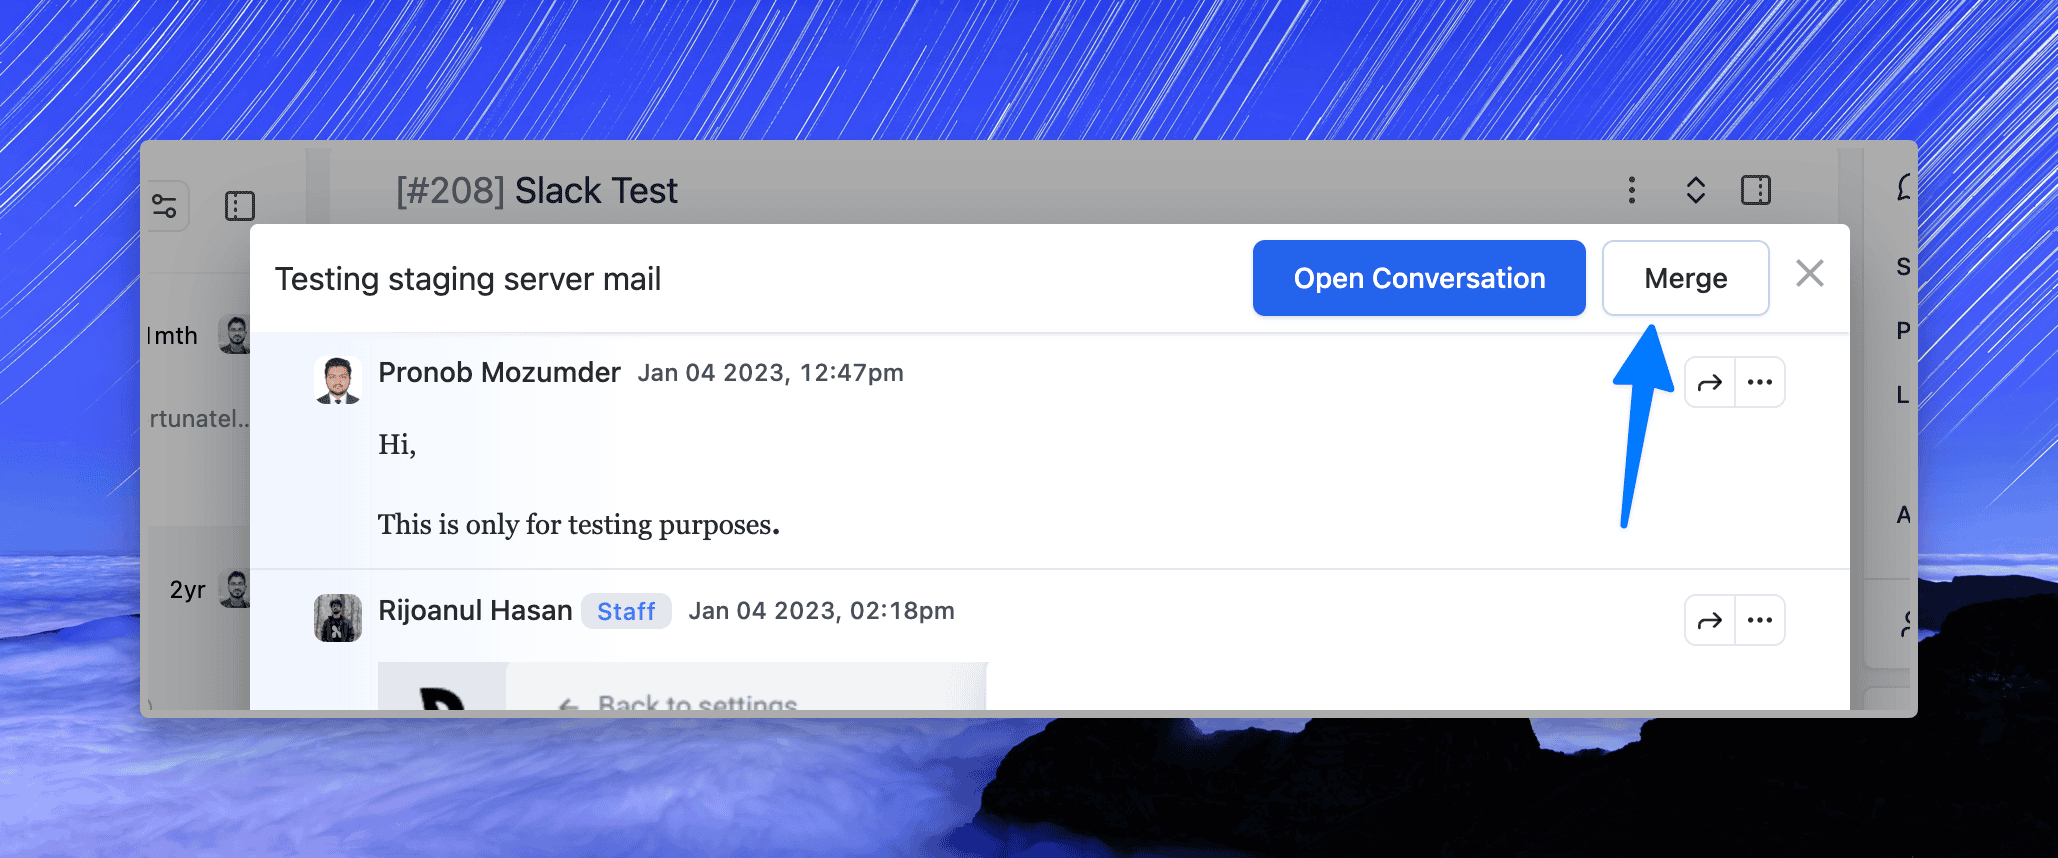### Confirm the Merge
Click the **Merge** button. A confirmation modal will appear showing the conversation you are merging **into** the current one.
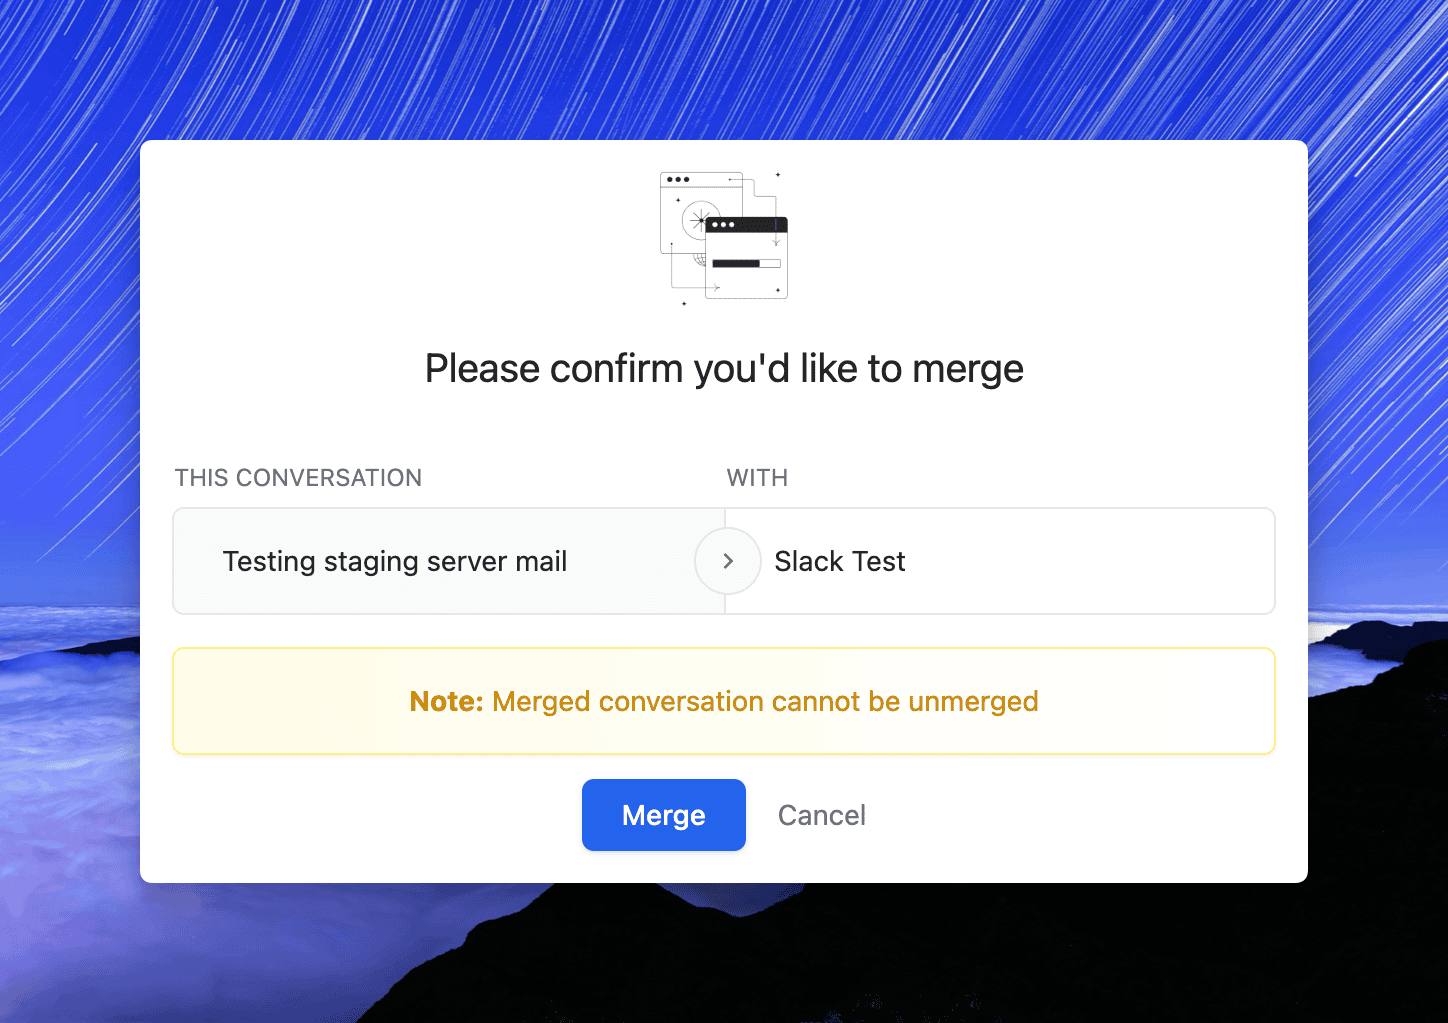Click **Merge** to finalize.
Once merged, conversations cannot be separated again.
## Visual Indicator for Merged Conversations
After a merge, ThriveDesk automatically logs an entry in the **activity timeline** of the conversation. This log shows:
* Which conversation was merged
* Who performed the merge
* When the merge occurred
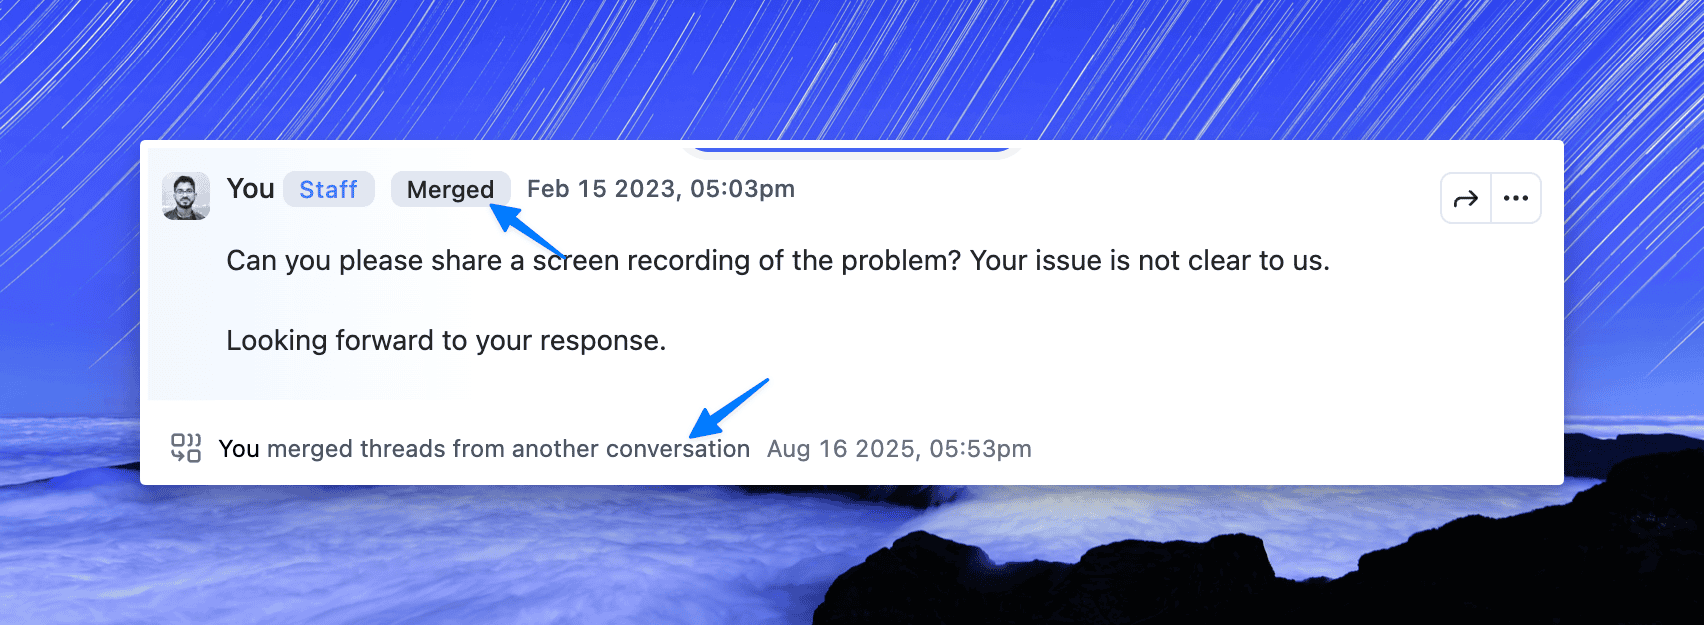This makes it easy for teammates to track changes and understand the full history of the conversation.
## Troubleshooting
* **Accidentally merged the wrong conversation:** Since merges cannot be undone, the best option is to add an **internal note** explaining the mistake and create a **new conversation** if needed.
* **Conversation not appearing in Recent Conversations:** Ensure both conversations are from the same contact (same email address). If not, you may need to Change Contact first.
* **Merge button not available:** Only admins and agents with permission can merge conversations. If you do not see the option, contact your workspace admin.
## Best Practices
* Always merge into the conversation with the **most complete context** (usually the one with your internal notes or most replies).
* If a customer has sent multiple short emails, merge them into the primary support request so your team has the full history in one place.
# Mixpanel
Mixpanel is a powerful product analytics tool that helps businesses understand user behavior across their digital platforms. By tracking interactions in real-time, Mixpanel allows companies to analyze user journeys, identify trends, and make data-driven decisions to enhance engagement and retention.
## Create Mixpanel Project Token
* Log into Mixpanel, select or create a project, and click the cog icon in the top right to access **Set up Mixpanel**.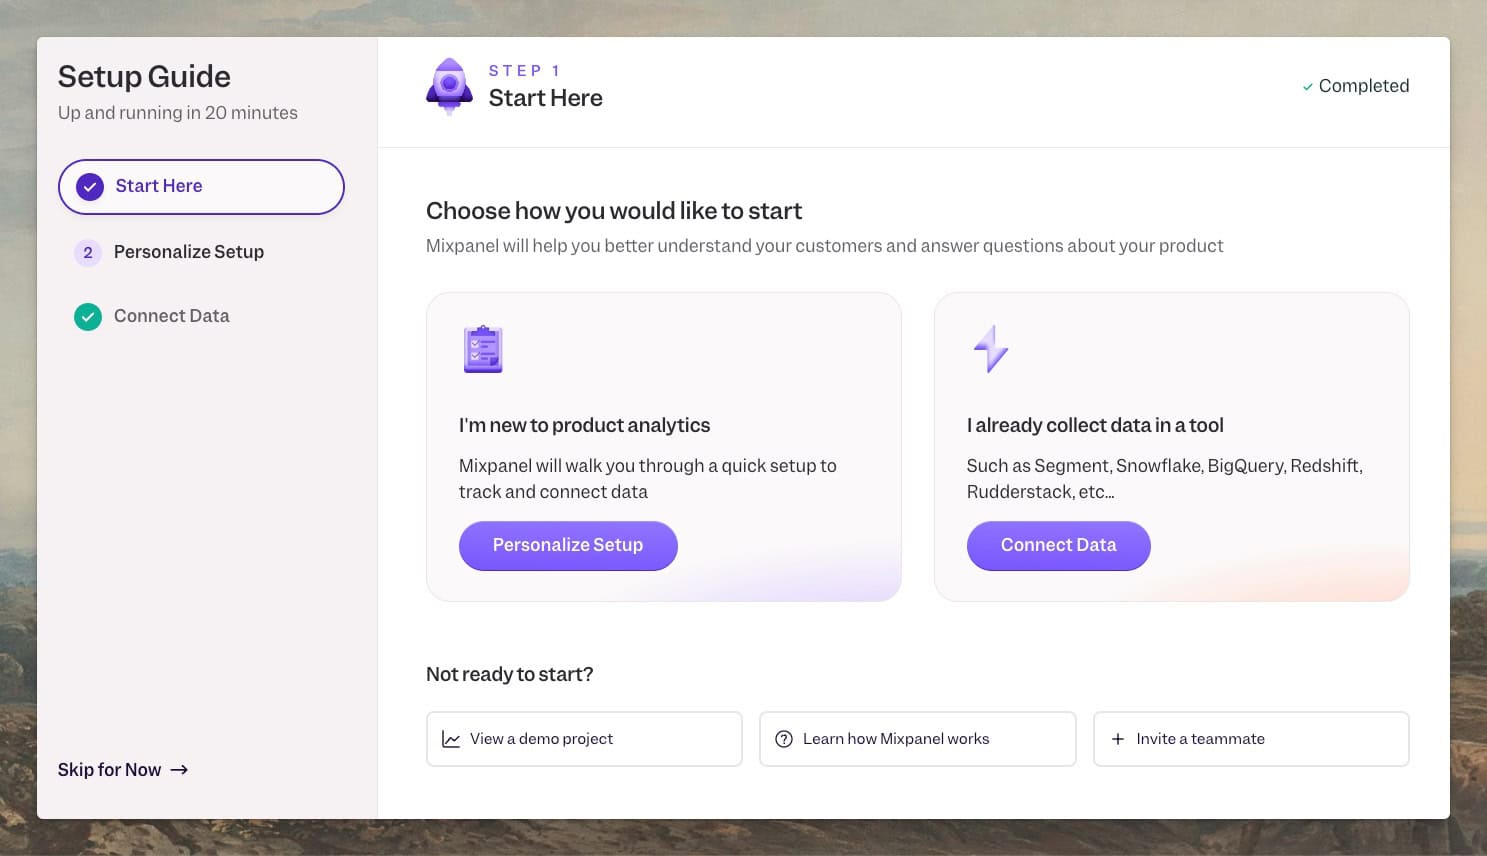
* Under the **Start Here** tab, select **Personalized Setup** and follow the guide.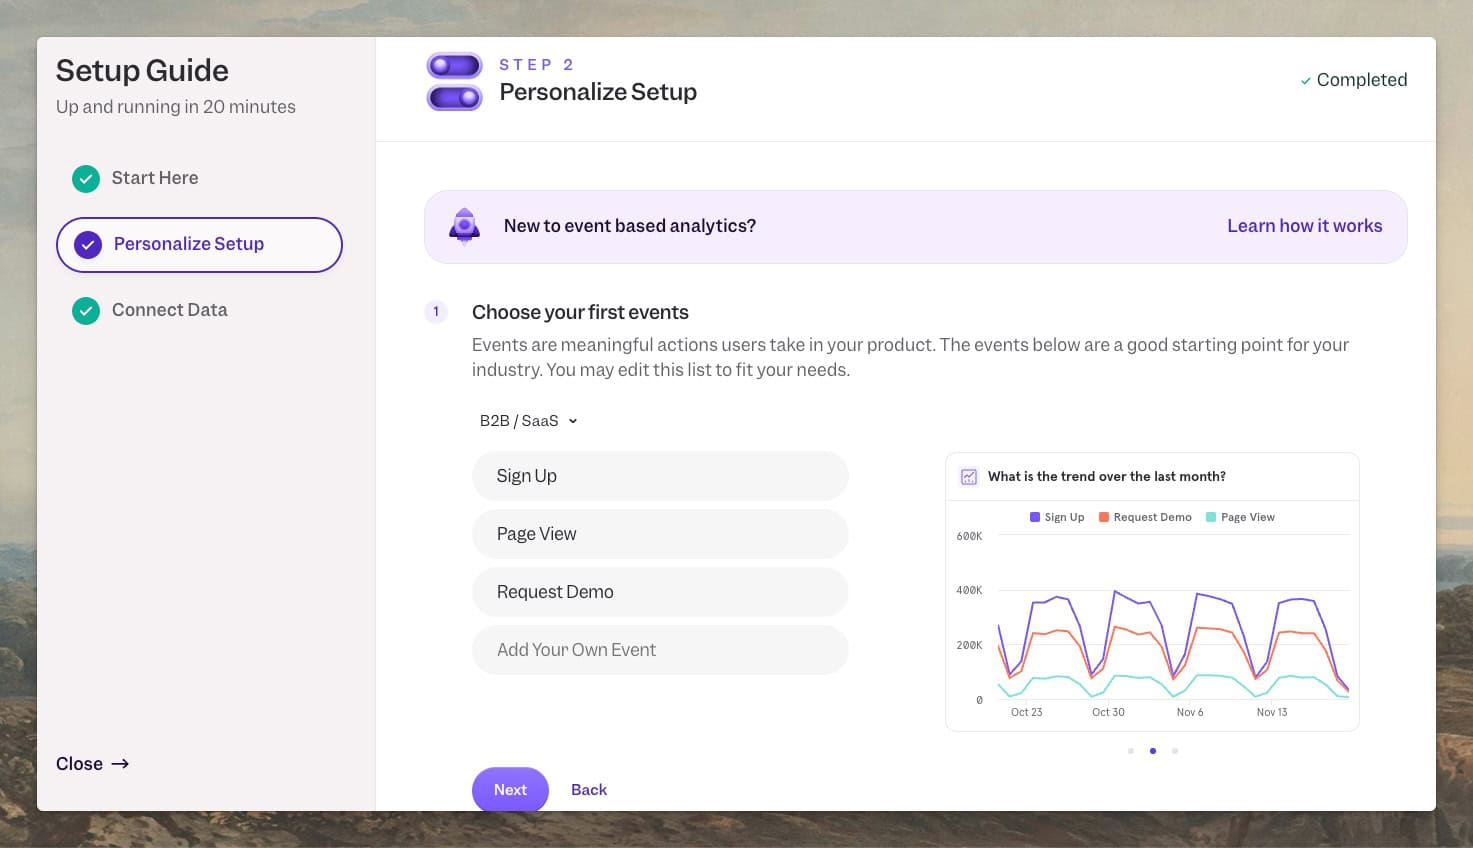
* In the **Connect data** tab, copy your **Project Token**.
## Install Mixpanel App
1. Log into ThriveDesk Knowledge Base(KB) site and go to **Settings > Apps**.
2. Click **Install** button on Mixpanel App.
3. Put your **Project Token** and press **Save Changes**.
Remember that preview links won’t track analytics by default.
# Mobile notifications
Mobile notifications are useful for tracking conversation updates on the move. This article guides you on how to configure and manage your mobile notifications on both iOS and Android apps.
## iOS app
Ensure you have the [ThriveDesk iOS app](https://apps.apple.com/us/app/thrivedesk/id1612184462) installed and notifications enabled within your account settings before activating mobile alerts on your device. If you need to adjust or activate your [notification settings](//help.thrivedesk.com/en/manage-thrivedesk-notificaitons), refer to this article.
Once that's completed, you can then enable your mobile notifications on your iPhone or iPad. You can do so by going to **Settings > Notifications > ThriveDesk > Allow Notifications**. From there, you can also choose how you'd like to be notified.
## iOS Focus mode
Starting with iOS 15, it is possible to customize the overall notification settings by utilizing the focus mode feature. If you have predefined focus modes configured, you can easily enable ThriveDesk notifications by following these steps:
1. Go to Settings > Focus 
2. Tap a provided Focus option—like Do Not Disturb, Personal, Sleep, or Work—then tap Customize Focus.
3. Tap on Apps then tap **Add Apps**. Search for ThriveDesk, select and press **Done **
## Android app
To set up notifications on your Android device, open the [ThriveDesk android app](https://play.google.com/store/apps/details?id=com.thrivedesk&pli=1) and select the '**Show notifications**' checkbox. If you need to enable or update your notification settings, refer to [this article](//help.thrivedesk.com/en/manage-thrivedesk-notificaitons).
# Move Conversations
You may need to move a conversation from one inbox to another if it was received in the wrong place or needs to be handled by a different team. This ensures the right people can see and respond to the conversation efficiently.
**Bulk moving conversations is not supported at this time.** Conversations can only be moved one at a time.
## Move Single Conversation
Follow these steps to move a conversation:
1. Open the conversation you want to move.
2. Click the **three-dot menu** in the top-right corner of the conversation header.
3. Select **Move to another inbox** from the dropdown menu.
4. Choose the target inbox.
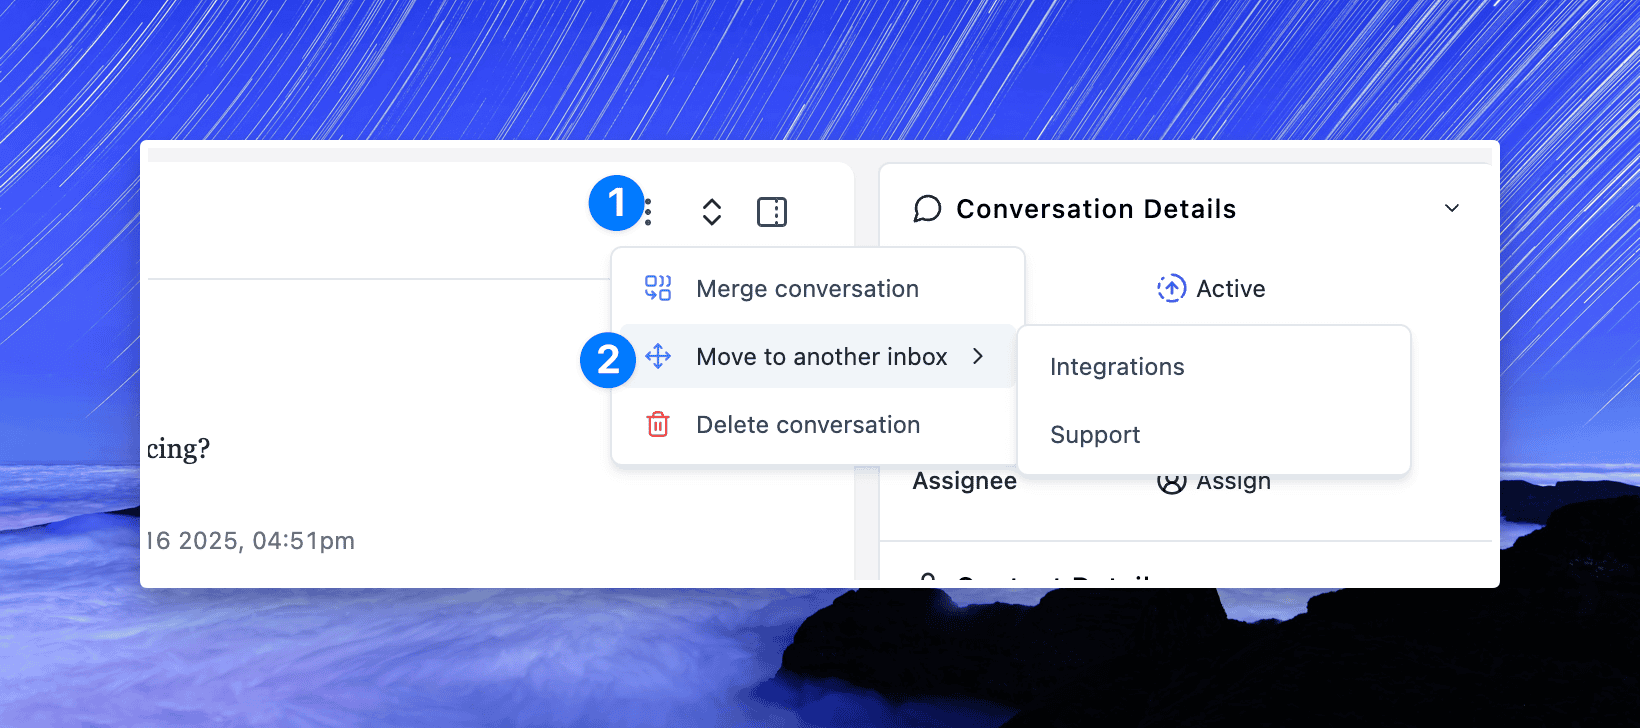Once selected, the conversation will be instantly moved to the chosen inbox.
## Troubleshooting
* **Conversation not visible after moving:** If you move a conversation to an inbox you do not have access to, it will no longer appear in your view. Contact an admin or a teammate with access to confirm the move.
* **Notifications:** The new inbox members will be notified based on their notification settings.
* **Accidental move:** If you moved a conversation by mistake, open it from the target inbox (if you have access) and move it back to the original inbox.
# Forwarding From Namecheap to ThriveDesk
If you want to use Namecheap email forwarder then you must use **Namecheap BasicDNS.** Namecheap email forward will not work if you use another nameserver.
1. First things first: Make sure you have followed the first steps in [Connect Your Custom](//help.thrivedesk.com/en/getting-your-emails-into-thrivedesk) Address and you have your ThriveDesk Inbox Address ready.
2. From your Namecheap dashboard, click on **Domain List** in the left sidebar menu.
3. Click on the domain you'd like to modify and click on the **Manage** button.
4. Go to **Advanced DNS** menu select **Email forwarding** from the dropdown of **Mail Settings**.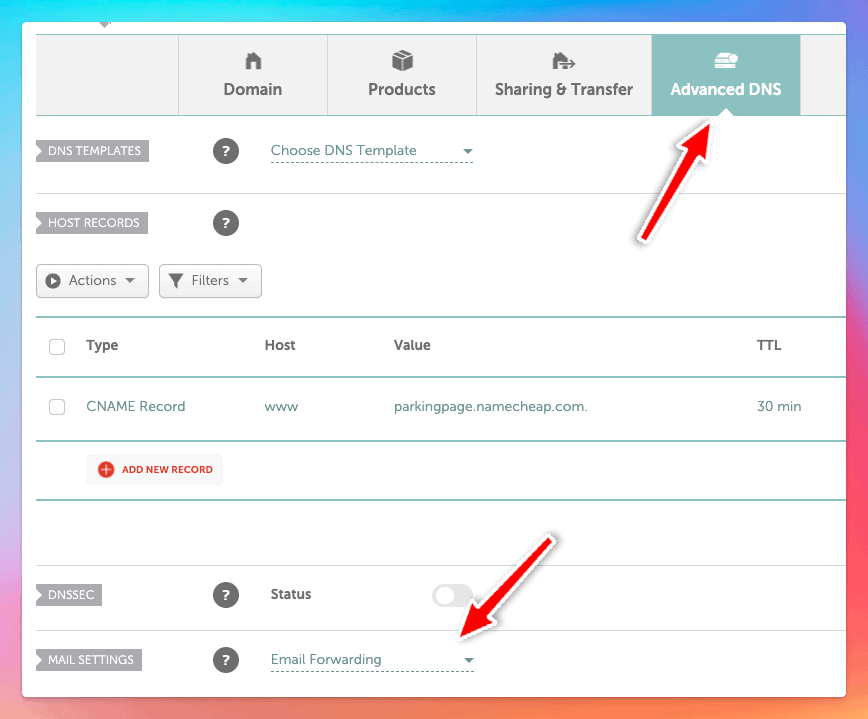
5. Scroll down to the **Redirect Email** section, and click on the **Add Forwarder** button.
6. Enter your alias (for example, for help@acme.com, you'd type in help) into the **Alias** field, and paste the ThriveDesk email address into the **Forward To** field. Click the **green checkmark** to save your changes.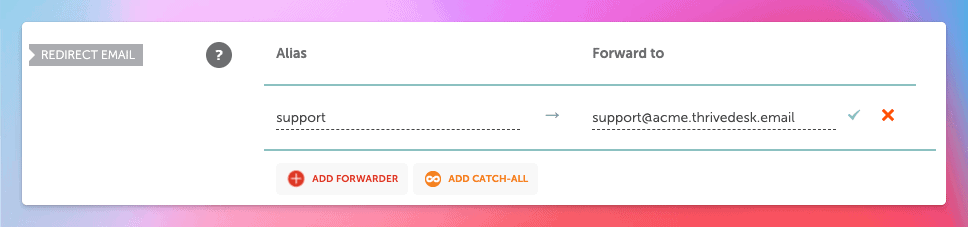
# Pabbly Connect Integration
[Pabbly Connect](https://www.pabbly.com/connect/integrations/thrivedesk/) enables anyone (marketing, support, legal, HR, ops, product, etc...) to easily connect multiple web apps together to automate tasks, without writing code.
With the ThriveDesk's Pabbly connect integration, you can integrate ThriveDesk with over 800+ different apps and the possibilities are endless:
* SMS alerts or push notifications for new ThriveDesk tickets.
* Create JIRA issues, Trello cards or Airtable rows from ThriveDesk tickets.
* Create Salesforce cases from ThriveDesk tickets.
* Create Basecamp or Asana to-dos from ThriveDesk tickets.
* Create Github issues from ThriveDesk tickets.
* Send notification to Discord channel form ThriveDesk tickets.
* Create lead on your CRM from ThriveDesk tickets.
* and many, many more...
The process for setting up the integration is simple:
## Step 1: Pabbly Webhook trigger
1. Login to Pabbly connect and create a new workflow.
2. Choose 'Webhook by Pabbly' from app list
3. Copy the webhook URL
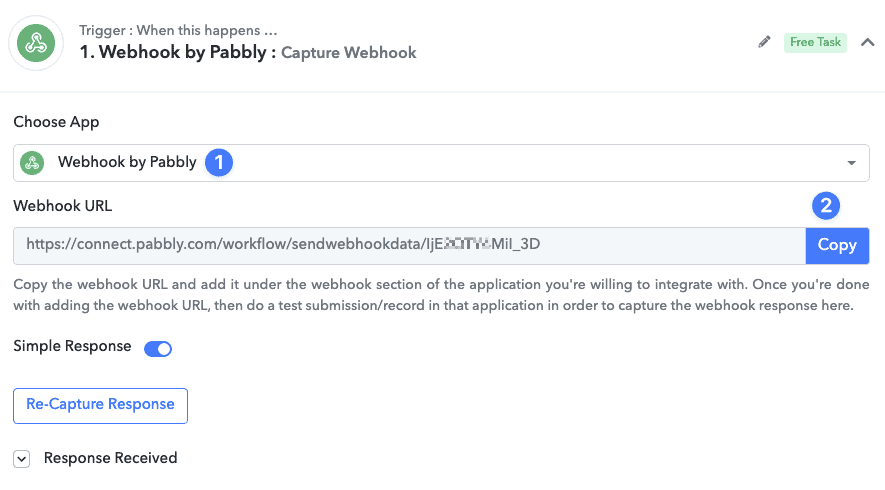 Pabbly connect webhook trigger
## Step 2: ThriveDesk Webhook setup
1. Login to ThriveDesk and go to **App Store**.
2. Select Webhook app and click install button
3. Give your Webhook a name, random secret key and use **Pabbly webhook** URL in **Callback URL** field.
4. Select events where you want to trigger the webhook.
5. Select Inboxes where this wehook will work.
6. Press save to continue.
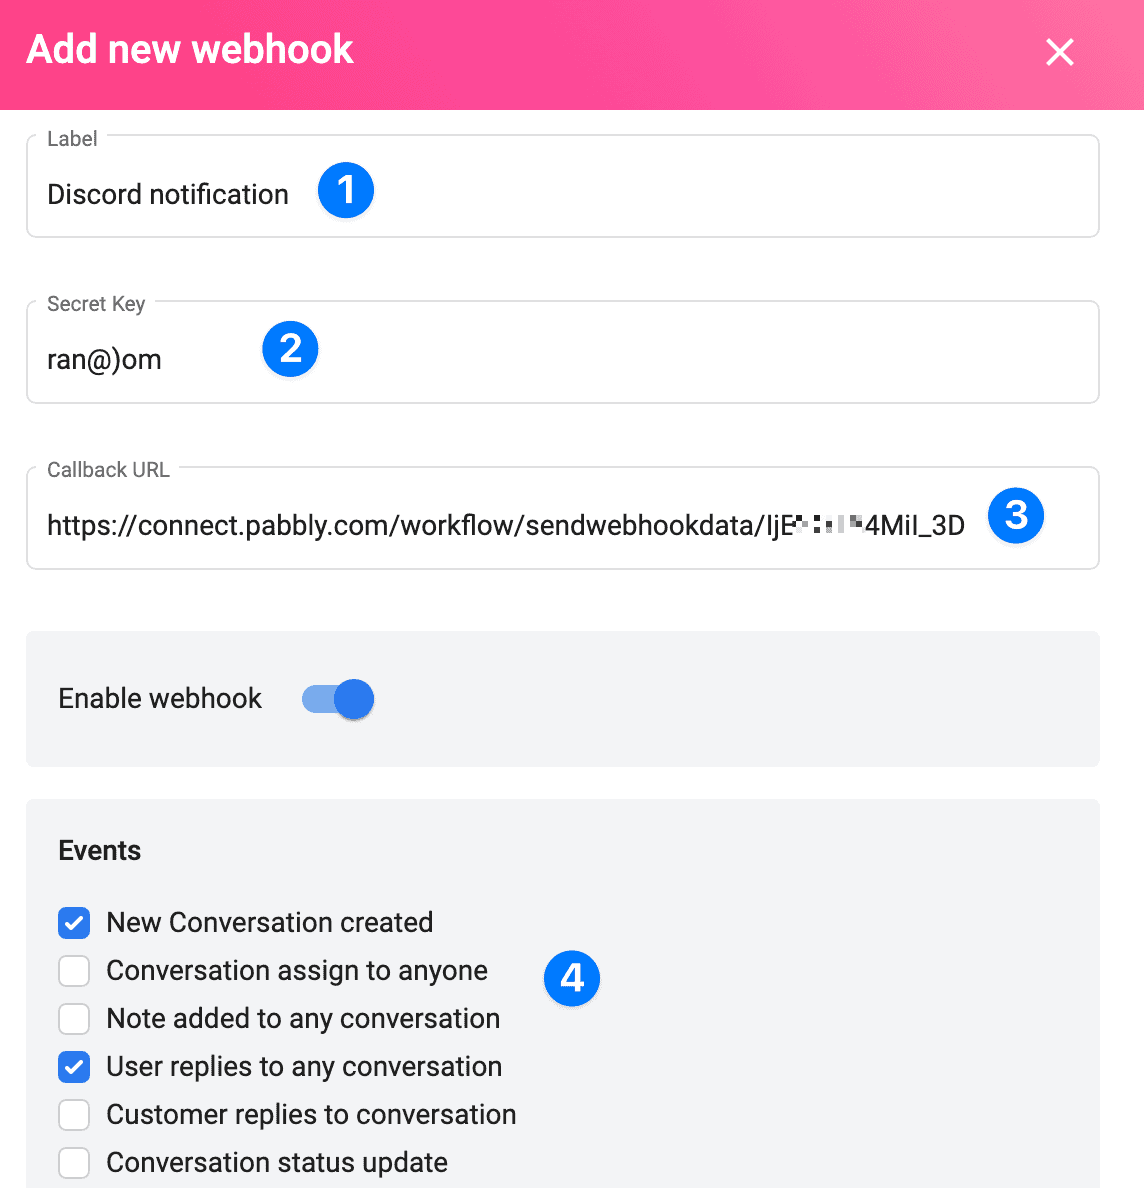 ThriveDesk webhook settings
## Step 3: Test Wehbook response
Depending on your wehbook events, you'll see a response like this on your Pabbly workflow settings.
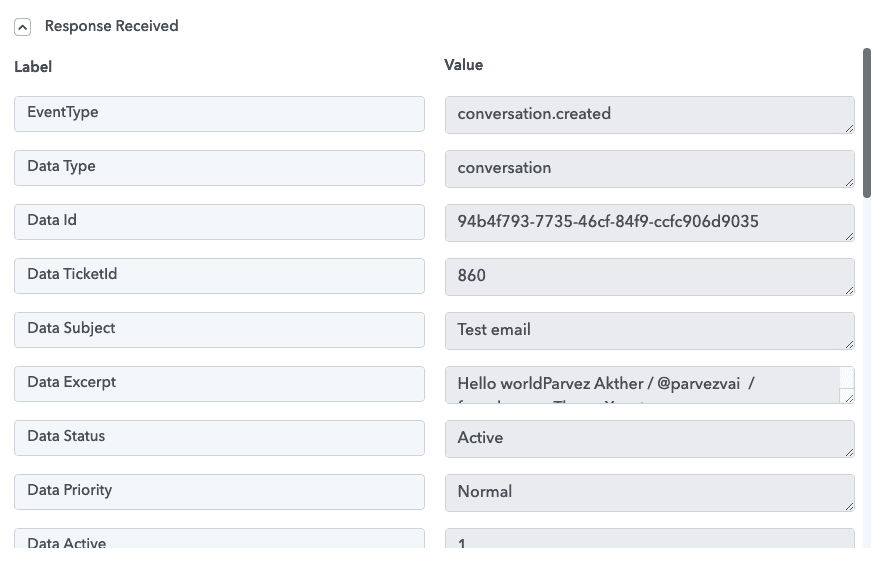 Pabbly webhook response
## Step 4: Pabbly Webhook action
From their 1000+ action listed choose any depending your workflow. Here is a sample of Discord action, when new ticket created on ThriveDesk it'll notify to a Discord channel 👇
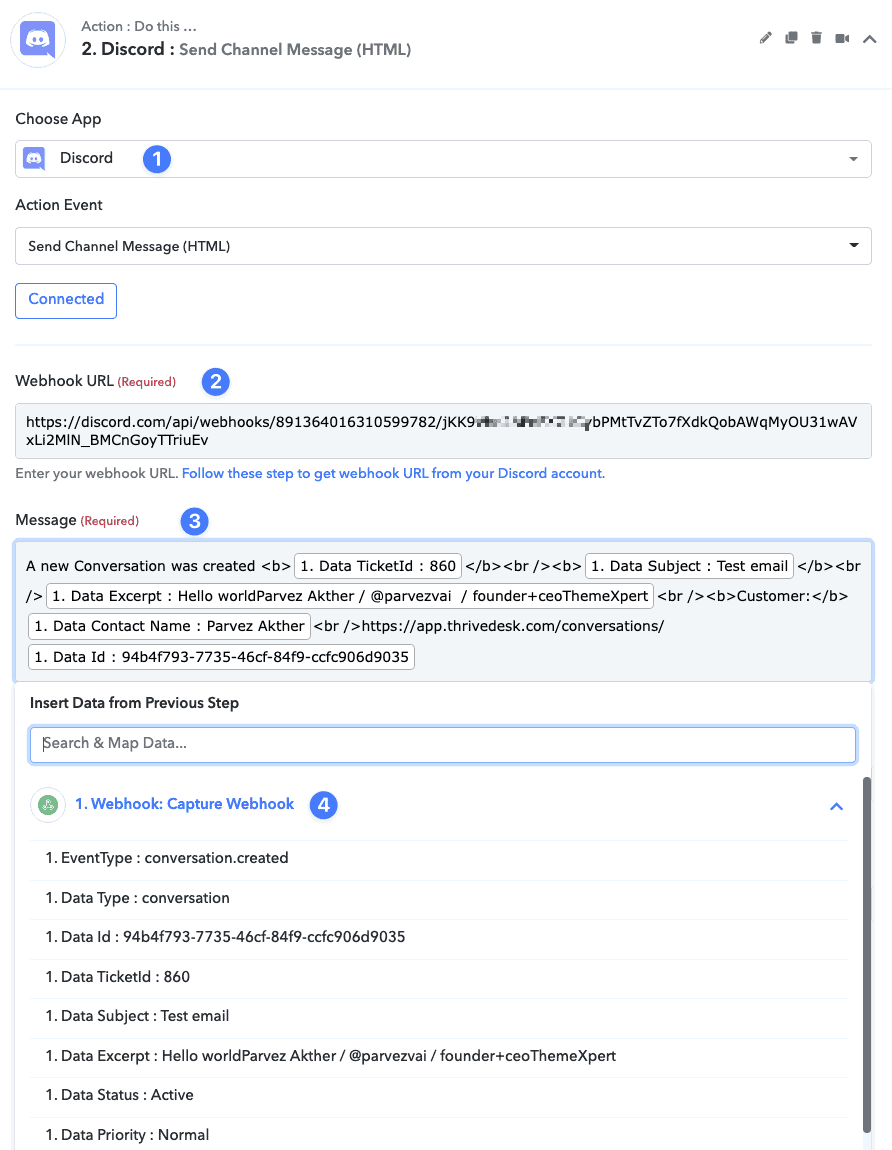 Pabbly webhook action
Map the webhook response in your Message body and use however you want.
That’s it! You’re connected and ready to use Pabbly automation!
# Paddle Integration
Paddle is a comprehensive billing platform that integrates seamlessly with ThriveDesk. This integration enables ThriveDesk agents to access customer subscription details, billing history, and invoices directly within the ThriveDesk platform.
**Here's a snapshot of what it looks like in ThriveDesk**
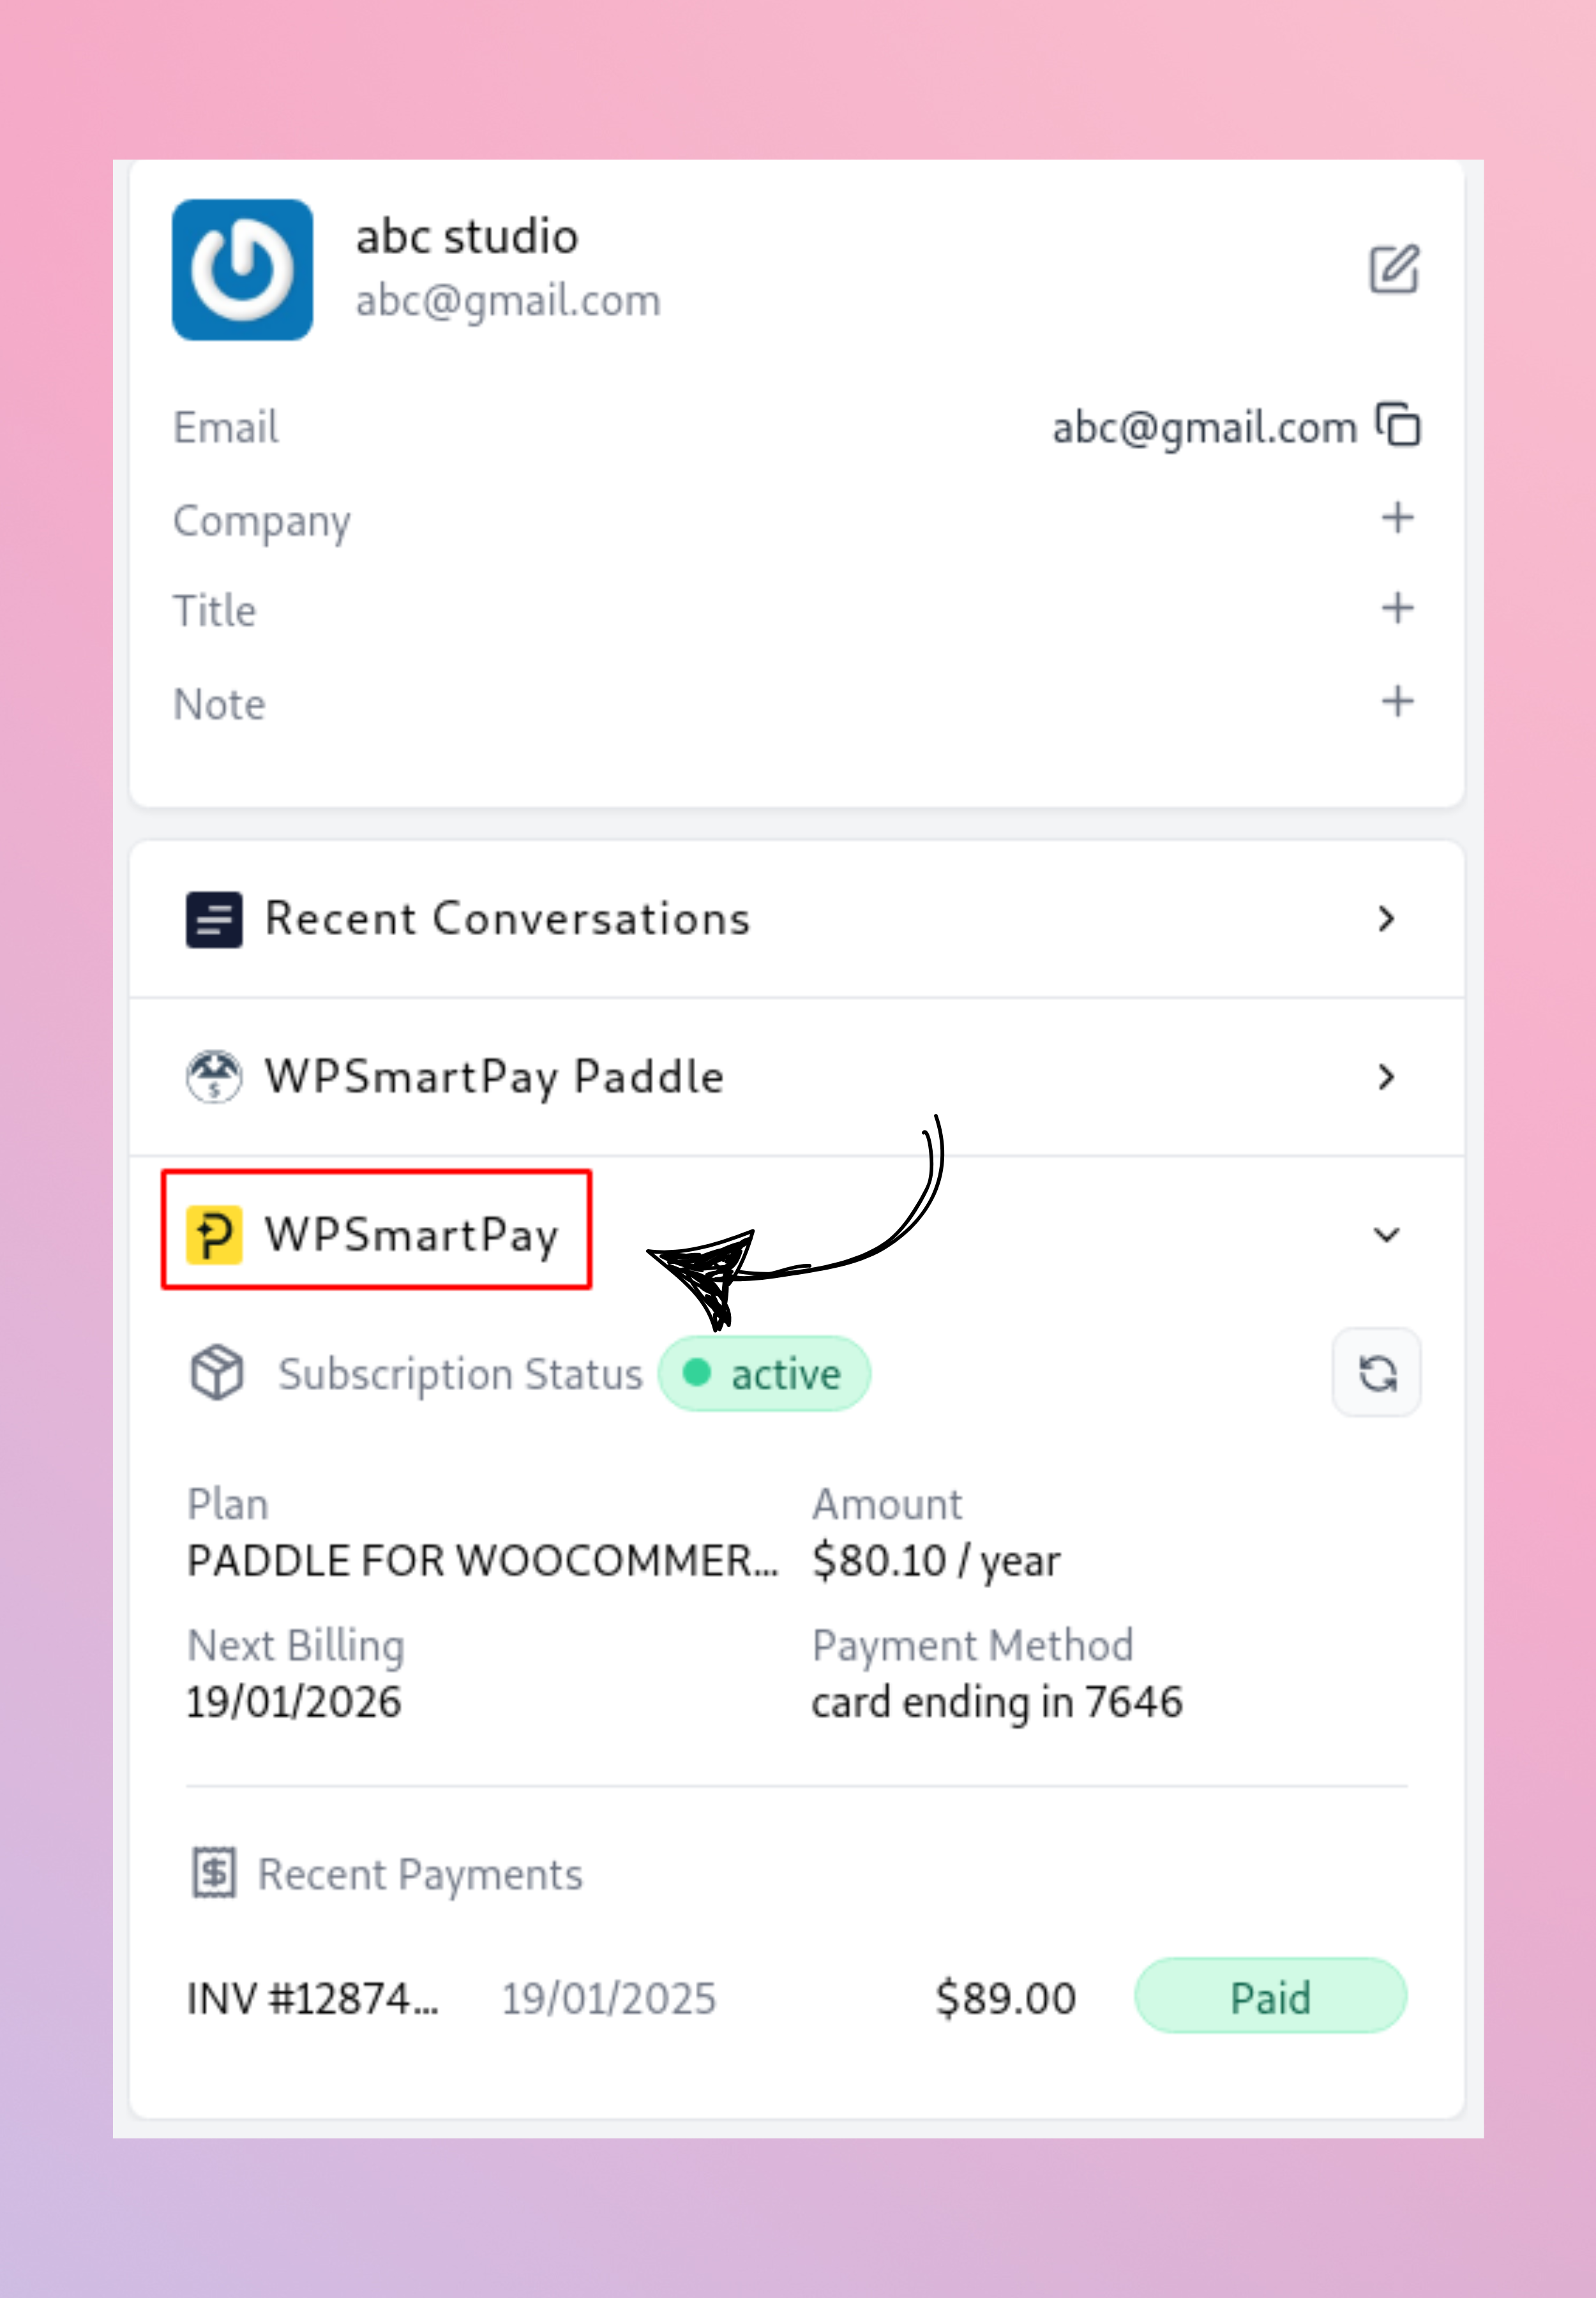Only the workspace owner and admin can install the app. Make sure you have the permission to install the app.
## **Step 1: Get Paddle Seller ID & API Key**
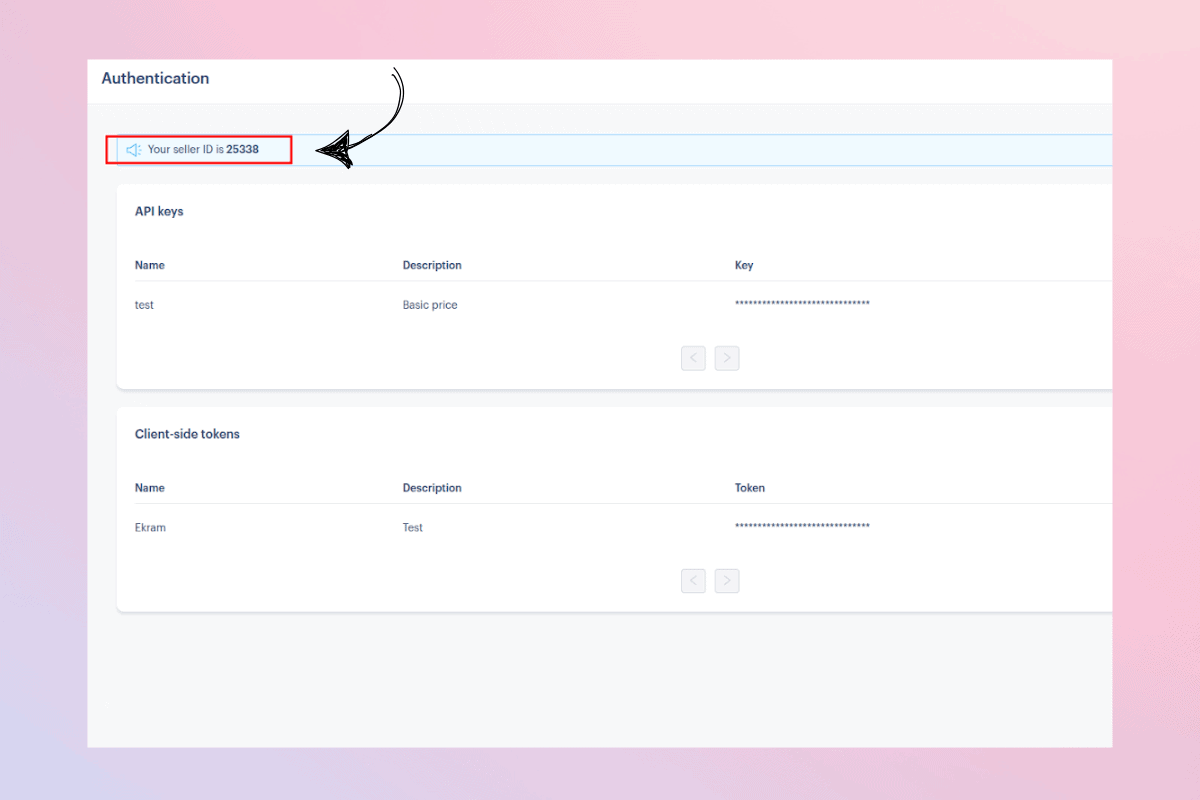* Open the Paddle Authentication page
* Copy the seller ID and put it in the Seller ID field here
* Click on **"Generate API Key",** copy the key, and put in the API key field here.
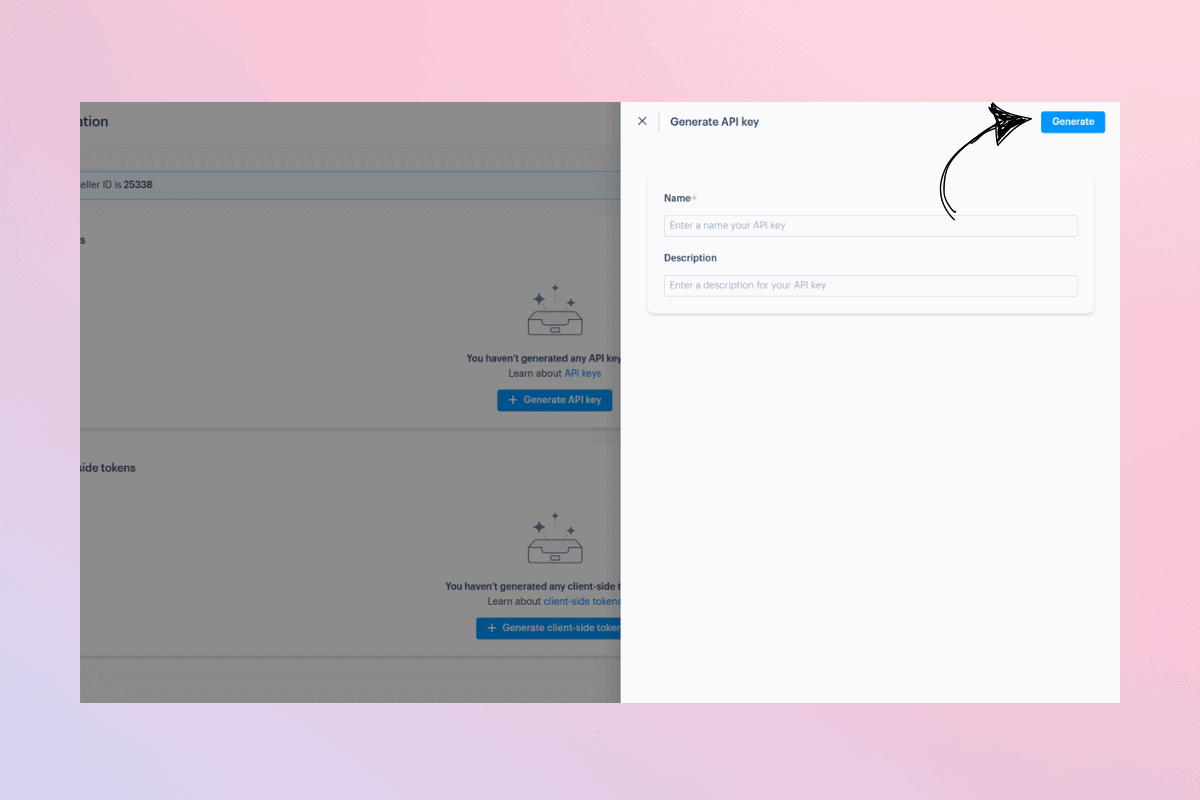## Step 2: ThriveDesk App Setup
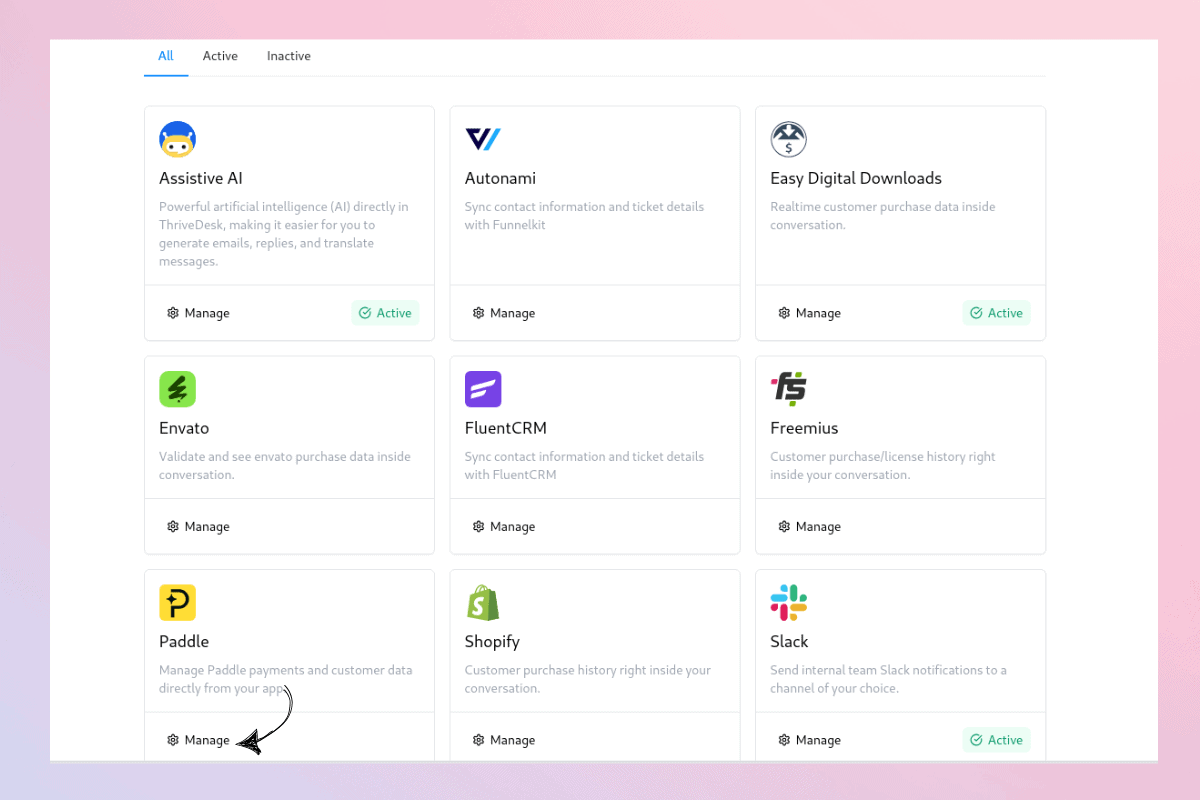* Log into your ThriveDesk account and switch to the workspace where you want to enable the Paddle app.
* Navigate to **Settings**, select **Integrations**, and then click on **App Store**.
* Search for **Paddle** and click the **Manage** button
* You will see the '**Install now**' button available.
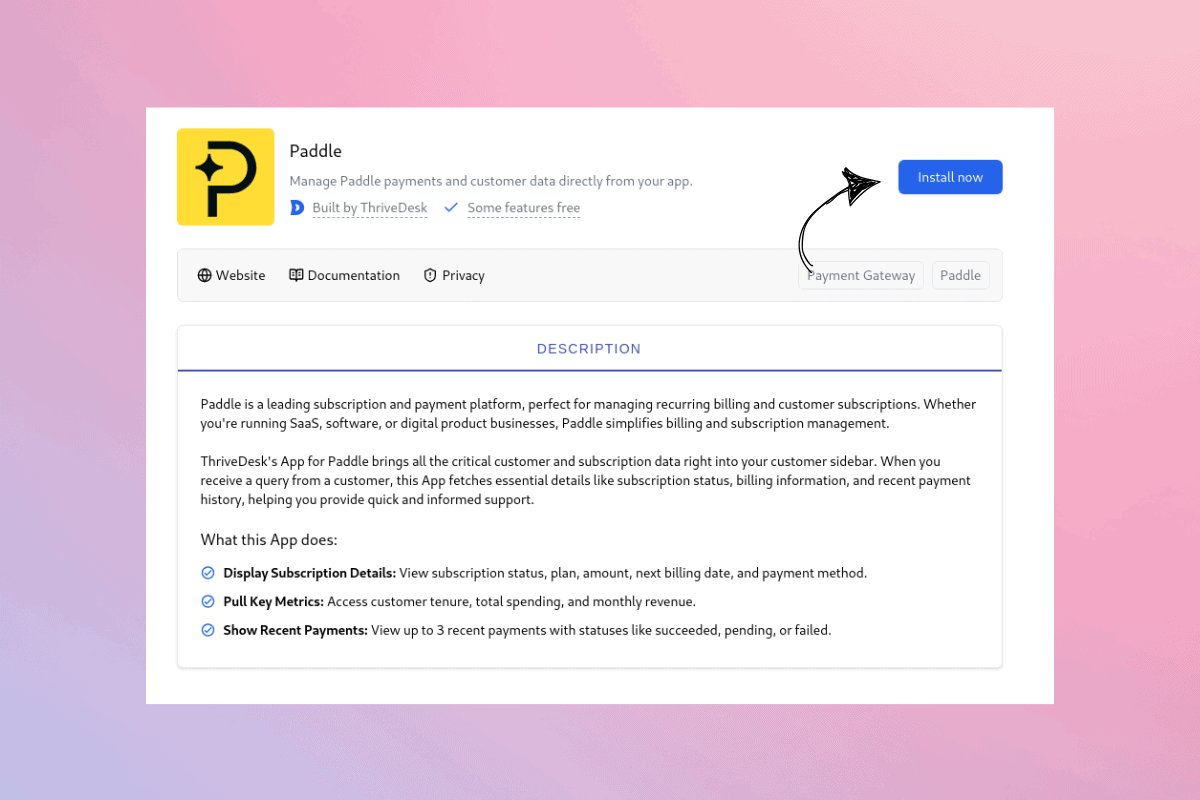**Note**: Only workspace owners or admins can install the app. Ensure you have the required permissions.
## **Step 3: Configure the App**
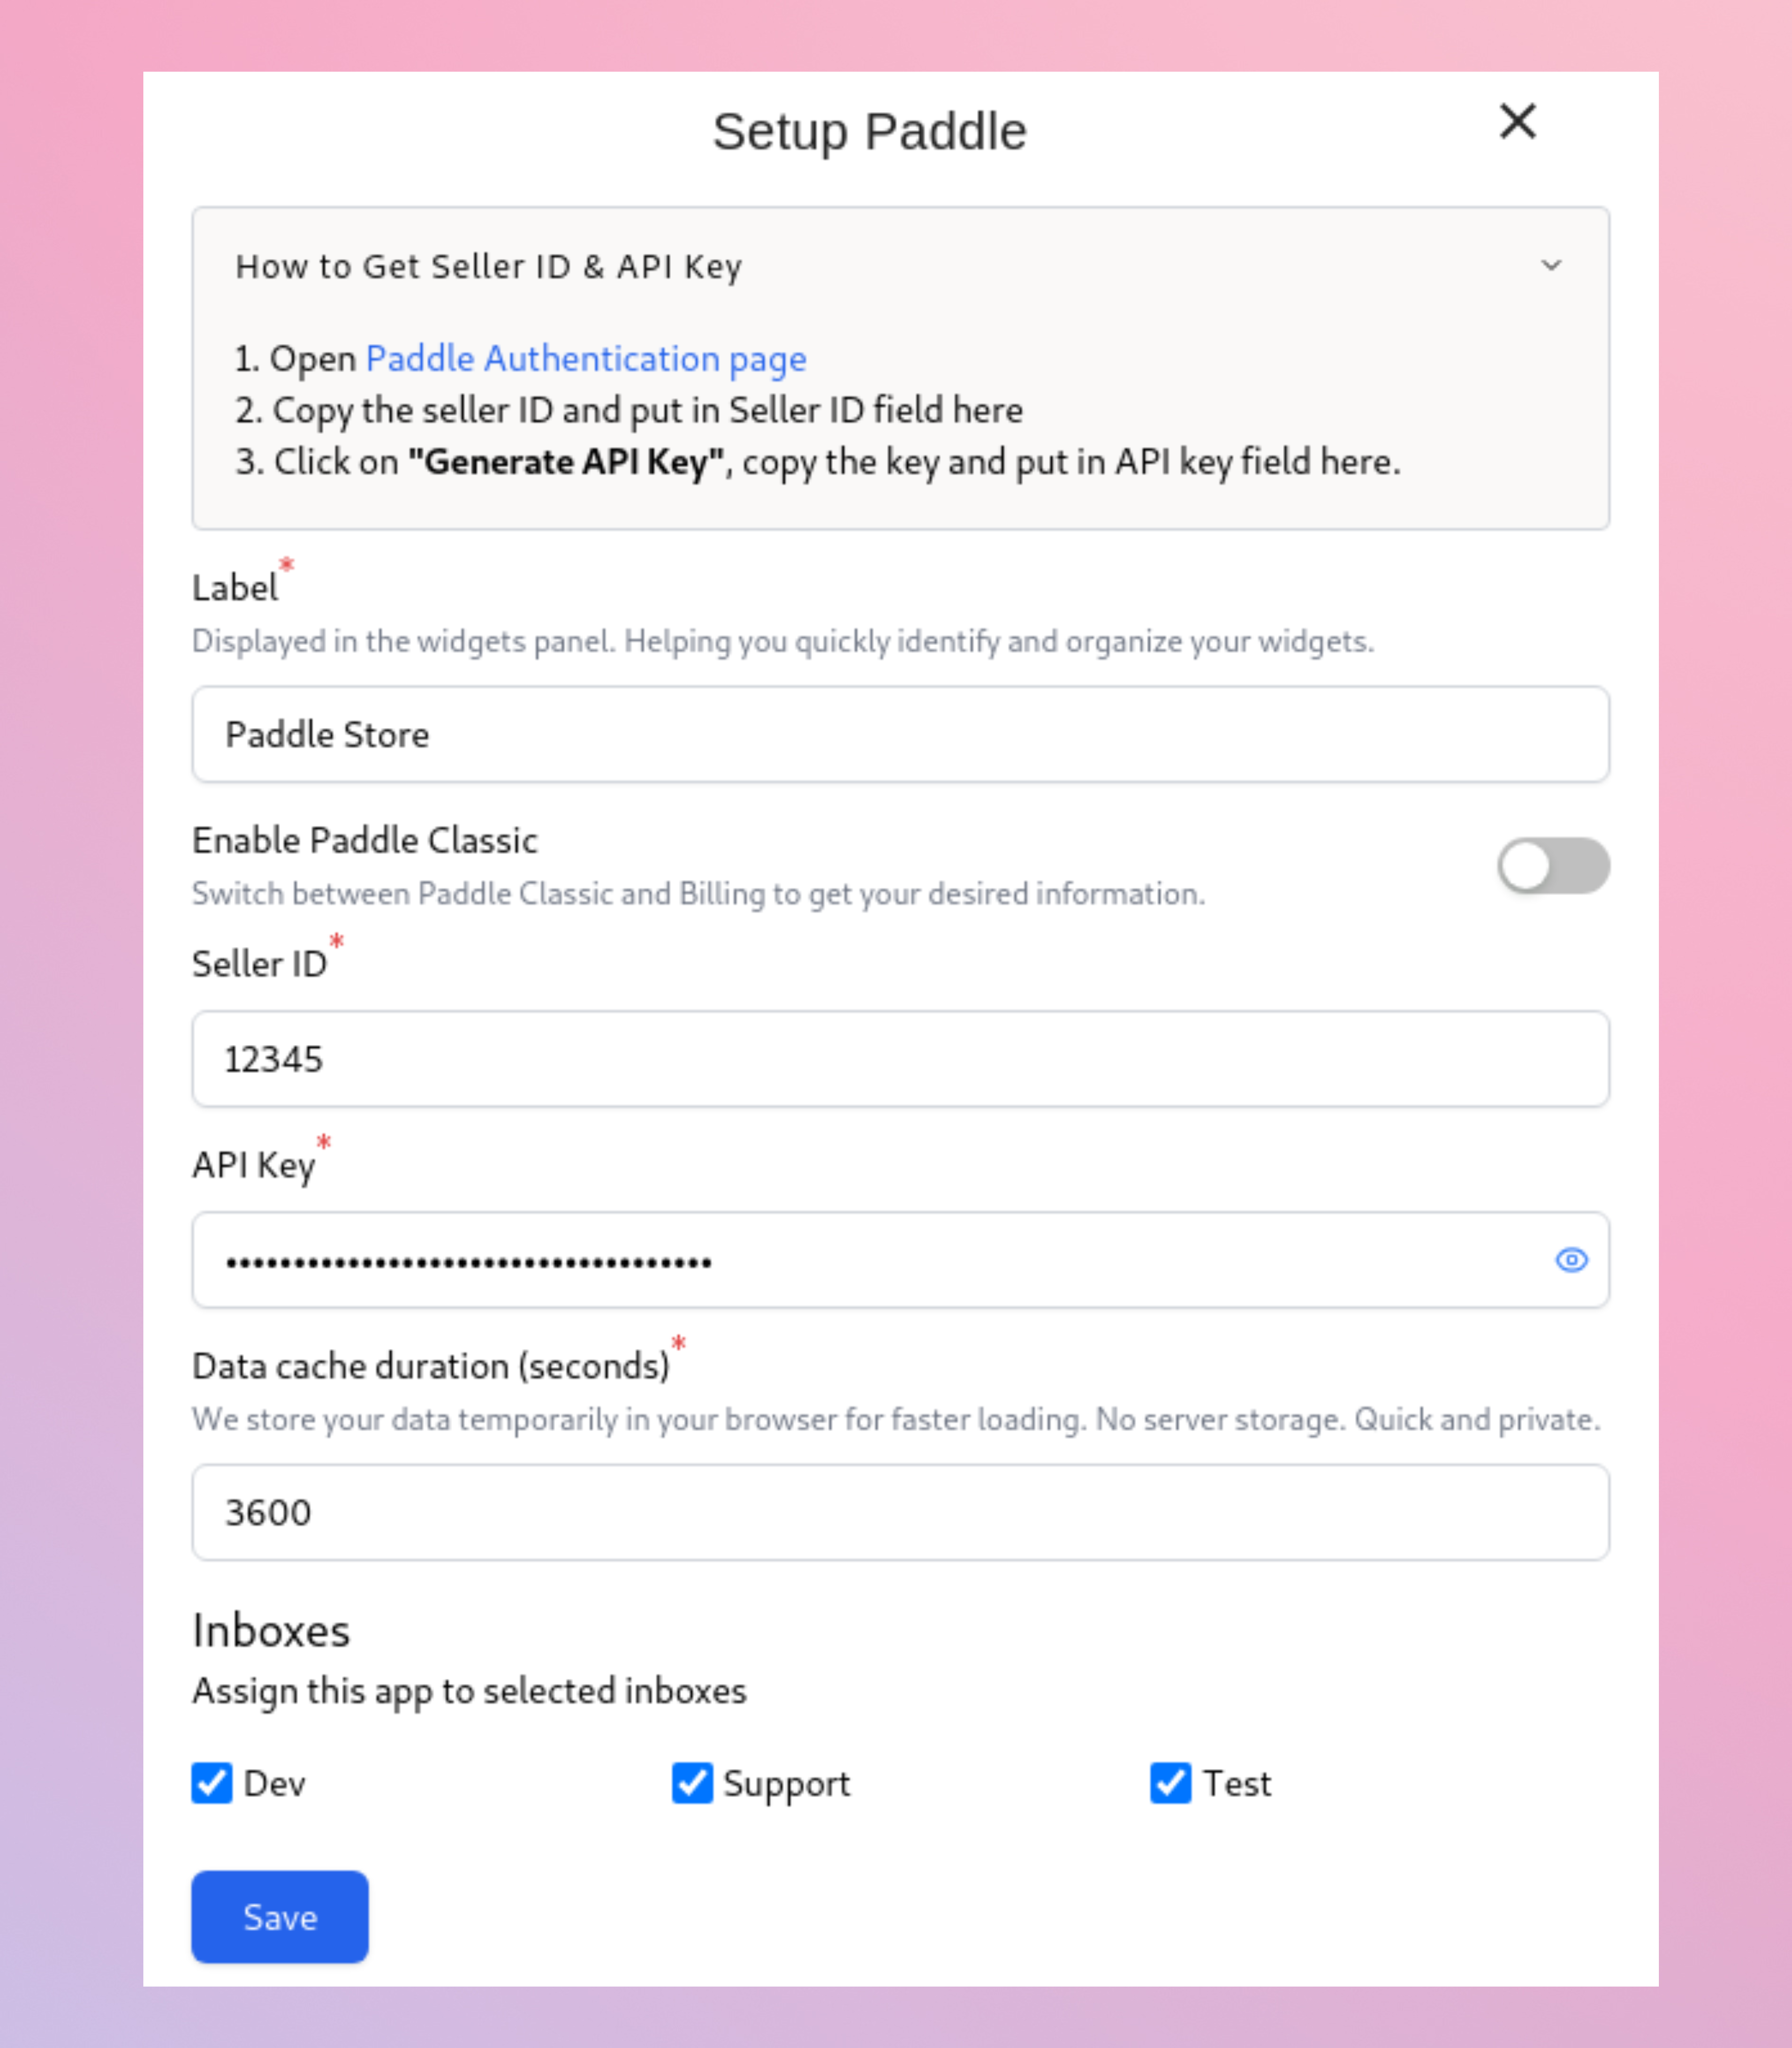* **Label**: Assign a label to each Paddle instance for easy identification within the ThriveDesk sidebar.
* **Enable Paddle Classic**: You can switch between Paddle Classic and Billing to get the desired information.
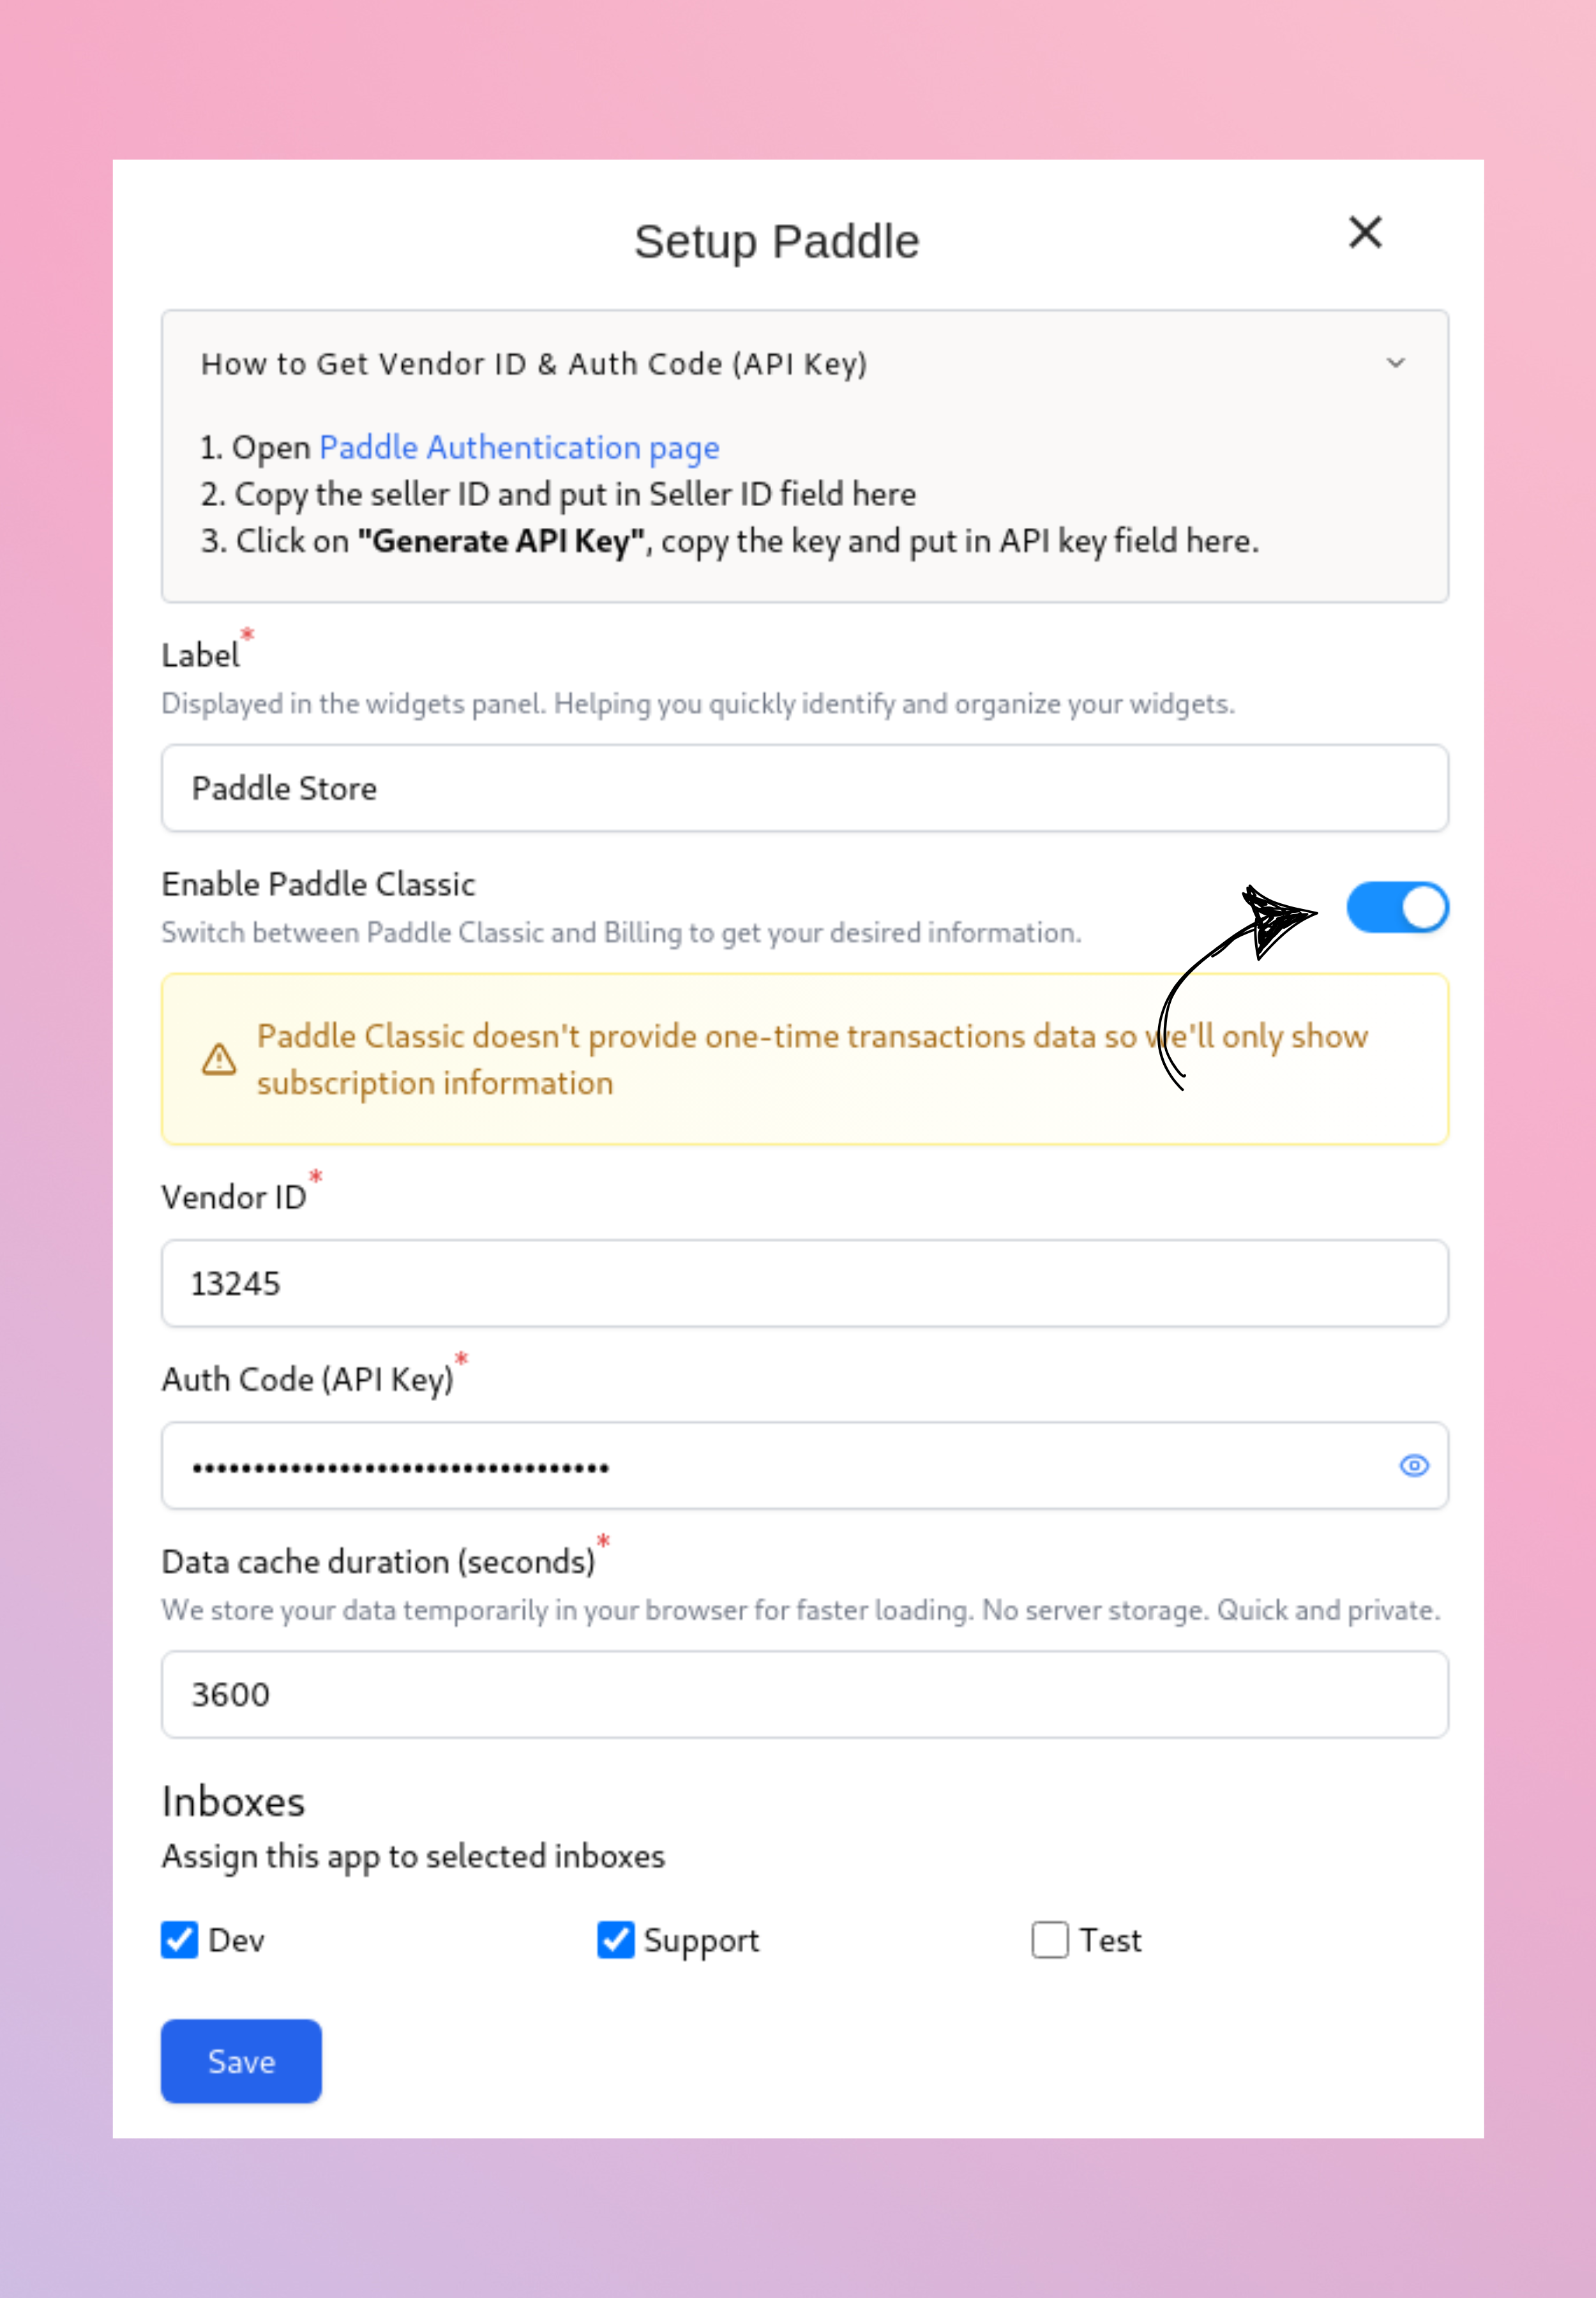* **Seller ID/Vendor ID**: Insert the seller ID/Vendor ID from the paddle authentication page.
* **API Key/Auth Key**: Copy the API key from the paddle and paste it.
* **Data cache duration (seconds)**: Your data is stored temporarily in your browser for faster access. It's never saved on a server and ensures speed and privacy.
* **Mailboxes**: Choose the mailbox(es) where you want the Paddle app to be active. Multiple selections are supported.
### Adding Multiple Paddle Accounts
If you manage multiple Paddle accounts, you can integrate all of them into ThriveDesk:
* Repeat **Step 2** and **Step 3** for each account.
* Use distinct labels for easy differentiation.
* Ensure each account is configured with its unique API key and settings.
### Removing a Paddle Account
If you need to remove a Paddle account:
* Go to **App Store > Paddle**.
* Click on the label of the account you want to remove to expand its settings.
* Click **Delete** to remove that specific account.
* To uninstall the Paddle app entirely, click the **Uninstall** button to delete all connected accounts.
Disclaimer: ThriveDesk does not collect or retain any customer data on its servers. All information is displayed through API calls upon request.
# Posthog
PostHog is an open-source analytics platform designed for product teams to track and analyze user behavior. It provides tools to capture user events, visualize trends, and gain insights without needing third-party services, ensuring data privacy and control. With PostHog, teams can build dashboards, run experiments, and improve user engagement through a comprehensive analytics suite.
**Acquire PostHog API Key and API Host:**
* Log into your PostHog account and navigate to the **Project Settings**.
* Scroll bottom of General settings page and you'll find API key secion. **Copy** the **Project API key** for integration.
* To obtain the API Host, go to your project’s main page. The URL displayed in the browser’s address bar serves as your API Host
## Install PostHog App
1. Log into ThriveDesk Knowledge Base(KB) site and go to **Settings > Apps**.
2. Click **Install** button on PostHog App.
3. Put your **Project API Key,** **Host URL** and press **Save Changes**.
Remember that preview links won’t track analytics by default.
# Scheduled Reply
Scheduled replies(aka send later) allow you to draft a response and choose a specific future time for it to be sent to the customer. This is ideal for managing communication across different time zones or ensuring follow-ups land in a customer's inbox at the perfect moment.
## How to Schedule a Reply/Send Later
### Draft a reply
**From the Reply Editor** draft your message as usual. Instead of clicking the "Reply" button, click the **Calendar icon** located in the bottom toolbar of the reply area.

### Set a time
After clicking the icon, a **Send later** modal will appear. Select your desired time and click **Choose**.
Once the time is set, the main button in the editor will change to **Schedule**. Click it to queue your message.

### Schedule reply
Our system understands both specific dates and natural language:
* **Standard Format:** Use a precise format like `MM/DD/YYYY HH:MM AM/PM` (e.g., 03/05/2026 08:00 AM).
* **Natural Language:** Use phrases like `tomorrow 3am`, `next Friday`, `in 2 hours`, or `friday 10am`.
Select appropriate time and press **Schedule** button.
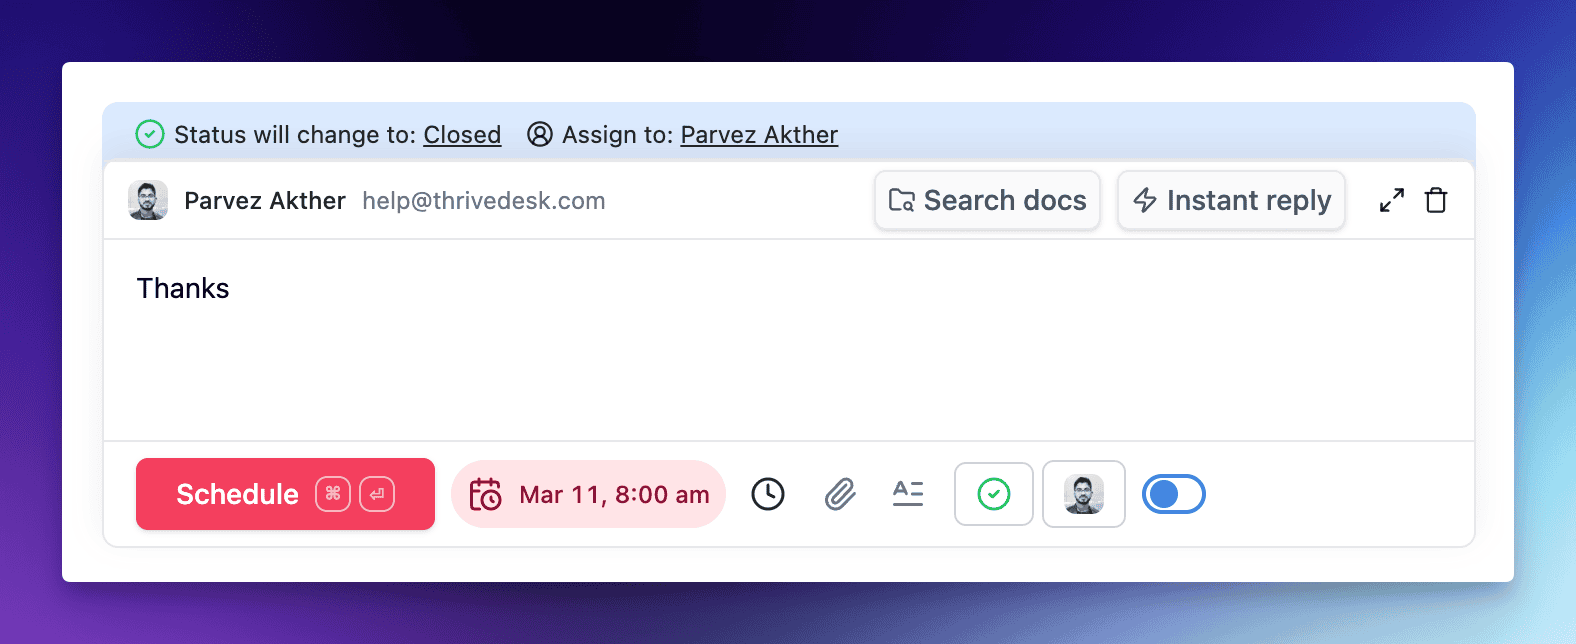
## Schedule Condition
When you trigger the schedule action, the **Send later** modal allows you to customize the following:
**Sending Conditions:** Define how the message behaves if the customer reaches out earlier:
* **If no reply:** Sends the message **only** if the customer doesn't reply before the scheduled time. (Default)
* **Regardless:** Sends the message **even if** the customer replies before the scheduled time.
## Managing Scheduled Actions
Scheduled messages appear at the bottom of the conversation thread with a **Scheduled** badge and a pink background. To manage a pending reply, follow the steps for each action below:
### Delete a Scheduled Reply
If you no longer wish to send the message:
1. Locate the scheduled message bubble (pink background) at the bottom of the thread.
2. Click the **options menu (...)** on the right side of the bubble.
3. Select **Delete**. The message will be removed from the queue immediately.
### Send Now
If you need to deliver the message immediately without waiting for the scheduled time:
1. Click the **options menu (...)** on the scheduled message bubble.
2. Select **Send now**.
3. The message will be delivered to the customer instantly and move from the scheduled state to a sent state.
### Edit and Takeover
To modify the content or time of a scheduled message:
1. Click the **options menu (...)** on the scheduled message bubble.
2. Select **Edit**. This will load the message back into the reply editor.
3. **Handle Takeover (if applicable):** If the message was originally scheduled by another agent, a confirmation prompt will appear: *"This schedule reply will be taken over to you."*
4. Confirm the takeover to become the new owner.
5. Modify the text or click the **Calendar icon** to adjust the delivery time.
6. Click **Schedule** to save your changes and re-queue the message.
## Timezone Setup
To ensure your conversations reappear at the correct time, you must configure your timezone. If not set, the system will default to the server timezone.
**To set your timezone:**
1. Click on the **Settings (gear) icon** in the bottom left sidebar.
2. Navigate to **Workspace > General**.
3. Under **Select Timezone**, choose your local timezone from the dropdown menu and click **Save Settings**.
> **Tip:** You can also click the **update timezone** link directly from the Send later modal to jump to these settings.
### Visual Indicators
* **The "Later" Folder:** All conversations with an active scheduled reply move to the **Later** section in your sidebar.
* **Avatar Badge:** A **small red calendar icon** will appear over the contact's avatar in the conversation list to indicate a pending reply.
# Search in ThriveDesk
ThriveDesk's search feature helps you quickly find conversations, tickets, customer information, and more across your support platform. It makes it easier for support teams to locate information and respond to customer inquiries fast.
## Search and Results
To start a search, click the magnifying glass icon in the bottom left corner of the app.
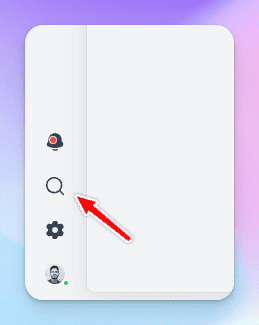Type your search terms and press Return/Enter. Your search results will appear.
### Conversations Search
Type your query and press Return/Enter to search through all conversations.
Pro-tip: Search works only on the conversation subject and body. If you need to search by contact, use the Contact filter.
### Contact Search
To search for a specific contact in conversations, click the Contact filter, enter the email address, and press Apply.
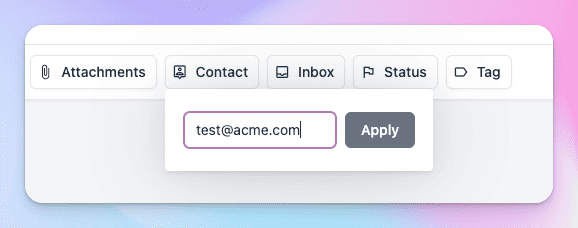## Refine with Filters
Use filters at the top to narrow down your search results. You can apply multiple filters to get more precise results.
Pro-tip: Your last 5 searches will appear under "Recently Searched" when you return to the search page. Click any of them to search again with the same filters.
# ThriveDesk integration for Slack
Slack centralizes all of your team's conversations. In addition to group chat and instant messaging, Slack connects with many of the services you use on a daily basis and automatically sends updates to a channel (akin to a room) of your choosing.
With our integration for Slack, you can send events from ThriveDesk (like new chats, new conversations, customer responses, etc.) right away to any channel or person you choose.
Even different inboxes can be linked to different channels. Each event will have a link to the relevant conversation. See how it will look in action in the picture below:
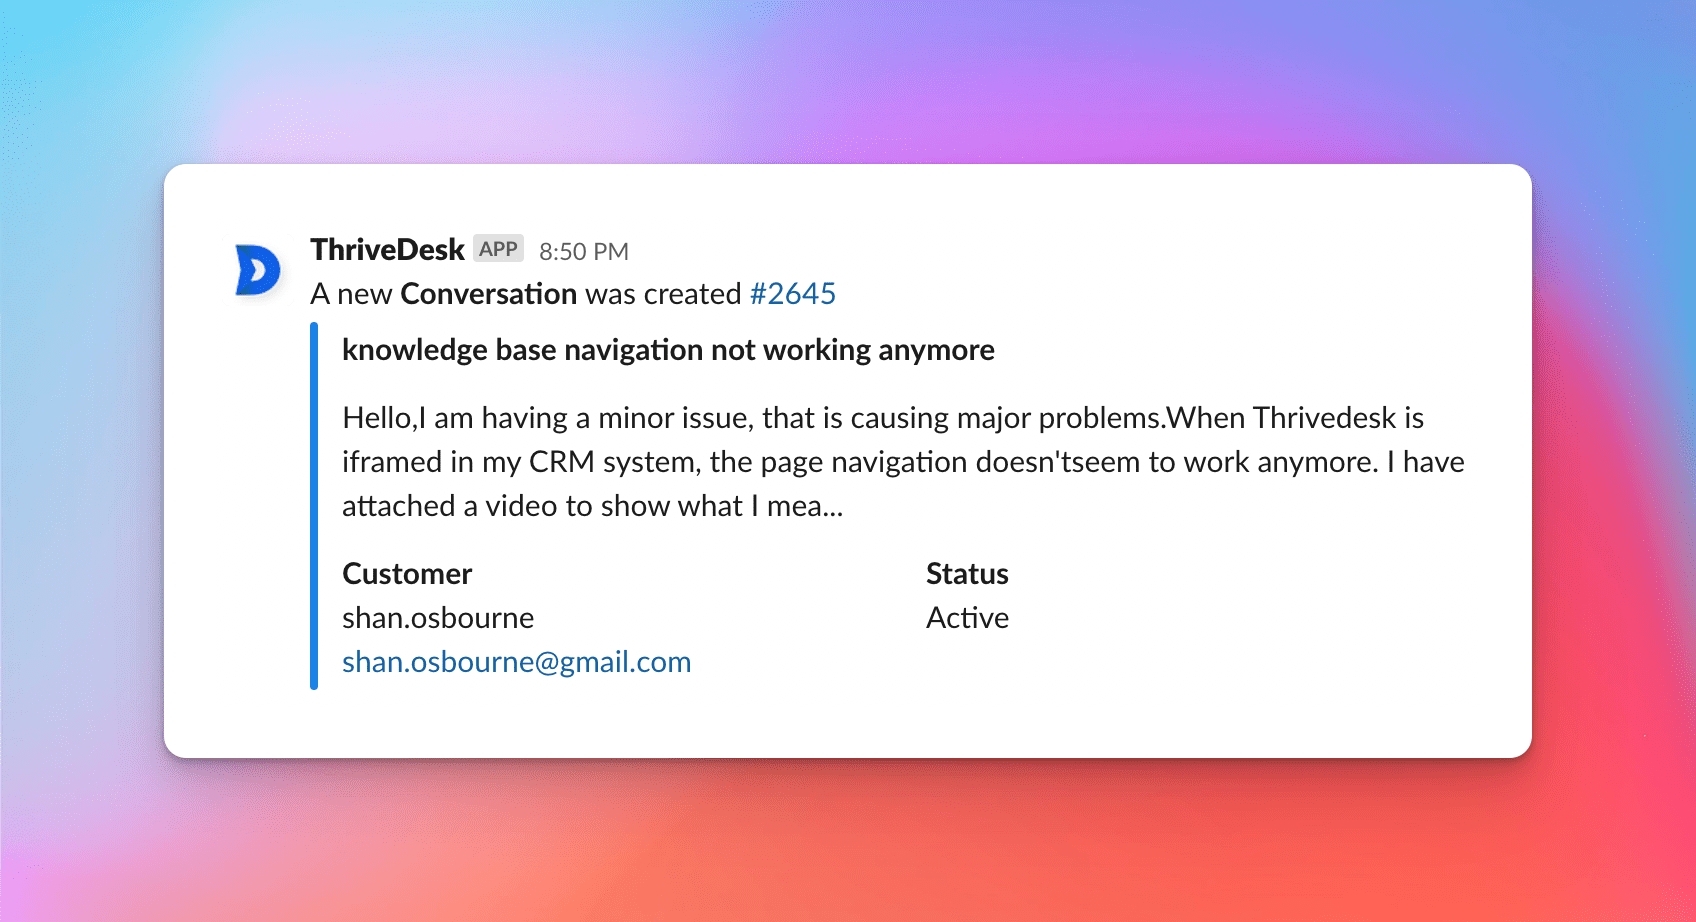Integration for Slack is available to all ThriveDesk plan including our Free plan.
## Installing the app
1. Log in to your ThriveDesk account. Head to **App Store → Slack** and click **Install now**.
1. If prompted, log back in to your Slack account and then click **Allow**.
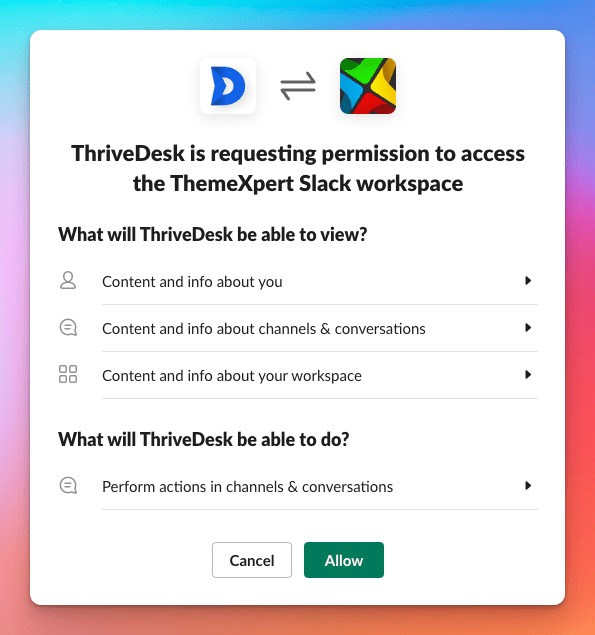1. Under the integration settings in ThriveDesk, select which events you'd like to post to Slack, then select a channel for each inbox and click **Save**.
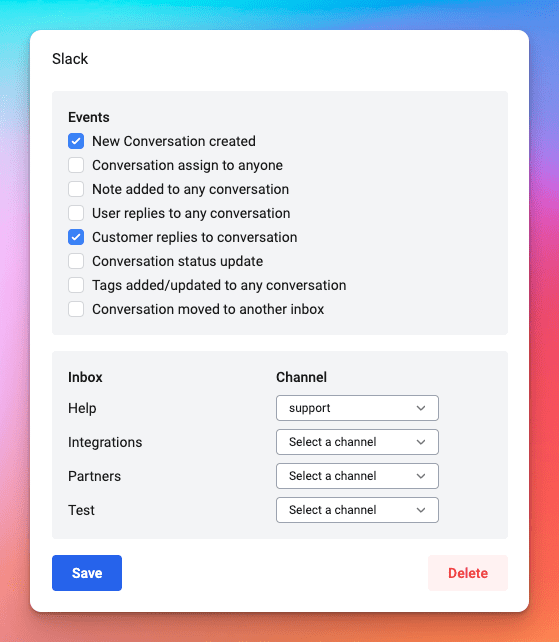Note: Newly created Slack channels can take up to 2 hours to be displayed in the Channel menu(s) in ThriveDesk.
1. Your selected Slack channels will receive a message like this:
It is only possible to link one Slack team/domain per ThriveDesk account.
## Uninstall Integration for Slack
1. Head to **Manage Apps** in your Slack Workspace and open any existing ThriveDesk apps (name may contain the word "legacy"). Click **Remove App** to uninstall.
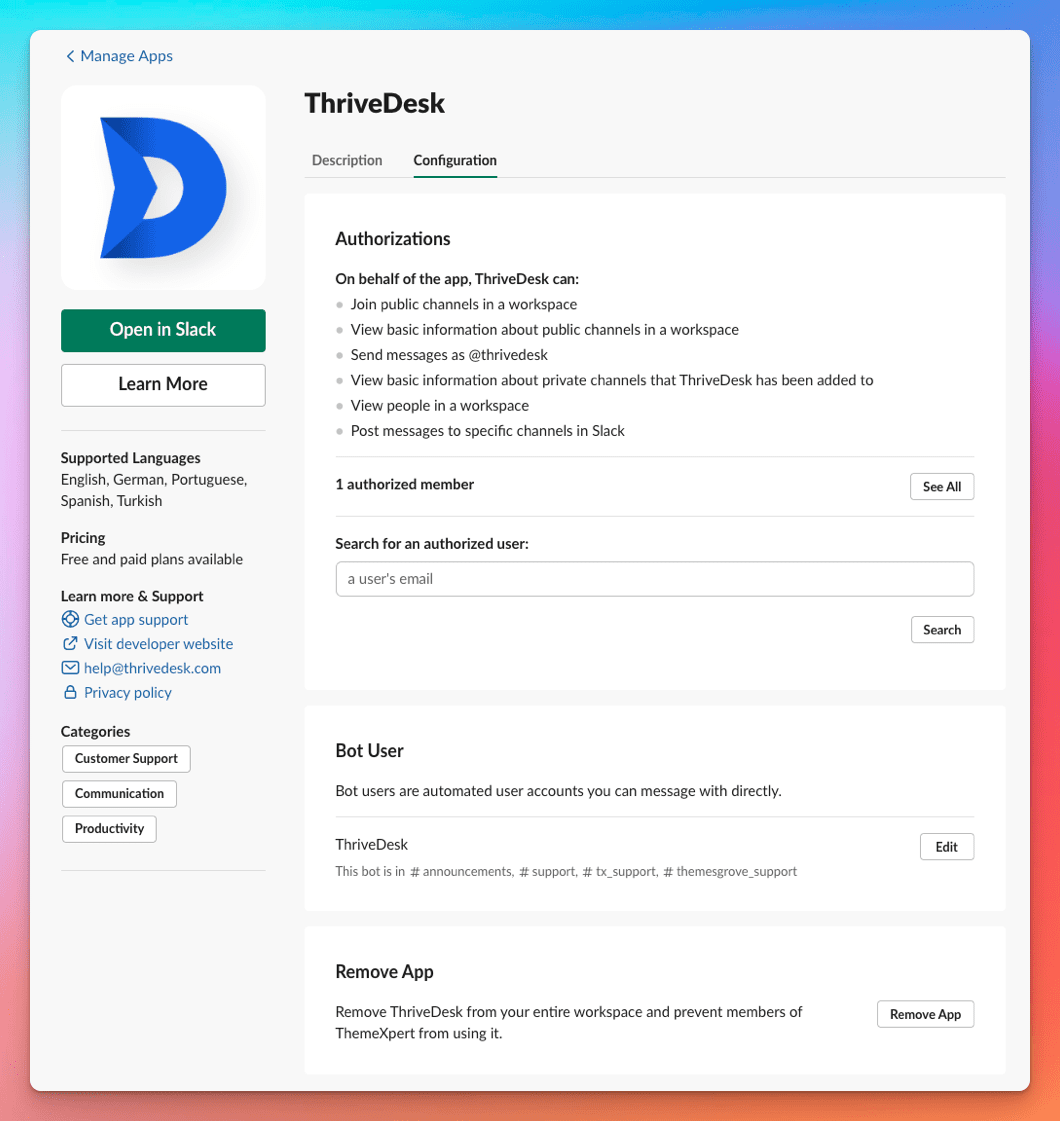1. Head back to ThriveDesk **App Store → Slack** and click Uninstall App.
## Including private channel
Invite ThriveDesk in your private channel using `/invite` command. Search for `@thrivedesk` and press enter. You'll see private channel inside Slack integration on ThriveDesk once you invite ThriveDesk into the channels.
It may take few minutes to show your updated channel list in ThriveDesk
## Privacy policy
ThriveDesk privacy policy:
Slack privacy policy:
# Smart app user guide
### How do I install smart app?
**step 01: Navigate to smart app**
* Click on settings in app navigation bar.
* Go to "**App store"** which belongs to "**Integrations"** accordion
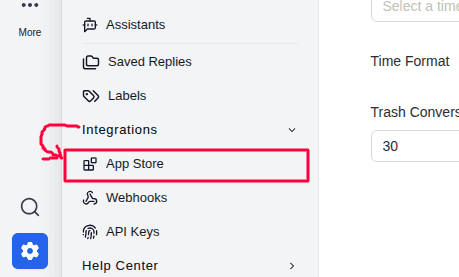* Either you can go to **"Smart app"** using shortcut:
* Or you can navigate and select from apps list:
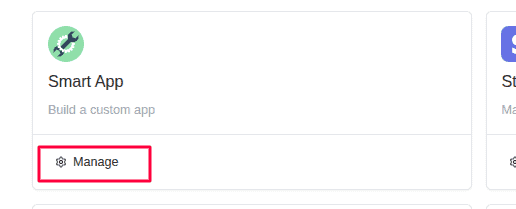**step 02: Installation**
* Set a label, it is the name of the integration.
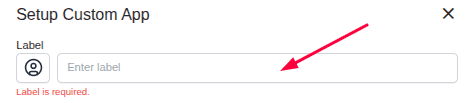* Select an icon (optinal).
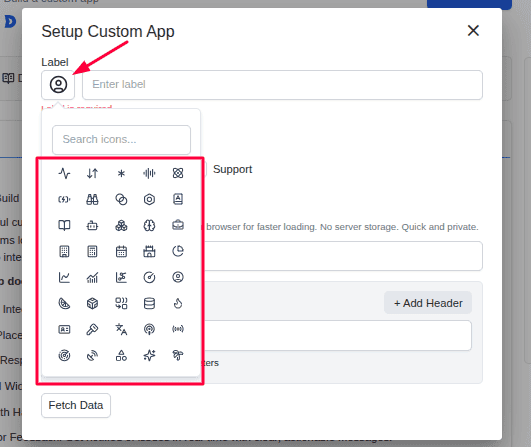* Select inboxes on which you want to install the integration.
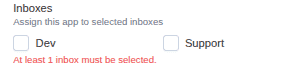* Set data refetching time interval (very optional)
* Fill in the API endpoint
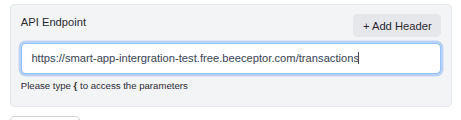* Add a header if needed (maybe optional). However, in most cases, you may need to set an authorization header (e.g., a Bearer Token).
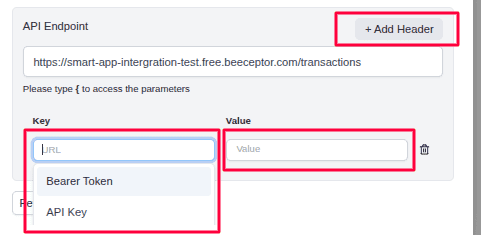* Add dynamic parameter (optional). It will be replaced automatically with an actual value when a request is made by ThriveDesk. **Type "{" to add parameter.**
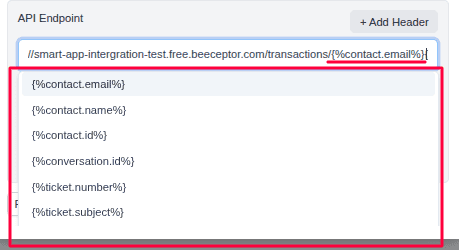* If any dynamic parameter is attached to the endpoint, then it is mandatory to add a mock value for testing the connection. You can use any known value that would work for your desired api connection's parameter.
* Fetch the endpoint and check the connection.
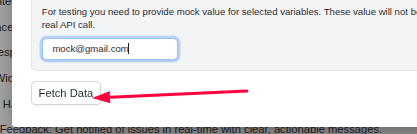**Note: As we have successfully setup the connection, now, either you can install the app without specifying the builder page or before installing you can set the builder page. It's your choice. Here, we are installing it for now and in next step we will define the builder page.**
* Now, save the app
If it is successfully installed then you should see:
### How do I select the desired data to show in the widget pannel?
or, **How do I set up the builder page?**
After a successful installation you should see a bunch of handy tools. As below:
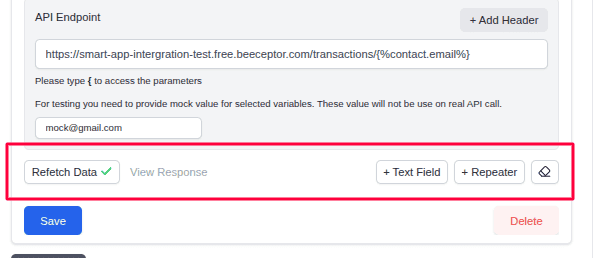Here,
* "**View Response**" - you can see fetched API response on clicking it.
* "**Text Field**" - it shows a normal text type data.
* "**Repeater**" - it can loop a similiar type data or an array type data. It can have nested repeater fields.
* "Clear Selections" - it clears all the currently existing fields.
### Let's try them:
* **Text Field**
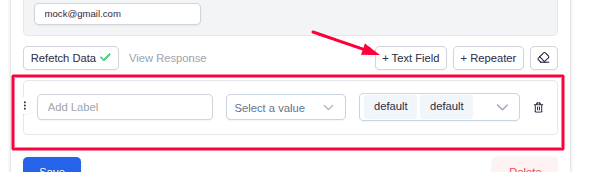It has 3 options. From left to right:
1\. Label (Simply you `can type` here as your wish or keep `empty`)
2\. The value selector (what you want to see). Here you `can select` any value as need.
3\. styling options Default Text style is black & default font is base (16px) size.
* Repeater Field
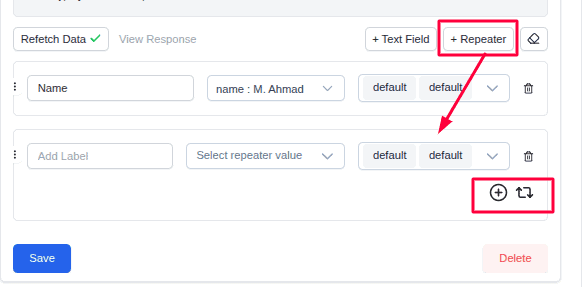Every Repeater has 3 inline options and 2 sub options. From left to right:
1. Label same as Text field.
2. Selector, here you selects the data you want to loop through.
3. Styling exact same as Text field.
4. Sub options
* Option to add text field directly
* Or option to Repeat again
Example:
Let's assume 🤔 we have a data set of some transacttions as below :
```typescript
{
"id": "unique_user_id_123",
"name": "M. Ahmad",
"email": "user@example.com",
"type": "purchase",
"bought_products": ["Quix", "Thrivedesk", "Photoshop"],
"transactions": [ // we want to show all the items of this transaction
{
"transaction_id": "tx1",
"date": "2024-07-24",
"amount": 20.00,
"description": "Software License",
"items": [
{ "name": "Avast Pro", "qty": 1, "price": 20 }
]
},
{
"transaction_id": "tx2",
"date": "2024-07-23",
"amount": 10.00,
"description": "Monthly Subscription",
"items": [
{ "name": "TD Subscription", "qty": 1, "price": 10 }
]
},
{
"transaction_id": "tx3",
"date": "2024-07-22",
"amount": 50.00,
"description": "Hardware Purchase",
"items": [
{ "name": "Keyboard", "qty": 1, "price": 25 },
{ "name": "Mouse", "qty": 1, "price": 25 }
]
},
{
"transaction_id": "tx4",
"date": "2024-07-21",
"amount": 15.50,
"description": "Service Fee",
"items": []
},
{
"transaction_id": "tx5",
"date": "2024-07-20",
"amount": 25.00,
"description": "Product Renewal",
"items": [
{ "name": "Photoshop License", "qty": 1, "price": 25 }
]
}
]
}
```
We want to show all the items data at once. Then we will **repeat** the **transactions** first, and then **repeat** the **items** again to access the **item** properties.
**Target Structure:**
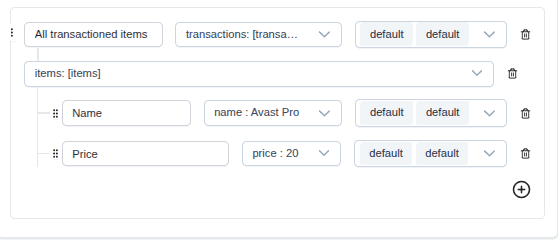**Process:**
Step 1: Add main Repeater
Step 2: Select transactions array in main repeater & add label
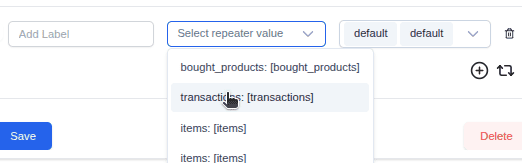Step 3: Repeat again
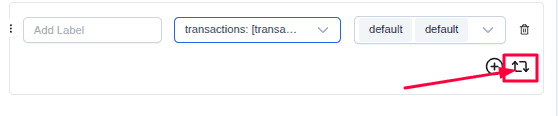Step 4: Select "**Items**" to repeat again (Here, we define the data structure of what we want to show — not the actual values. ThriveDesk automatically handles data display based on the structure).
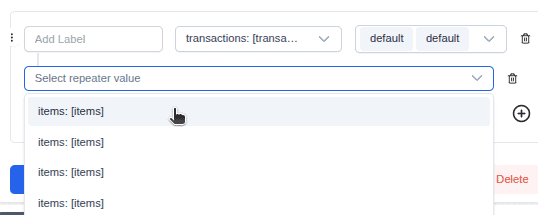Step 5: Now add text fields and select your desired properties.
**Output:**
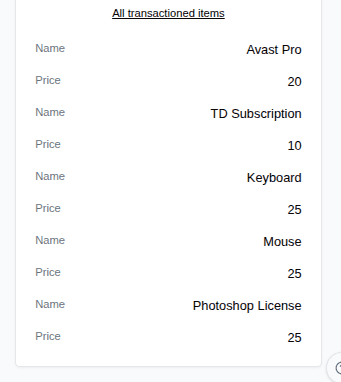### what is `Print all text value option` **in repeater selection**?
Let's assume from the previous data set we have an array (data lists) of product bought by that user. We want to show that. We can do that by simple selecting the `print all text value` option of repeater selector.
```typescript
"bought_products": ["Quix", "Thrivedesk", "Photoshop"],
```
Example:
**Target Structure:**
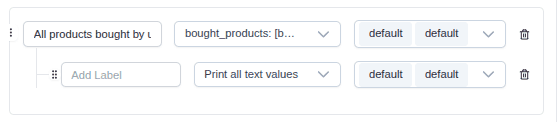**Process:**
Step 1: Add a main `Repeater` field
Step 2: Select the `bought_products` array in repeater selector & give a label if want
Step 3: Add a `Text Field` & select `Print all text value`
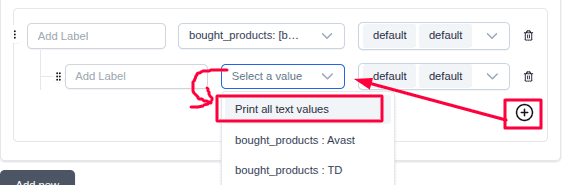**Output:**
### Extra features:
* `Drag & drop` items in builder page to change order. **User must save after this change.** Example:
* `Delete` any item in builder page. **User must save after this change.** Example:
* `Clear all selection` option. It clears all the selected items in builder page. Example:
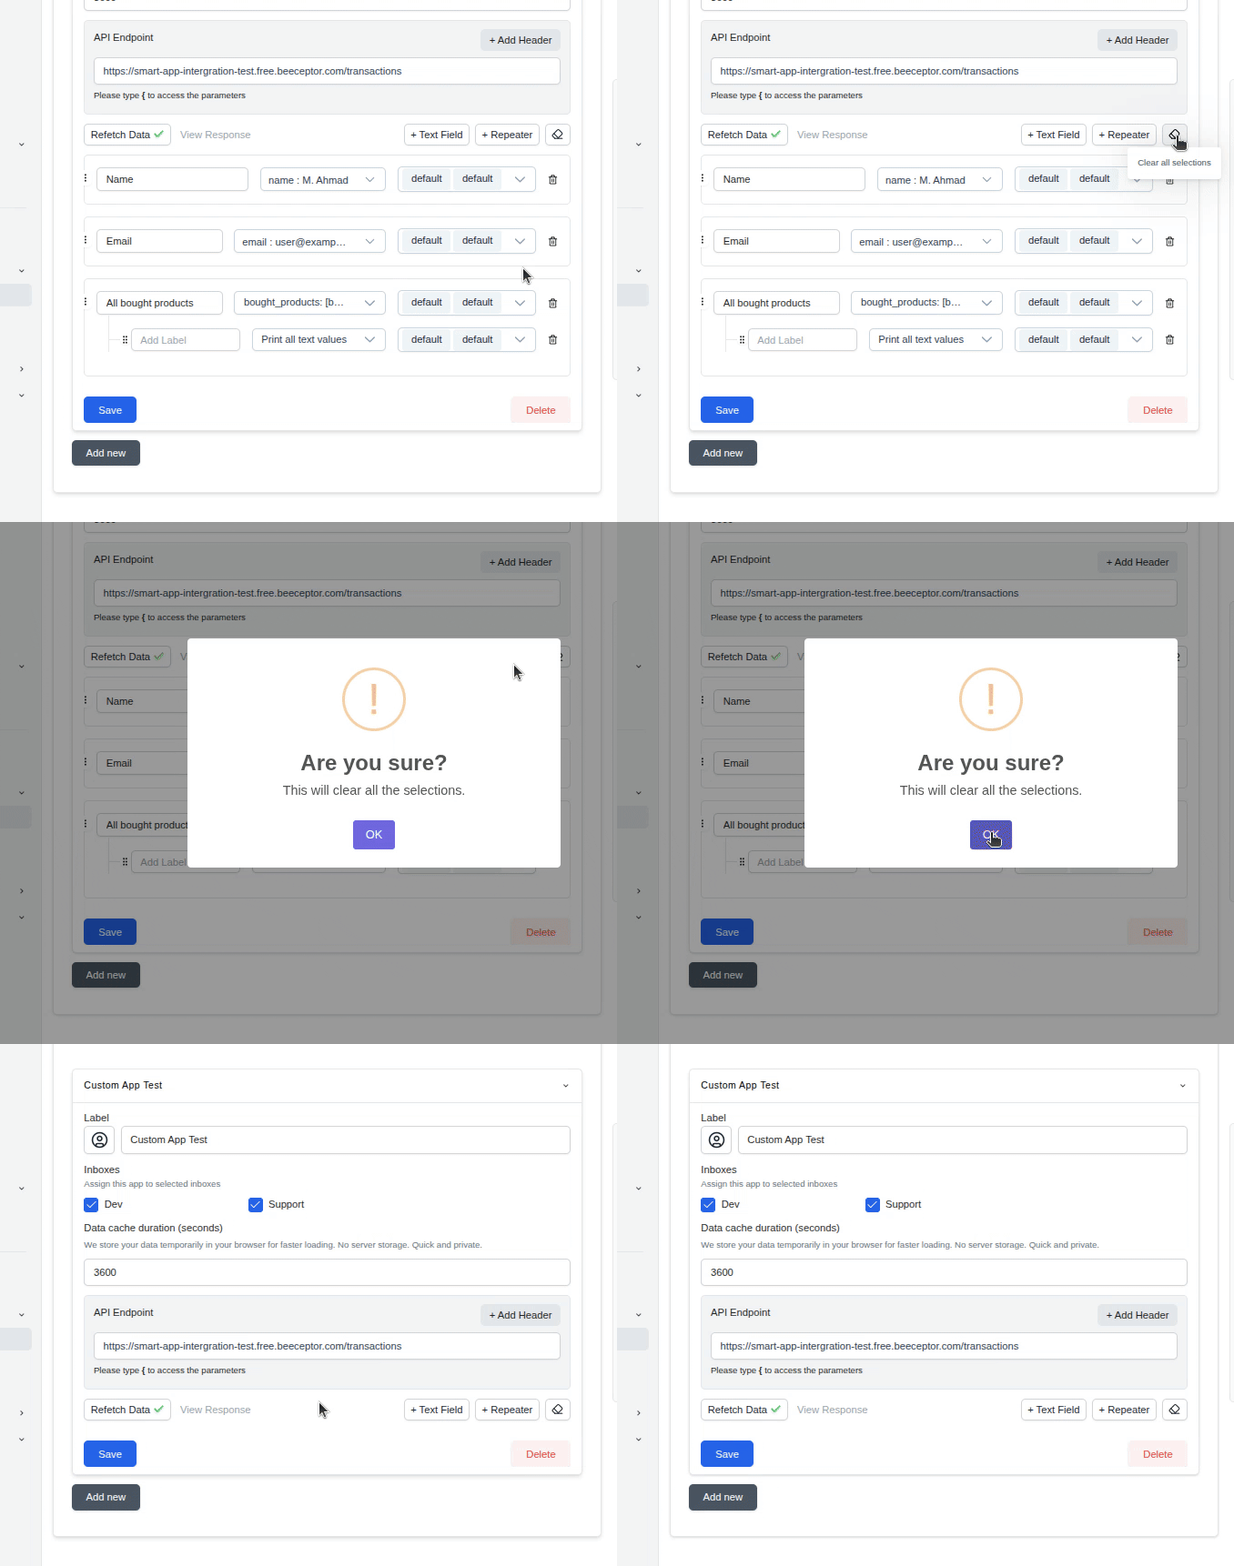Note: you can add multiple smart app instances as you want.
# Snooze Conversation
Snoozing allows you to temporarily remove a conversation from your active inbox and have it reappear at a later, more relevant time. This helps you stay focused on immediate tasks while ensuring that follow-ups don't fall through the cracks.
There are several ways to snooze a conversation depending on your current view:
* **From the Conversation Header:** Click the **Clock icon** in the top-right corner of an open conversation to set a snooze time.
* **From the Reply Editor:** You can snooze a conversation while sending a reply by clicking the **Clock icon** located in the bottom toolbar of the reply area.
* **From the Conversation List:** In the inbox view, right-click a conversation or click the options menu to select **Snooze conversation**.
## How to Snooze Conversation
### Initiate snoozing
Press the snooze button from any place mentioned above.

### Set the time
When you trigger the snooze button, a **Snooze until...** modal will appear. You can customize the following:
* **Flexible Time Input:** Our system is designed to understand both specific dates and natural language. You can enter a time in two ways:
* **Standard Format:** Use the precise format `MM/DD/YYYY HH:MM AM/PM` (e.g., **03/05/2026 08:00 AM**).
* **Natural Language:** Use human-friendly phrases like `tomorrow at 3pm`, `next Wednesday`, `in 2 hours`, or `friday 10am`.
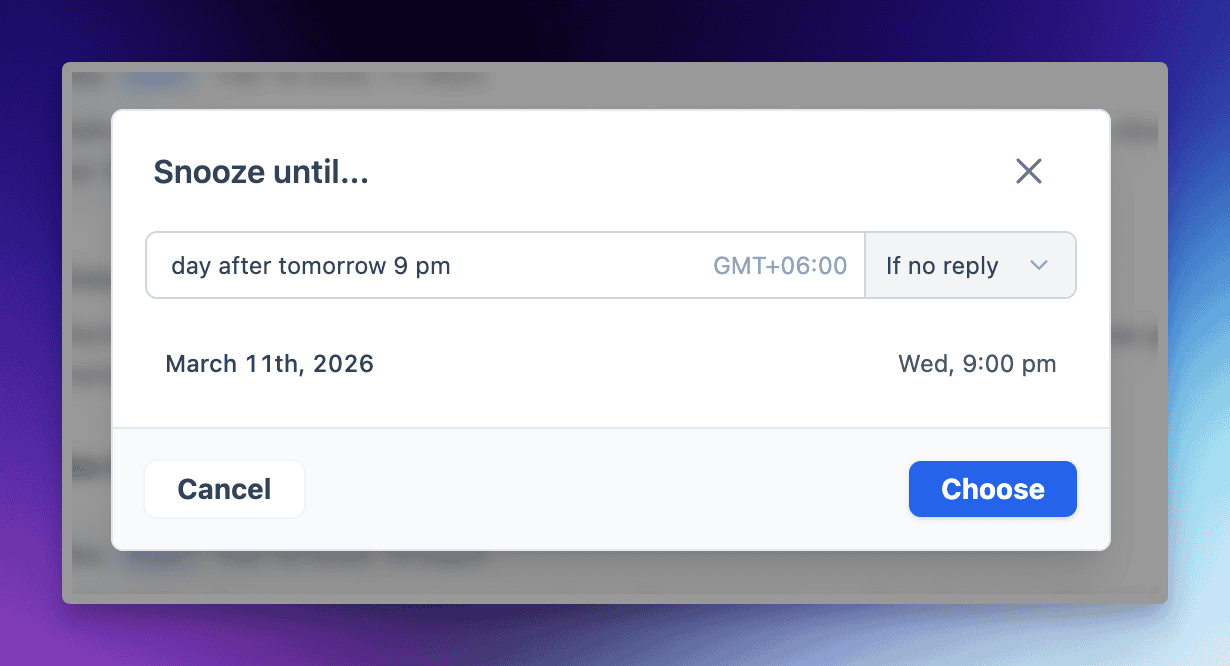
### Snooze conditions
You can choose how the snooze behaves if the customer reaches out earlier:
* **If no reply:** The snooze is automatically cleared if the customer replies before the set time. This is the default setting.
* **Regardless:** The snooze persists until the scheduled time, even if the customer sends a message in the meantime.
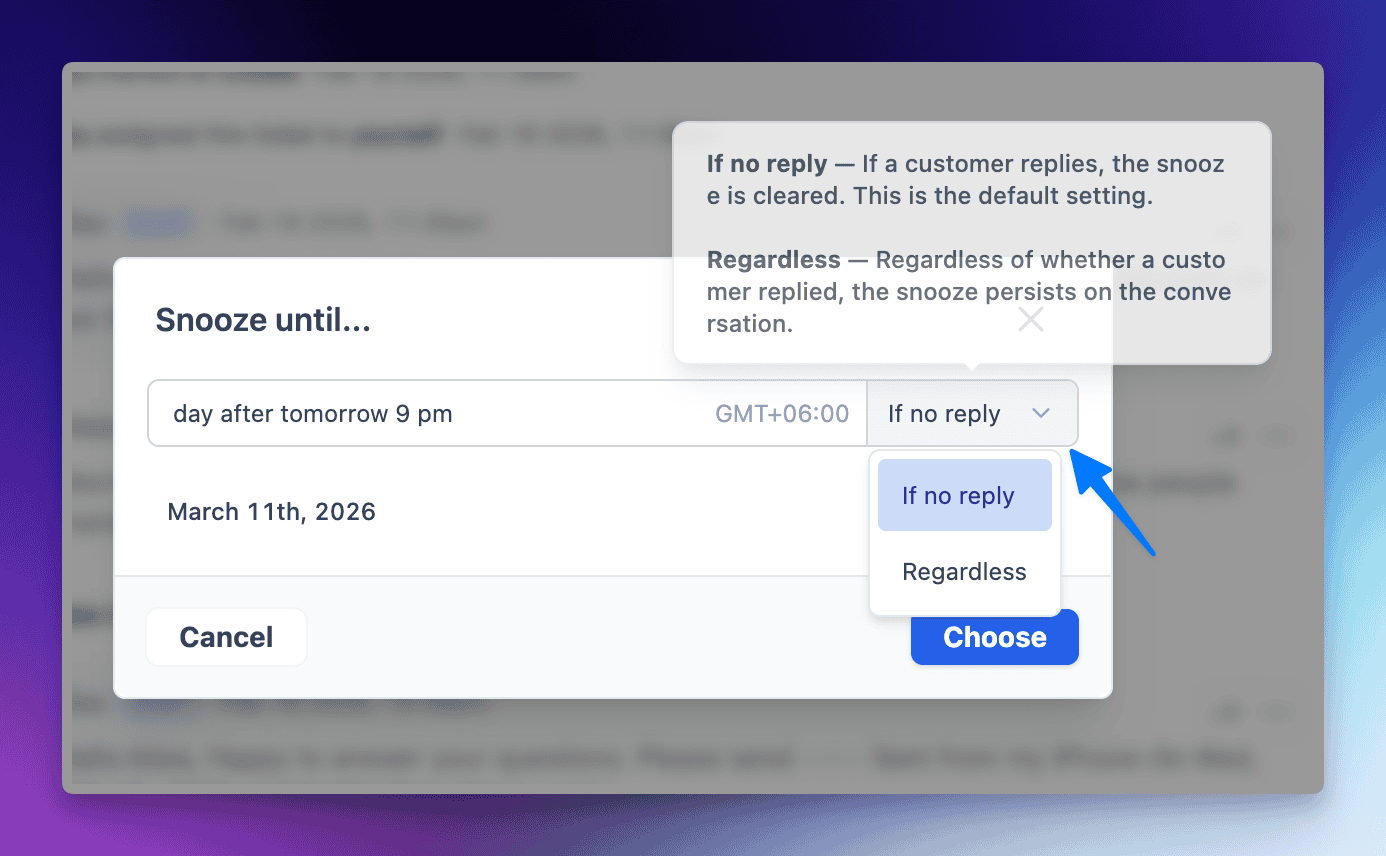
## Updating a Snoozed Conversation
If your schedule changes, you can easily adjust the timing of a snoozed conversation:
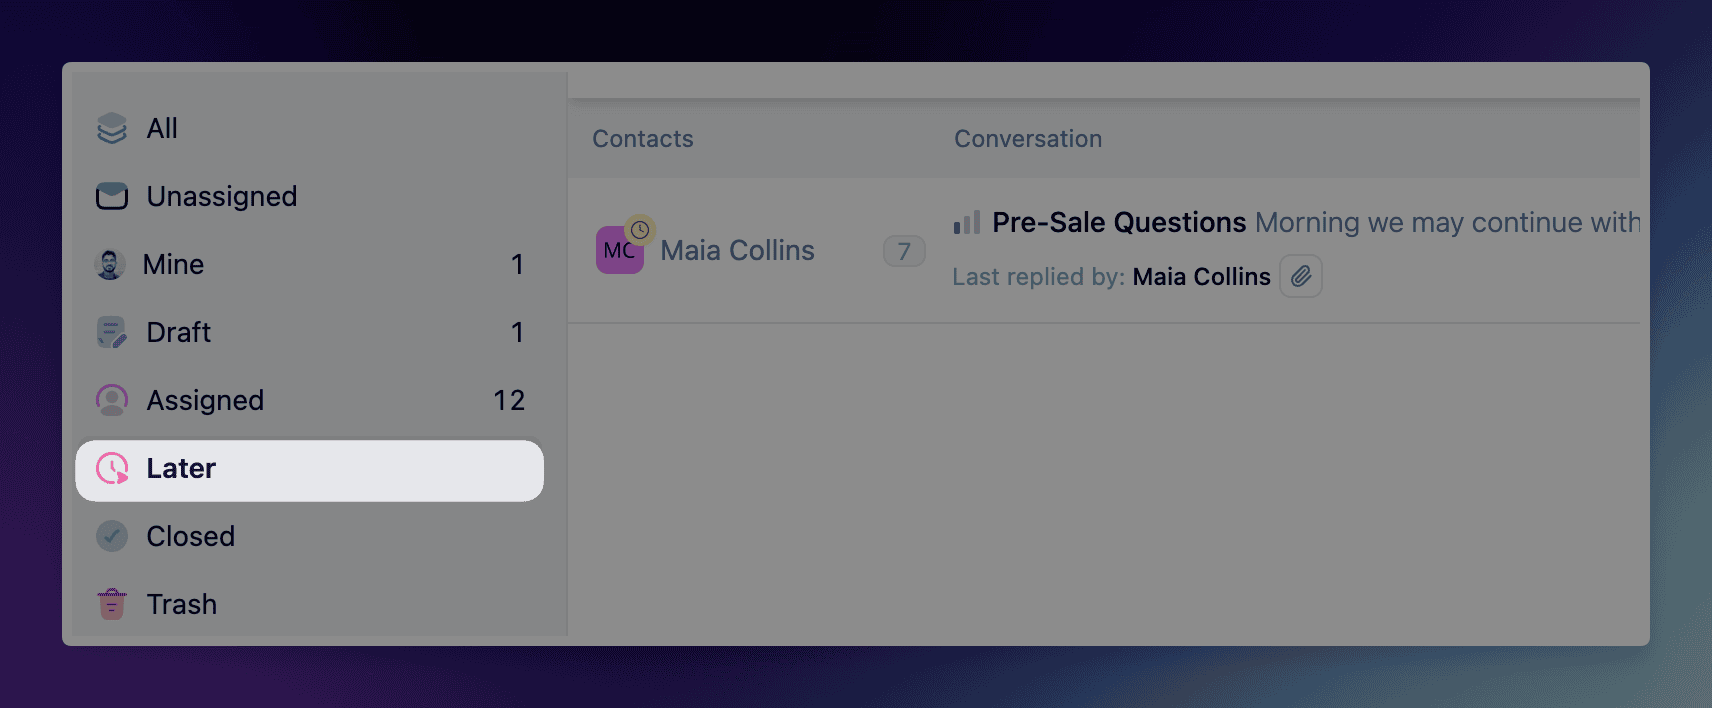1. Locate the conversation in the **Later** folder or via the conversation header.
2. Click the **Clock icon** again to reopen the snooze modal.
3. Select a new date or time using the **Flexible Time Input**.
4. Click **Update Snooze** to save the new time.
## Unsnooze a Conversation
If you need to bring a conversation back to your active inbox immediately before the scheduled time:
1. Open the snoozed conversation.
2. Click the **Clock icon** in the header.
3. Click the red **Unsnooze** button in the bottom left of the modal. The conversation will immediately return to your **Open** folder.
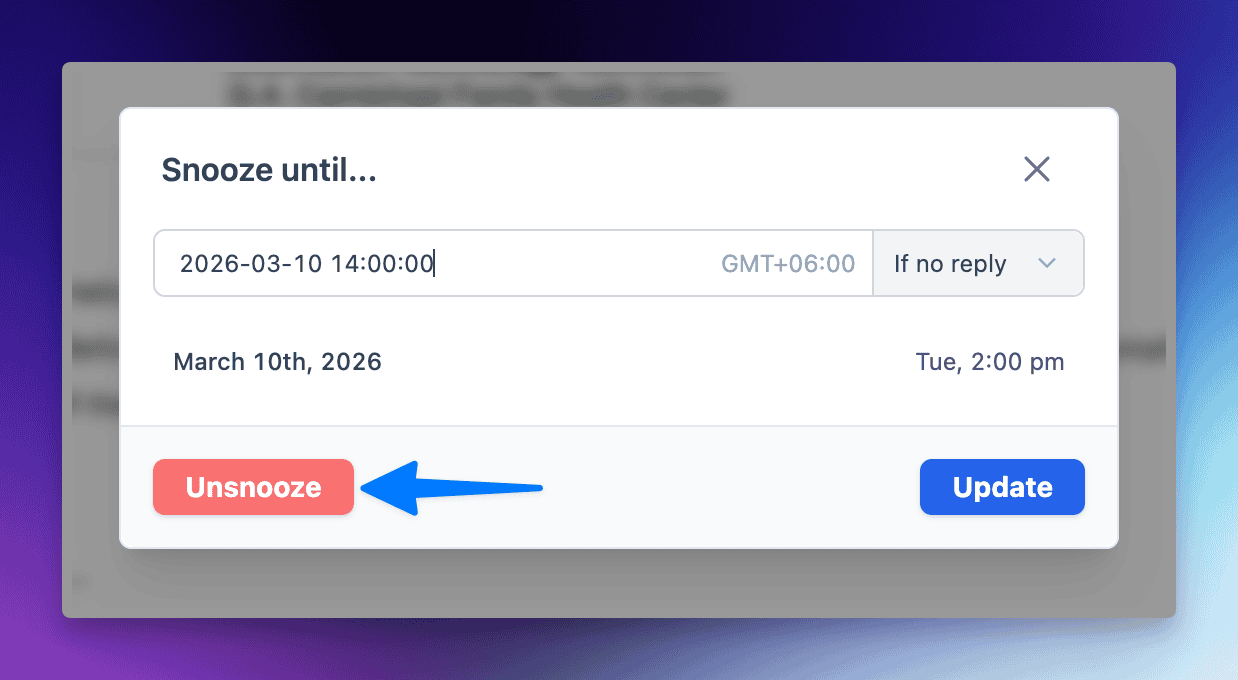## Timezone Setup
To ensure your conversations reappear at the correct time, you must configure your timezone. If not set, the system will default to the server timezone.
**To set your timezone:**
Visit your profile page by clicking on your avatar on bottom left corner and click on your name.
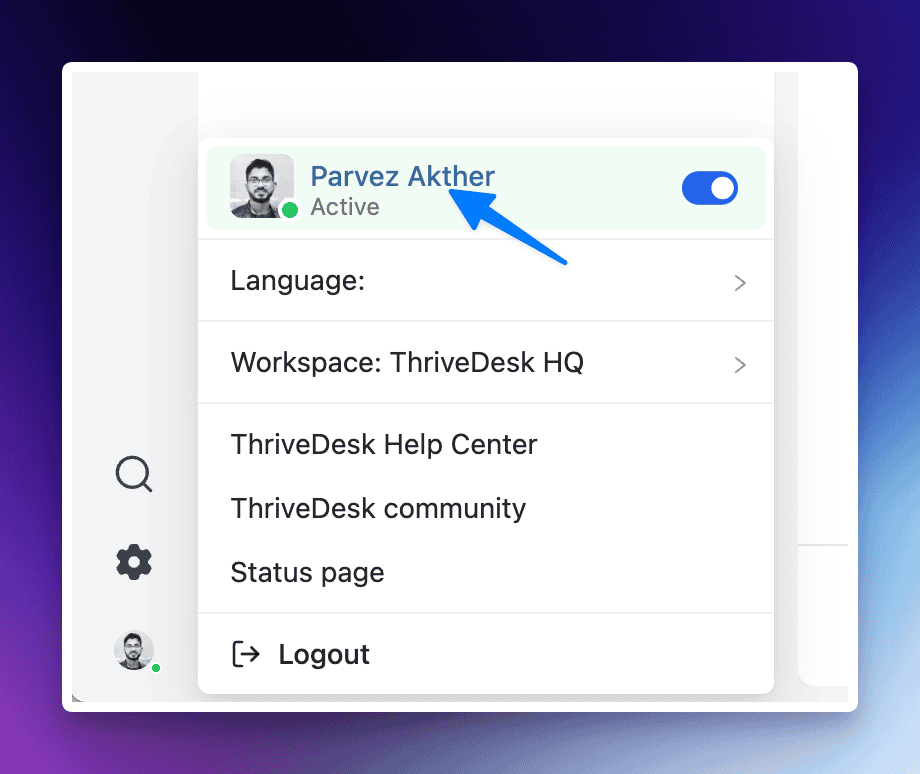Then select your timezone from the dropdown.
> **Tip:** You can also click the **update timezone** link directly from the Snooze modal to jump to these settings.
## Managing Snoozed Conversations
* **The "Later" Folder:** All snoozed conversations move to the **Later** section in your sidebar.
* **Visual Indicators:** Conversations in the list view that are currently snoozed will display a small **yellow clock icon** over the contact's avatar.
* **Viewing Snooze Status:** Hovering over the clock icon in the conversation header will show a tooltip with the exact reappearance time (e.g., "You snoozed until Mar 5 at 2:00 pm").
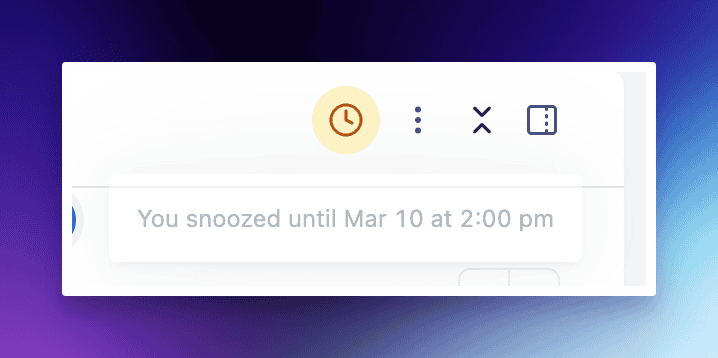
# How To Split Conversations
The **Split Conversation** feature is designed to help support agents manage and organize customer communication more efficiently.
When a single conversation thread covers multiple topics or when a new issue is raised mid-thread, splitting the conversation allows agents to create a new ticket for better focus, tracking, and resolution.
This ensures clarity for both the support team and the customer, avoiding confusion and improving response management.
**Important:** Once a conversation is split, it cannot be merged back. The original and new conversations will proceed independently from that point forward.
## How to Start a Split Conversation
To initiate a split conversation:
* Navigate to the message within the conversation that you want to split.
* Click the **ellipsis (⋯)** icon next to the message.
* From the dropdown menu, select **Split conversation**.
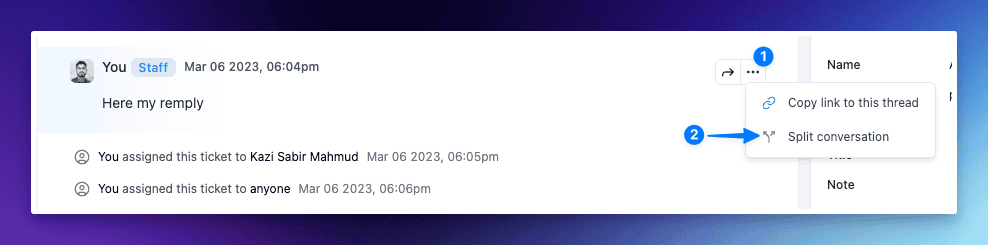This action opens the **Split conversation** modal, where you can configure the details for the new conversation.
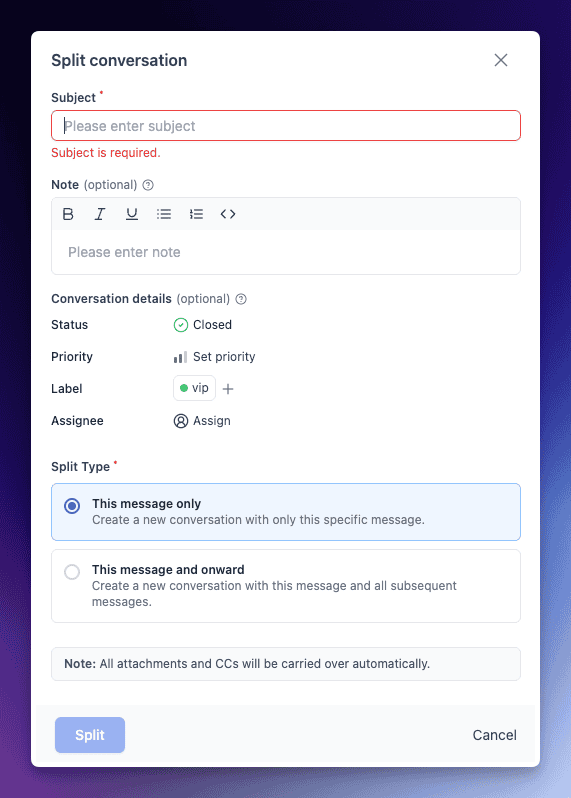**Subject (Required):** Enter subject for the new conversation. This field is mandatory and must be filled to proceed.
**Note (Optional):** Add internal notes with text formatting to provide context for teammates.
**Status:** Set the initial status of the new conversation (e.g., Open, Closed).
**Priority:** Assign a priority level to help triage the conversation appropriately.
**Label:** Add predefined labels such as “vip” to categorize the conversation.
**Assignee:** Assign the new conversation to a specific team member or group.
**Split Type (Required):**
* **This message only:** Creates a new conversation using only the selected message.
* **This message and onward:** Creates a new conversation from the selected message and all following messages.
All files and CCs from the original thread are automatically carried over to new conversation
Click **Split** button to finalize the split and create the new conversation.
## Identifying Split Conversation
Once you split conversations from parent thick you'll see a message linking to the new conversation
Inside the new conversation you'll also see message from where it split from
## Use Case for Split Conversation
The Split Conversation feature is especially useful in the following scenarios:
* A customer introduces a **new issue** in the middle of an ongoing conversation.
* A **separate team** needs to handle part of the conversation (e.g., billing vs. technical support).
* For **tracking purposes**, when multiple issues are discussed in one thread but require separate follow-up.
* When preparing a thread for **handoff** or escalation.
# Style Overriding
If you want to override the Assistant overall style or any specific area, this guide will help you.
The Assistant uses a feature called Shadow DOM. This keeps its styles separate from your website, preventing conflicts. However, it also means:
1. Your website's main CSS won't affect the Assistant.
2. You need to use JavaScript to add custom styles *inside* its Shadow DOM.
3. Crucially, you can only do this *after* the Assistant is fully loaded and ready on the page. Trying too early won't work.
**The Solution: The** `tdAssistantConnected` **Event**
To solve the timing issue, the ThriveDesk Assistant emits a custom event called `tdAssistantConnected` as soon as it's fully initialized and added to your page.
By "listening" for this event, you can safely access the Assistant's Shadow DOM and add your styles.
**How to Do It:**
Place this script tag on your page:
Copy
```typescript
```
**Why This Method?**
* **Reliability**: Your styling code only runs when the Assistant is definitely ready.
* **Correct Scope**: Styles are correctly applied within the Assistant's encapsulated Shadow DOM.
This approach ensures your custom styles are applied effectively without interfering with the rest of your page or the Assistant's internal operations.
### **Commonly Used CSS Classes**
The following table lists some of the most commonly used CSS classes:
| **CSS Class** | **Description** |
|---|---|
| `.td-assistant` | Main Assistant Window |
| `.td-header` | Header section of the assistant |
| `.td-body` | Main content area |
| `.td-footer` | Footer section with navigation |
| `.td-card` | The widget cards on the home page |
| `.td-launcher` | Main container for the launcher |
| `.td-launcher__icon` | Icon within the launcher button |
| `.td-launcher__text` | Text shown in the launcher |
| `.td-livechat` | Main Livechat container |
| `.td-contact` | Main Contact Form container |
| `.td-order` | Main Order Status container |
| `.td-kb` | Main Knowledge Base container |
### **Why Not Just** `querySelector` **and Style?**
While you *could* try something like this:
```javascript
// Potentially unreliable approach
const assistant = document.querySelector('thrivedesk-assistant');
if (assistant && assistant.shadowRoot) {
const styleTag = document.createElement('style');
styleTag.textContent = '.td-launcher-button-container { right: 100px !important; }';
assistant.shadowRoot.appendChild(styleTag);
}
```
This approach has a higher risk of failure due to timing:
* **Script Execution Order**: If this script runs before the `` element is defined and upgraded by the browser, `document.querySelector('thrivedesk-assistant')` might return `null` or an uninitialized element.
* `shadowRoot` **Availability**: Even if the element is found, its `shadowRoot` might not be attached immediately. The `connectedCallback` (where the `tdAssistantConnected` event is fired) is the guaranteed point at which the element is part of the DOM and set up.
Using the `tdAssistantConnected` event ensures that your styling logic runs only after the component is fully ready, making your customizations more robust and reliable.
### **Important Notes**
* Use `!important` in your CSS rules to ensure they override the default styles
* Test your customizations across different browsers and devices
* Your styles will be applied each time the Assistant loads on your page
* CSS variables (custom properties) defined on the `:host` can also be overridden for consistent theming
# SureCart Integration
SureCart is a powerful e-commerce platform that seamlessly integrates with ThriveDesk. The integration allows ThriveDesk agents to access customer orders, shipping information, and subscription details directly from the ThriveDesk platform. With the integration, agents can also perform order refund and cancellation actions, subject to their permission levels.
## Step 1: SureCart Setup
1. Login to your WordPress website.
2. Go to **Plugins > Add Plugins** and search for **SureCart**.
3. Install and activate the plugin.
4. Head over to **SureCart > Get Started** menu and setup your store(one time only).
5. In final step, you'll get your **API Token**. Copy the token you will need it later.
6. If you alreay have your store setup, you will find API Token on [SureCart website > API](https://app.surecart.com/api_tokens) menu. Select existing token or click **+New API Token** button to create new one.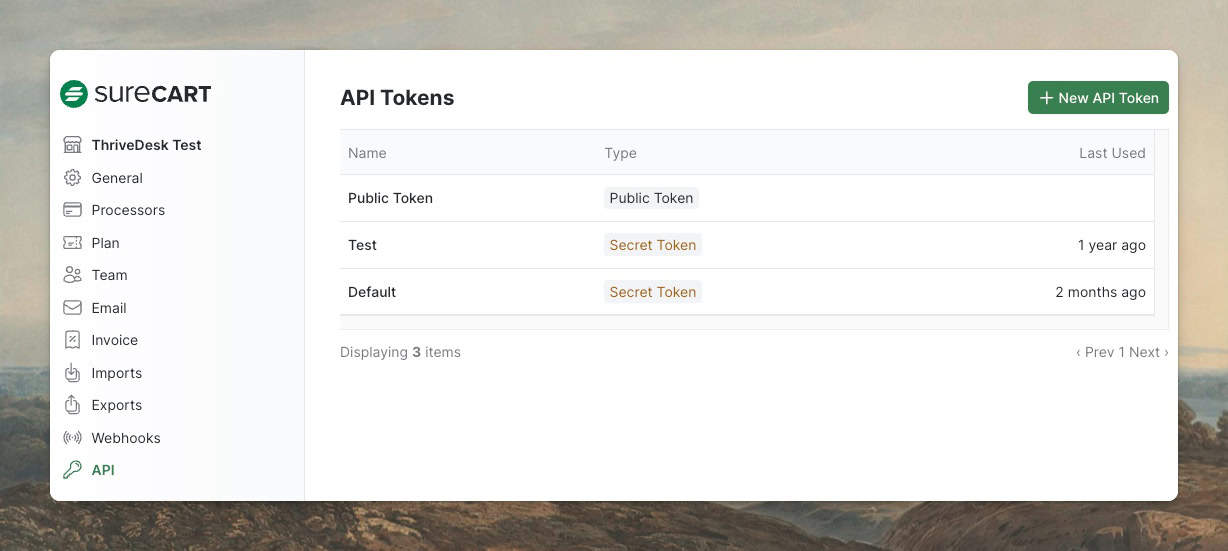
## Step 2: ThriveDesk app setup
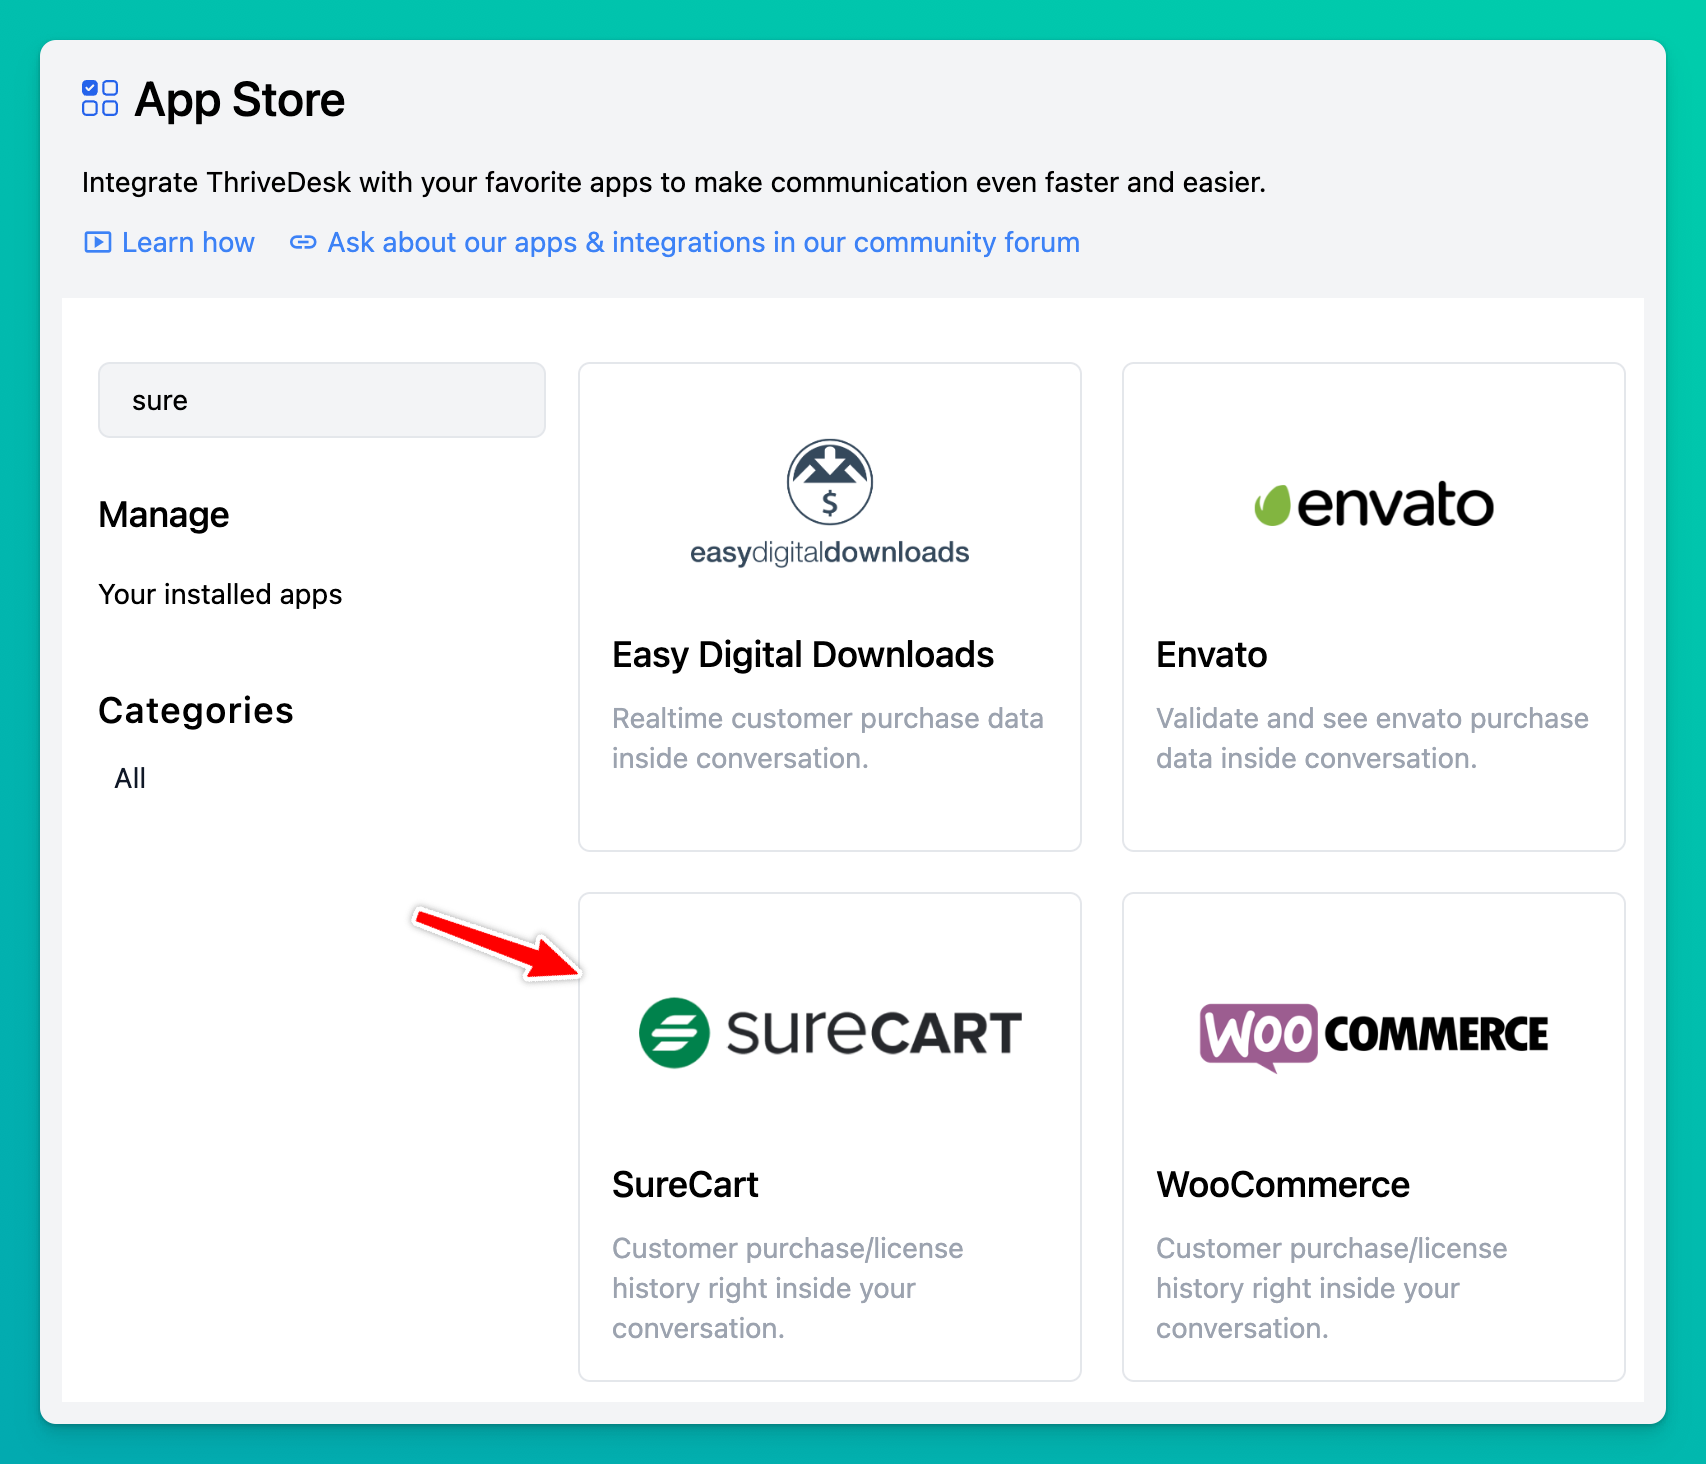
* Log into your ThriveDesk account and switch to the workspace you want to install SureCart app.
* Click the **App Store** menu from left sidebar.
* Search for **SureCart** and click Install App button.
Only workspace owner and admin can install the app. Make sure you have the permission to install the app.
## Step 3: Configure the app
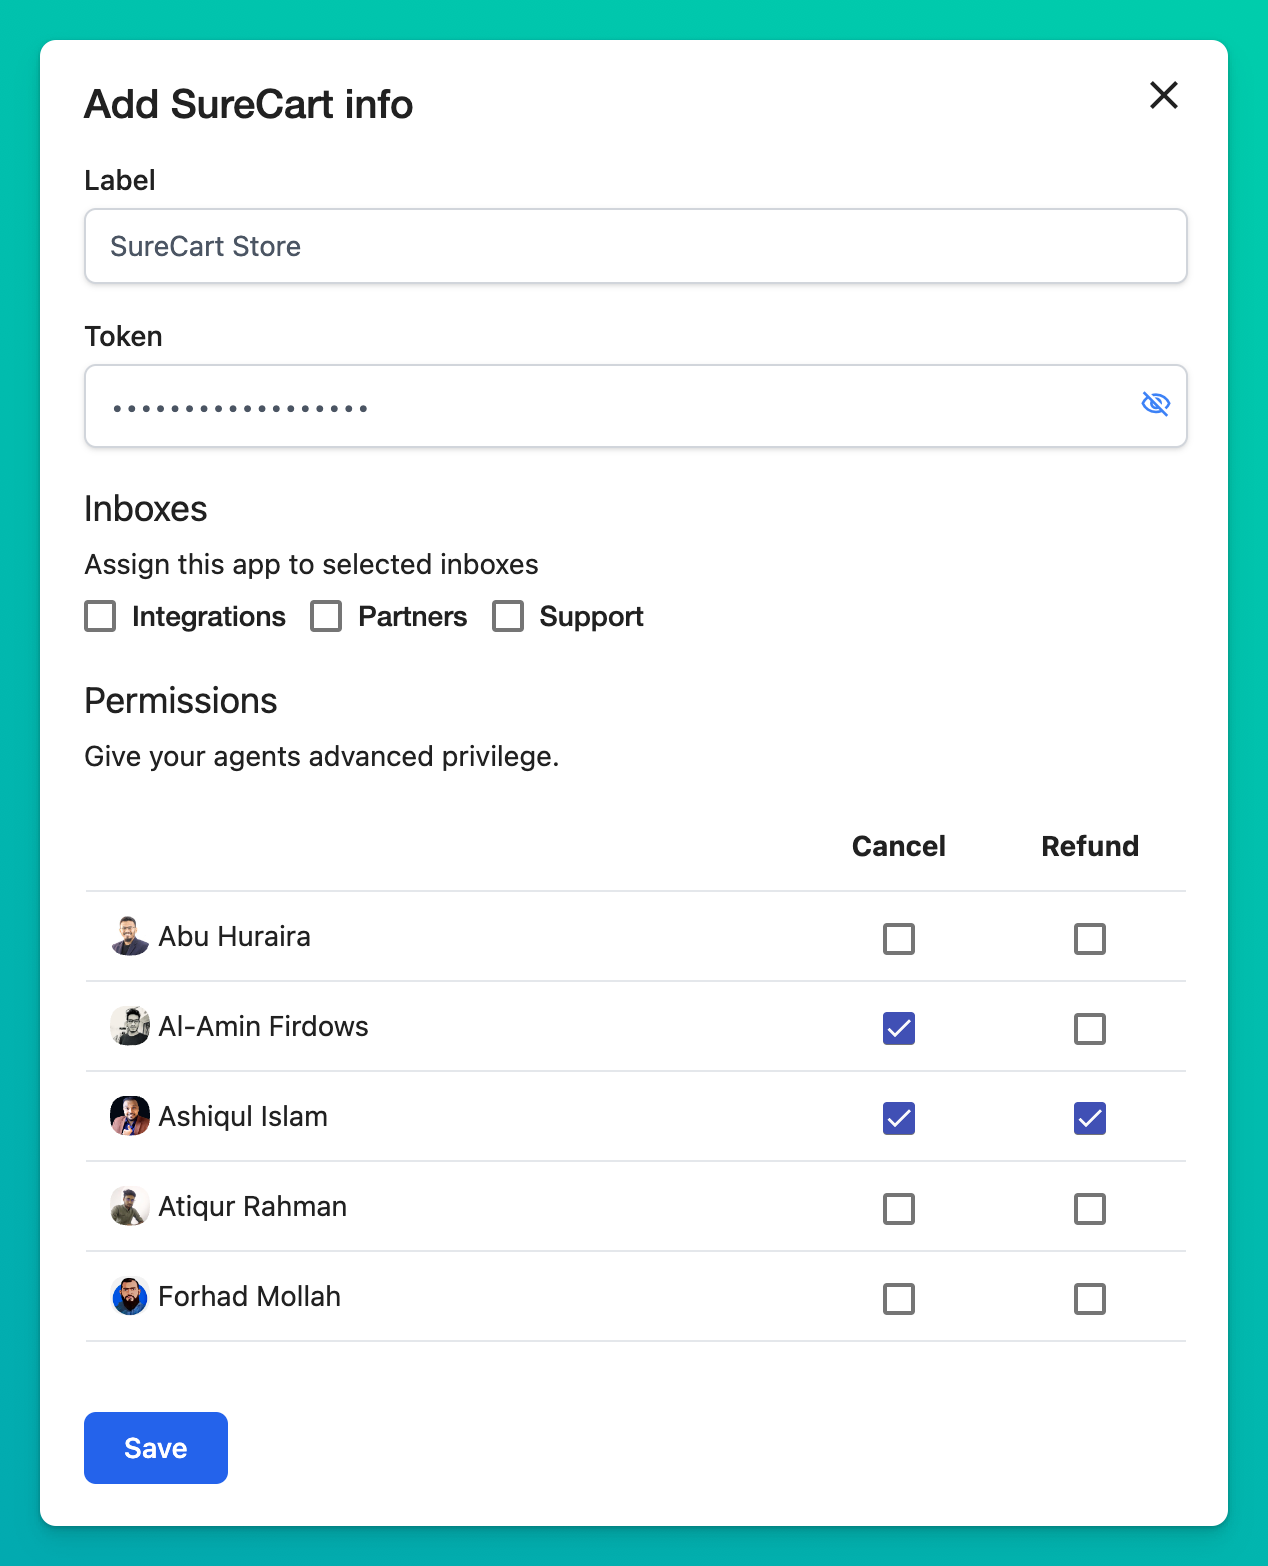
* **Label:** Label each app instance to easily distinguish them within the ThriveDesk sidebar.
* **Mailboxes:** Choose the mailbox(es) where you want to use this app. Multiple selections are allowed.
* **Permission:** Grant your agents permission to issue refunds and cancellations. Only designated agents with the necessary permission can carry out these actions.
## Adding multiple SureCart stores
You can also add multiple accounts if you have several other SureCart stores you'd like to integrate into ThriveDesk. Follow steps 2-3 and make sure to save your settings.
## Removing a SureCart Store
If you ever want to remove a store, just head back to **App Store > SureCart**, and click on the label to expand then click **Delete**. If you want to uninstall the app entirely, press the **Uninstall** button and it will remove all store connections that you have.
**Disclaimer:** ThriveDesk does not collect or retain any customer data on its servers. All information is displayed through API calls upon request.
# The Beginner’s guide to ThriveDesk
This guide is for beginners who want to get familiar with ThriveDesk and its essential features, such as setting up mailboxes, live chat assistant, automations, and customizing your account.
👋 Welcome to ThriveDesk, If you haven't yet signed up, [click here](https://app.thrivedesk.com/register/).
## Setup your Mailbox
You can access any shared mailboxes that you have permission to use when you sign in to your ThriveDesk account.
Each ThriveDesk mailbox is equipped with its unique email address, which can be readily employed. If you already have an email address that people use to send you an email, you can set that up inside ThriveDesk. Watch this video to learn how:
#### Additional resources:
* [Setup instructions for Gmail and Google Workspace](//help.thrivedesk.com/en/forward-email-from-google-workspace)
* [Setup instructions for Outlook](//help.thrivedesk.com/en/forward-email-from-outlook-office365)
* [Setup instructions for Amazon WorkMail](//help.thrivedesk.com/en/forward-email-from-amazon-workmail)
* [Customize your Mailbox settings](//help.thrivedesk.com/en/inbox-settings-overview)
## Organize your Mailbox
### Managing tags
Using tags to categorize conversations is the optimal method for identifying patterns, conducting future analysis, or assigning the conversation to the appropriate team member.
### Workflow Automation
Workflow automation is like having a helpful assistant in customer support. It simplifies tasks, meets deadlines, and keeps everything organized. By automating processes, it saves time and makes sure customers get quick responses. This boosts efficiency and keeps customers happy.
### Canned responses
Canned responses streamline repetitive FAQs, saving you from repeatedly typing the same answers and maintaining a pleasant tone.
## Add Live Chat Assistant
The Assistant enables you to engage with your customers directly within your application or website – a feature you're likely familiar with! There are multiple methods available for installing the Assistant, and although it's a relatively swift process, it does require access to your codebase or integration through tools like Google Tag Manager.
Watch this video to learn more about Assistant:
#### Additional resources:
* [Install Live Chat Assistant on WordPress](//help.thrivedesk.com/en/add-assistant-to-wordpress)
* [Add Live Chat Assistant to Webflow](//help.thrivedesk.com/en/add-assistant-to-webflow)
* [Add Live Chat to Wix](//help.thrivedesk.com/en/add-assistant-to-wix)
* [Click here to read all other platform instructions](https://help.thrivedesk.com/en/category/assistant)
## Connect your apps to ThriveDesk
Connect ThriveDesk with your other tools to make the most of the information you already have, and achieve better results.
Check out our [app store](https://app.thrivedesk.com/apps) for more options, and you can even create your own apps to improve your team's work.
## Invite Teammate
Whether you're sharing setup steps, inviting your support team, or getting Marketing or Sales more involved in the customer's experience, you can securely invite them.
Follow these step-by-step instructions to learn how to:
* Create new users
* Manage users profiles, permissions and settings
* Delete users
* Change passwords
## Notification Settings
The most important thing you should do after setting up your mailbox and live chat is to set up notifications. You and your team could be a support powerhouse with proper notifications settings. Learn more about:
* [Setting up mobile notifications](//help.thrivedesk.com/en/mobile-notifications)
* [Browser notifications](//help.thrivedesk.com/en/manage-thrivedesk-notificaitons)
## Setup Knowledge Base
With Knowledge Base(also referred to as a [Help Center](https://www.thrivedesk.com/knowledge-base/)) you can create and retain articles designed to address your customers' most common queries. It consolidates all your help resources into a single location accessible to both your customers and your team.
To discover how to establish your Knowledge Base in ThriveDesk, we encourage you to watch this informative video.
## Key Resources
We put in a lot of effort to ensure that ThriveDesk is not only effective for you and your customers but also user-friendly and enjoyable. During your onboarding process, We'll be sending you messages to assist you in getting everything set up. However, if you ever encounter any challenges, you'll find various resources available to help you maximize your ThriveDesk experience, tailored to your specific situation and needs.
### 📖 Help Center
Where we have all our [help articles](https://help.thrivedesk.com/en/) like this one, FAQs, how-tos and best practices all in one place. Great for one-shot unblockers for you and your team.
### 🖥️ Book Demo
[Book a demo](https://www.thrivedesk.com/demo) with Parvez(CEO) and ask any question you may have for ThriveDesk.
### 🗣️Chat with support
If you'd like some extra assistance with your setup, just reach out via the Messenger and chat to our support team.
Alternatively email our support team at any time - . We're always ready to help.
# Getting started with Docs
Docs is our knowledge base or help center product. It lets you give your customers the power to find answers to their most-asked questions or just learn more about your business.This article is all about Docs.
# How to translate ThriveDesk
# Troubleshooting Missing Inbound Emails
Inbound email refers to any message being sent to your ThriveDesk Inbox. This includes:
* Messages sent to your custom support address (e.g., `support@yourcompany.com`)
* Any aliases you’ve forwarded in (like `help@yourcompany.com`)
* Emails sent directly to your `companyname@thrivedesk.email` address
If you’re expecting an email but can’t find it inside ThriveDesk, use the following guide to troubleshoot the issue step by step.
## **There are emails that should be in my ThriveDesk Inbox, but I can't find them**
Don’t worry—it happens! Here’s how to track them down:
### **Search inside ThriveDesk**
Start by searching for the sender’s email address inside ThriveDesk:
* Use the **search bar** or the **Contact List**
* Look for any existing conversations with that email address
**Tip:** Sometimes an email shows up as a reply to an older thread or gets routed to a different Inbox than expected. A quick search might help you locate it instantly.
### **Check your original email inbox (email provider)**
If the message isn’t in ThriveDesk, check whether your **email provider** received it.
**Here’s how:**
1. Log in to your email provider as the support address you connected to ThriveDesk. For example, if you use Google Workspace and your email is `support@yourcompany.com`, log in to Gmail with that address.
2. Look in your inbox **and** your **Spam/Junk** folder.
ThriveDesk can only receive what your email provider forwards. If the message never arrived or was flagged as spam, it won’t show up in ThriveDesk.
### **If the email is missing or marked as spam**
If you can’t find it in your provider inbox or it's sitting in the spam folder:
* The provider likely **didn’t forward it** to ThriveDesk.
* You’ll need to **manually forward** the message to your ThriveDesk Inbox address.
When you manually forward emails, ThriveDesk may treat **you** (your support address) as the sender. That means the contact won’t appear as your customer automatically. You can manually change the contact later. See [how to change contact on a conversation](https://help.thrivedesk.com/en/changing-contact).
### **If the email is in your inbox but still didn’t reach ThriveDesk**
This usually means **email forwarding is turned off** or misconfigured.
Here’s what to do:
* Head to your email settings and check that forwarding is still active.
* Make sure it forwards to the correct ThriveDesk address.
👉 You can follow this guide:[ ](https://www.thrivedesk.com/tools/email-header-analyzer/)[Get Your Email Into ThriveDesk](https://www.thrivedesk.com/tools/email-header-analyzer/)
Sometimes forwarding gets disabled automatically (e.g. Gmail’s security checks or permission changes). Re-enable it if necessary.
### **Still can’t find the email? Let us help!**
At this point, we recommend sending the email **headers** to our support team. These help us trace whether the email reached ThriveDesk. Check our tool and guide on [How to Get Email Headers](https://www.thrivedesk.com/tools/email-header-analyzer/)
Include:
* The original email address of the customer
* The subject of the missing message
* Any relevant email headers or conversation IDs
---
## **What if the email was marked as spam by my provider?**
Spam filters can be sneaky. If your provider marked the message as spam, it won’t forward it to ThriveDesk.
**What to do:**
1. Go to your spam/junk folder in your email provider account
2. Manually forward that message to your ThriveDesk Inbox
3. Fix the contact in ThriveDesk after it shows up
If this keeps happening, consider:
* **Disabling spam filters** for your custom address (if your provider allows)
* Or reaching out to your email provider’s support team to explore bypassing spam filters
---
## **I have some other issue with inbound email**
Can’t find the problem in any of the steps above? No problem—we’ve got your back.
Please send us an email with as many details as you can:
* The email address the message was sent from
* Conversation number (if any)
* Email headers or any clues
We love details—they help us help you faster.
📬 Email our support team or use this tool to start: [Email Header Analyzer Tool](https://www.thrivedesk.com/tools/email-header-analyzer/)
# Troubleshooting with Cloudflare
To ensure seamless integration functionality with your website behind Cloudflare, it's essential to whitelist the ThriveDesk IP address. Failure to do so may result in the malfunction of integrations such as WooCommerce and other plugins.
Below are the step-by-step instructions on how to whitelist the ThriveDesk IP address:
### Steps
1. Access your [Cloudflare account](https://dash.cloudflare.com) using your credentials.
2. Once logged in, navigate to the website you wish to whitelist the IP address for.
3. Click on the "**Security**" tab, then choose "**WAF**" from the dropdown menu.
4. Within the WAF menu, locate and click on the "**Tools**" tab.
5. In this section, you'll need to input the ThriveDesk IP address into the designated field. Ensure that the action is set to "**Allow**" and the zone is set to "**This Website**". Additionally, it's helpful to add a note such as "ThriveDesk App IP" for future reference.
ThriveDesk IPs:
IPV4: `178.156.134.94`
IPV6: `2a01:4ff:f0:4967:0:0:0:1`
Repeat this step by inputting all IP addresses individually.
1. After entering the IP address and specifying the action, zone, and adding a note, click on the "**Add**" button to confirm the whitelist entry.
2. Congratulations! You have successfully whitelisted the ThriveDesk IP address.
Allow a minute for the changes to take effect. Subsequently, proceed with integrating WordPress plugins like WooCommerce or WPPostSync.
If you encounter any issues during the process or even after the integration, don't hesitate to [reach out to our support team](https://www.thrivedesk.com/contact/) for assistance.
# Use @mentions in Notes
Mentions in notes allow you to bring teammates into conversations quickly without forwarding or copying emails. With a simple **@mention**, you can notify individuals or groups so the right people are looped in at the right time.
## How Mentions Work
When you type **@** in a note, ThriveDesk will display a list of teammates you can mention. You can:
* Mention a **specific teammate** to notify them directly.
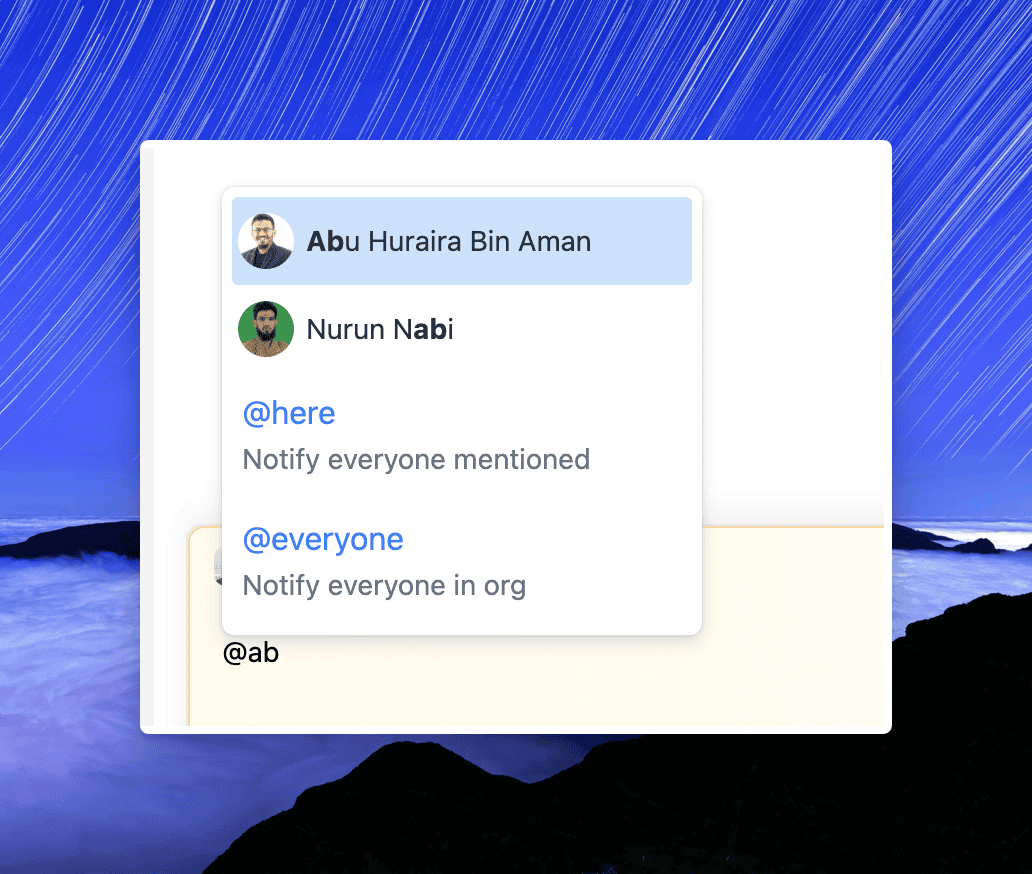* Use **@here** to notify everyone who is a member of that inbox.
* Use **@everyone** to notify all members of your workspace or organization.
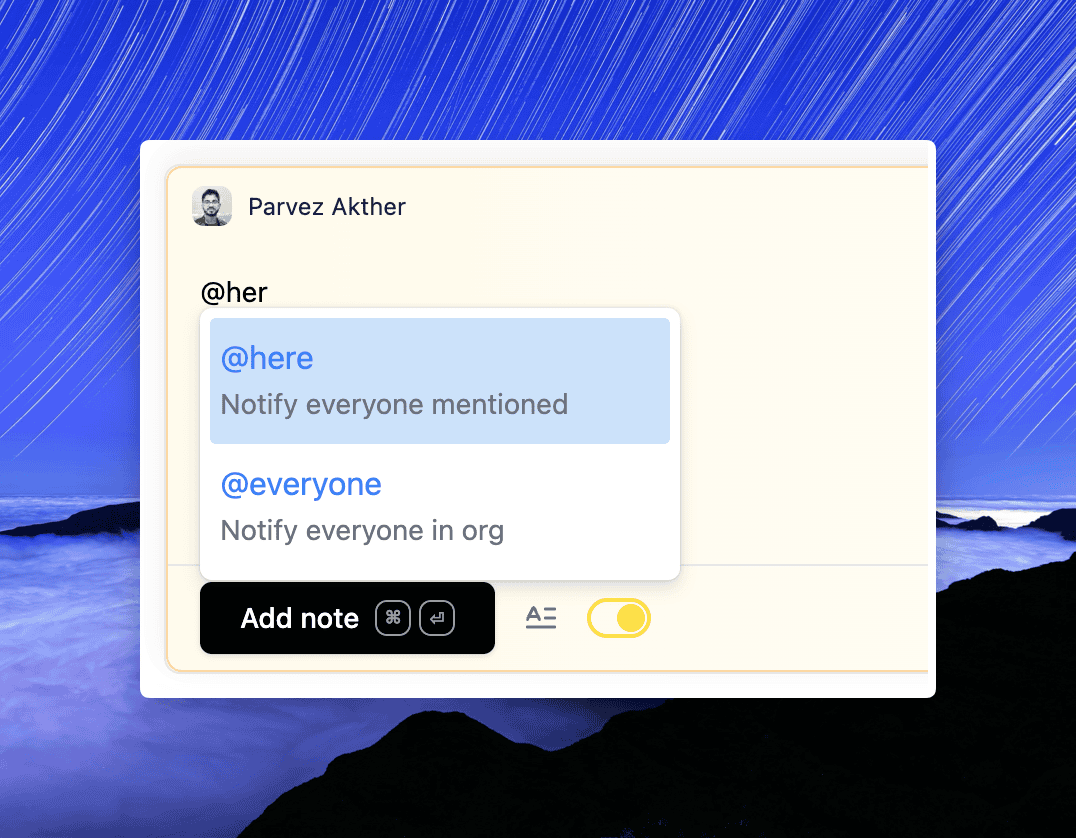---
## Notification Delivery
Since ThriveDesk does not provide in-app notifications, all mention notifications are sent via **email**.
* **Individual mention (@teammate)** – Sends an email notification to the mentioned teammate.
* **@here** – Sends an email notification to all teammates who have access to the inbox where the conversation is located.
* **@everyone** – Sends an email notification to all teammates in your ThriveDesk workspace.
---
## Example Use Cases
* Use **@teammate** when you need input from a specific person.
* Use **@here** when an issue affects everyone handling conversations in that inbox.
* Use **@everyone** when sharing something important that the entire organization should know
# User Availability
User Availability lets your team show real-time online and offline presence inside ThriveDesk. Agents can see who is currently active, set themselves as away, and customers visiting your website can see which agents are available before starting a conversation.
## How Agent Presence Works
Any agent who is logged into ThriveDesk is automatically considered online. When they close their browser or lose their internet connection, their status switches to away.
There are two presence states:
* **Online** - The agent is connected to ThriveDesk and available to help.
* **Away** - The agent has manually set themselves as away, or is no longer connected.
## Showing Agent Availability on the Assistant Widget
The Assistant widget can display which agents are currently online. This gives customers a clear idea of whether they can expect a quick reply or should allow some extra time.
The widget connects to a presence channel that is specific to each assistant. Only agents who have access to the assistant's linked inbox will appear in this channel.
Here is how presence is determined on the widget:
* When an agent logs into ThriveDesk, they join the assistant's presence channel.
* If an agent has set their status to away, they always appear as away, even if they are connected.
* If an agent is connected and has not set themselves as away, they appear as online.
* If an agent is not connected, they appear as away regardless of their saved status preference.
## Inbox-Based Access Control
Not every agent needs to appear on every assistant widget. Visibility is controlled by inbox access to keep things relevant for your customers.
* Each assistant is linked to a specific inbox.
* Only agents who have been granted access to that inbox will appear in the assistant's presence channel.
* Agents without inbox access cannot join the channel and will not be visible to customers.
For example, a company with a "Sales" inbox and a "Support" inbox will only show the relevant team members on each respective widget.
---
## Notifications and Presence Status
Push and mobile notifications now respect an agent's presence status.
* If an agent is online (connected and not set to away), they receive push and mobile notifications as normal.
* If an agent is disconnected or has set themselves to away, push and mobile notifications are skipped for that agent.
This keeps things clean for agents actively working in ThriveDesk, since they can see new conversations in real time, and avoids sending notifications to agents who have stepped away.
---
## When Does an Agent Go Away Automatically?
ThriveDesk will automatically change an agent's status to Away when any of the following happens:
* The agent has logged out of ThriveDesk.
* All ThriveDesk browser tabs or windows have been closed.
* The agent's internet connection has been lost.
* The agent's computer has gone into sleep or hibernate mode.
* The agent has manually set their status to Away.
# User Roles and Permissions
ThriveDesk has three distinct user roles, including Account Owner, Administrators and Users.
Here, we'll go through the basics of each position, their respective default permissions, and how to modify either permissions or roles.
## Default User Roles & Permissions
These are the default settings for permissions in ThriveDesk.
#### Account Owner
The Account Owner has complete access to the ThriveDesk account. Only the Account Owner may edit the ThriveDesk plan or see and modify the billing information, and only the Account Owner can adjust the Administrator role's rights. Each ThriveDesk account has only one Account Owner, and by default, the person who created the account is the Account Owner.
**Note:** If the Account Owner has left the company without transferring ownership or if you want to transfer the ownership to another member inside your account, [give us a shout!](https://www.thrivedesk.com/contact)
#### Administrator
Administrators have access to all information except billing data. Administrators only has access to Inboxes as specified by Account owner. Administrators are able to read, but not modify, the specifics of your plan.
#### User
A User only has access to the specified Inboxes. A User can view all communications in a Inbox to which they have access, but cannot modify the Inbox settings. They have permission to create and update articles on specified Docs sites, but cannot modify the site's settings. In addition, Users cannot create additional Users or see User profiles.
# Webhooks
Webhooks are the way to have ThriveDesk call a script on your server when one or more events have happened, enabling you to react however you like. Webhooks can be thought of as event listeners or push notifications.
## Available Events:
Available Events:
> Each request body uses the object format linked in the table below. All webhooks use the v1 payload
| Event Name | Event Type |
|---|---|
| Conversation created | conversation.created |
| Conversation assigned | conversation.assigned |
| Note added to conversation | conversation.note.added |
| User replies to conversation | conversation.agent.replied |
| Customer replies to conversation | conversation.contact.replied |
| Conversation status updated | conversation.status.updated |
| Conversation Tags added/updated | conversation.tags.updated |
| Conversation moved | conversation.moved |
### Response:
A sample response body has been demonstrated here:
```
{
"eventType": "conversation.tags.updated",
"data": {
"type": "conversation",
"id": "dea1fca0-6529-43fd-91df-044afbf2a1d4",
"ticketId": 26,
"subject": "Duis aute irure dolor in reprehenderit in voluptate velit",
"excerpt": "Cillum dolore eu fugiat nulla pariatur. Excepteur sint occaecat cupidatat...",
"status": "Active",
"priority": "Normal",
"active": true,
"createdAt": "2021-06-29T13:04:05.000000Z",
"tags": [
"Beatae",
"Consequuntur",
"Cumque"
],
"inbox": {
"id": "f86385ff-9ce5-456a-a207-0bbf4ec59c0e",
"name": "Dev",
"inboxAddress": "example@app.thrivedesk.email",
"connectedEmailAddress": "example@mail.com"
},
"cc": [
"examplecc@mail.com"
],
"bcc": [
"examplebcc@mail.com"
],
"assignedTo": {
"id": "050cbdb6-a973-40df-a5dd-b7f72c993055",
"firstName": "Assigned",
"lastName": "Example",
"email": "exampleassigned@mail.com"
},
"contact": {
"id": "925298d4-a7d9-4d6b-8a01-10b2dea439aa",
"name": "example",
"email": "example@mail.com",
"avatar": null
},
"hasAttachment": false,
"hasInlineAttachment": false,
"threadsCount": 3,
"threads": [
{
"id": "967b48b3-32d7-4d63-81cc-4f6d04d879b1",
"type": "Email",
"status": "Active",
"direction": "Outbound",
"htmlBody": "Lorem ipsum dolor sit amet, consectetur adipiscing elit, sed do eiusmod tempor incididunt ut...",
"textBody": "Lorem ipsum dolor sit amet, consectetur adipiscing elit, sed do eiusmod tempor incididunt ut...",
"createdAt": "2021-06-29T13:04:05.000000Z",
"updatedAt": "2021-06-29T13:04:05.000000Z",
"viewedAt": null
},
{
"id": "e84aea7e-65ee-4b5a-a8d0-4f216192847e",
"type": "Email",
"status": "Active",
"direction": "Outbound",
"htmlBody": "Ut enim ad minim veniam, quis nostrud exercitation ullamco laboris nisi ut aliquip ex ea...",
"textBody": null,
"createdAt": "2021-06-29T13:04:46.000000Z",
"updatedAt": "2021-06-29T13:04:46.000000Z",
"viewedAt": null
},
{
"id": "ce7946ae-86c4-4891-af2a-485d984a6a74",
"type": "Note",
"status": "Active",
"direction": null,
"htmlBody": "Duis aute irure dolor in reprehenderit in voluptate velit esse cillum dolore eu fugiat nulla...",
"textBody": null,
"createdAt": "2021-06-29T13:04:59.000000Z",
"updatedAt": "2021-06-29T13:04:59.000000Z",
"viewedAt": null
}
]
}
}
```
## Response fields (Conversation):
| Path | Type | Description |
|---|---|---|
| *eventType* | *String* | Type of the event, one of the available events |
| *type* | *String* | Type of the data, ex: conversation |
| *data* | *Object* | Main response body |
| *id* | *String* | Unique identifier |
| *ticketId* | *Integer* | Unique ticket identifier |
| *subject* | *String* | Conversation subject |
| *excerpt* | *String* | Conversation excerpt |
| *status* | *String* | Conversation status, one of: ***Active*** ***Pending*** ***Closed*** |
| *priority* | *String* | Conversation priority, one of: ***High*** ***Normal*** ***Low*** |
| *active* | *Boolean* | Conversation active status |
| *createdAt* | *String* | UTC time when the conversation was created |
| *tags* | *Array* | List of tags, with the following fields: ***name*** |
| *inbox* | *Object* | Inbox information of the conversation, with the following fields: ***id*** ***name*** ***inboxAddress*** ***connectedEmailAddress*** |
| *cc* | *Array* | List of emails that are cc’d |
| *bcc* | *Array* | List of emails that are bcc’d |
| *assignedTo* | *Object* | Who the conversation is assigned to, with the following fields: ***id*** ***firstName*** ***lastName*** ***email*** |
| *contactInfo* | *Object* | An object containing the contact information associate with the conversation with the following fields: ***id*** ***name*** ***email*** ***avatar*** |
| *hasAttachment* | *Boolean* | Conversation contain attachment or not |
| *hasInlineAttachment* | *Boolean* | Conversation contains inline attachment or not |
| *isDraft* | *Boolean* | Is conversation drafted or not |
| *threadsCount* | *Integer* | Number of threads the conversation has |
| *threads* | *Array* | List of threads, with the following fields: ***id*** ***type (Email, Note, Draft)*** ***status*** ***Direction (Inbound, Outbound )*** ***htmlBody*** ***textBody*** ***createdAt*** ***updatedAt*** ***viewedAt*** |
### Headers:
Each webhook includes one ThriveDesk header:
X-TD-SIGNATURE: The computed signature generated by ThriveDesk. Used to know if the request is valid or not.
### Verifying:
Webhooks can be verified as coming from ThriveDesk by calculating a digital signature. Each webhook request contains an **X-TD-SIGNATURE** header, generated using the given secret key, along with the JSON encoded payload data (only the data field of response data) sent in the request.
To verify if the request came from ThriveDesk, compute the **HMAC** hash and compare it to the header value sent in the request. If the computed signatures match, you can be sure the request was sent from ThriveDesk.
Signatures are calculated based on the raw request body passed to your servers by ThriveDesk. This means that if non-ASCII characters are contained in the payload, you will need to calculate the signature based on the escaped, transliterated string passed to you by ThriveDesk. We recommend this as best practice in general, even for those primarily working with ASCII data.
**PHP**
```
function isFromThriveDesk($data, $signature, $secret_key) {
$calculate = base64_encode(hash_hmac('sha1', json_encode($data), $secret_key, true));
return $signature == $calculate;
}
if (isFromThriveDesk($request->get('data'), $signature, $secret_key)) {
}
```
**Node JS**
```
const crypto = require('crypto');
if (isFromThriveDesk(request.body.data, signature, secret_key)) {
}
let isFromThriveDesk = (data, signature, secret_key) => {
return signature === crypto
.createHmac('SHA1', secret_key)
.update(JSON.stringify(data))
.digest('base64');
}
```
### Responses:
Anything returned to the body of the response will be discarded. In order to know the webhook was successful, an HTTP status code between 200 and 299 must be returned.
A status code of 410 will cause the webhook to get deactivated/deleted.
Any status codes other than something between 200 and 299 or 410 is a failure of some kind. If the event fails several times, it is discarded.
# WooCommerce Integration
WooCommerce is a free and powerful WordPress plugin that enables you to create full-featured online stores in minutes. Managing orders, payments, inventory, store performance, and tax calculations can be done from within your WordPress dashboard.
ThriveDesk's app for WooCommerce brings the data you need directly into conversations with your customers. This app will automatically import your contacts' contact information, pull in your key metrics (lifetime value, annual value, and avg order value), and display the top 10 most recent orders. Here's a quick look at how it will appear in the ThriveDesk:
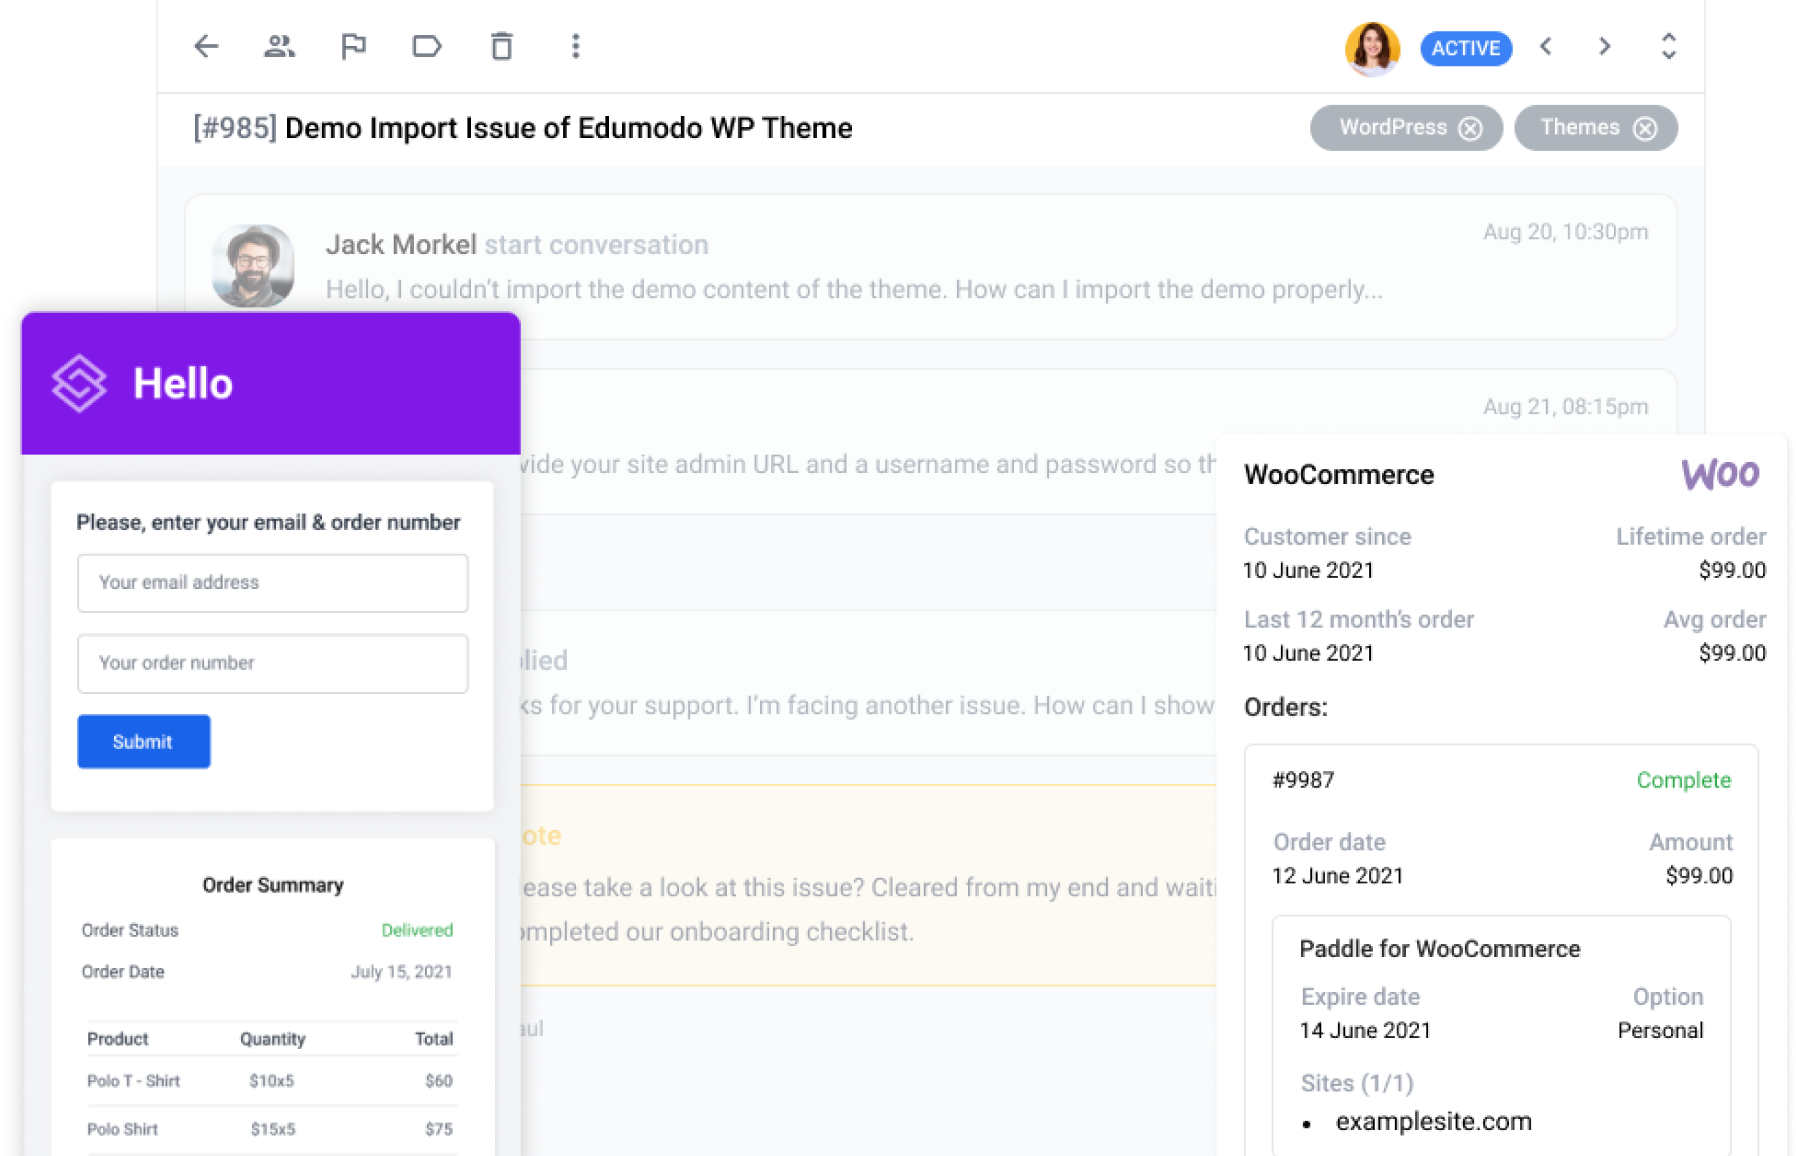
## Step 1: Login to ThriveDesk
* Log into your ThriveDesk account and switch to the workspace you want to install WooCommerce app.
* Click the **App Store** menu from left sidebar.
* Search for WooCommerce and click **Install App** button.
Only workspace owner and admin can install the app. Make sure you have the permission to install the app.
## Step 2: Install ThriveDesk WordPress plugin
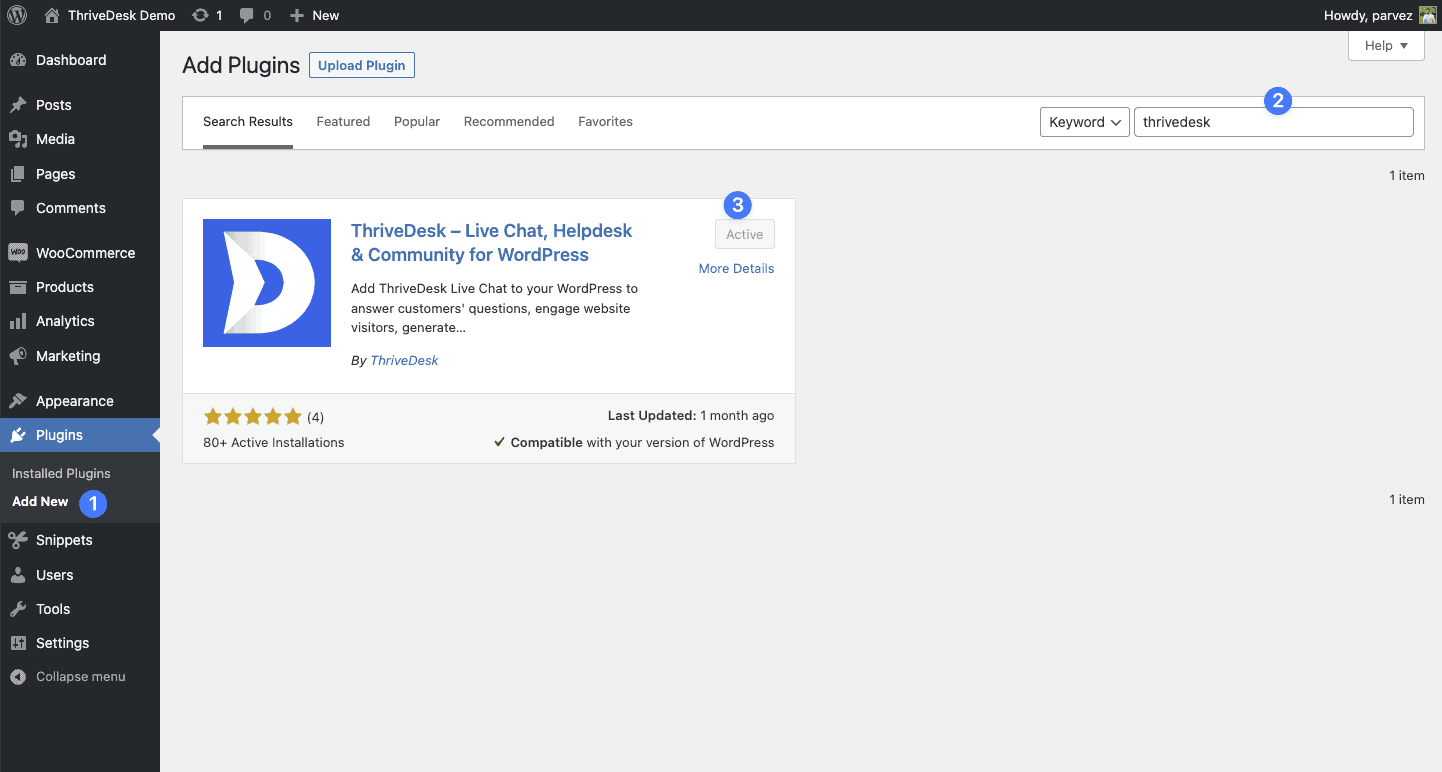 ThriveDesk plugin installation screen
* Log into your WooCommerce site.
* Go to **Plugins > Add Plugins** and search for **ThriveDesk.**
* Install and activate the plugin.
* Go to Settings > ThriveDesk page and click the WooCommerce Connect button.
* You'll redirect back to ThriveDesk and you'll see the connection information window.
## Step 3: Update the information
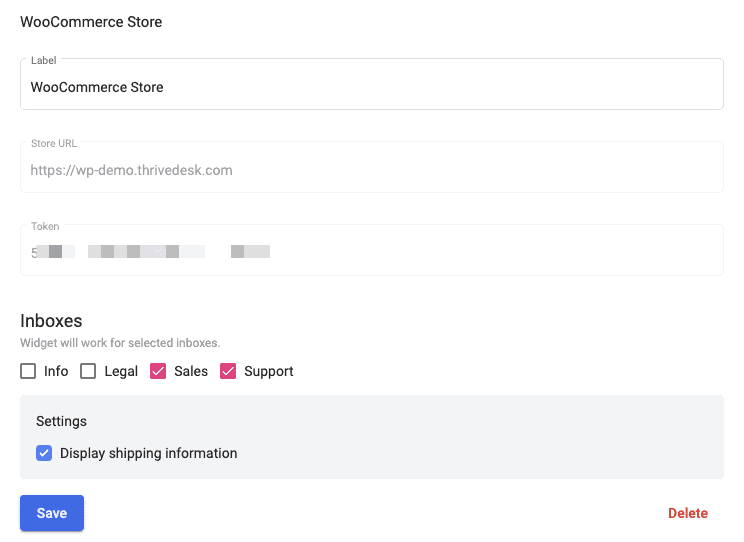
* **Label:** Label each app instance to easily distinguish them within the ThriveDesk sidebar.
* **Inboxes:** Select mailboxes where this app will be use for. You can select multiple mailboxes.
## Adding multiple WooCommerce stores
You can also add multiple accounts if you have several other WooCommerce stores you'd like to integrate into ThriveDesk. Follow **steps 2-3 and** make sure to save your settings.
## Removing a WooCommerce Store
If you ever want to remove a store, just head back to App Store > WooCommerce, and click on the label to expand then click Delete. If you want to uninstall the app entirely, press the Uninstall button and it will remove all store connection that you have.
---
If you don't see customer data on ThriveDesk dashboard, make sure to turned off the **Guest checkout** option. Read [this guide](https://woocommerce.com/posts/guest-checkout-right-for-store/) to know more about when and how to use this option.
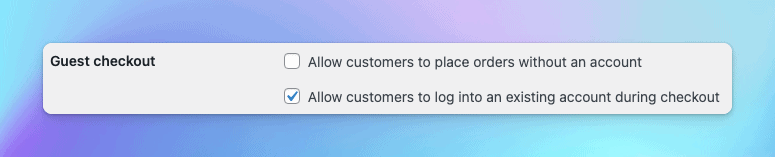
# Connect with WordPress and sync post, pages and customer post types
The WordPress Post Sync app is a unique tool that syncs your WordPress data with ThriveDesk in real-time, providing instant accessibility. You can search your WordPress site and link your content directly from ThriveDesk without having to leave the platform. Here’s how you can sync your posts, pages, products, or any custom post type data.
If you’re new here, please follow our [Getting Started guide](//help.thrivedesk.com/en/thirvedesk-setup-guide) to set up ThriveDesk correctly.
### Installation and Configuration
1. Login to your WordPress website.
2. Go to **Plugins > Add New** and search for ThriveDesk, or download the ThriveDesk plugin and install it manually.
3. Activate the plugin and navigate to the ThriveDesk page.
4. If you already have a ThriveDesk account, click the **Connect Existing Account** button. If you're starting fresh, click **Create New Account**.
5. Once you complete the on-screen connection process, you'll be returned to the plugin settings screen.
6. Click the **Connect** button of WordPress Post Sync, and it will take you to the ThriveDesk app configuration page.
7. Label each app instance to easily distinguish them later. 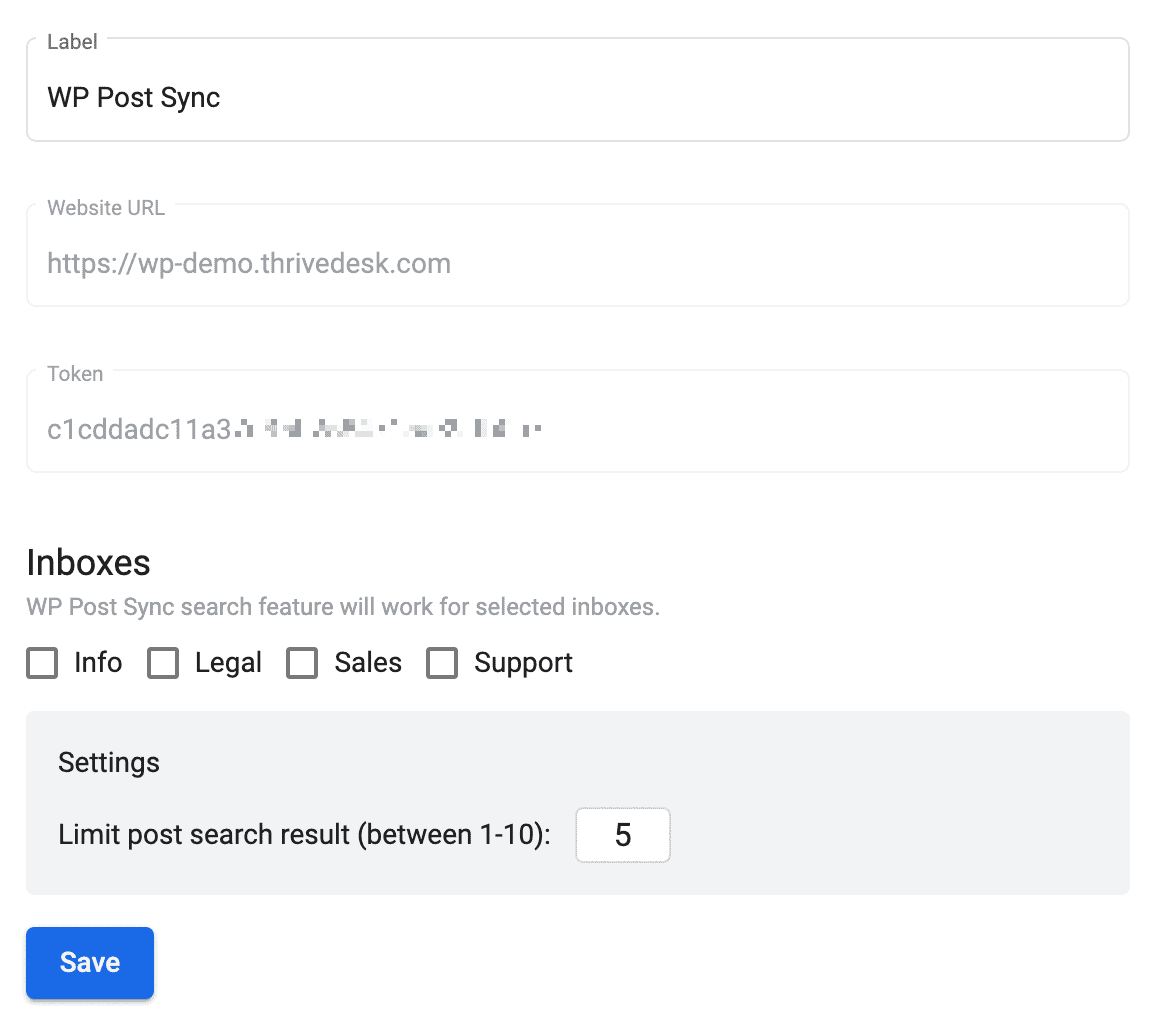
8. Select the mailboxes where this app will be used. You can select multiple mailboxes.
9. Congratulations! Your WordPress Post Sync app installation process is complete, and you'll be taken back to your WordPress site.
Only workspace owner and admin can install the app. Make sure you have the permission to install the app.
### How to use
1. Head over to any conversation and open it
2. Hit the reply button and start searching content from your website with **/** command. Eg: **/text**
3. You'll get a list of results when you type, select any item and hit enter.
4. The link with the article title auto insert into the editor.
---
### Troubleshooting
**Unable to install the app**
This is likely a permissions issue. Only the workspace owner and admins can install the app. The workspace owner can grant or revoke permissions in the Rules and Permissions settings. If you’re an admin, ask your workspace owner to grant you the necessary permissions.
**Customer data not displaying**
There could be several reasons for this issue, but it is often due to server firewalls or security plugins that block API requests to your site.
* If your website is protected by Cloudflare's firewall, please refer to our [documentation](//help.thrivedesk.com/en/troubleshooting-with-cloudflare) for guidance.
* If you have a custom firewall installed on your server, ask your system administrator to [whitelist our IP](//help.thrivedesk.com/en/troubleshooting-with-cloudflare) addresses.
* If you have a security plugin installed, ensure that our [IP addresses](//help.thrivedesk.com/en/troubleshooting-with-cloudflare) are whitelisted.
---
### WP Portal
You can setup a help center inside your WordPress website where your customer can see their ticket and create new one. For more information and setup guide follow [WP Portal documentation](//help.thrivedesk.com/en/wpportal).
### Integrations with other WordPress plugins
* [WooCommerce](//help.thrivedesk.com/en/woocommerce-integration)
* [SureCart](//help.thrivedesk.com/en/surecart-integration)
* [FluentCRM](//help.thrivedesk.com/en/fluentcrm-integration)
* [FunnelKit](//help.thrivedesk.com/en/autonami-integration)
* [Envato](//help.thrivedesk.com/en/envato-integration)
* [Freemius](//help.thrivedesk.com/en/freemius-integration)
**Note:** We do not store any of your website data on our server. Our plugin create the JSON response and cache on your server. Please check our privacy policy for more details.
# Workflow Conditions and Actions
Workflows help automate tasks in ThriveDesk. They work by checking **conditions** (what to look for) and applying **actions** (what to do). This guide lists all available conditions, operators, and actions you can use in your workflows.
## Workflow Conditions
Conditions define what the workflow should look for in a conversation before taking action.
| Condition | Description |
|---|---|
| **Customer Name** | Checks if the customer's name contains, does not contain, is, is not equal to, starts with, ends with, or matches a regex pattern. |
| **Customer Email** | Checks if the customer's email contains, does not contain, is, is not equal to, starts with, ends with, or matches a regex pattern. |
| **Subject** | Checks if the subject contains or does not contain specific words. |
| **Status** | Checks if the status is Active, Pending, Closed, or Spam. |
| **Message** | Finds messages that contain specific words or phrases. |
| **Attachments** | Checks if the conversation includes or does not include attachments. |
| **Assigned To** | Is equal to or not equal to a specific ThriveDesk agent assignee, or unassigned |
| **Last Message Sender** | Who's the last message sender |
| **Last Customer Reply** | Checks if the last customer reply was within a specific time frame. |
## Workflow Operators
Operators help refine conditions by defining how they match.
| Operator | Description |
|---|---|
| **Is equal to** | The field must match exactly, including spaces and special characters. |
| **Contains** | The field must include the specified words exactly. |
| **Does not contain** | The field must **not** include the specified words. |
| **Is not equal to** | The field must not match exactly. |
**Tip:** Use whole words and multiple conditions to refine searches instead of partial matches.
**Note:** Workflows only run **once** per conversation to prevent loops. The only exception is **AI Draft generation**, which can apply multiple times if set to run on all threads.
## Workflow Actions
Actions define what happens when a workflow condition is met.
| Action | Description |
|---|---|
| **Forward** | Forward a conversation with a custom message to a third party. |
| **Add a Note** | Add a private note to a conversation. |
| **Change Status** | Change the conversation status to Active, Pending, Closed, or Spam. |
| **Assign to User** | Assign the conversation to a specific ThriveDesk User. |
| **Add Label(s)** | Add one or more Label to a conversation. |
| **Remove Label(s)** | Remove one or more labels from a conversation. |
| **Move to Inbox** | Move the conversation to another inbox. |
| **Delete** | Permanently delete the conversation (cannot be recovered). |
| **Notify Agents** | Send notifications to selected agents |
# Workspace and inboxes
ThriveDesk gives you tools for data access control and logical separation of conversation: workspaces and inboxes.
## Workspaces
A workspace is the highest abstraction level within a ThriveDesk. It's made up of Inboxes (see more on them [below](#inboxes)) and users. Most commonly a ThriveDesk workspace represents a real-world company or other type of isolated grouping.
To switch between workspaces, to open the current workspaces settings, or to create a new workspace, use the account dropdown on the bottom of the left bar.
### Multiple workspaces
As a ThriveDesk user, you can create, manage, and join workspaces without limits. Each workspace could have different billing plan.
### Adding new members
Only account owner can invite other members to join in the workspace. Invite is sent automatically to the specified email and valid for 24hrs.
If there's no account associated with that email, the invited person will have to create an account. Otherwise, they'll be able to join with their existing account.
Newly-joined users get the basic User access level.
**Note:** Data is not transferable from one workspace to another. Be mindful about creating workspace. Our system peridically delete empty or inactive workspace. You'll receive an email 7 days prior to delete.
### Adding new workspaces
Mouse over to your profile bottom left side of the app bar and click Add a new Workspace from your workspace list.
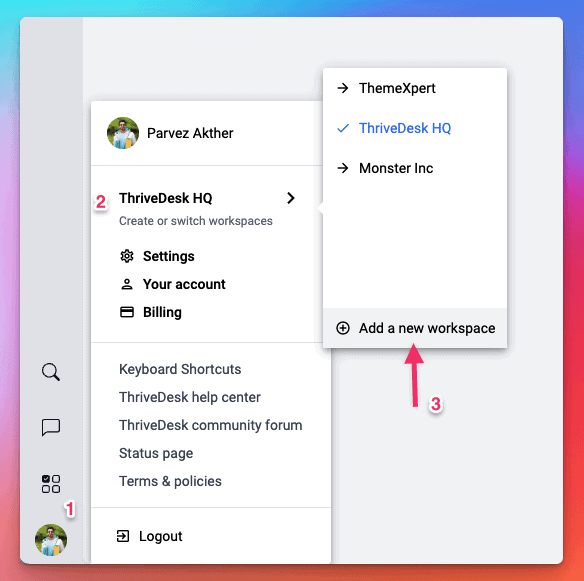
Select Workspace plan and give your workspace name and press the **Create** button. If the workspace already taken, tweak the domain name and you'll be able to create new Workspace.
### Deleting a workspaces
Deleting a workspace is simple process. Head over to **Settings > Organization** Profile and click **Delete Organization** to delete the workspace.
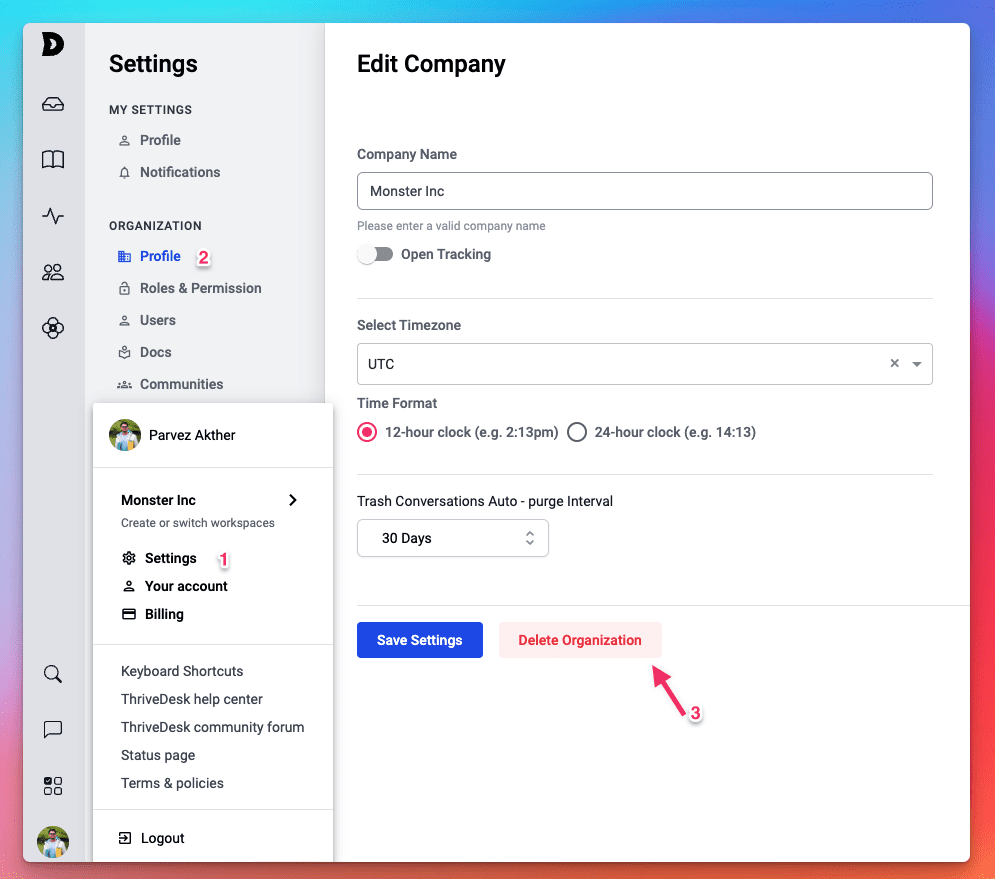
**Heads up:** Only account owner can delete a workspace and once deleted it's gone forever. We can't restore it back for you.
## Inboxes
A inbox is a silo of conversations within ThriveDesk. All conversations are inbox-specific and you could setup multiple inboxes for different purposes.
Every new workspace (including the one created for you on account creation) comes with a fresh inbox named “Support”. You can rename or delete it as you see fit.
### Ways of organizing inboxes
There are several practical ways of using inboxes:
* A inbox per department - If you have several departments like Sales, Support, HR, it makes sense to reflect that separation in ThriveDesk too.
* A inbox per multiple products - If you have separate team for each product and you want to track them separately, you can use a separate inbox for multiple products.
* A inbox per brand - If you have multiple brand you can separate inboxes per brand, eg: support@apple.com and support@oranage.com
Which way is the best fit for you depends on the characteristics of your product and business.
### Permissions
By default workspaces members doesn’t have access to any inboxes. When you create a Inbox you need to assign member and teams for that inbox. Their permissions are then dicated by their workspace-wide access level.
There are three access levels in ThriveDesk: User, Administrator, and Owner. Please note that an workspace must have one and only one Owner.
Access levels can be viewed and changed in the Roles and Permission section of organization settings.
# WPPortal for Wordpress
WPPortal is a powerful helpdesk solution designed to enhance your WordPress website by providing efficient customer support. With WPPortal, your customer can easily initiate new conversations, check message history, and access a comprehensive knowledge base.
## Create API Key
1. Login to ThriveDesk and hover over your avatar(bottom left corner).
2. Click **Settings** then **API Keys** menu under your organization settings
3. Click on **Create new API key** button.
4. Give your API a name and it'll only use for your referance.
5. Click **create** button and you'll see your API key.
Make sure to copy and store the API key somewhere safe. You'll not be able to see it again and it'll expire after one year.
## Add Live Chat Assistant
Once you validate your API key you'll be able to select chat assistant that you created in ThriveDesk.
Select the Assistant and press save button, Now visit your website and you'll see the Assistant loaded in every page.
## Portal setup
To create a customer portal on your WordPress site, create a new page and add the `[thrivedesk_portal]` shortcode. This will turn the page into a portal where customers can access their support tickets.
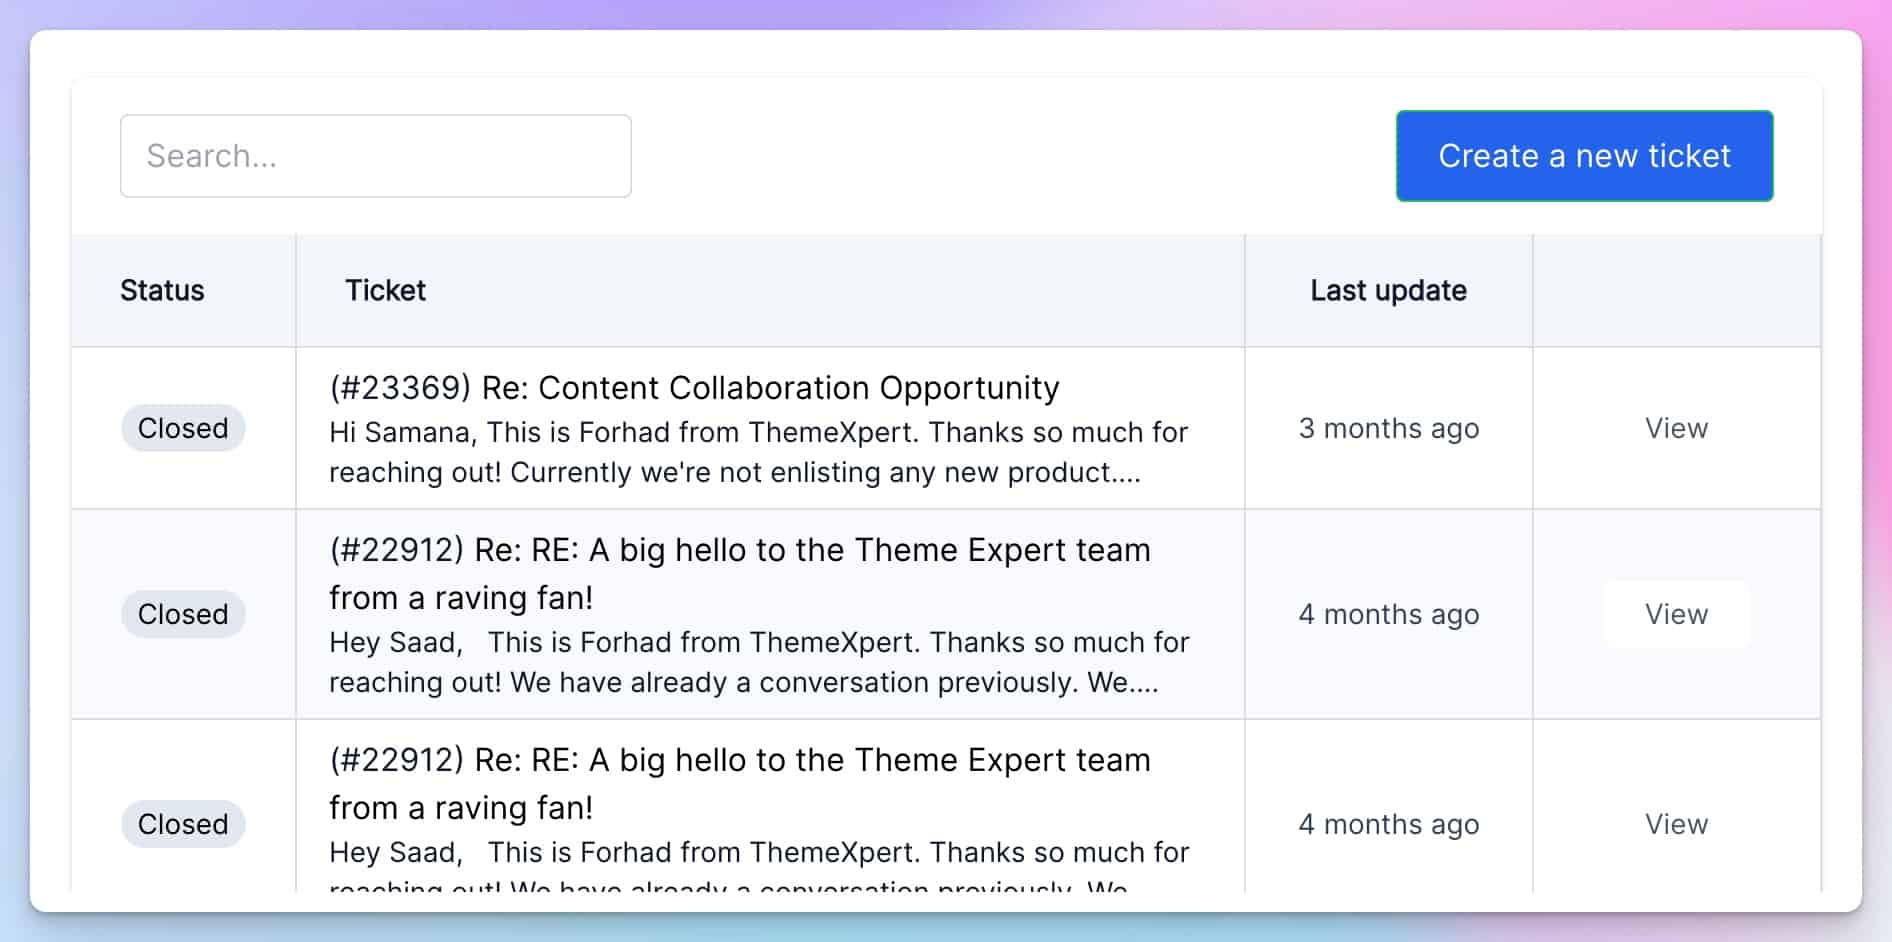This centralized approach streamlines the support process, making it organized and efficient for both you and your customers. By utilizing the ThriveDesk portal, all customer support inquiries can be accessed and managed from a single location.
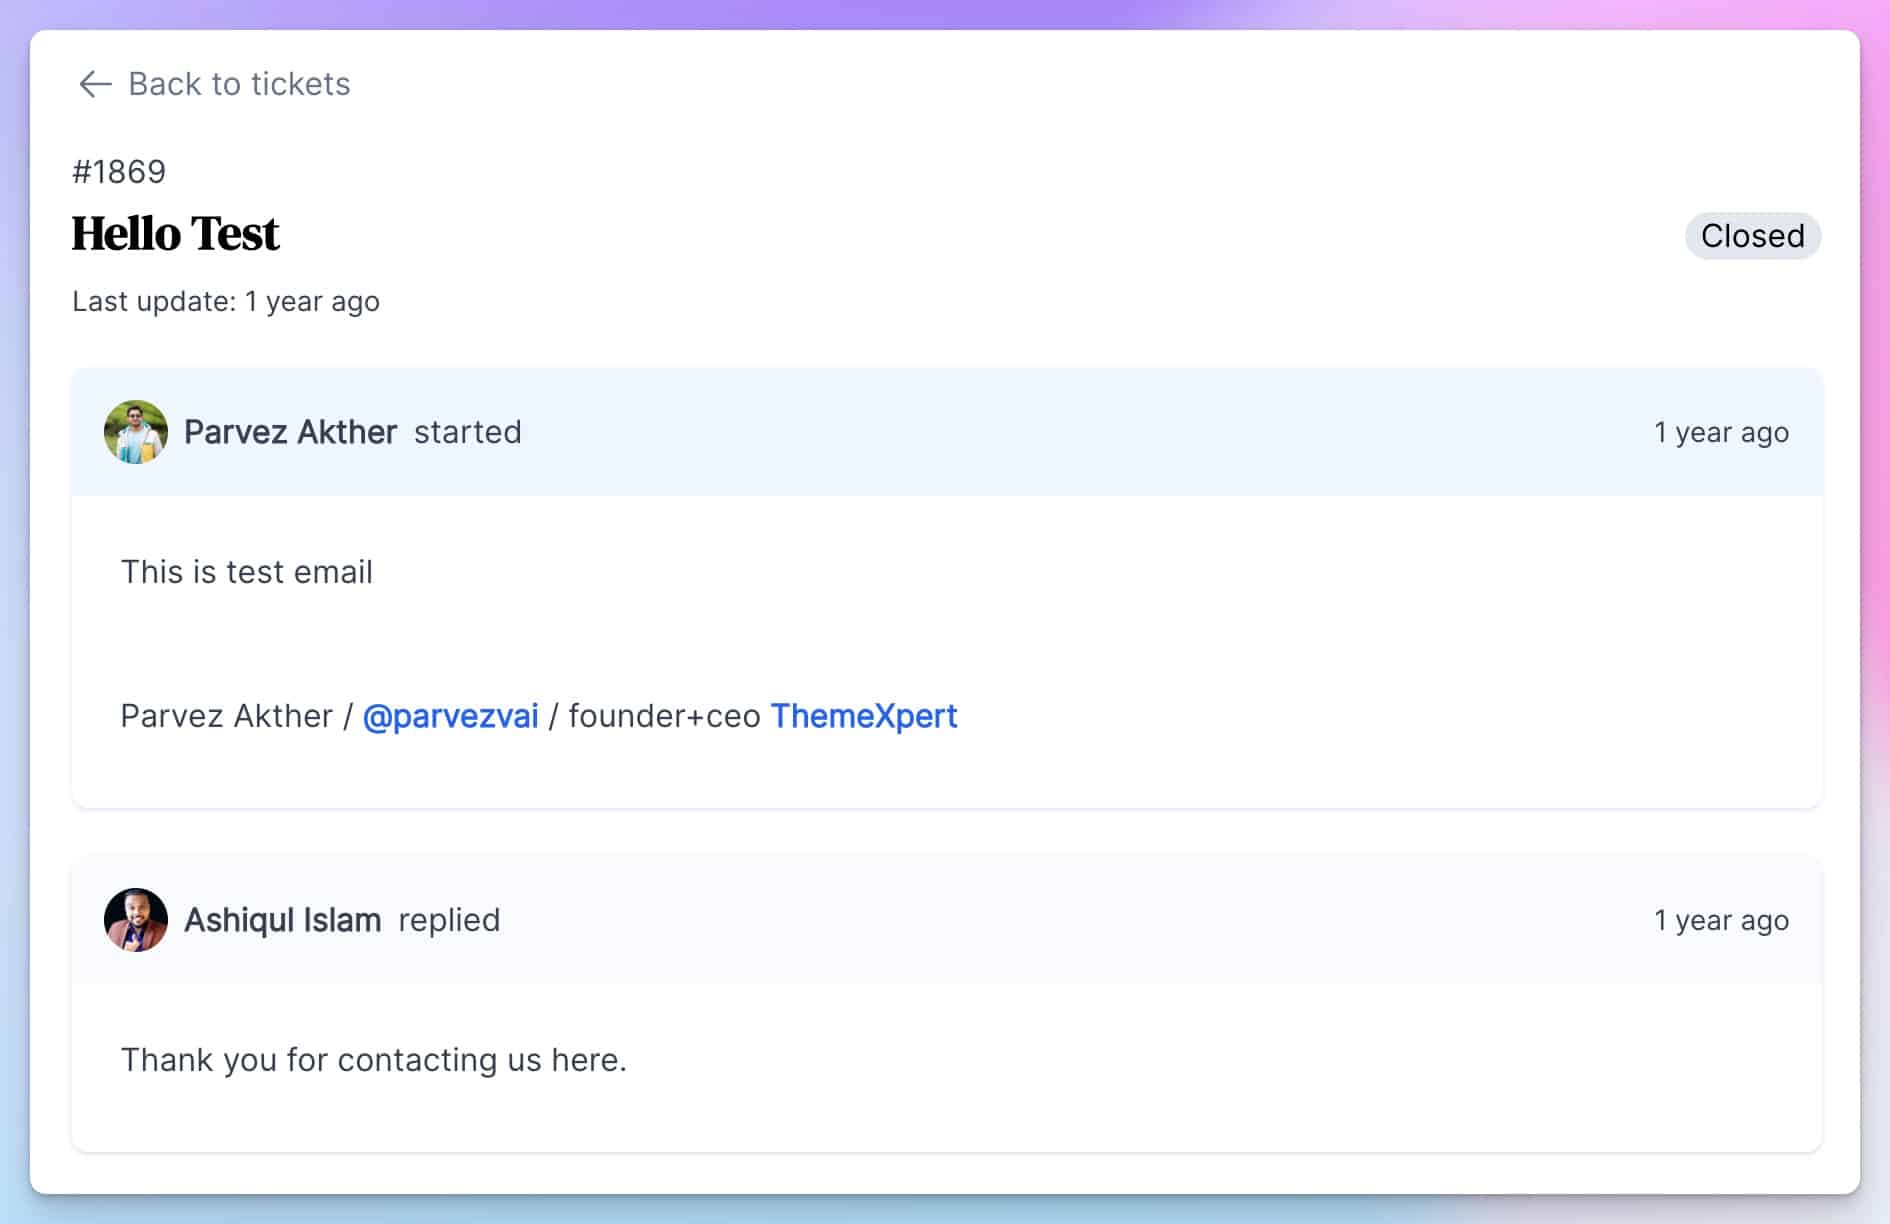For security purposes, the customer portal is only accessible to logged-in users. To ensure this, make sure the page is set to 'private'.
## Create Ticket page
To begin the process, it is recommended to install a form builder plugin of your choice, to create the necessary forms for your website. WPPortal is compatible with a wide range of form builder plugins available in the market.
Once the form is created using the chosen plugin, it can be embedded into a webpage of your choice.
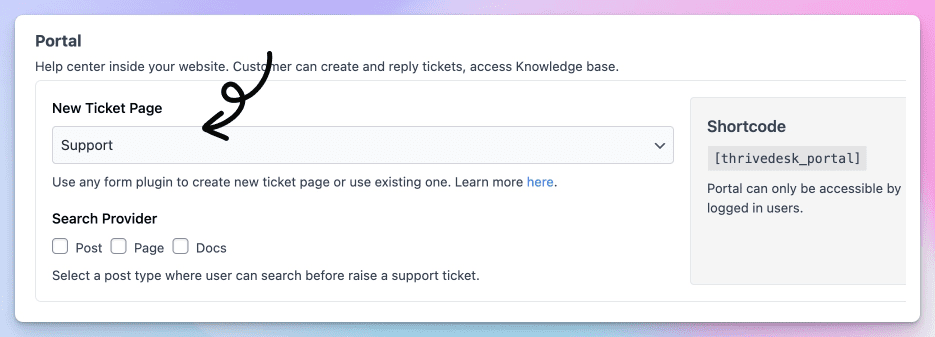Then, navigate to the WPPortal settings and select the desired form page from the **New Ticket Page** dropdown.
This will enable users to submit a request for assistance via the designated form on your website.
### Contact Form 7
### Fluent Form
## Search provider
To improve the ticket creation process, select relevant post types for the search screen. This enhances customer satisfaction and streamlines support requests.
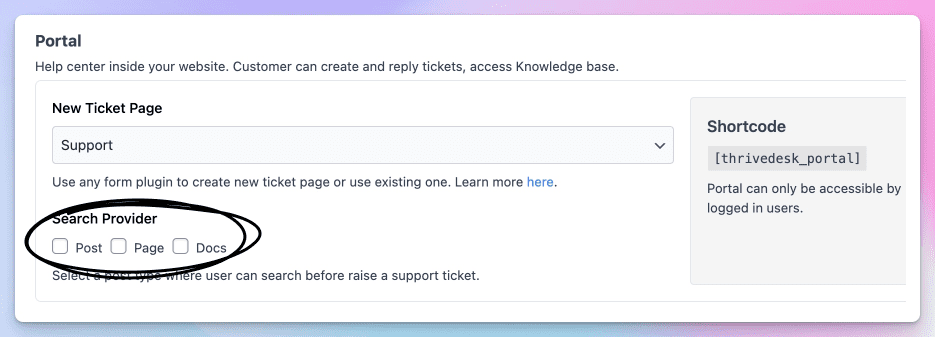WPPortal doesn't support ThriveDesk knowledge base yet.